Operations Marketing - Connecting Google Analytics to Your Commerce Website
Log into your Google Analytics account
To add Google Analytics to your website, log into your Google Analytics account. If you do not have one already, you will need to create one.

Click "Create"
To begin the process of adding Google Analytics to your Commerce website, select the "Create" button once logged in.

Click "Property"
To measure your web data, you will need to create a Google Analytics property. To do so, click "Property".

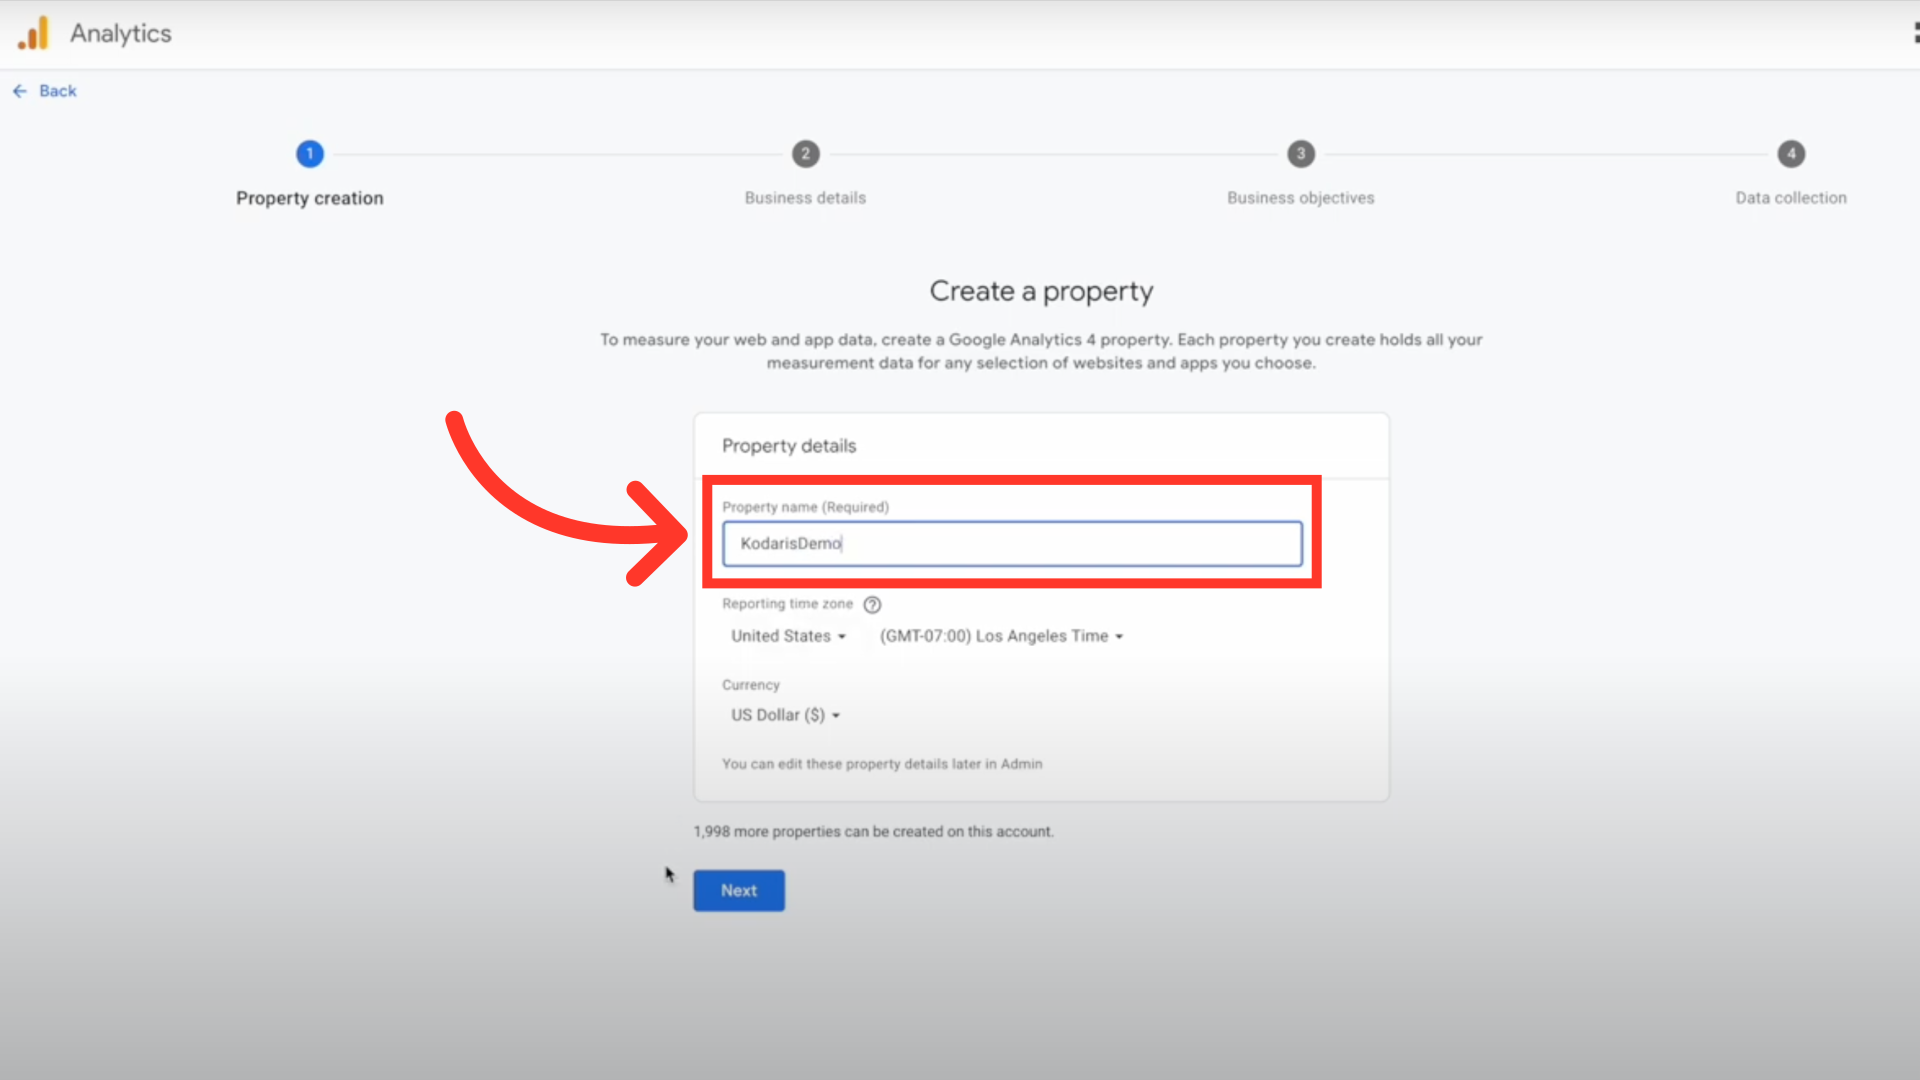
Give your property a name
Fill out the required information on this page. Start by giving your property a name, such as the name of your website.
Choose your time zone
Choose your time zone.

Select the currency
Select the currency in which you do business.

Click "Next"
Click the "Next" button.

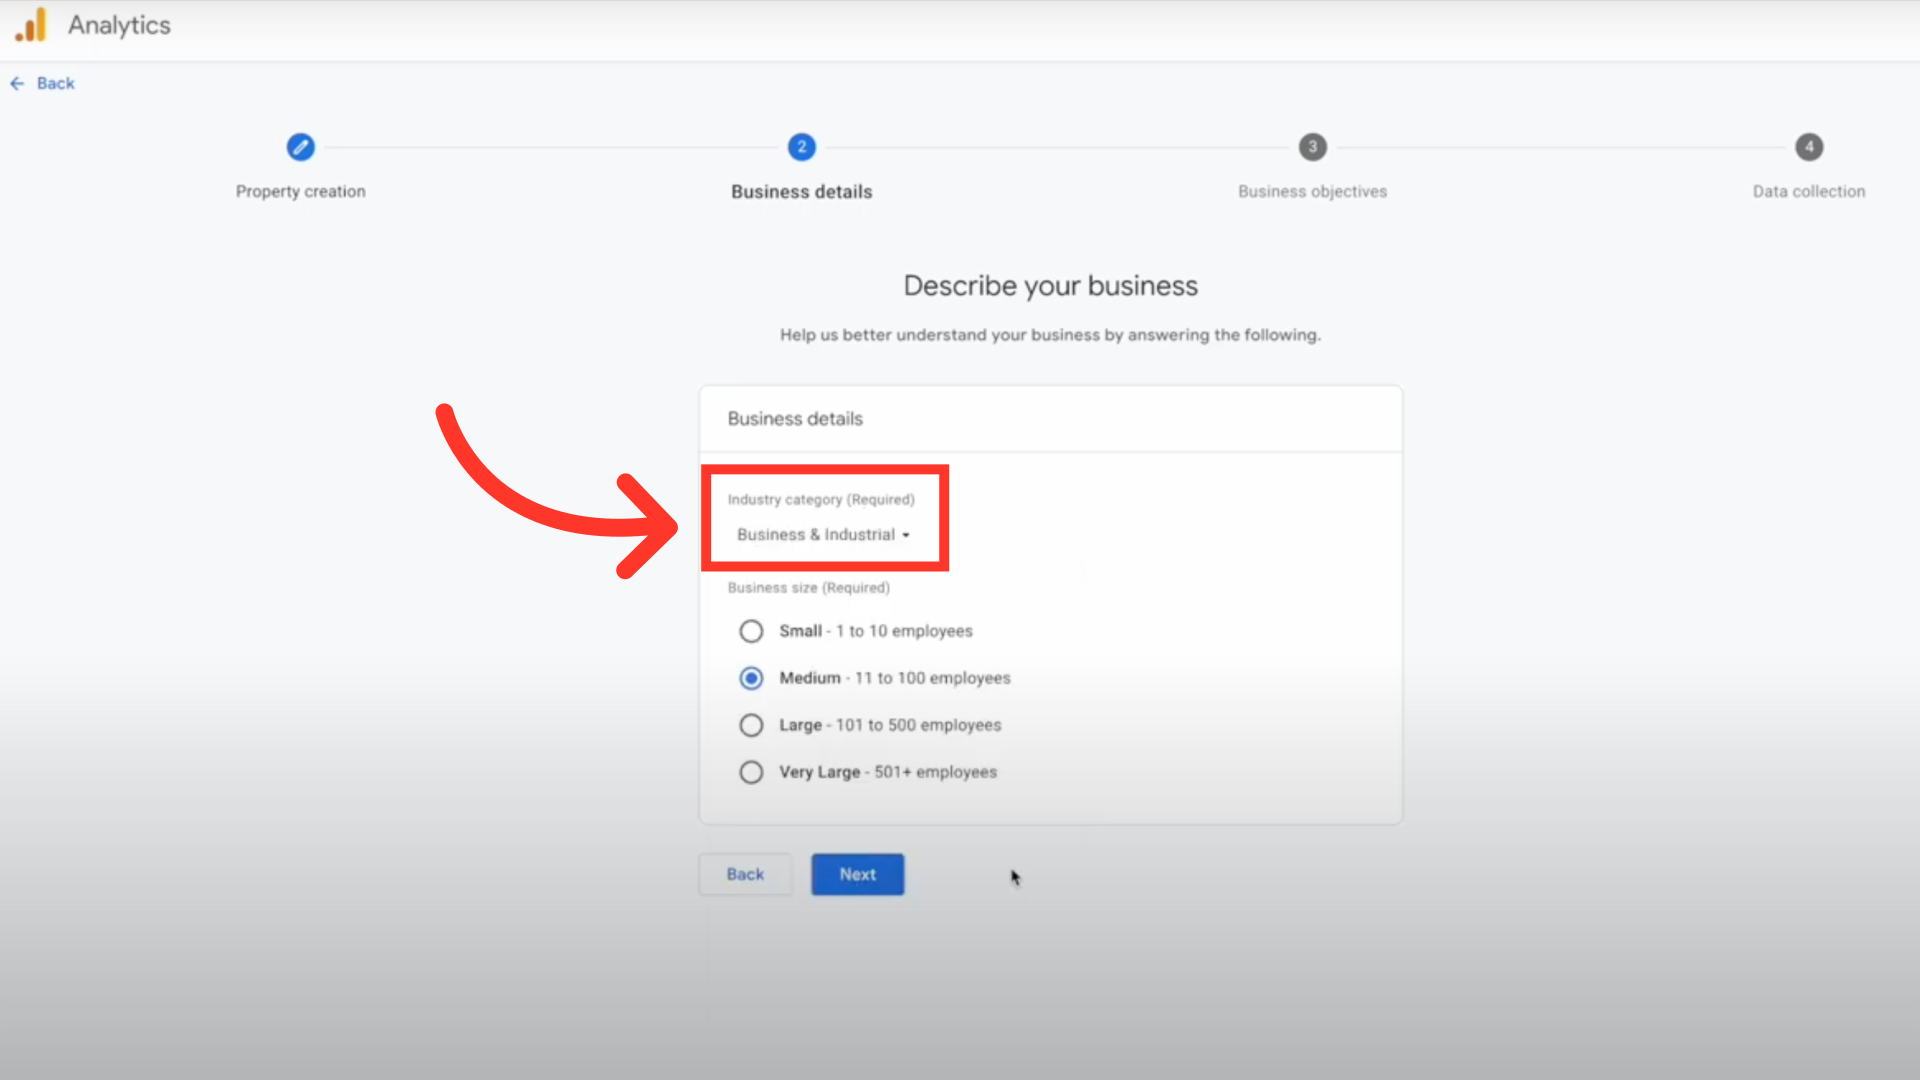
Choose the industry
Choose the industry that best describes your business from the dropdown list.
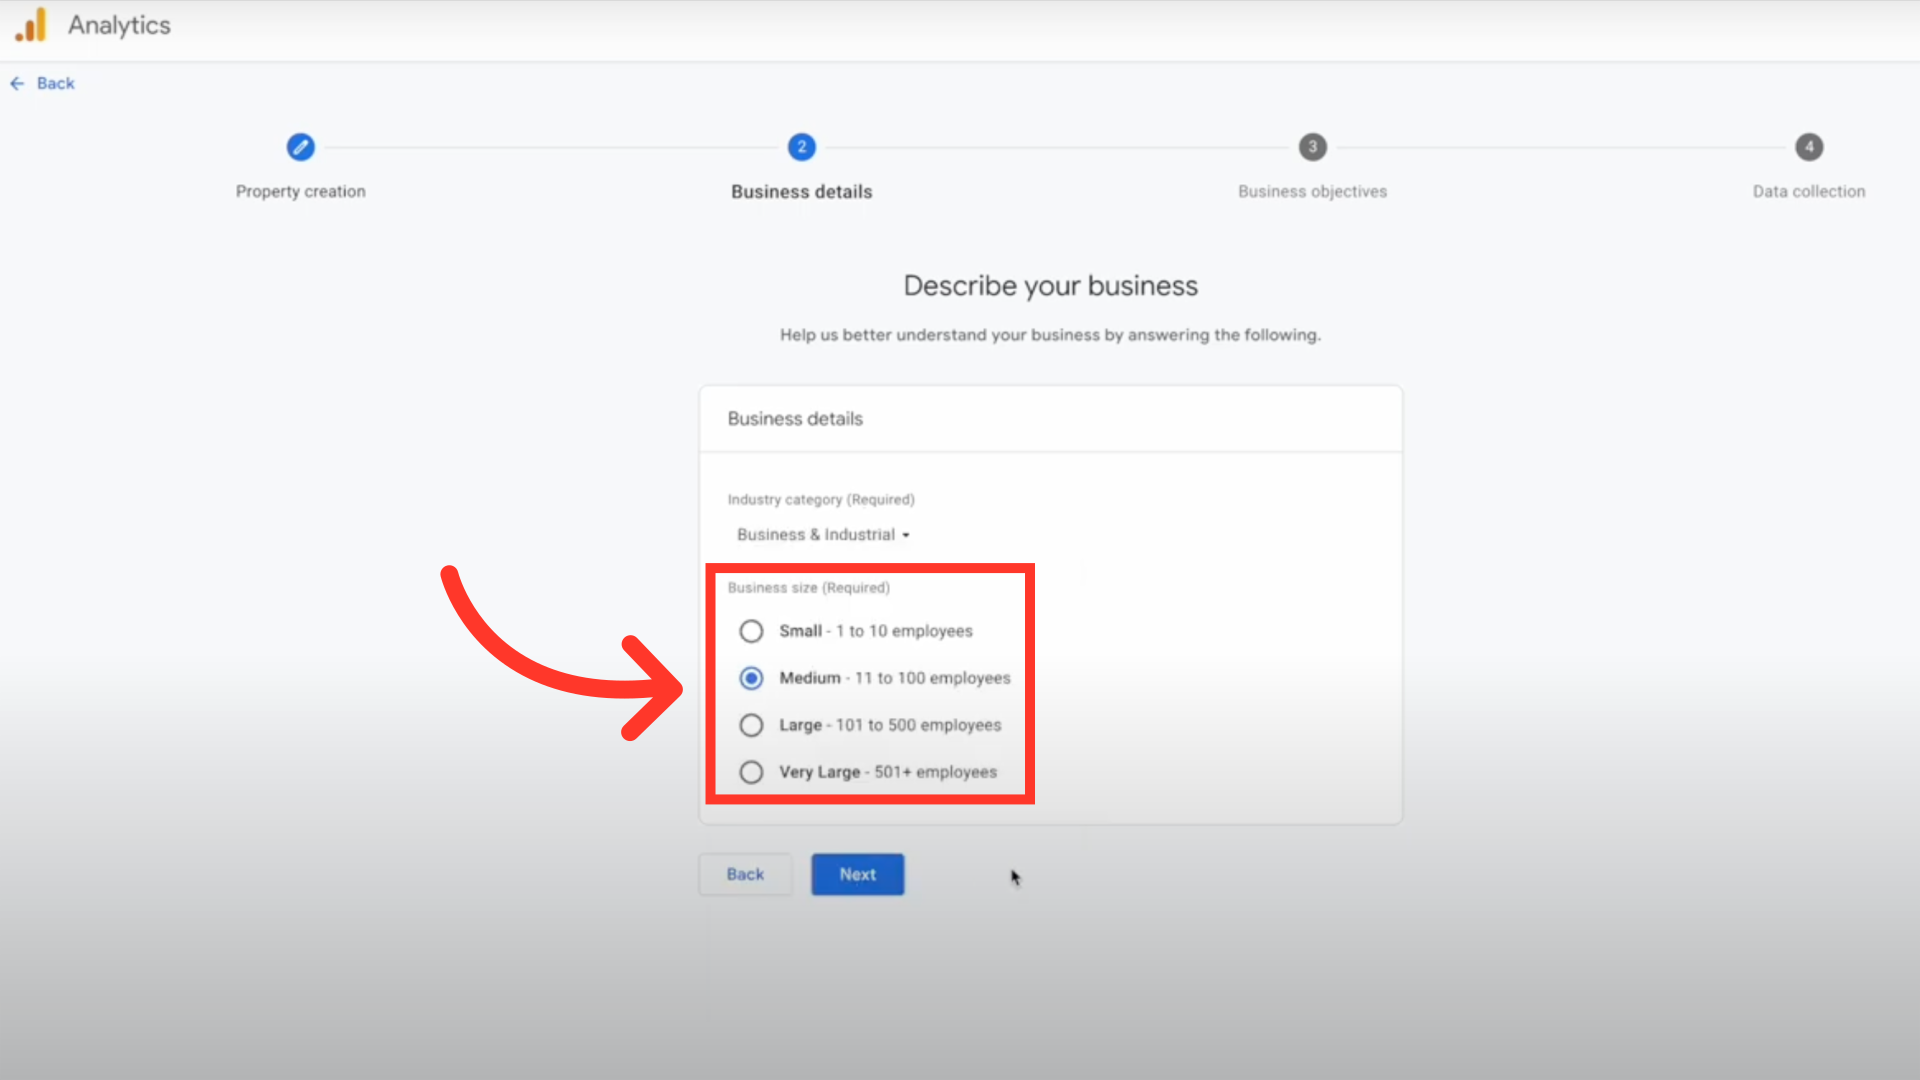
Select your business size
Select the size that best matches your business.
Click "Next"
Click the "Next" button.

Choose your business objective(s)
Select as many of the objectives from this list that best match the topics that are most important to your business. You can select one, just a few, or all of the options.

Click "Create"
Select the "Create" button.

Select "Web"
Next, to set up data collection, choose the platform from where you will be collecting data. Since this is for your Commerce website, select "Web".

Add website URL
Add your website's URL.
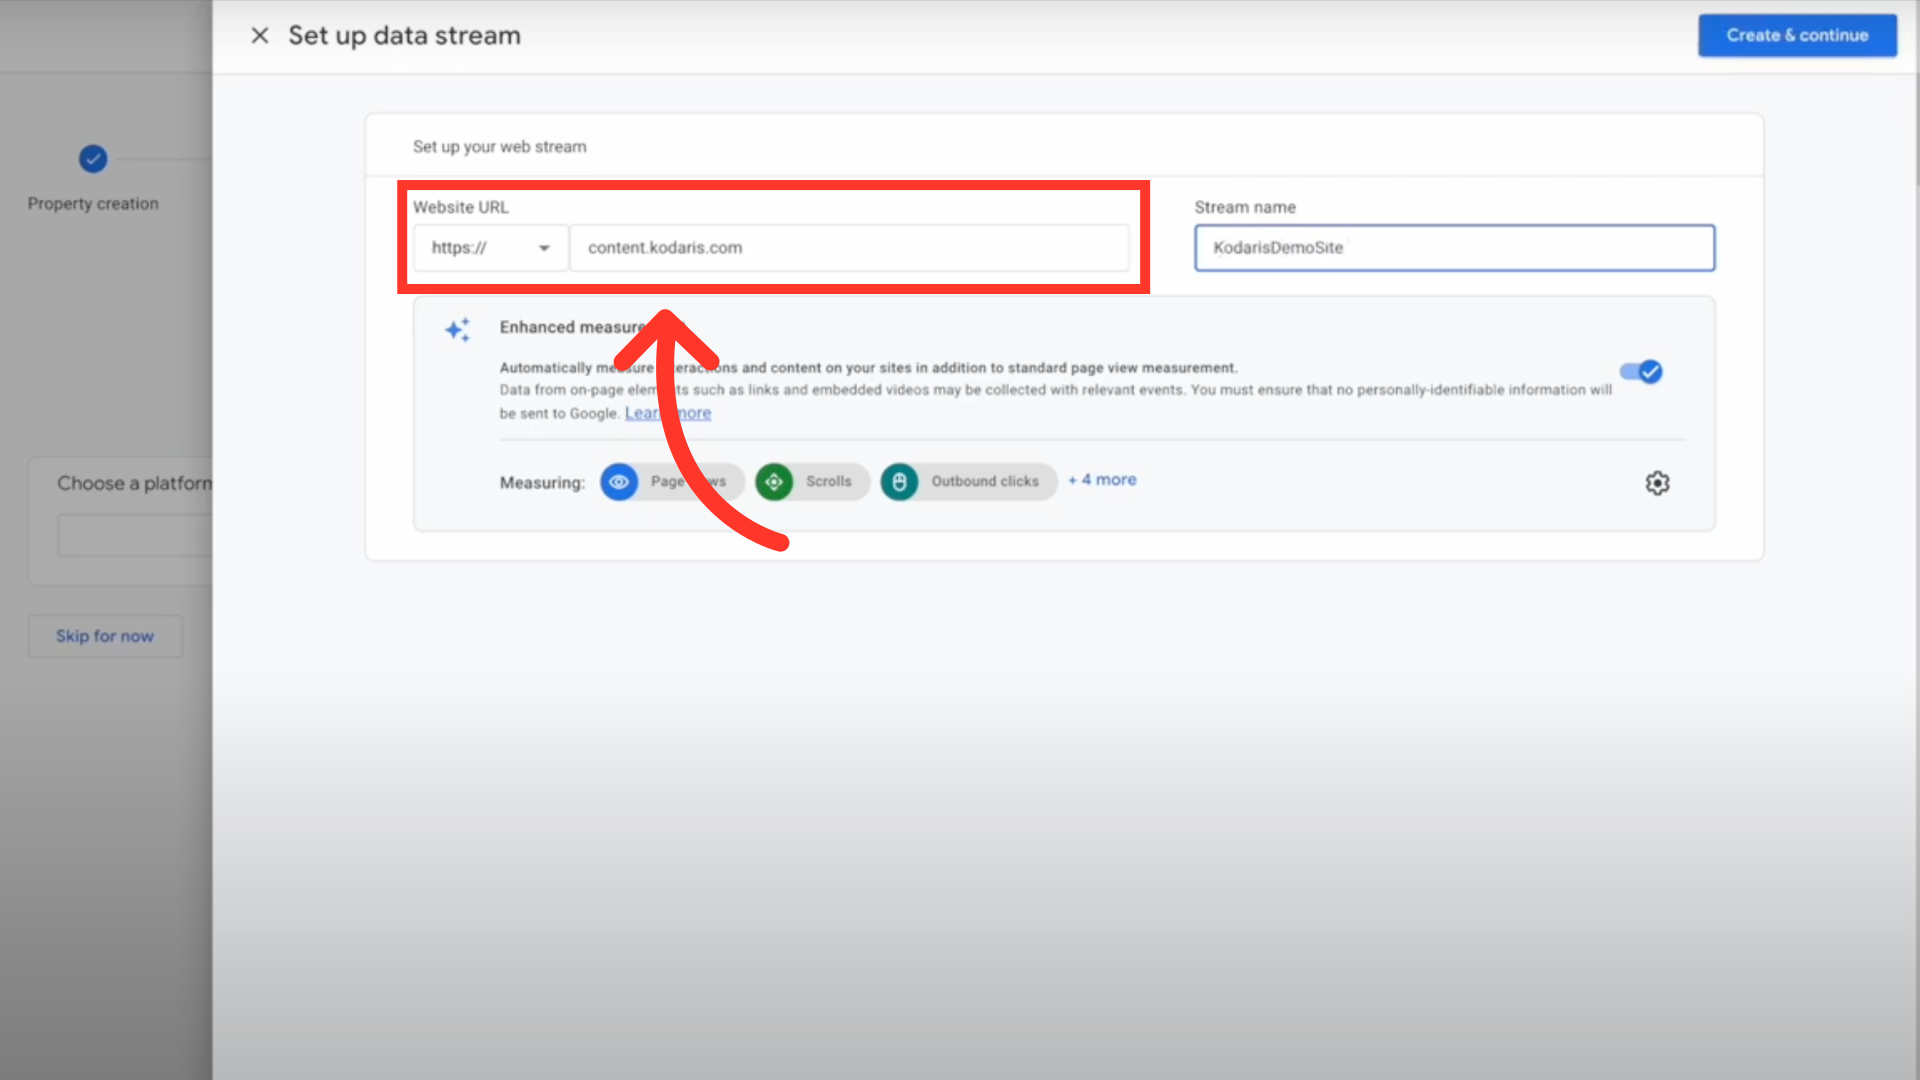
Add a name for your data stream
Add a name for your data stream.

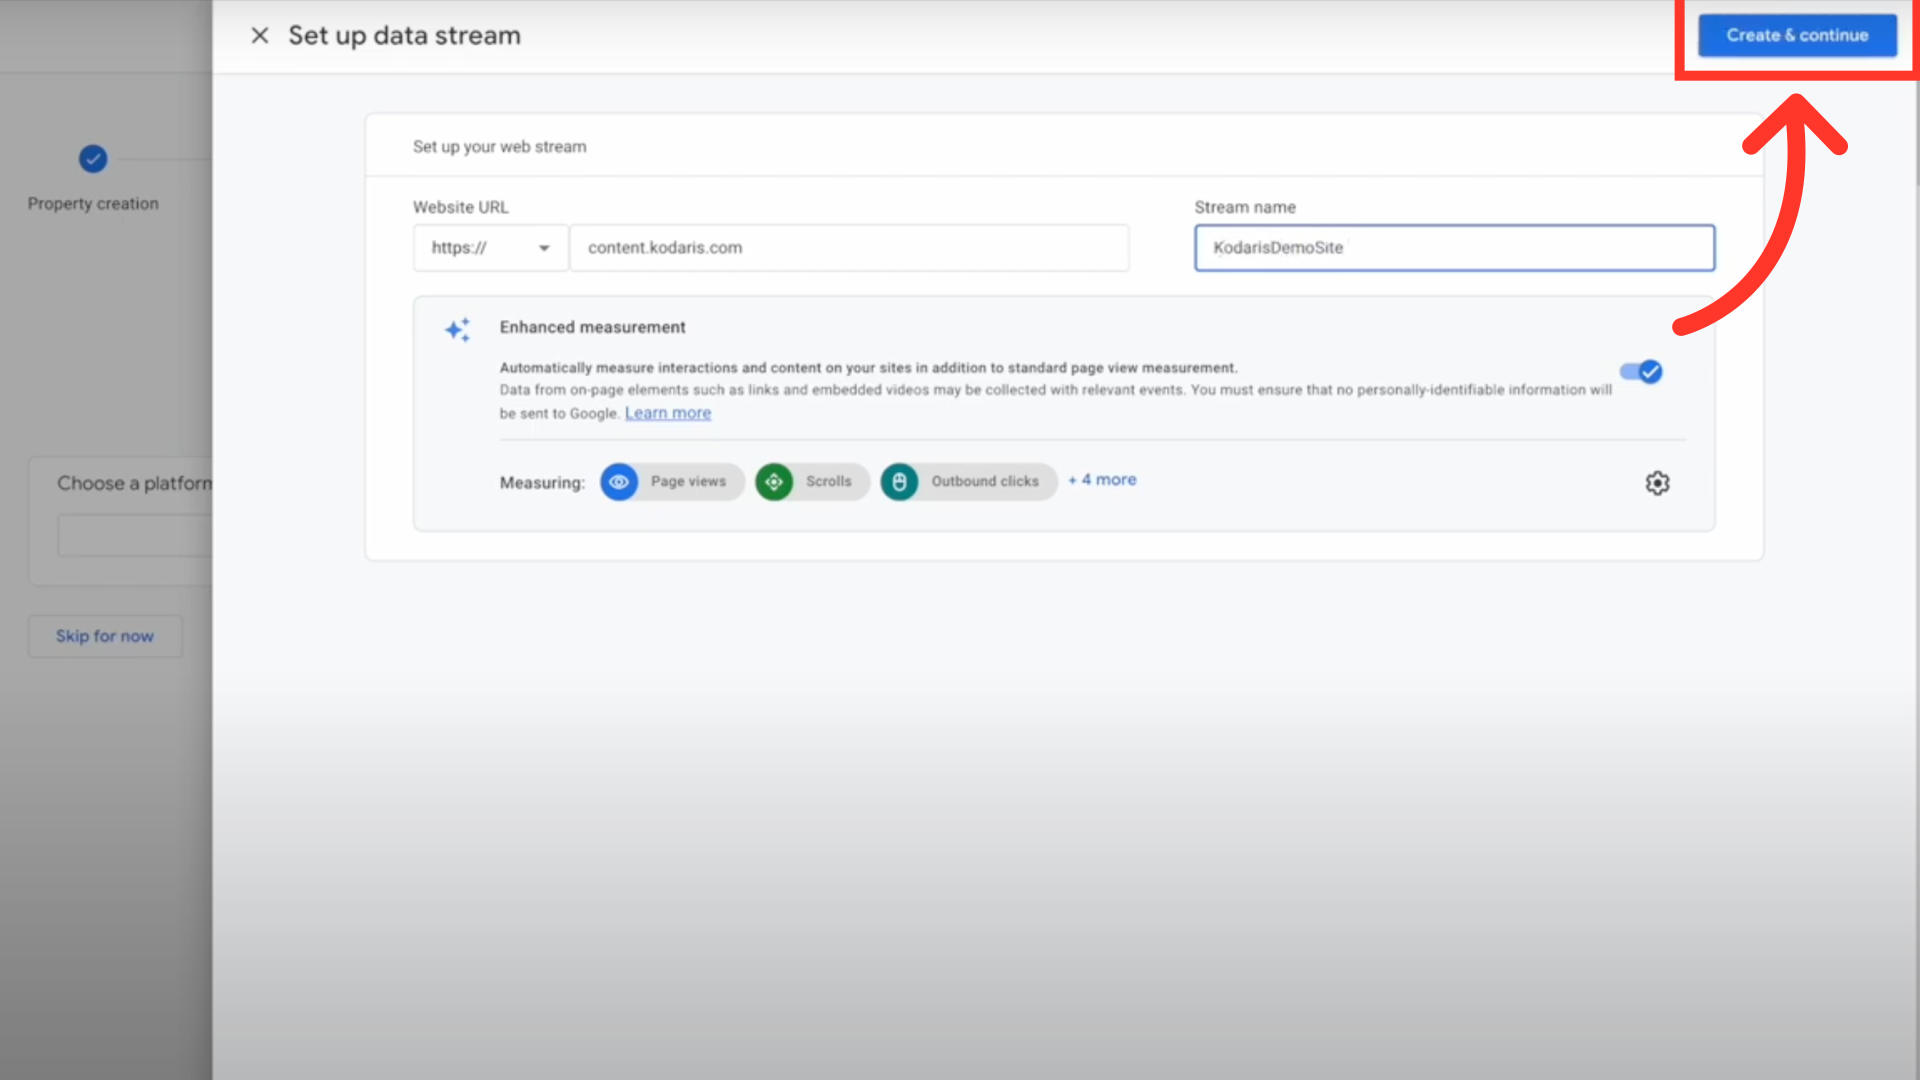
Click "Create & continue"
Click the "Create and continue" button.
Confirm the new data stream was added
You will now see the new data stream listed. Confirm it is the one you just created.
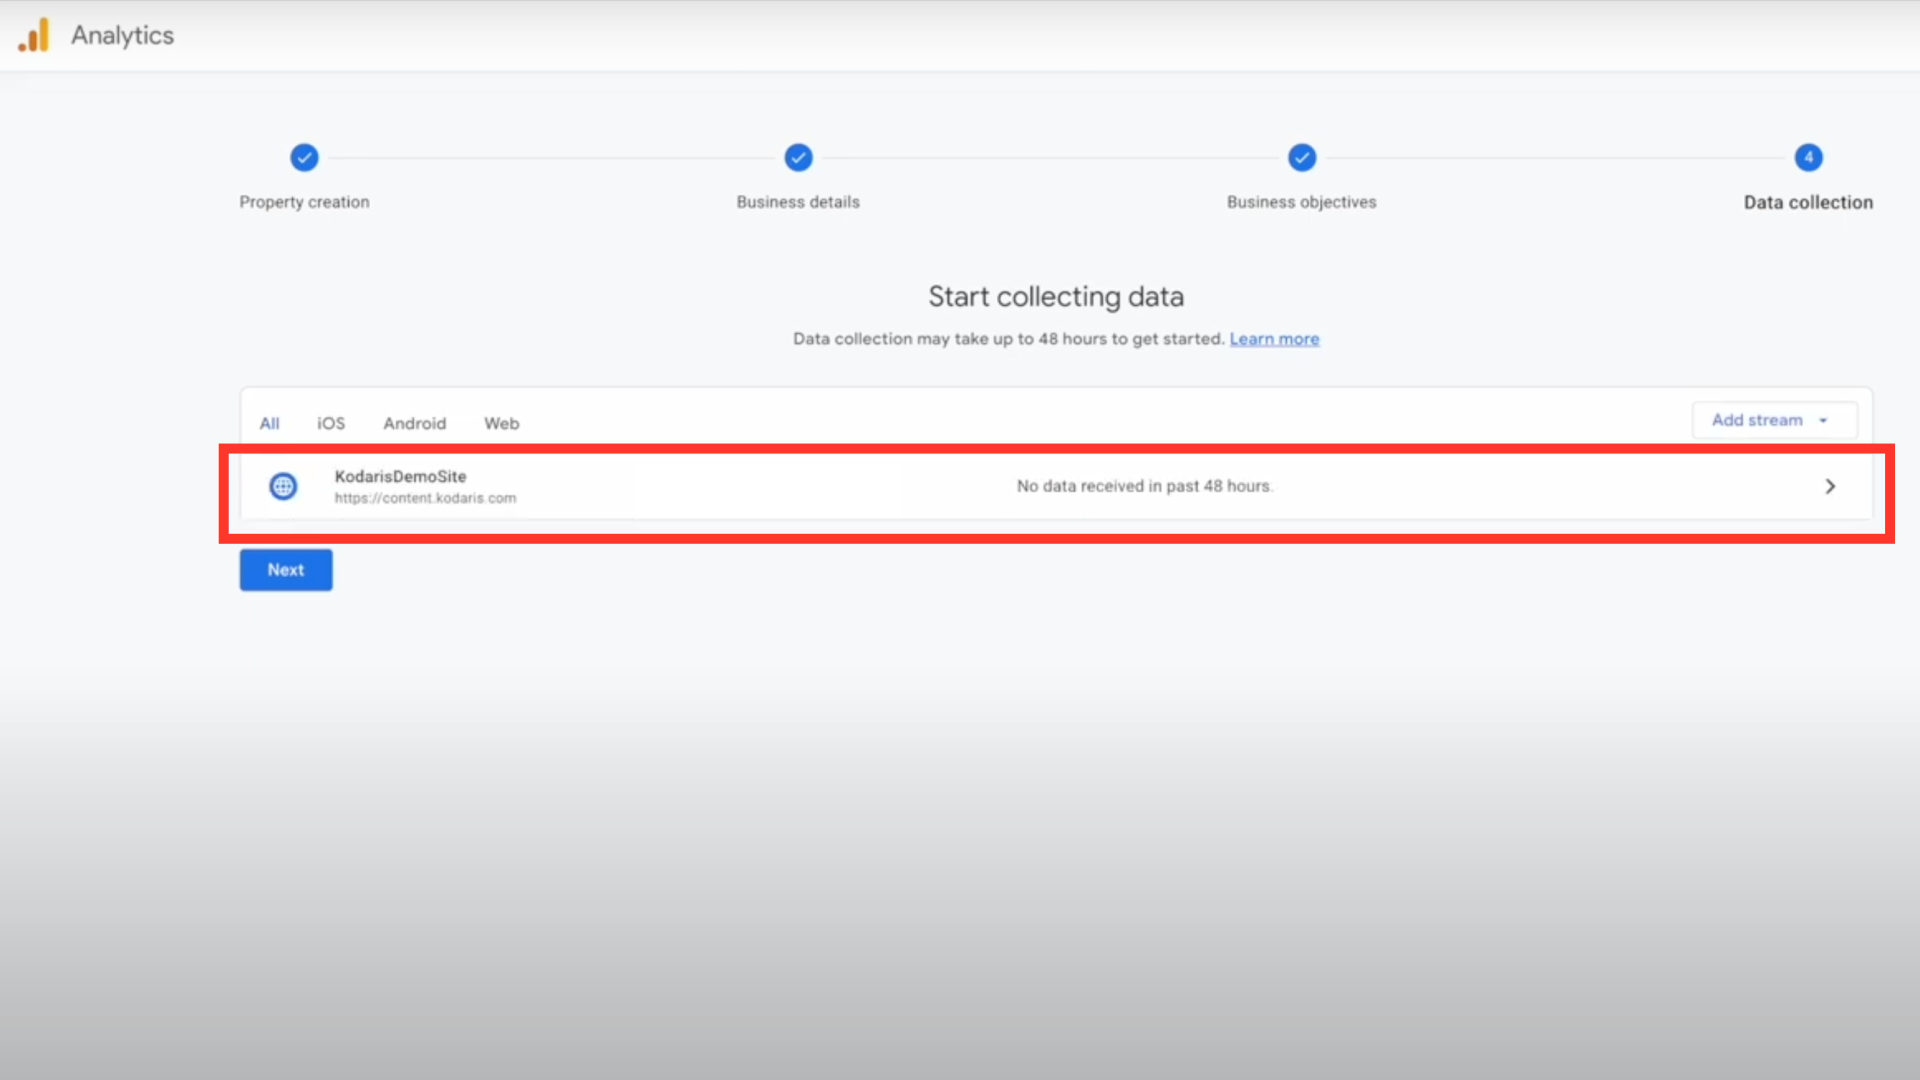
Click "Next"
Click the "Next" button.

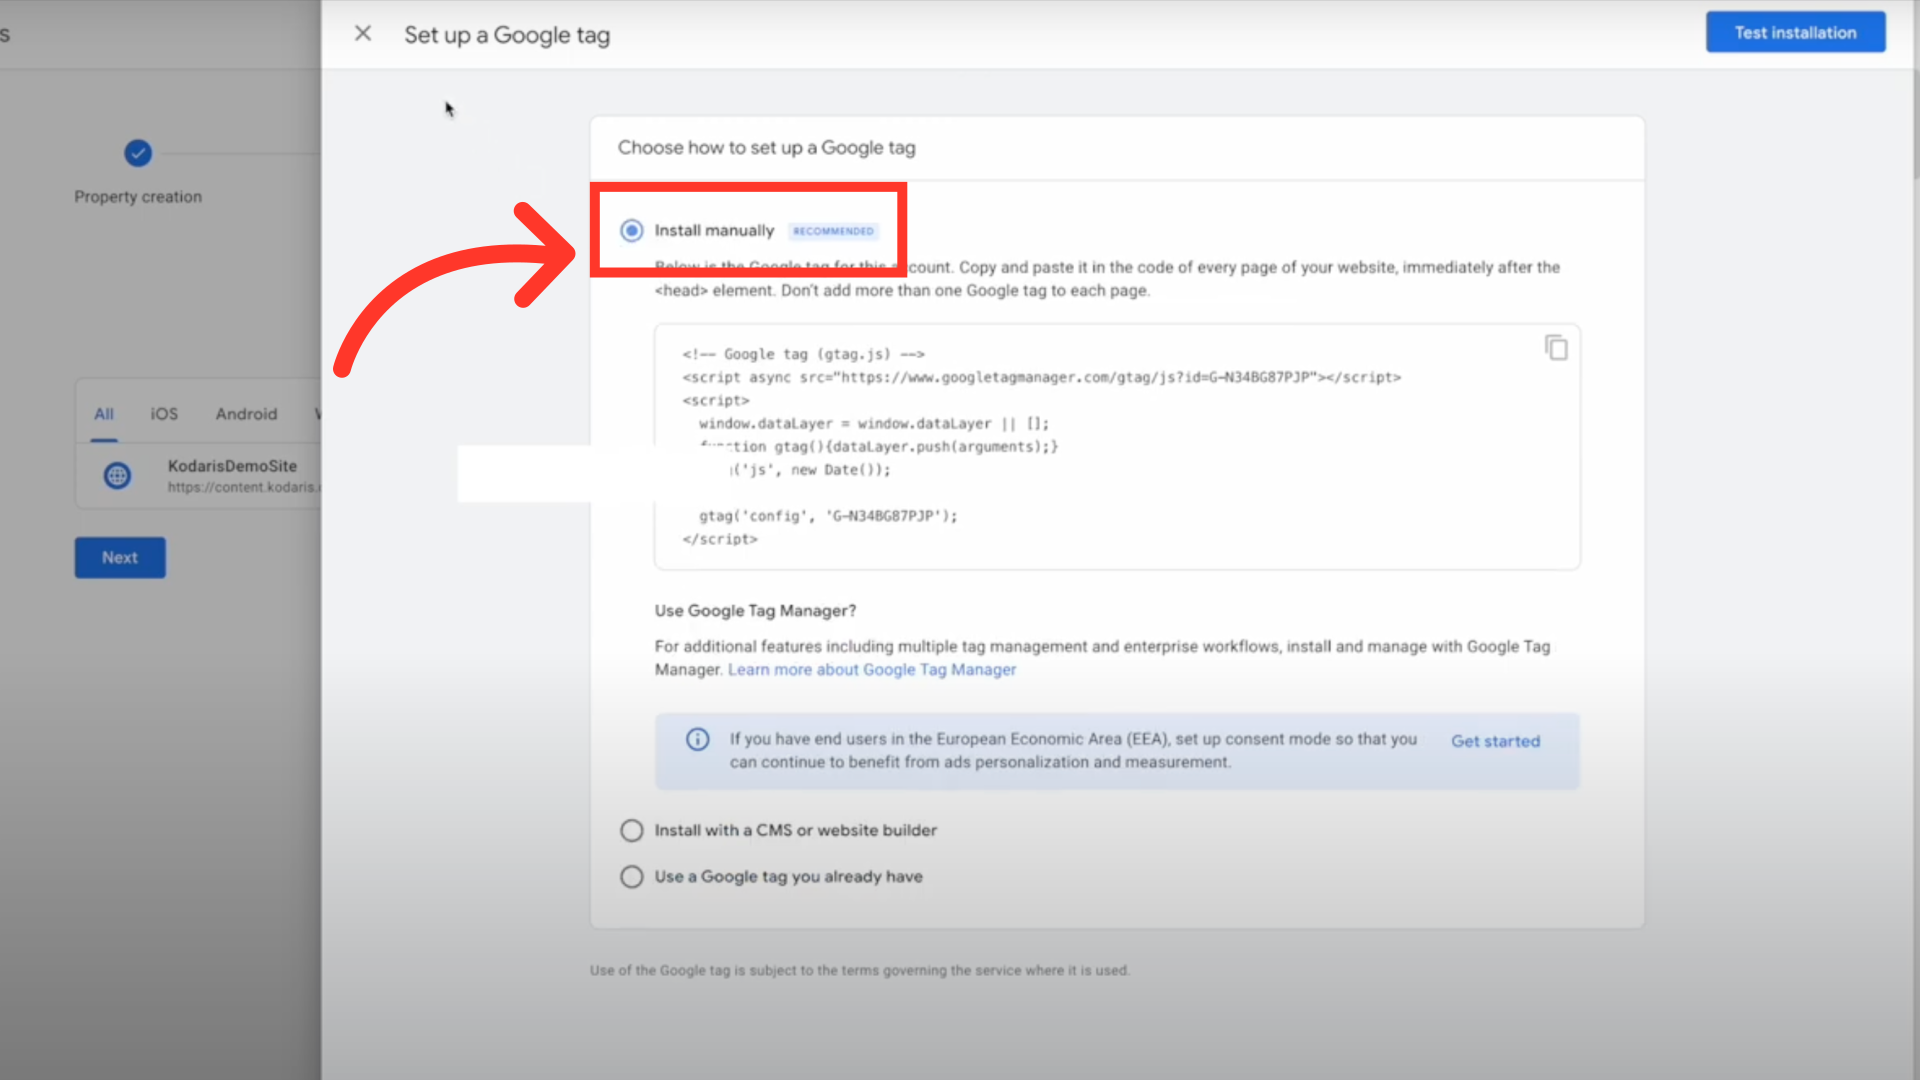
Select "Install manually"
Now that the data stream is set up, Google will prompt you to add the tracking code to your website. To do this, select "Install manually".
Close out of the page
Click the "X" in the upper left-hand corner of the page to close out of it.

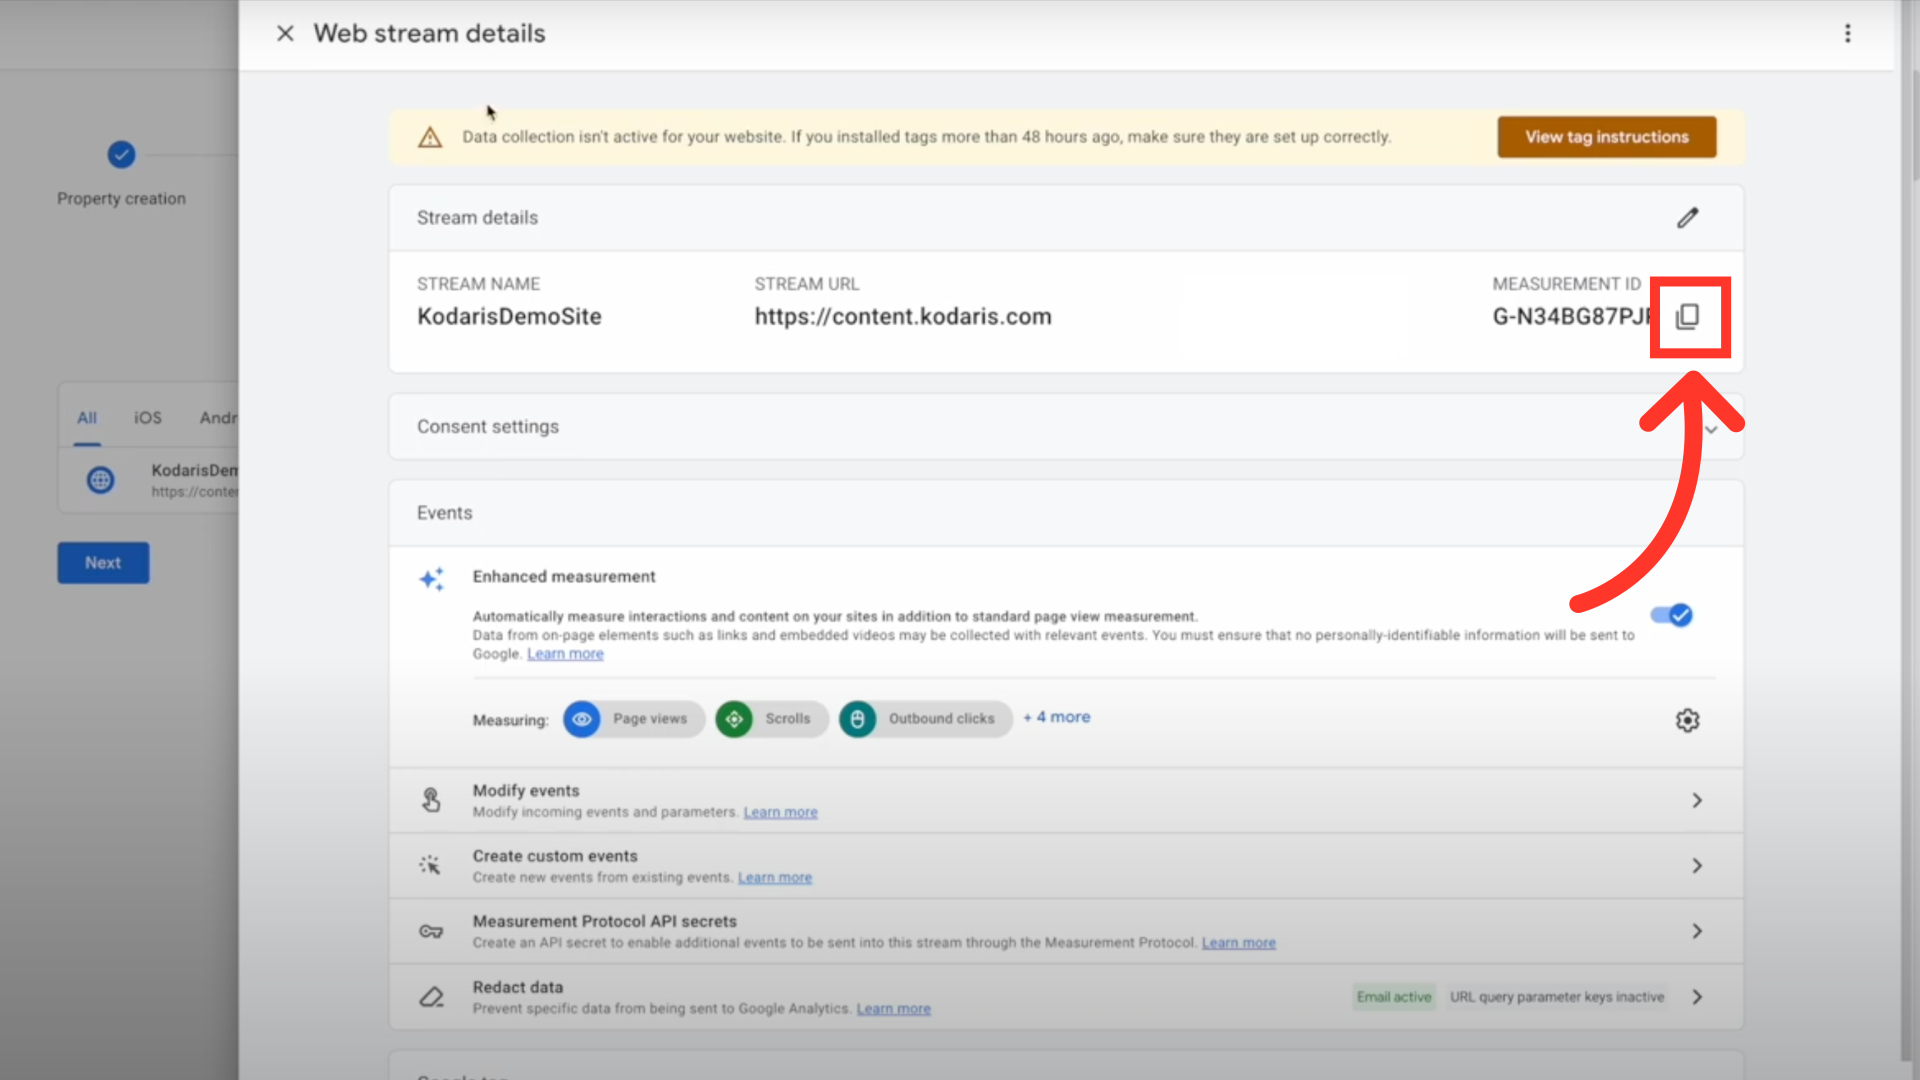
Copy the "Measurement ID"
A new page will automatically open with additional information about the data stream. To configure your website to track analytics, copy the "Measurement ID".
Click "Marketing"
Navigate to the Operations Portal and select "Marketing" from the main navigation.

Click "Google Analytics"
Select "Google Analytics".

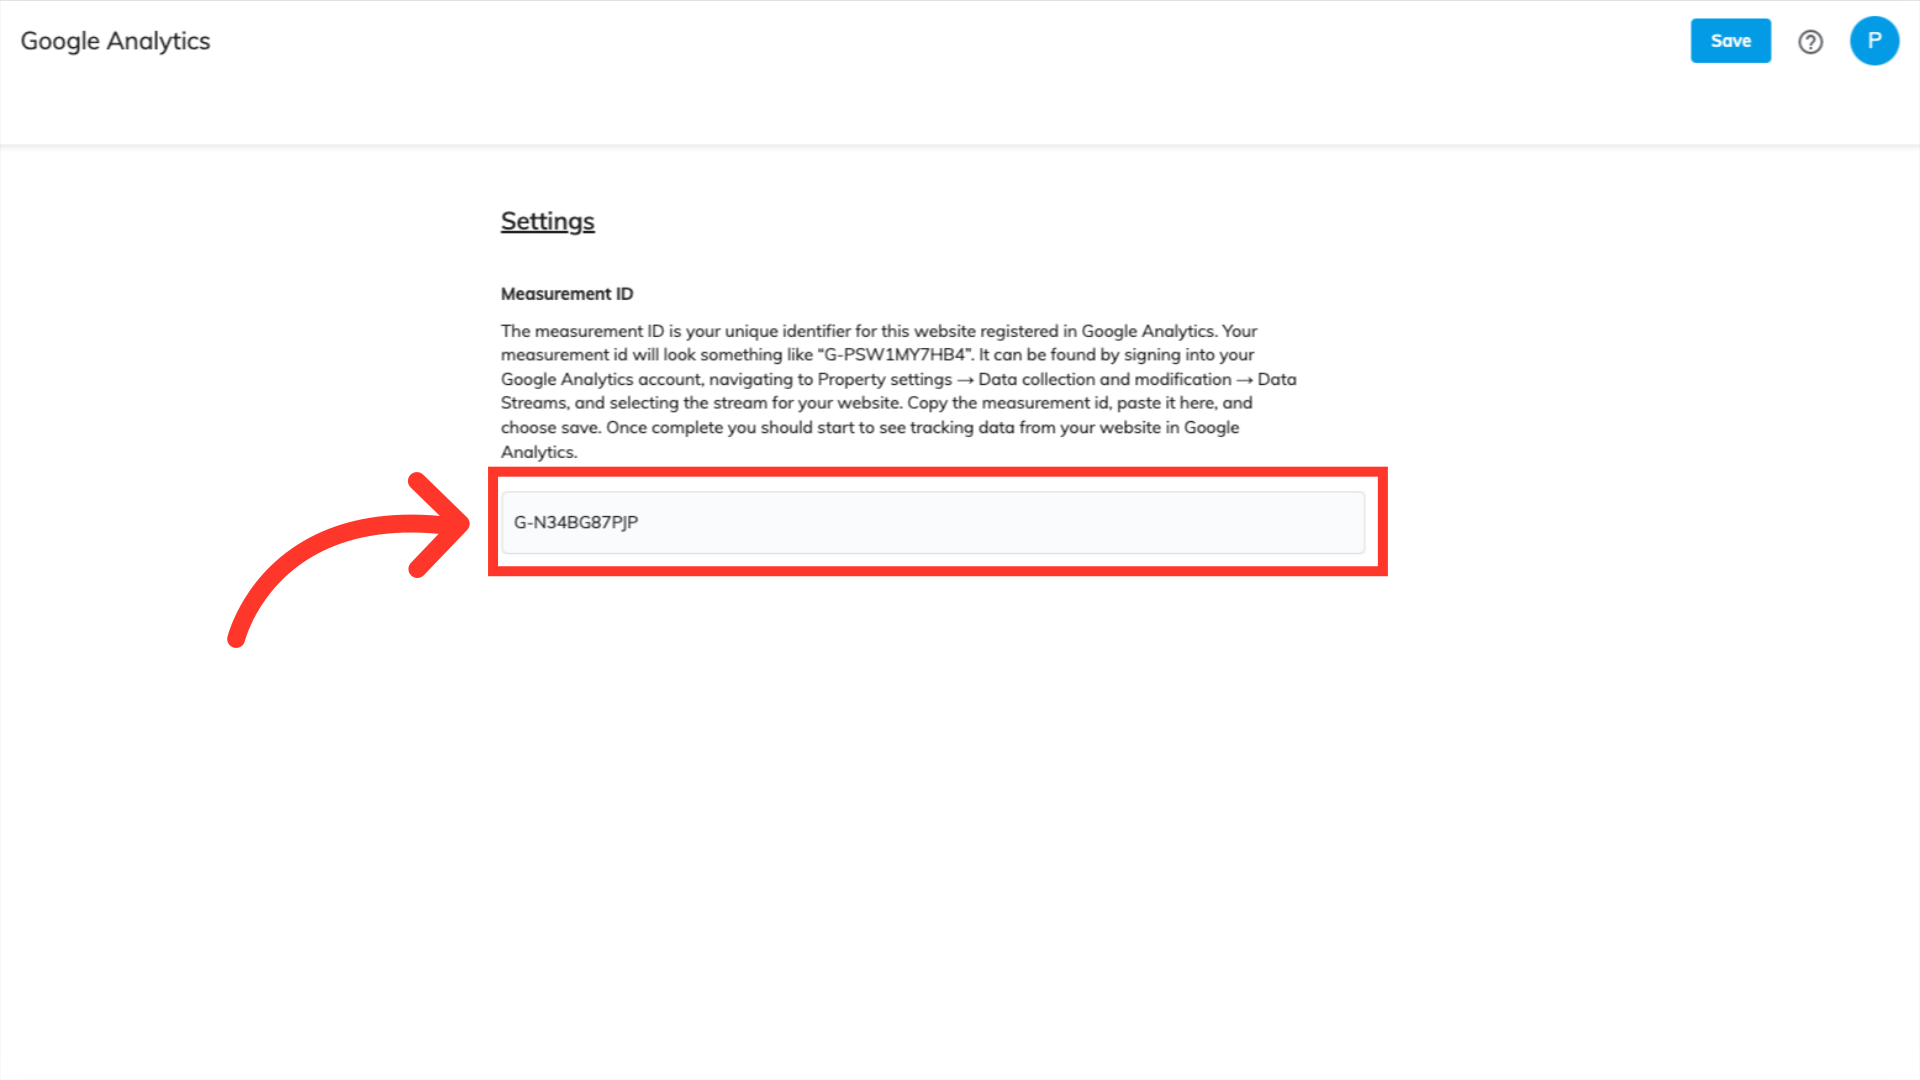
Paste the "Measurement ID"
Paste the "Measurement ID" that was recently copied into the text box.
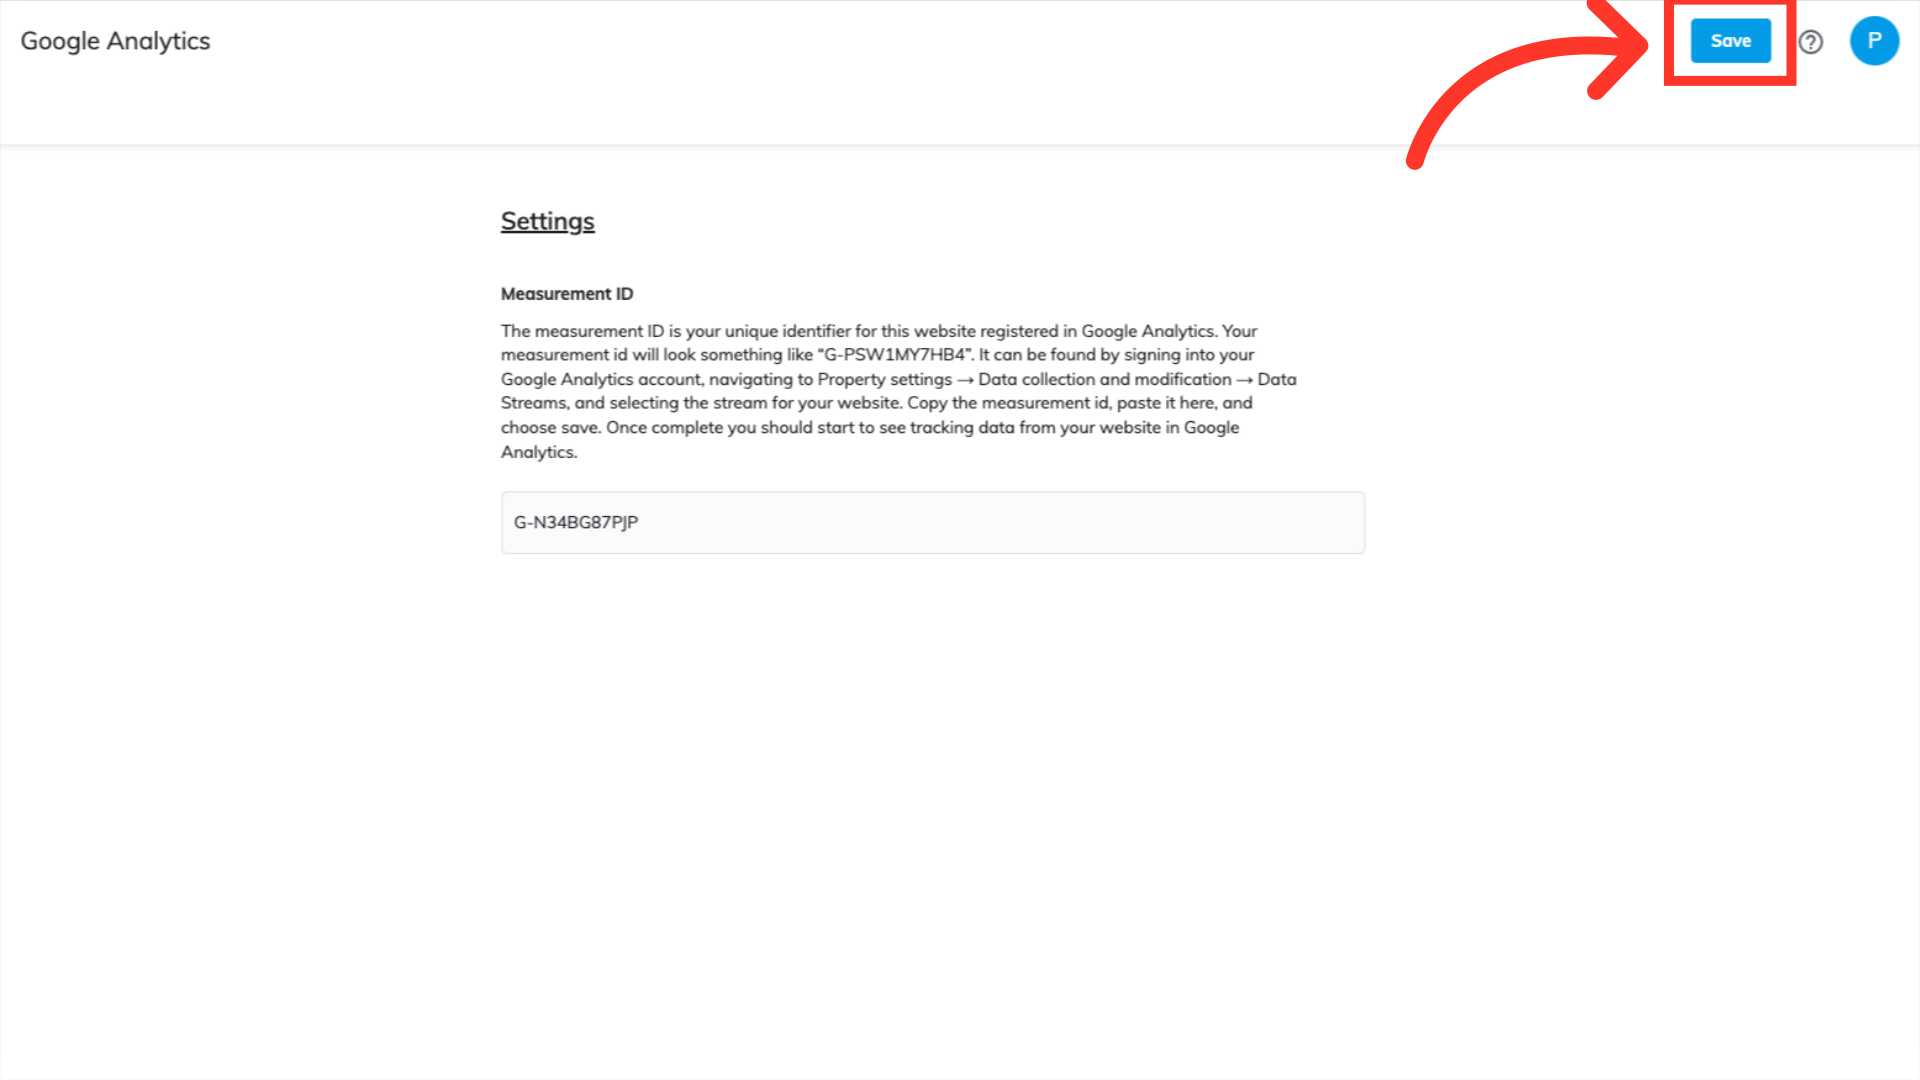
Click "Save"
Click the "Save" button to save your changes.
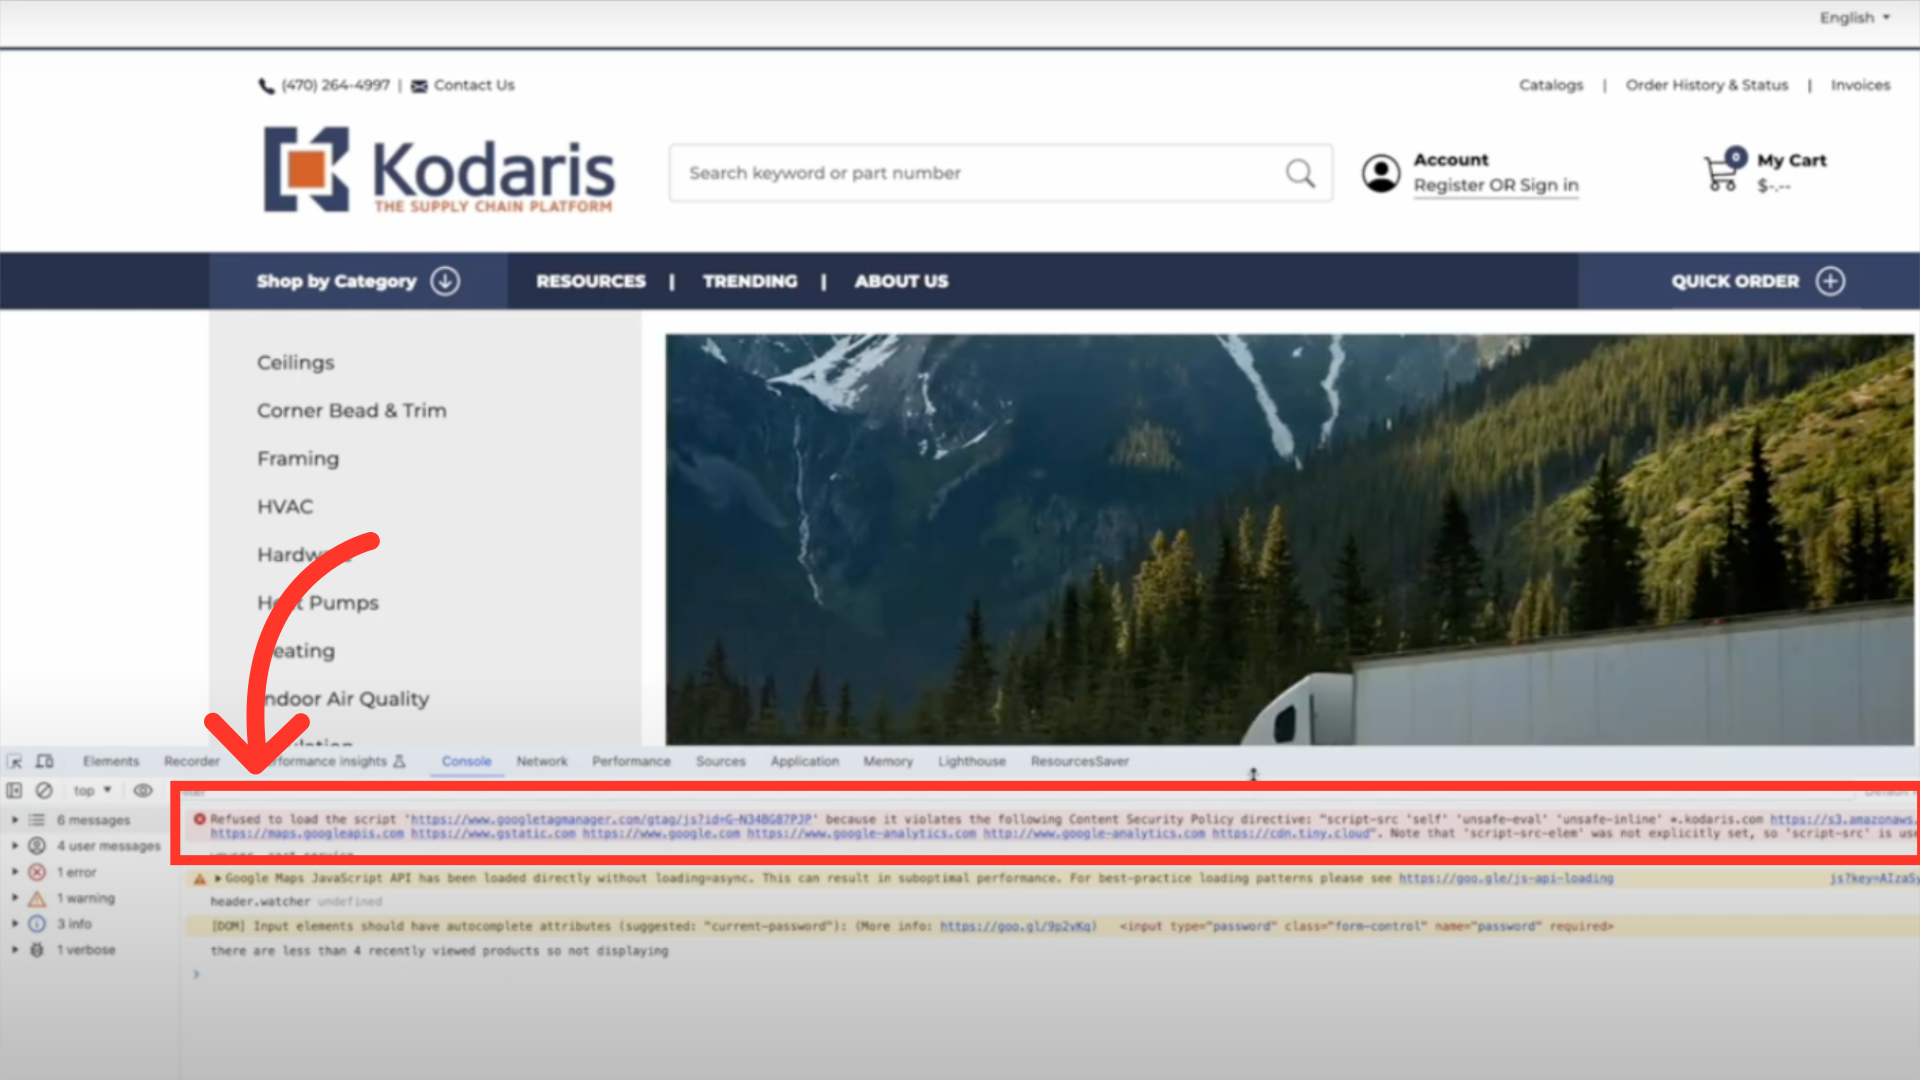
Click "Inspect"
To check on the script, navigate to your website. Once on your website, right-click and select "Inspect" to view the website's scripts.

Click on the "Console" tab
Select the "Console" tab.

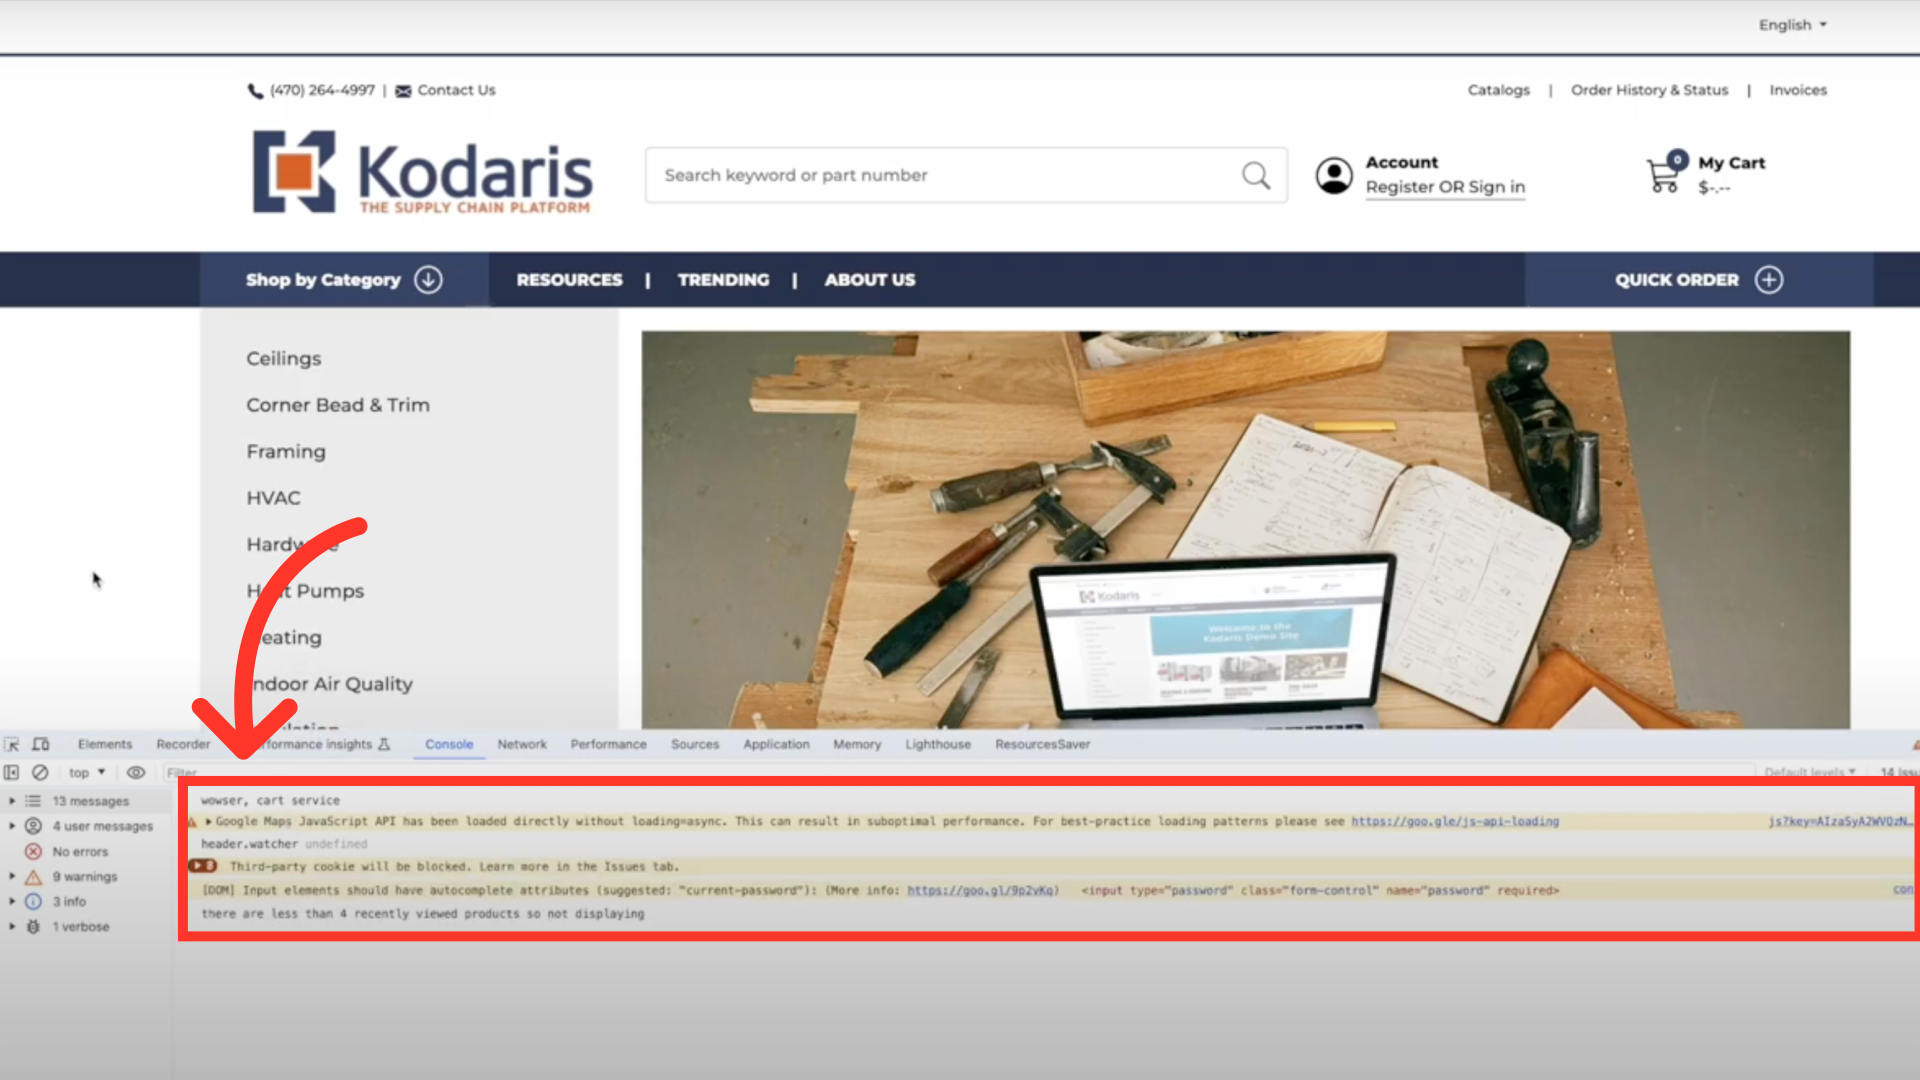
Locate the error
You'll notice that there will be an error that says, "Refused to load the script". This error pertains to the new script you just added. If you do not see an error, reload the page. This error is because only certain script sources are allowed on your website by default and for security purposes. Generally speaking, you should only allow script sources that you trust. Because Google Tag Manager is a trustworthy source, you need to whitelist it. Whitelisting the script will allow your website to load the script from Google Tag Manager.
Copy the website domain
To whitelist the script, highlight and copy the website domain located in the error notification.

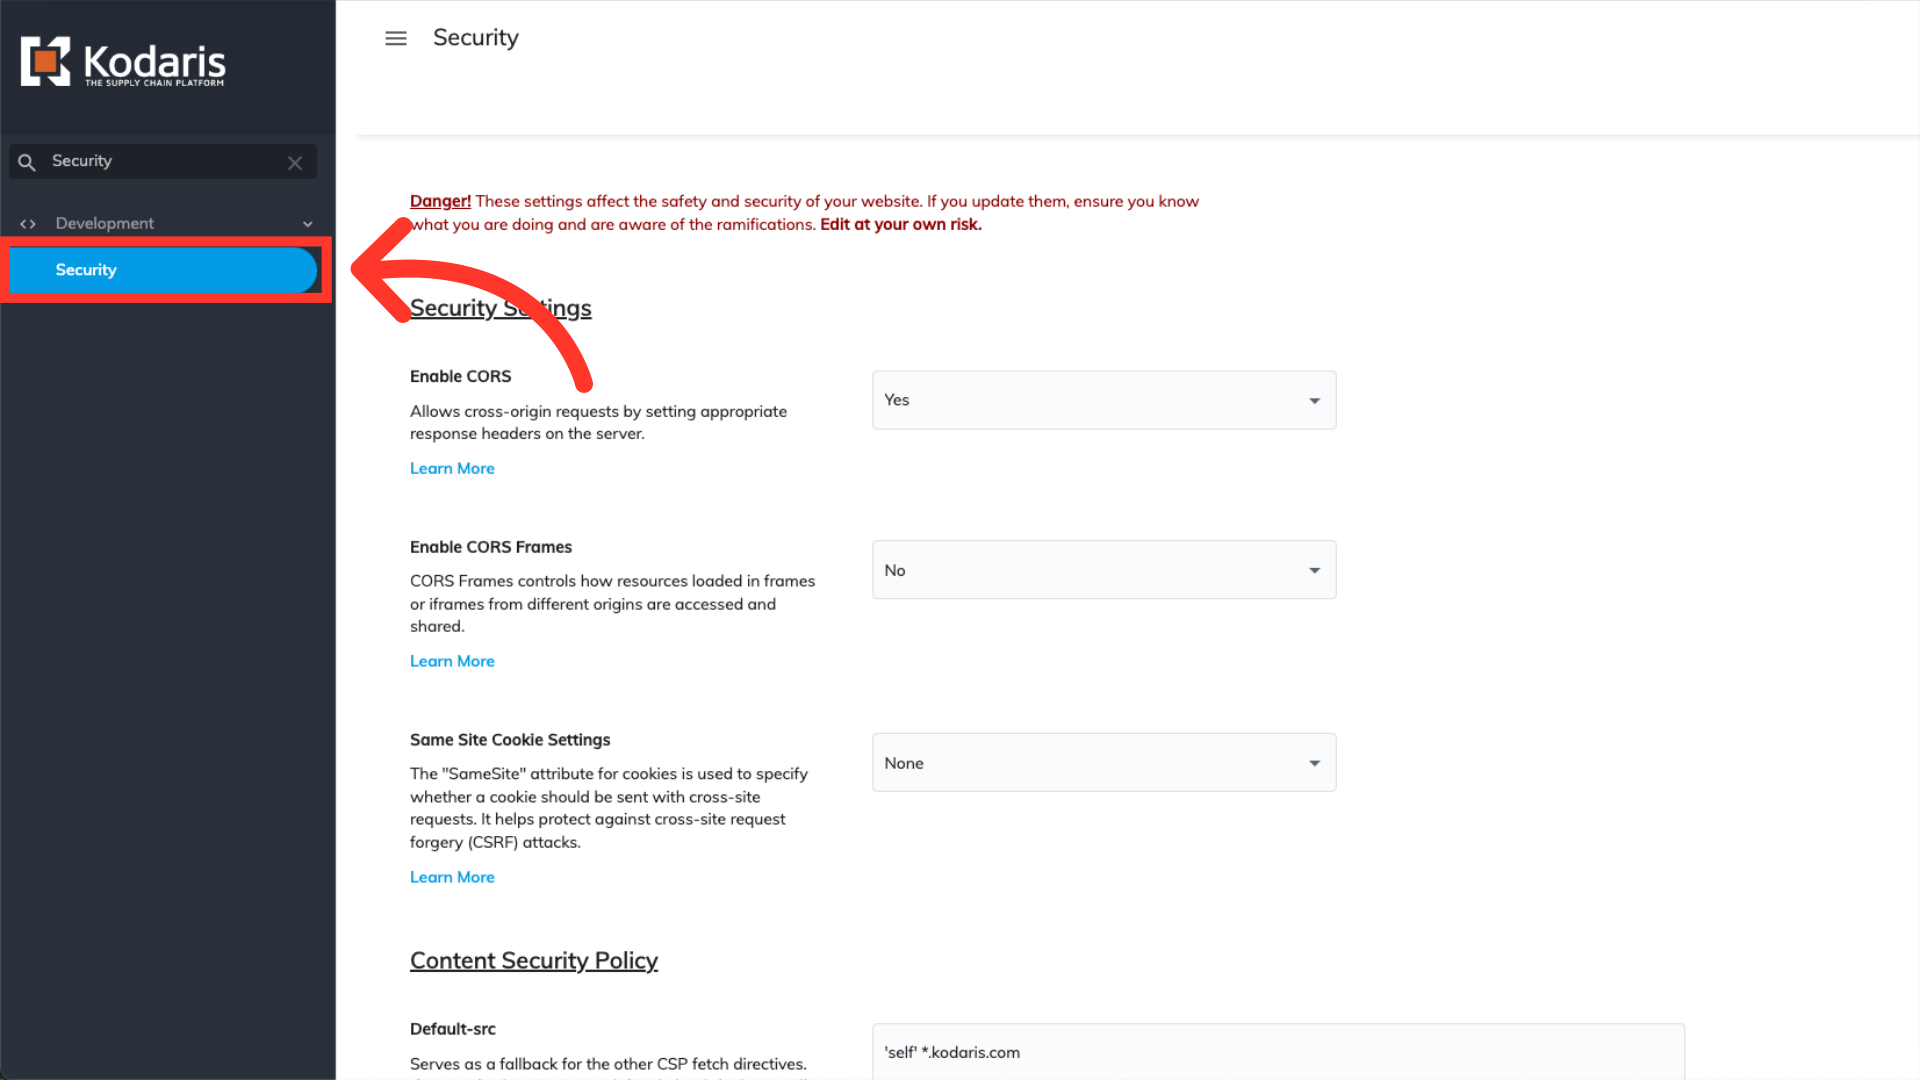
Search "Security"
Head back to the Operations Portal, and search "Security" in the search bar.

Click "Security"
Click the "Security" tab.
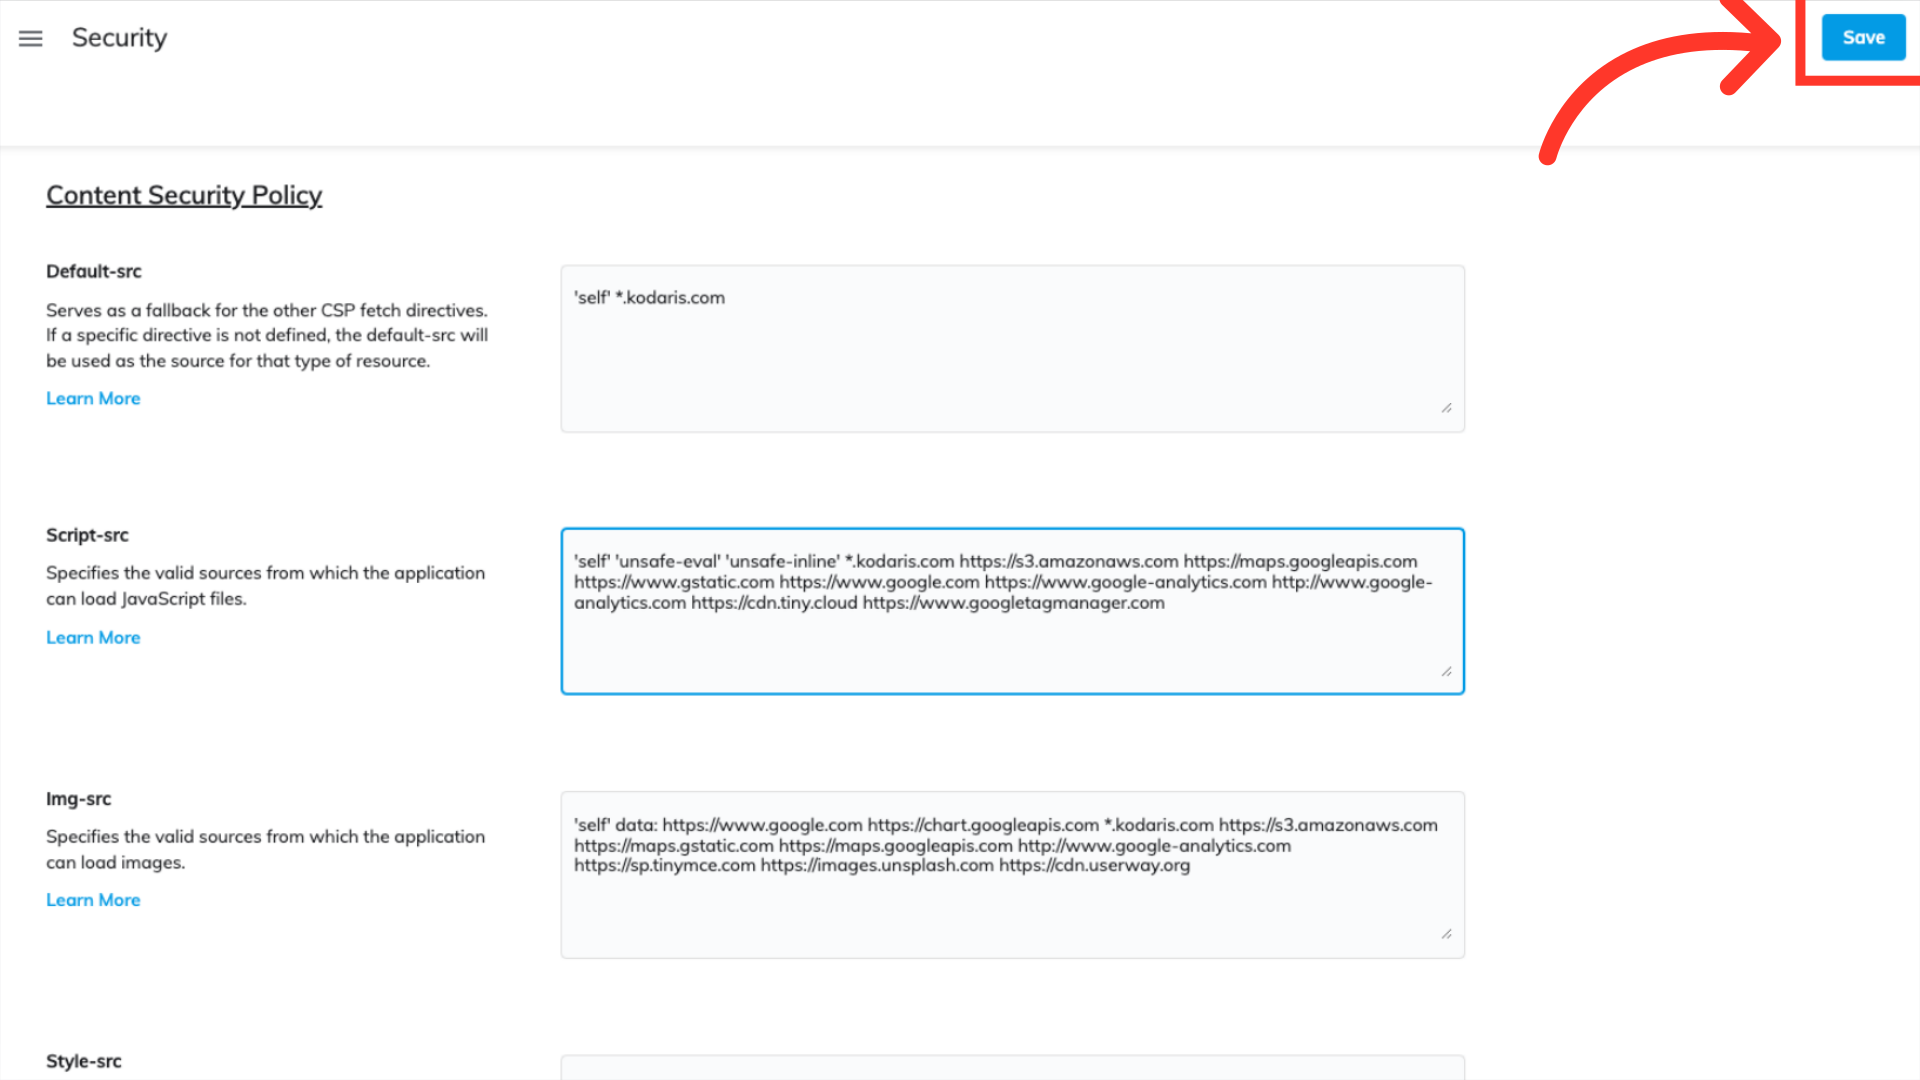
Paste the URL
On this page, scroll to the heading titled "Script-src" under the "Content Security Policy" section. To whitelist Google Tag Manager, paste the URL you recently copied into the text box along with the other whitelisted domains. When pasting the URL, make sure there is a space separating the previous link with the new one you are adding.

Click "Save"
To save your changes, click the "Save" button.
Confirm the error no longer exists
Head back to your website and refresh the page. View the source code to ensure the error that was previously shown no longer exists. After following these steps, Google Analytics will now be connected to your Commerce website. You can begin viewing insights in your Google Analytics account after just a few minutes.