Customer Portal - Open Invoices Screen Overview
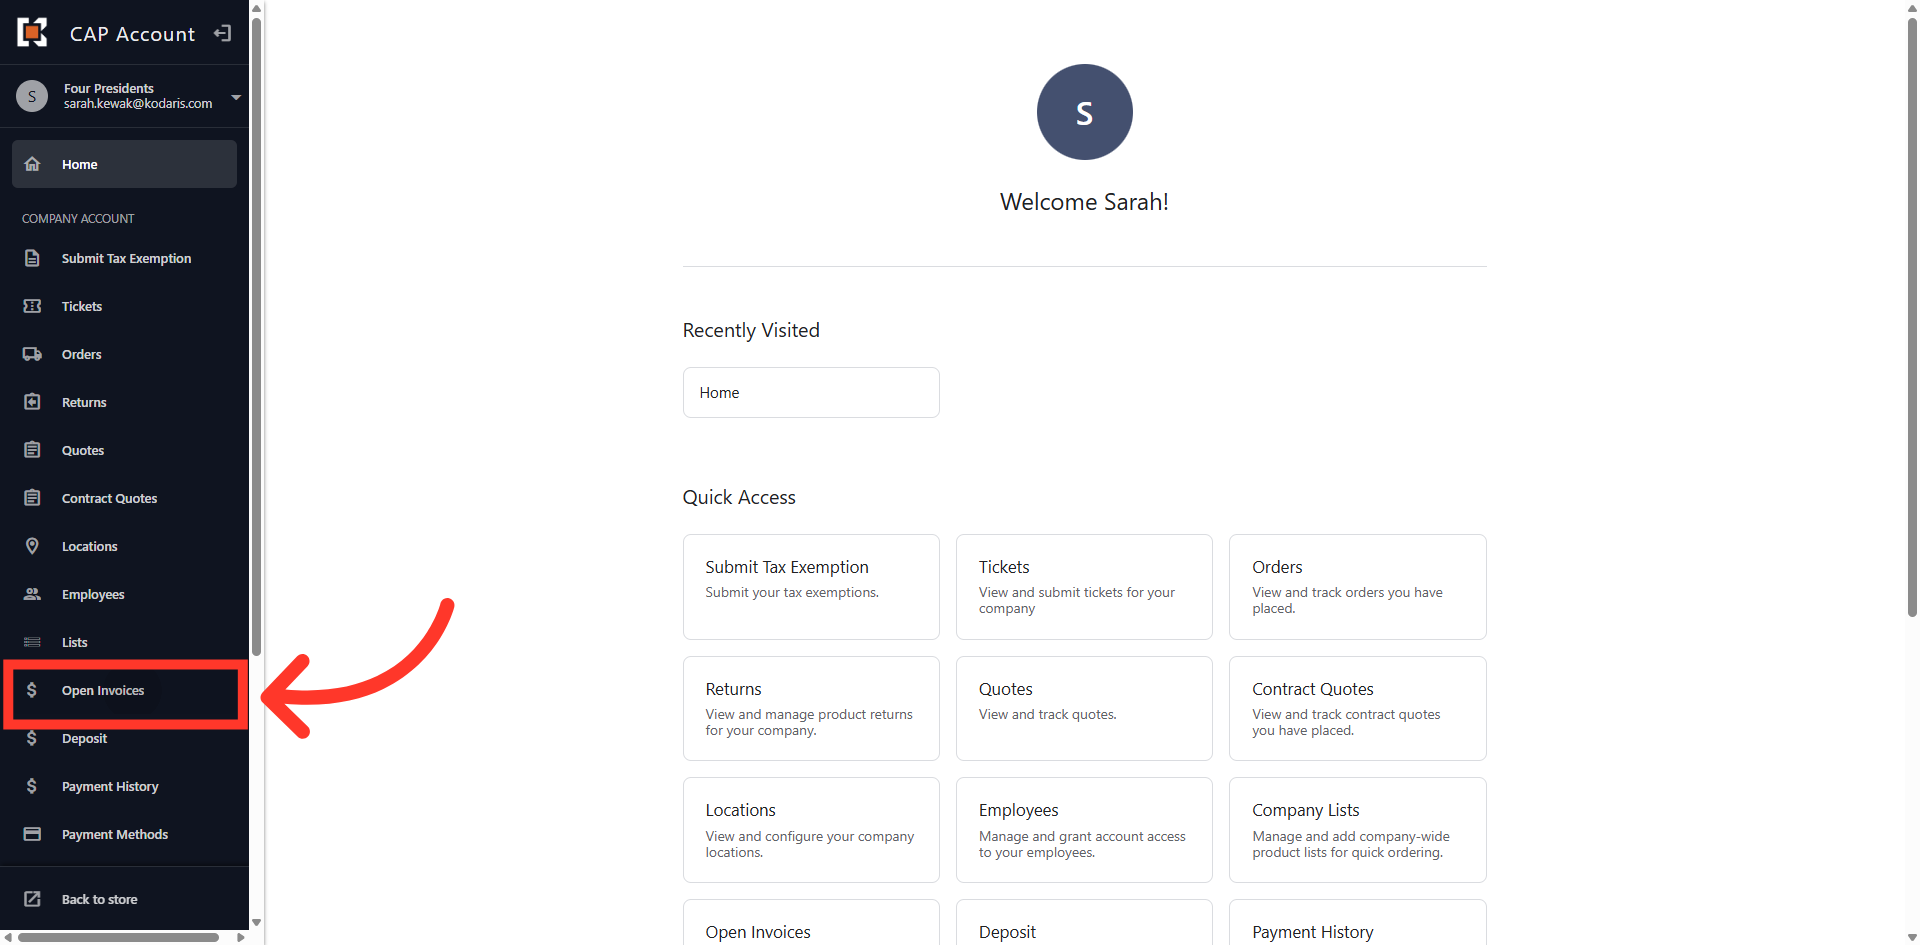
Navigate to "Open Invoices"
You can view Account Balances and Open Invoices in the Customer Portal by navigating to the "Open Invoices" section. In order to complete these actions, you will need the "Accounts Payable" permission.
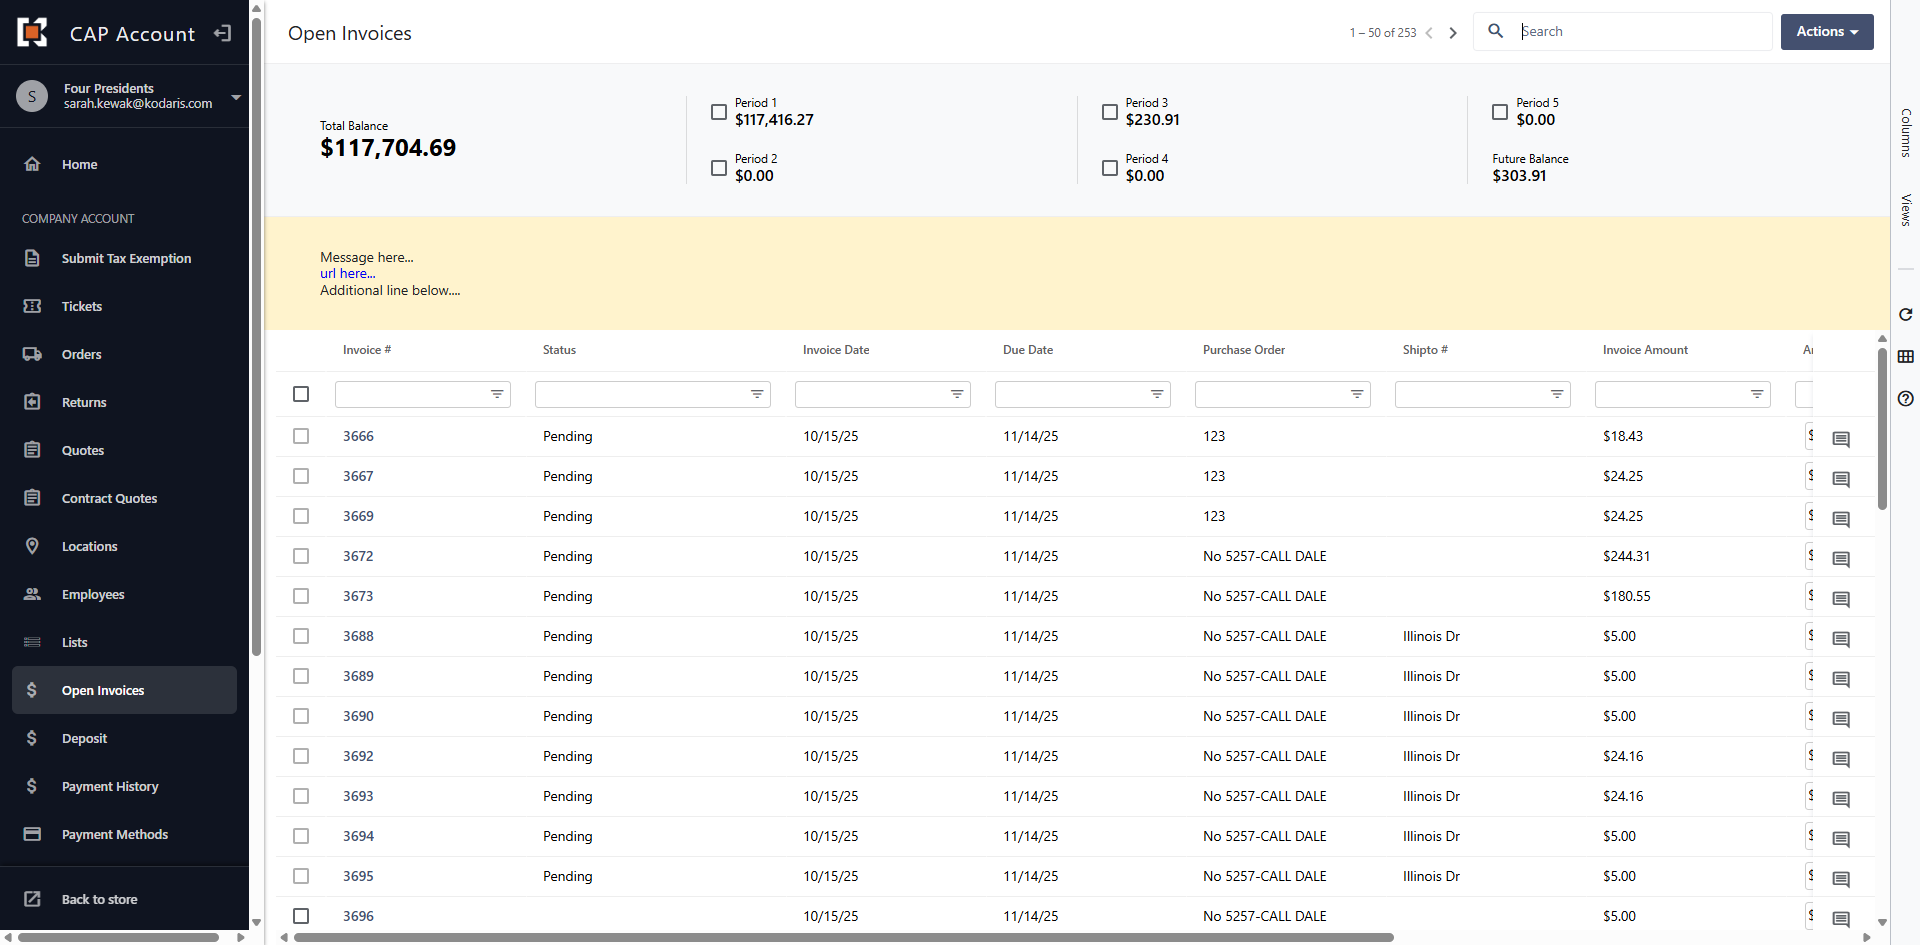
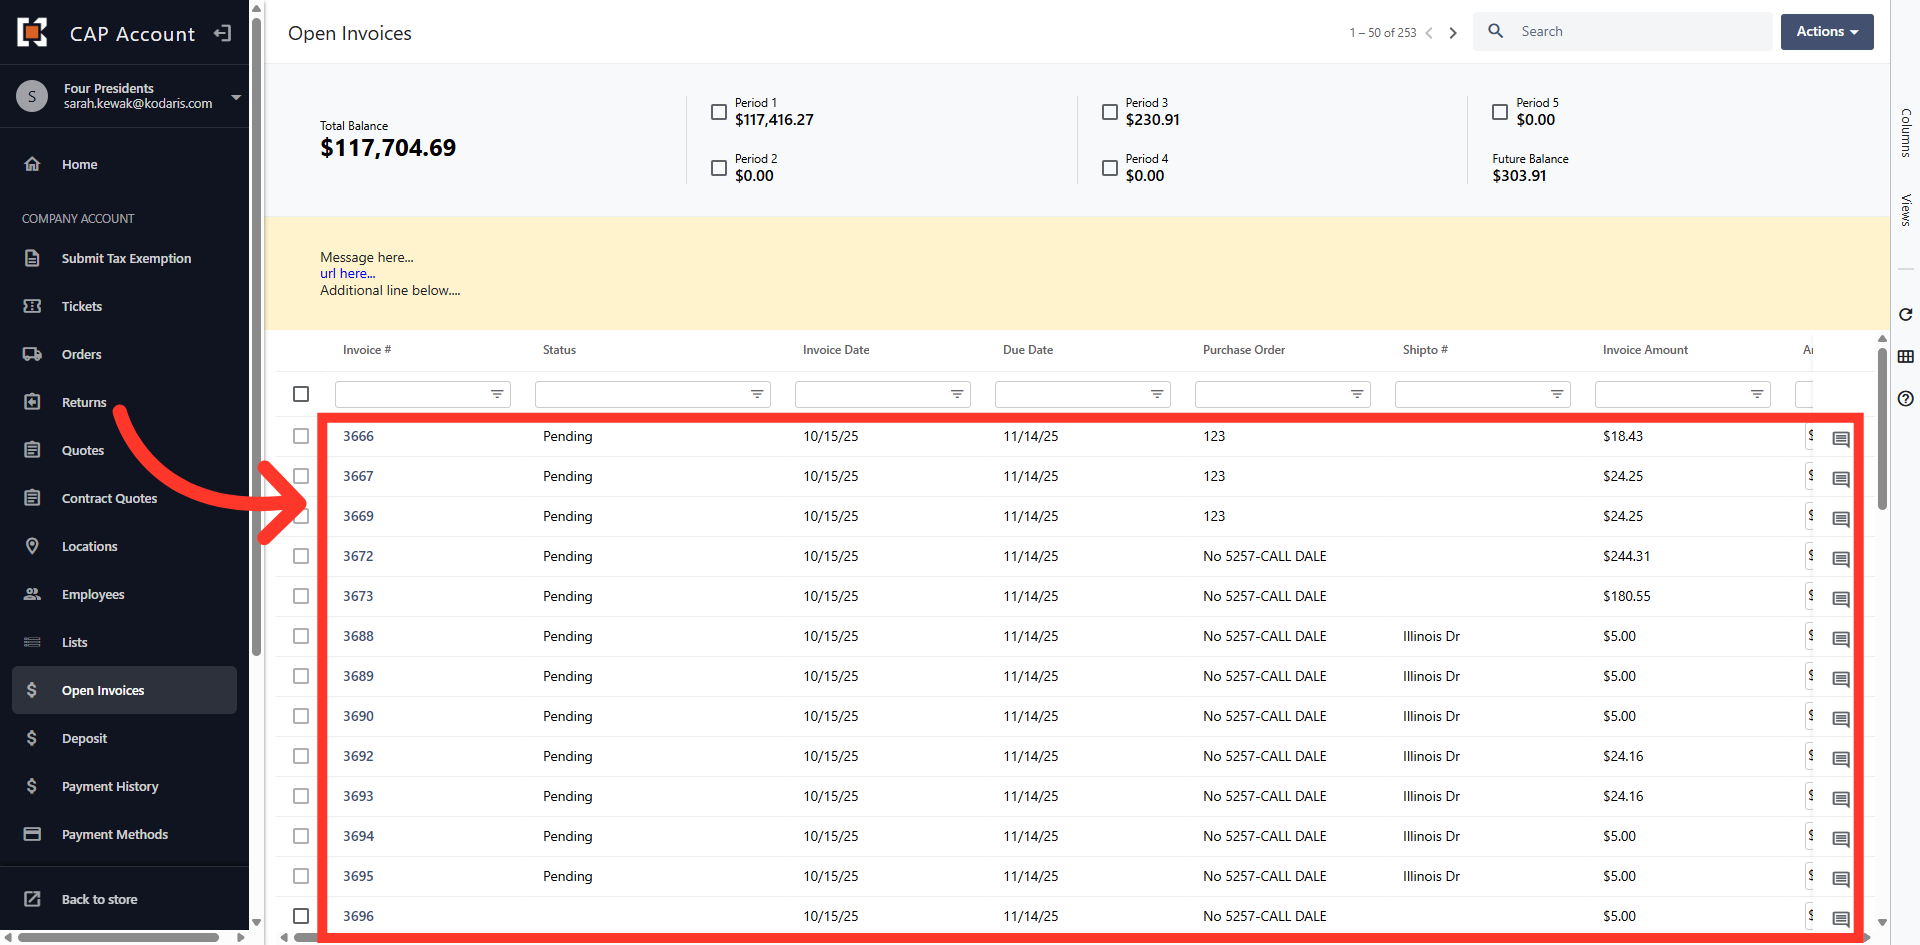
Open Invoices
The grid view displays all Open Invoices on the account.
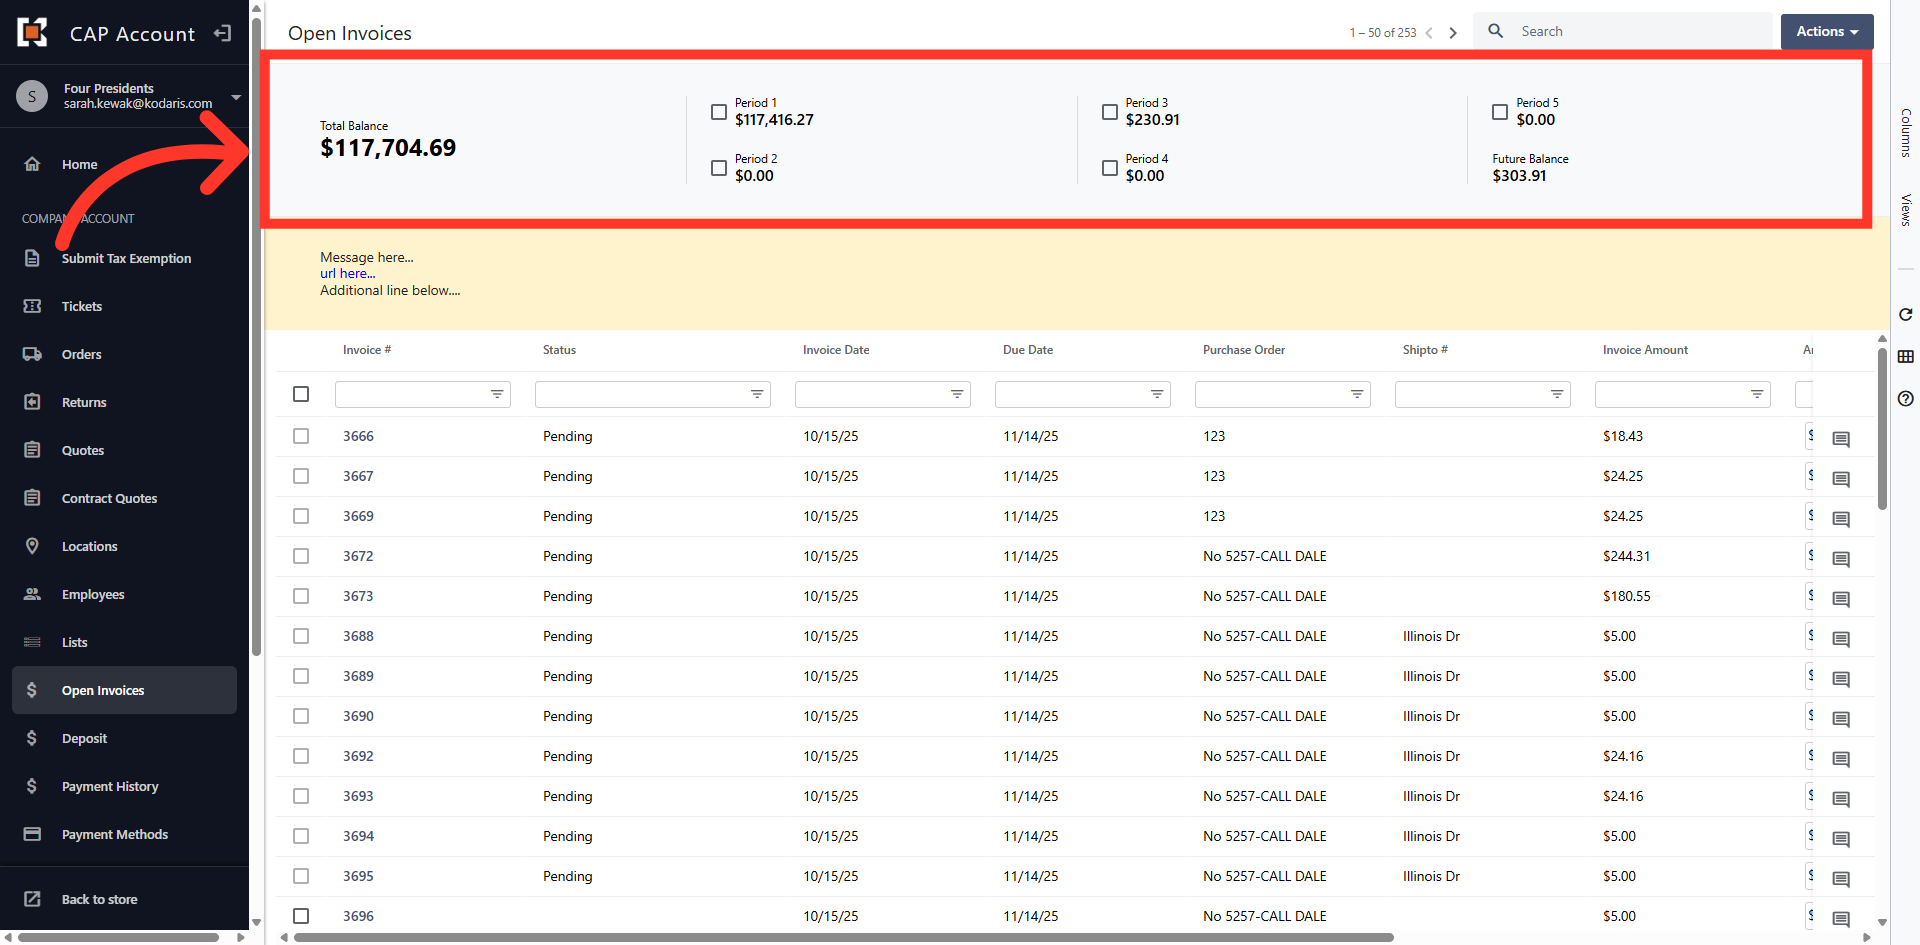
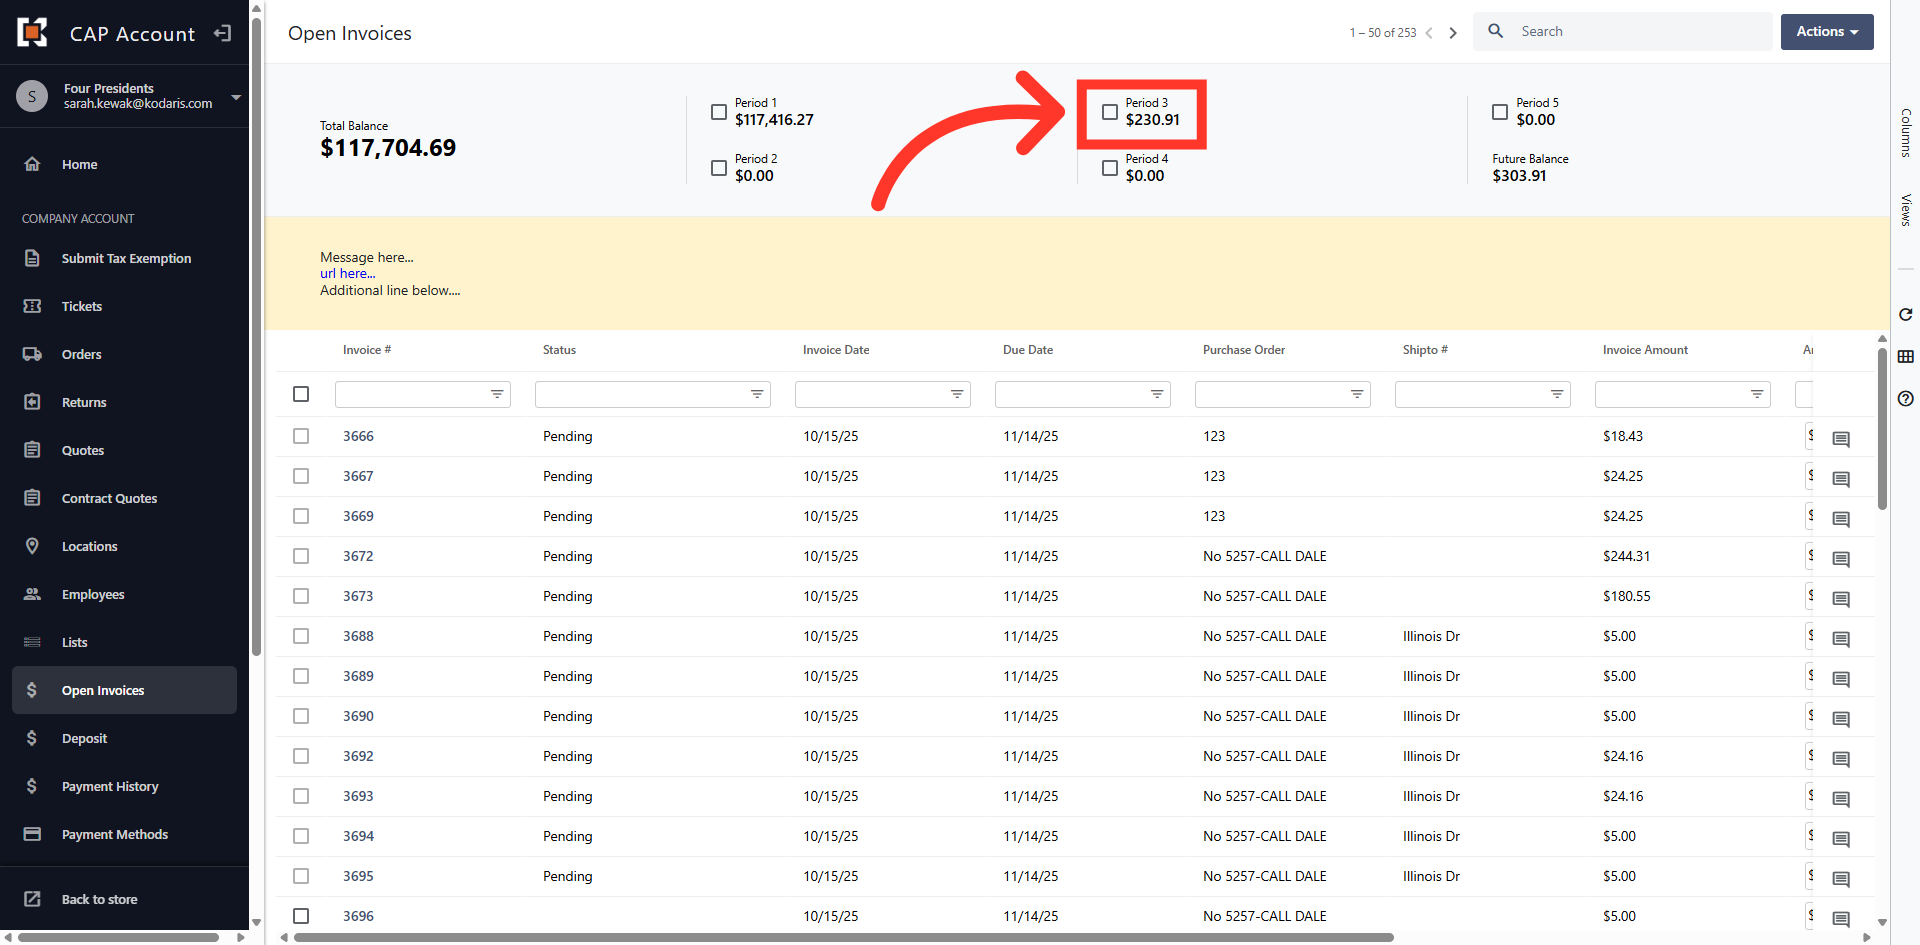
Account Balances
The top section, displays overall balance as well as balances by period.
Click into a Specific Period
You can click into a specific period to view invoices relevant within that timeframe.
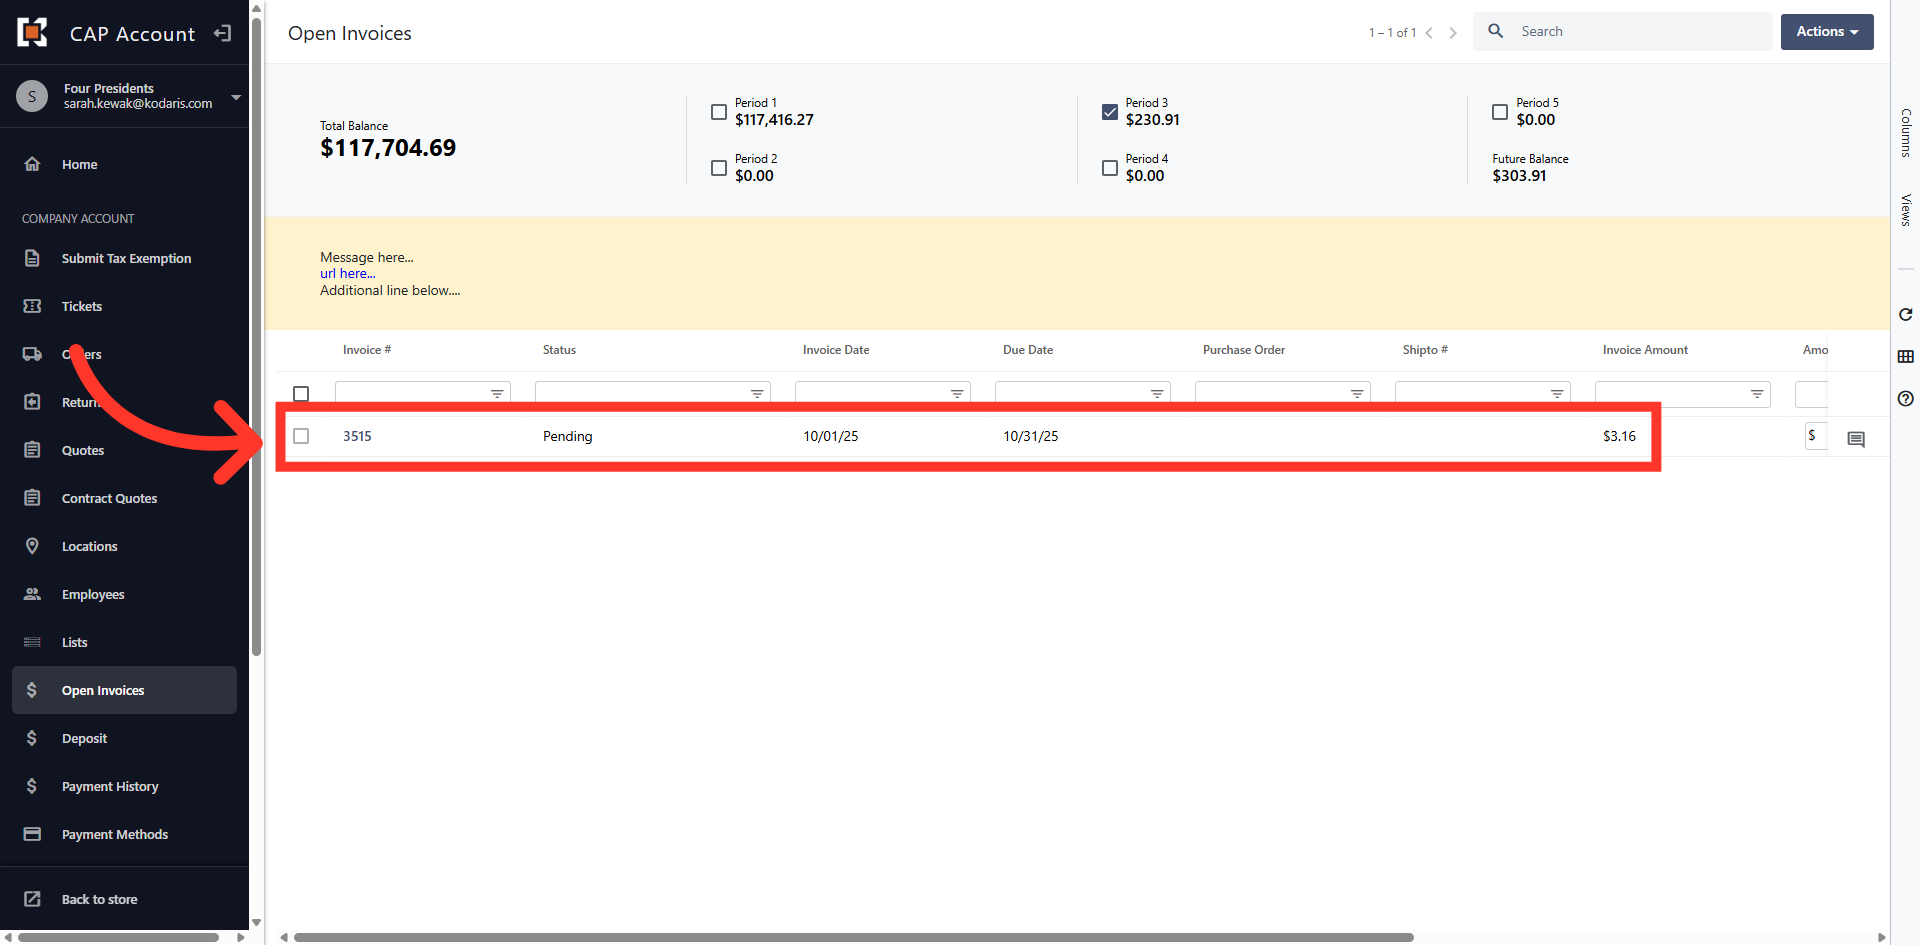
Confirm Selection
This allows you to quickly select invoices and make a payment.
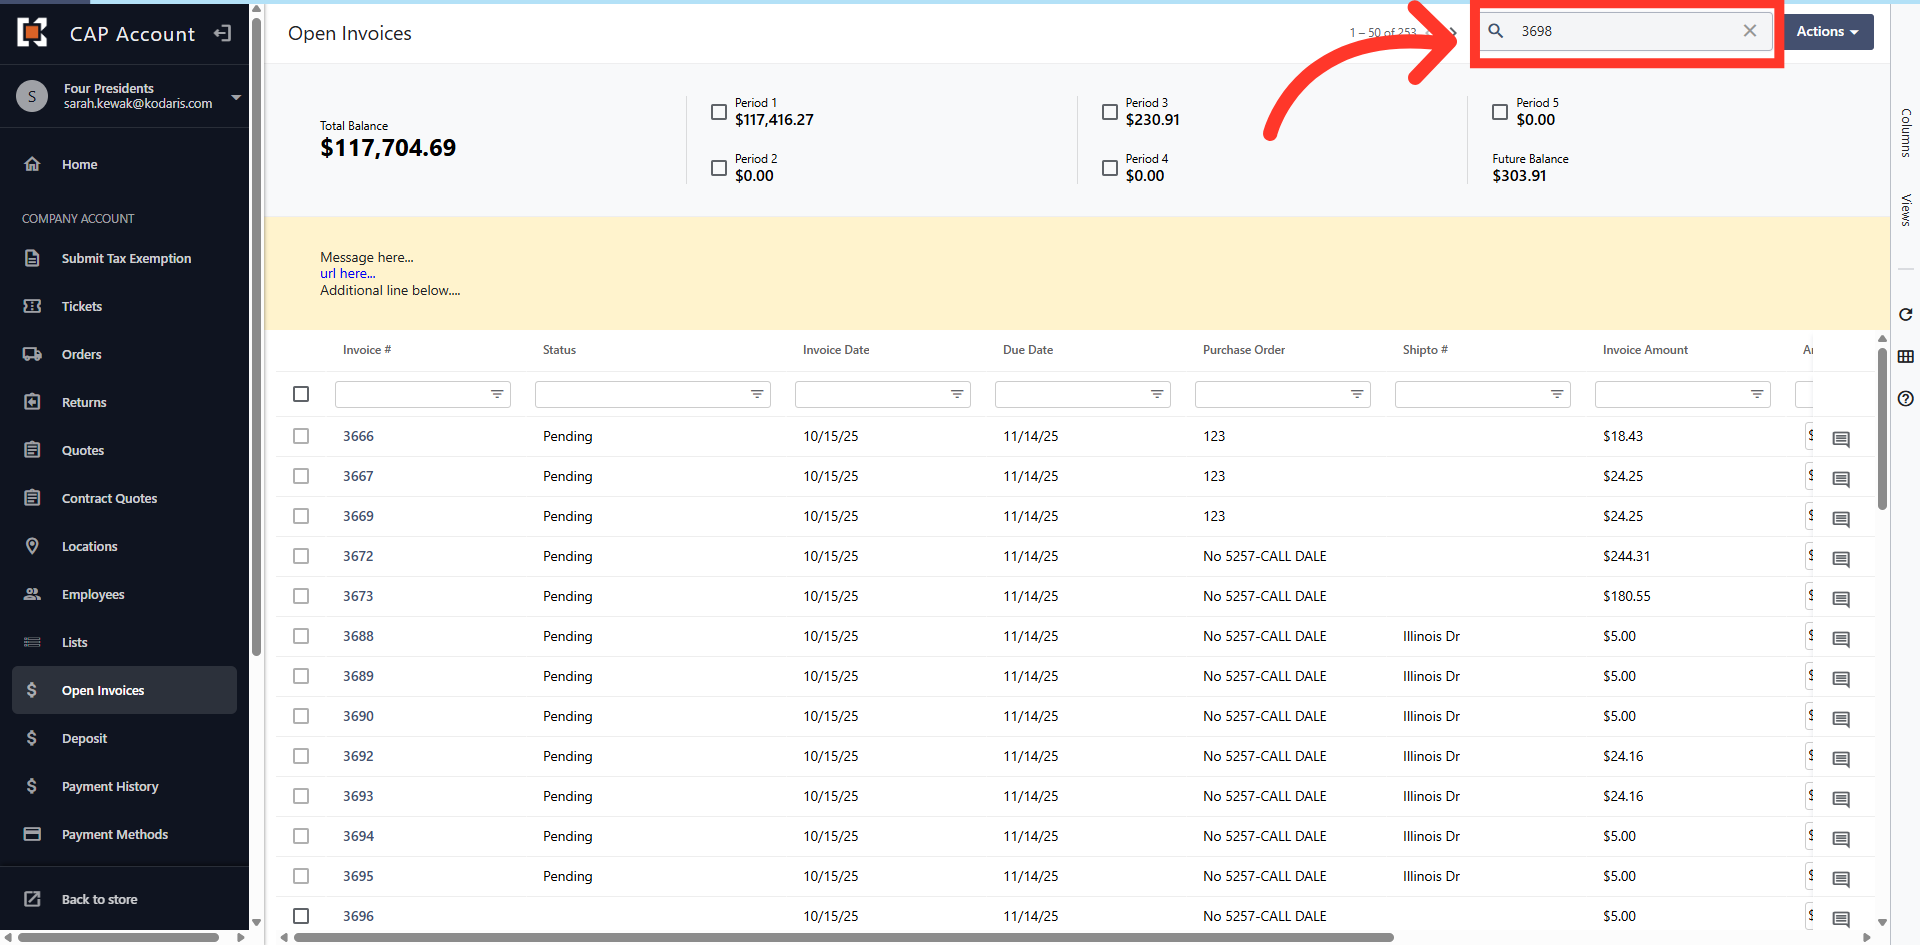
Search for an Invoice
You can use the general search to further narrow down the invoices. You can search for a specific invoice using a keyword such as an invoice or purchase order number.
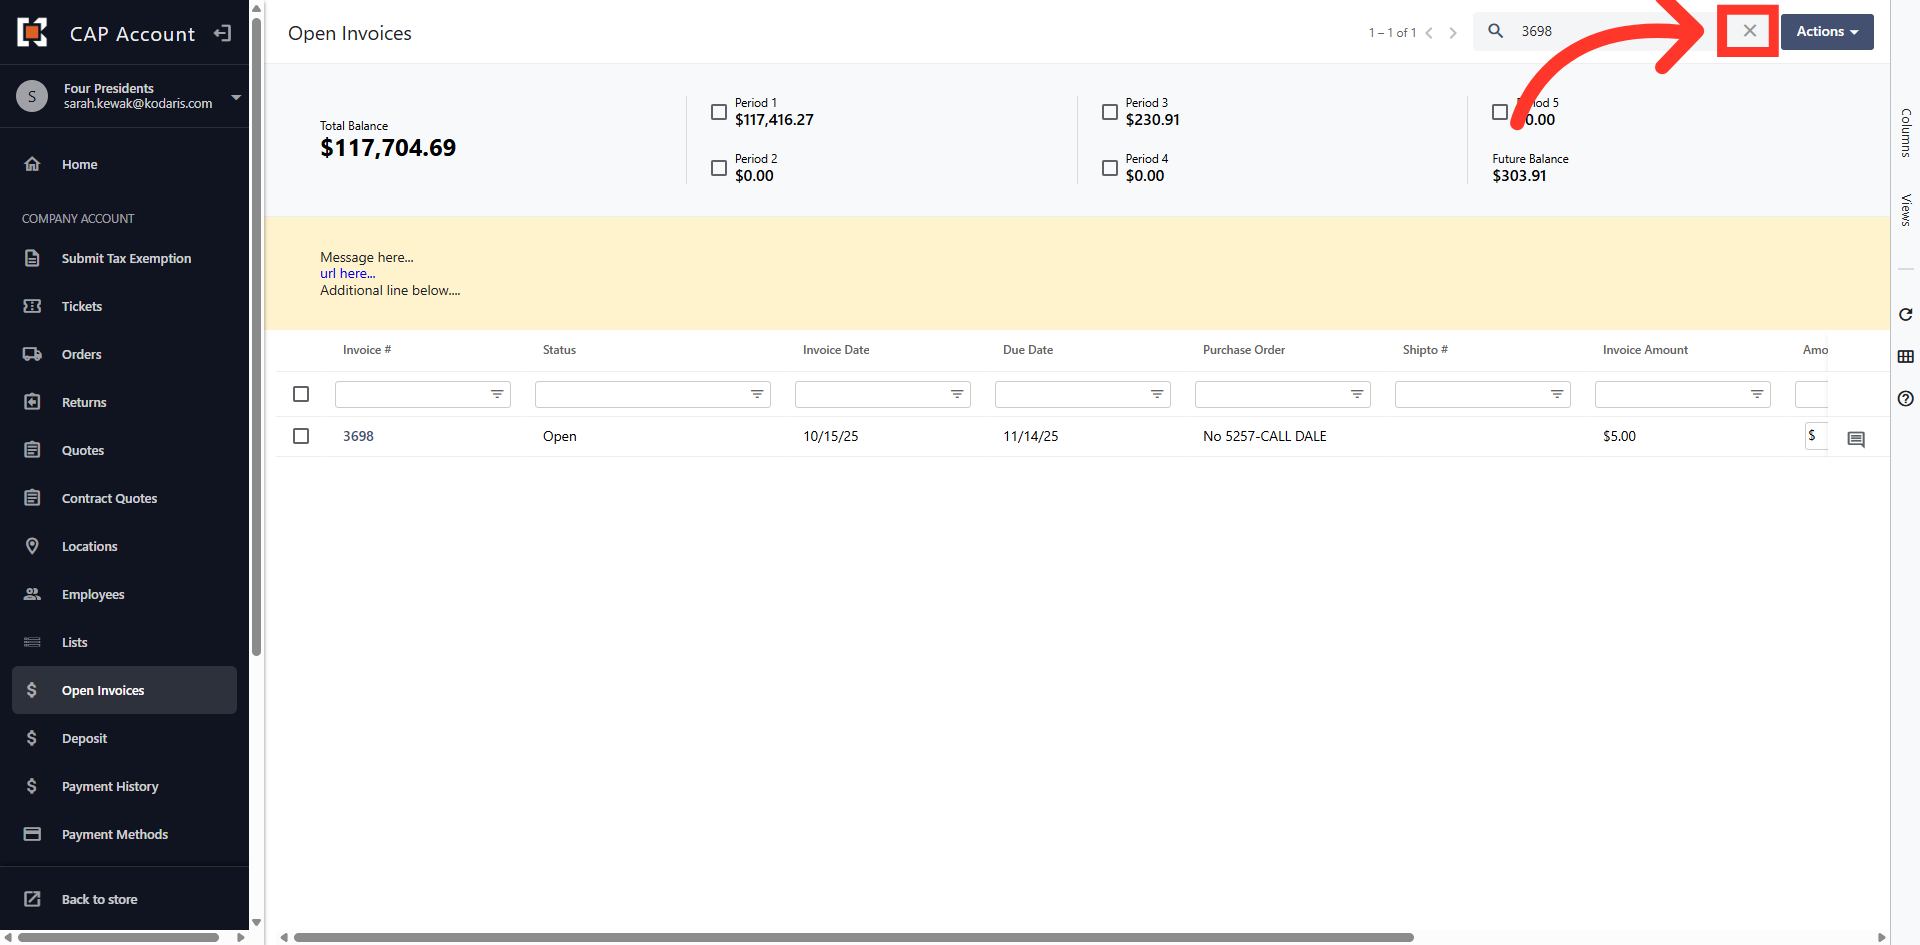
Click "x" to clear search
Click the "x" icon to clear the search.
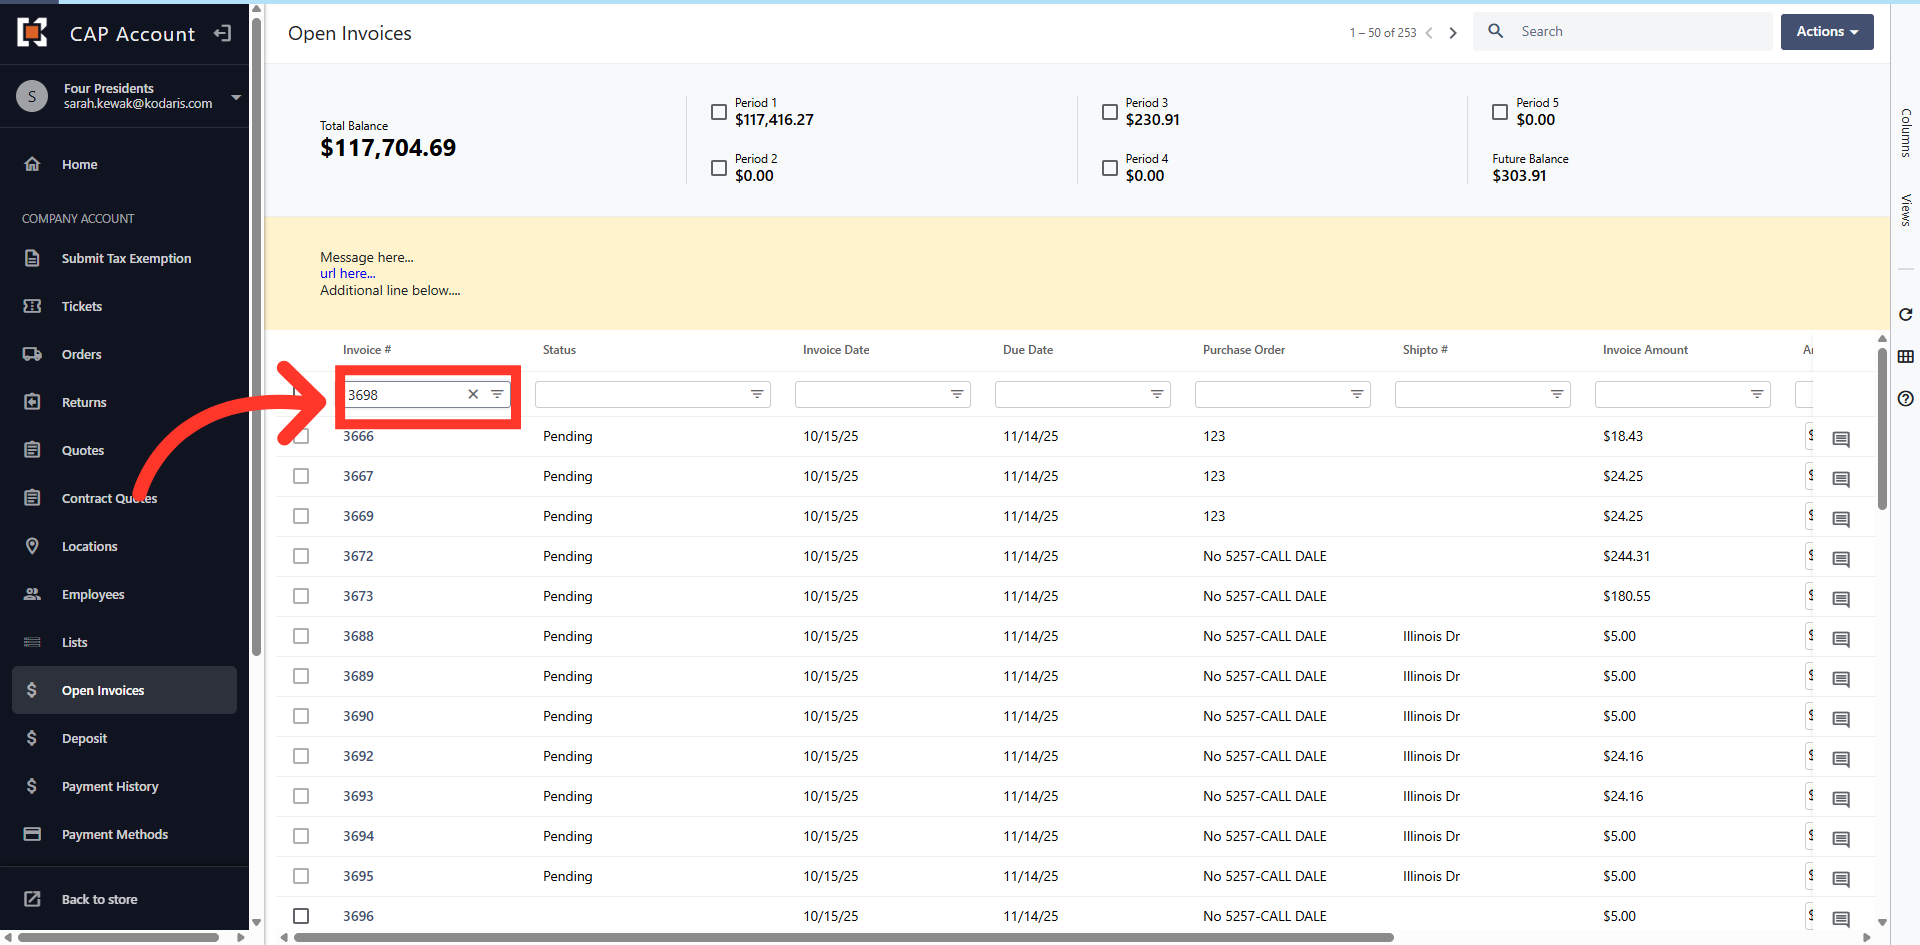
Navigate To Invoice # Column
You can use the columns to filter or sort your invoices. For example, use the "Invoice #" column to filter your invoices by typing your invoice number.
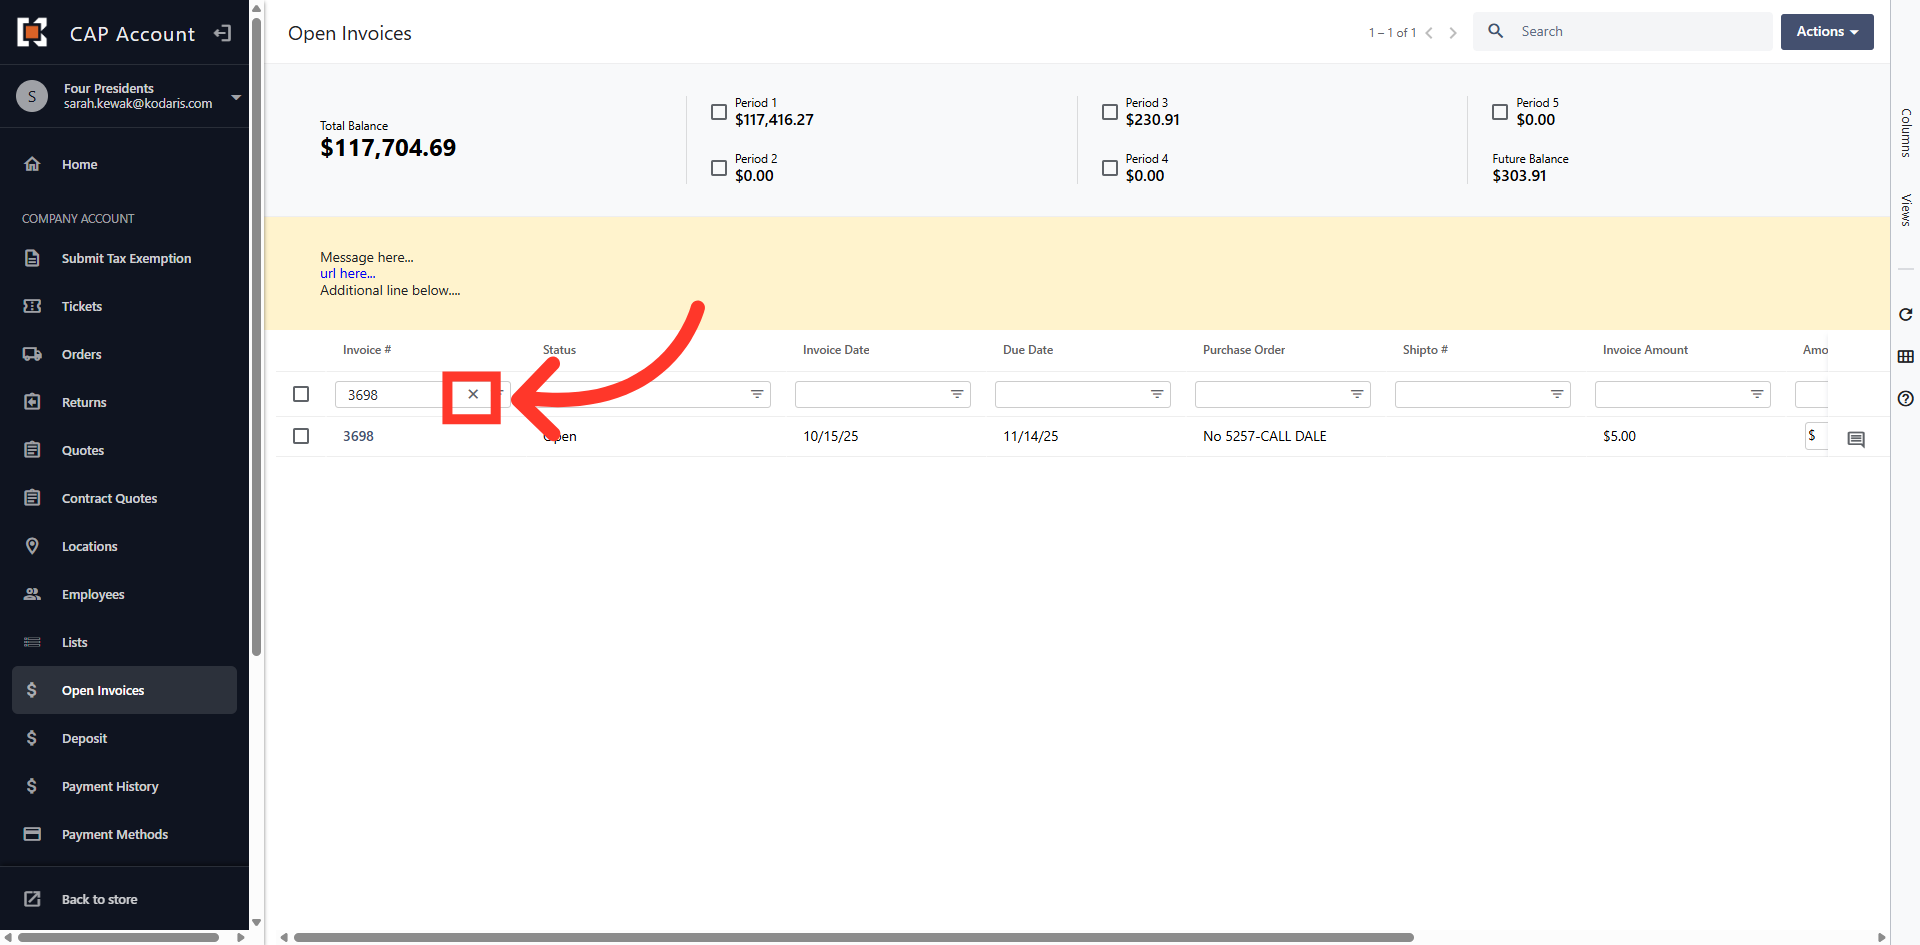
Click "x"
Click the "x" to clear the filter and return to the grid view.
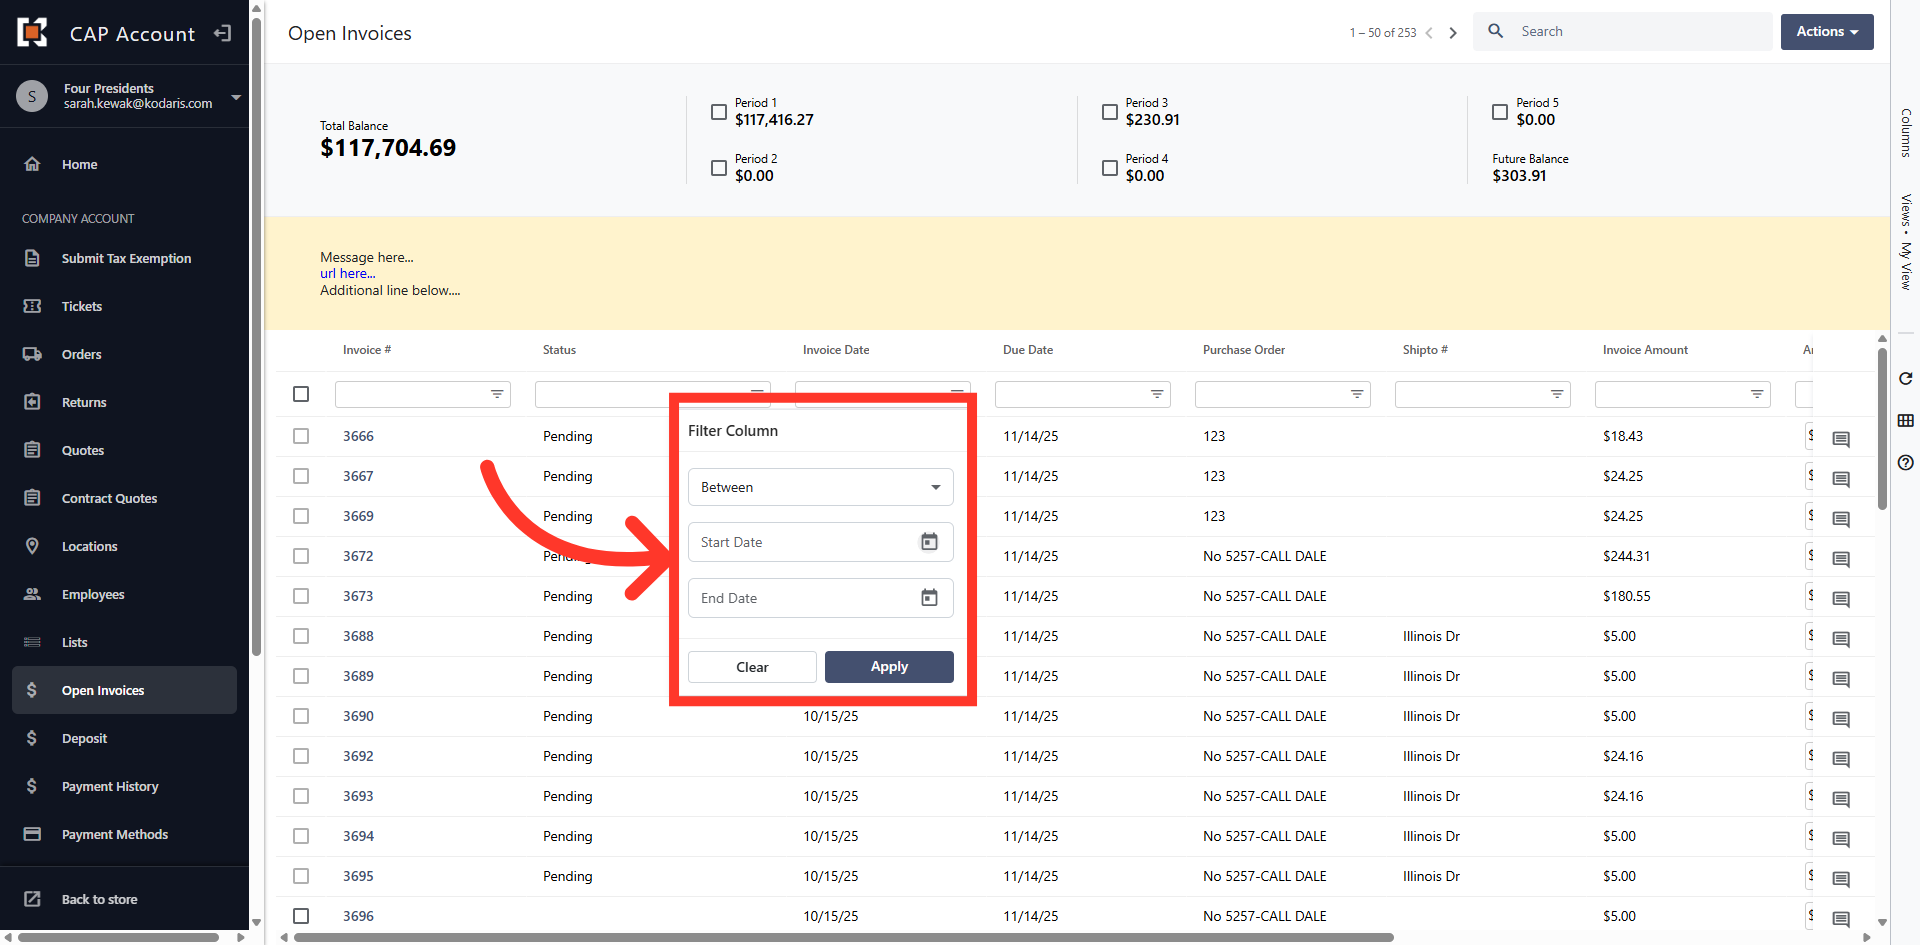
Filter on Invoice Date
You can also filter invoices on "Invoice Date" by entering the "Start Date" and "End Date" in the "Invoice Date Column" filter settings.
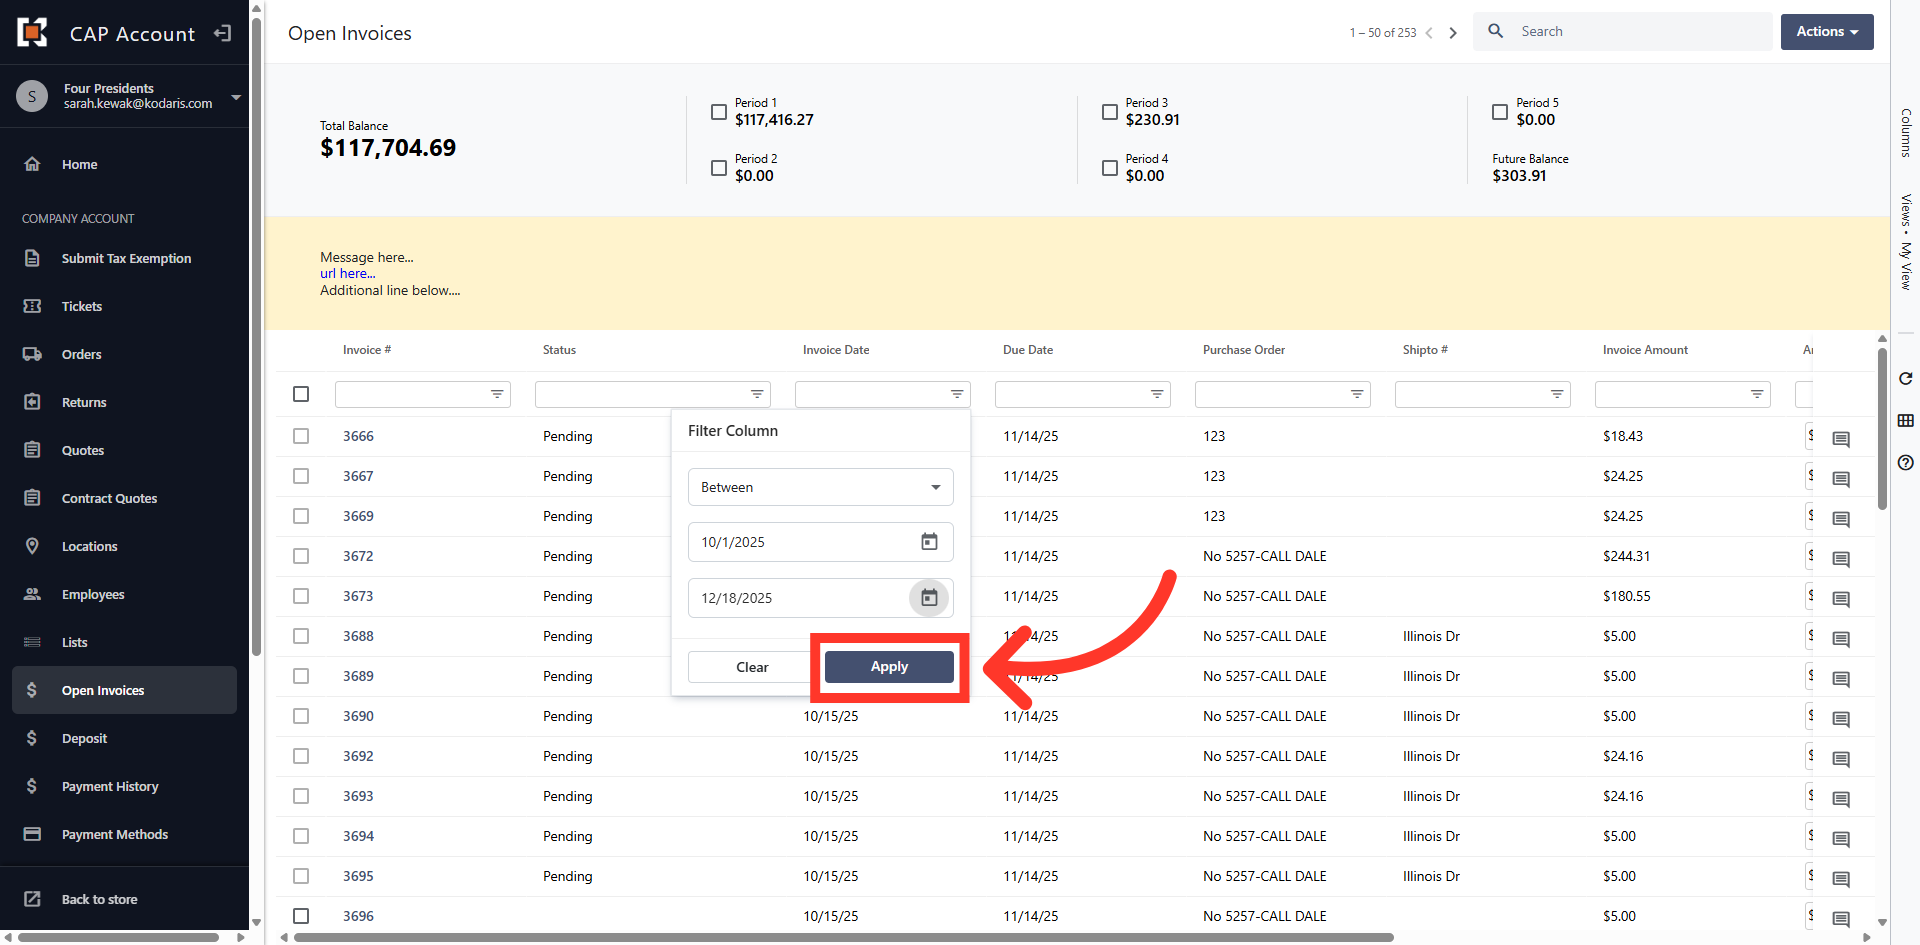
Click "Apply"
Once you've entered the start and end date click "Apply" to filter invoices.
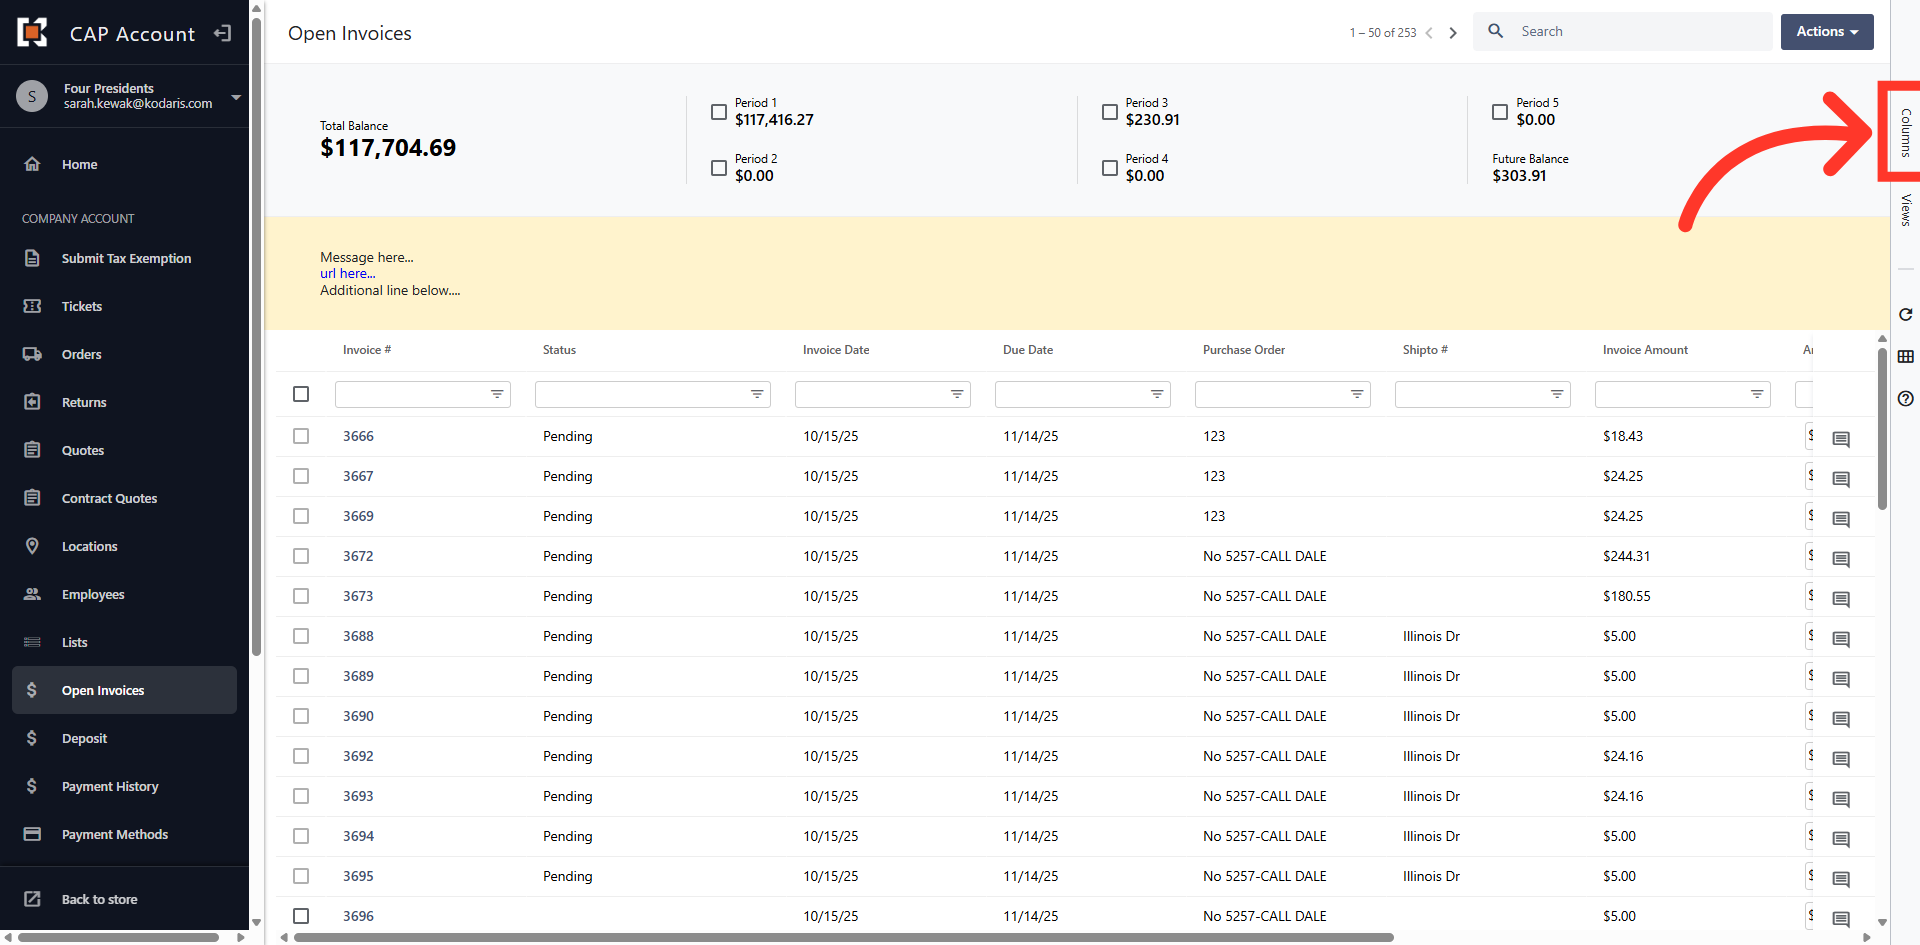
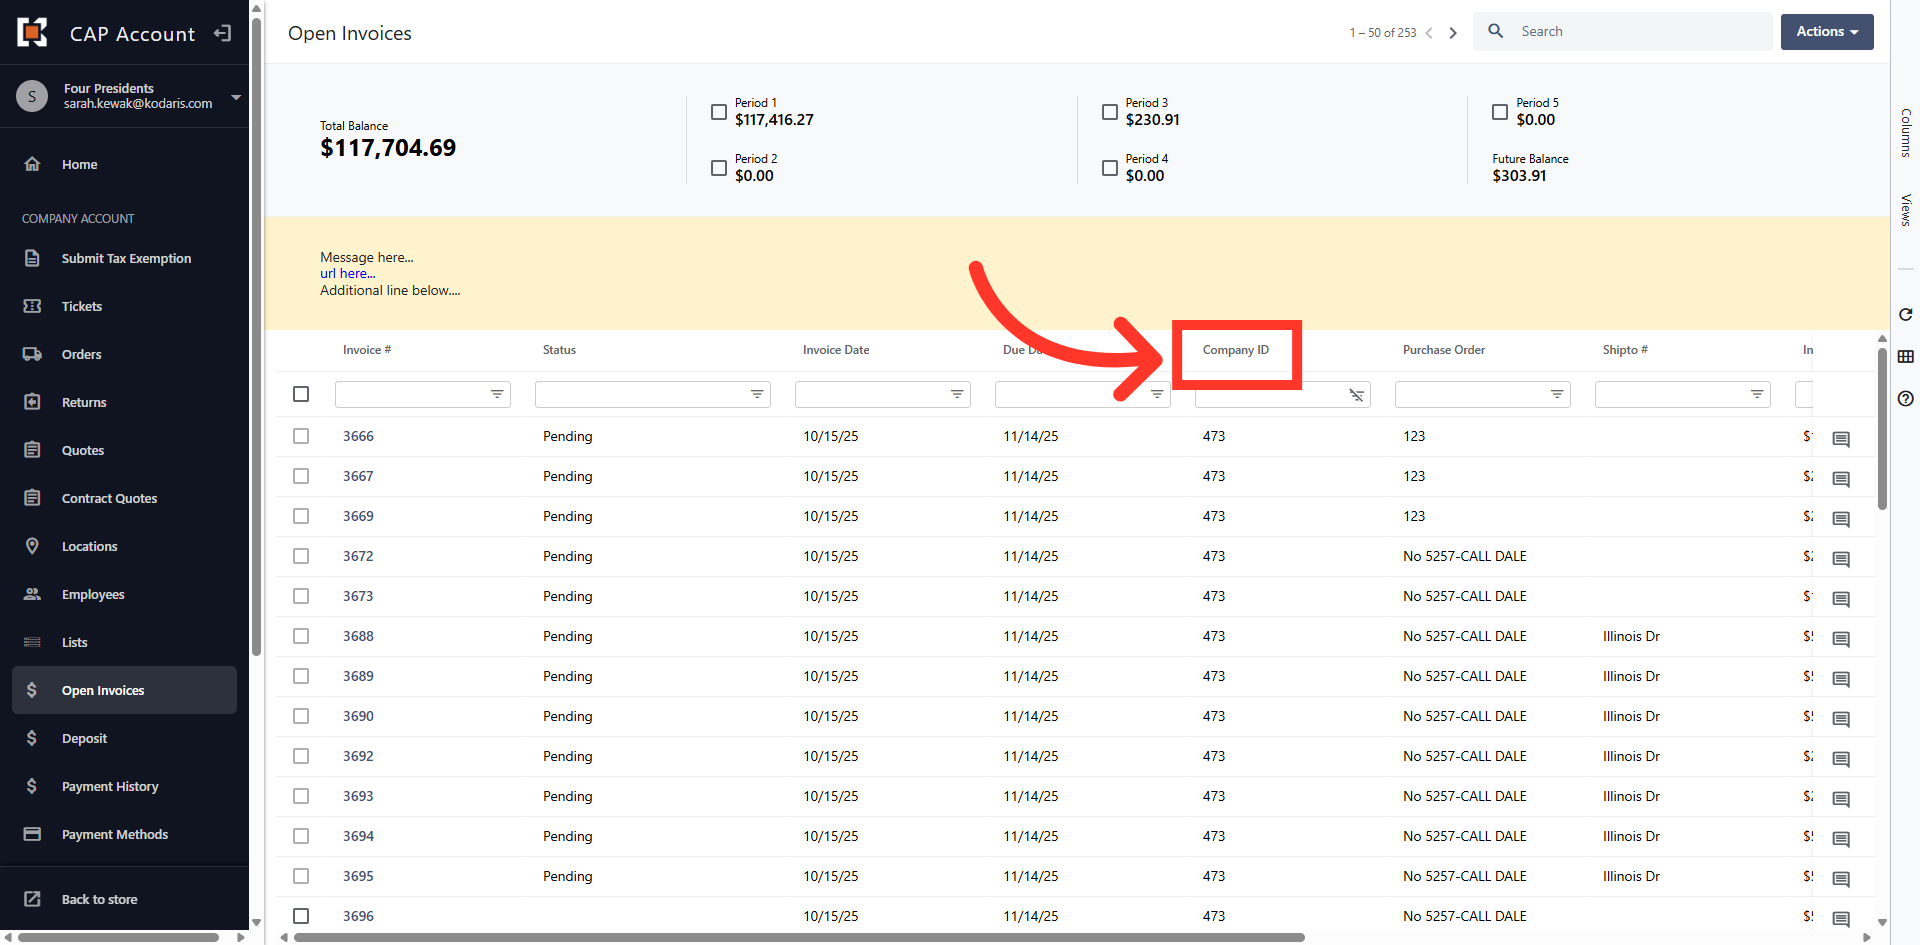
Select Columns
You can further customize your view by adding or removing additional fields to the grid view. Click the "Columns" tab to display additional fields.
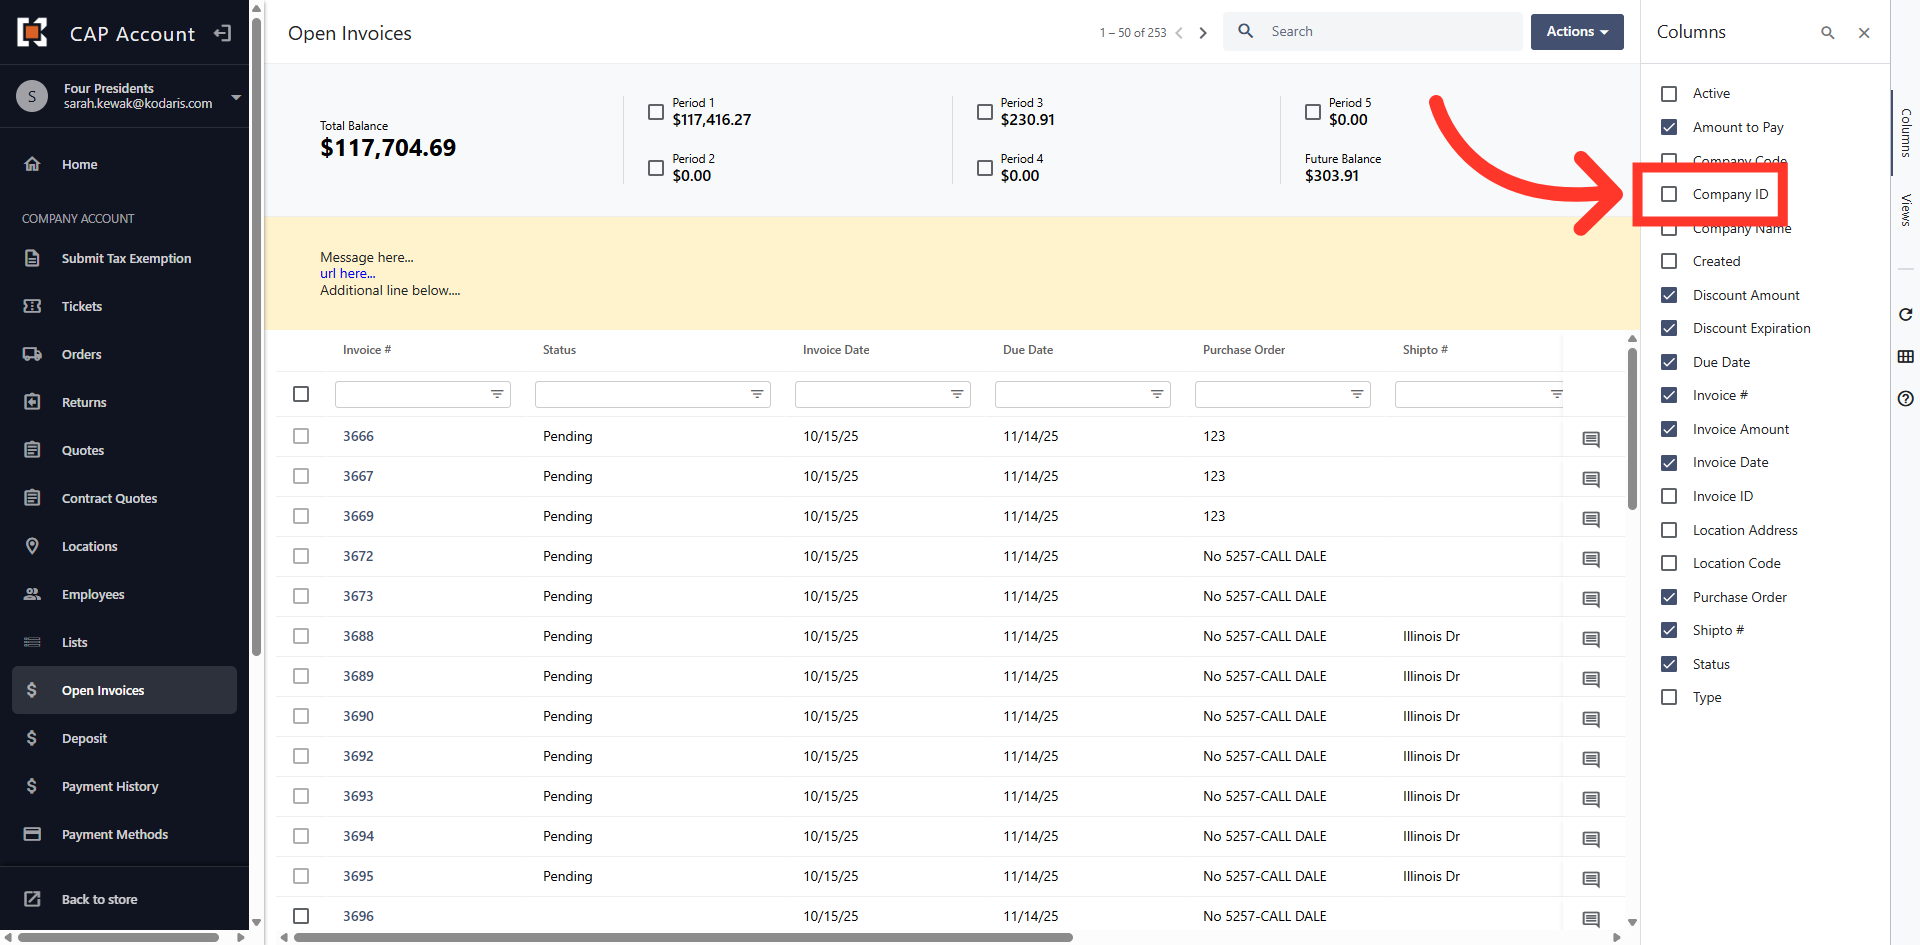
Select fields
Click in a check box to add a field to the column header in the grid view.
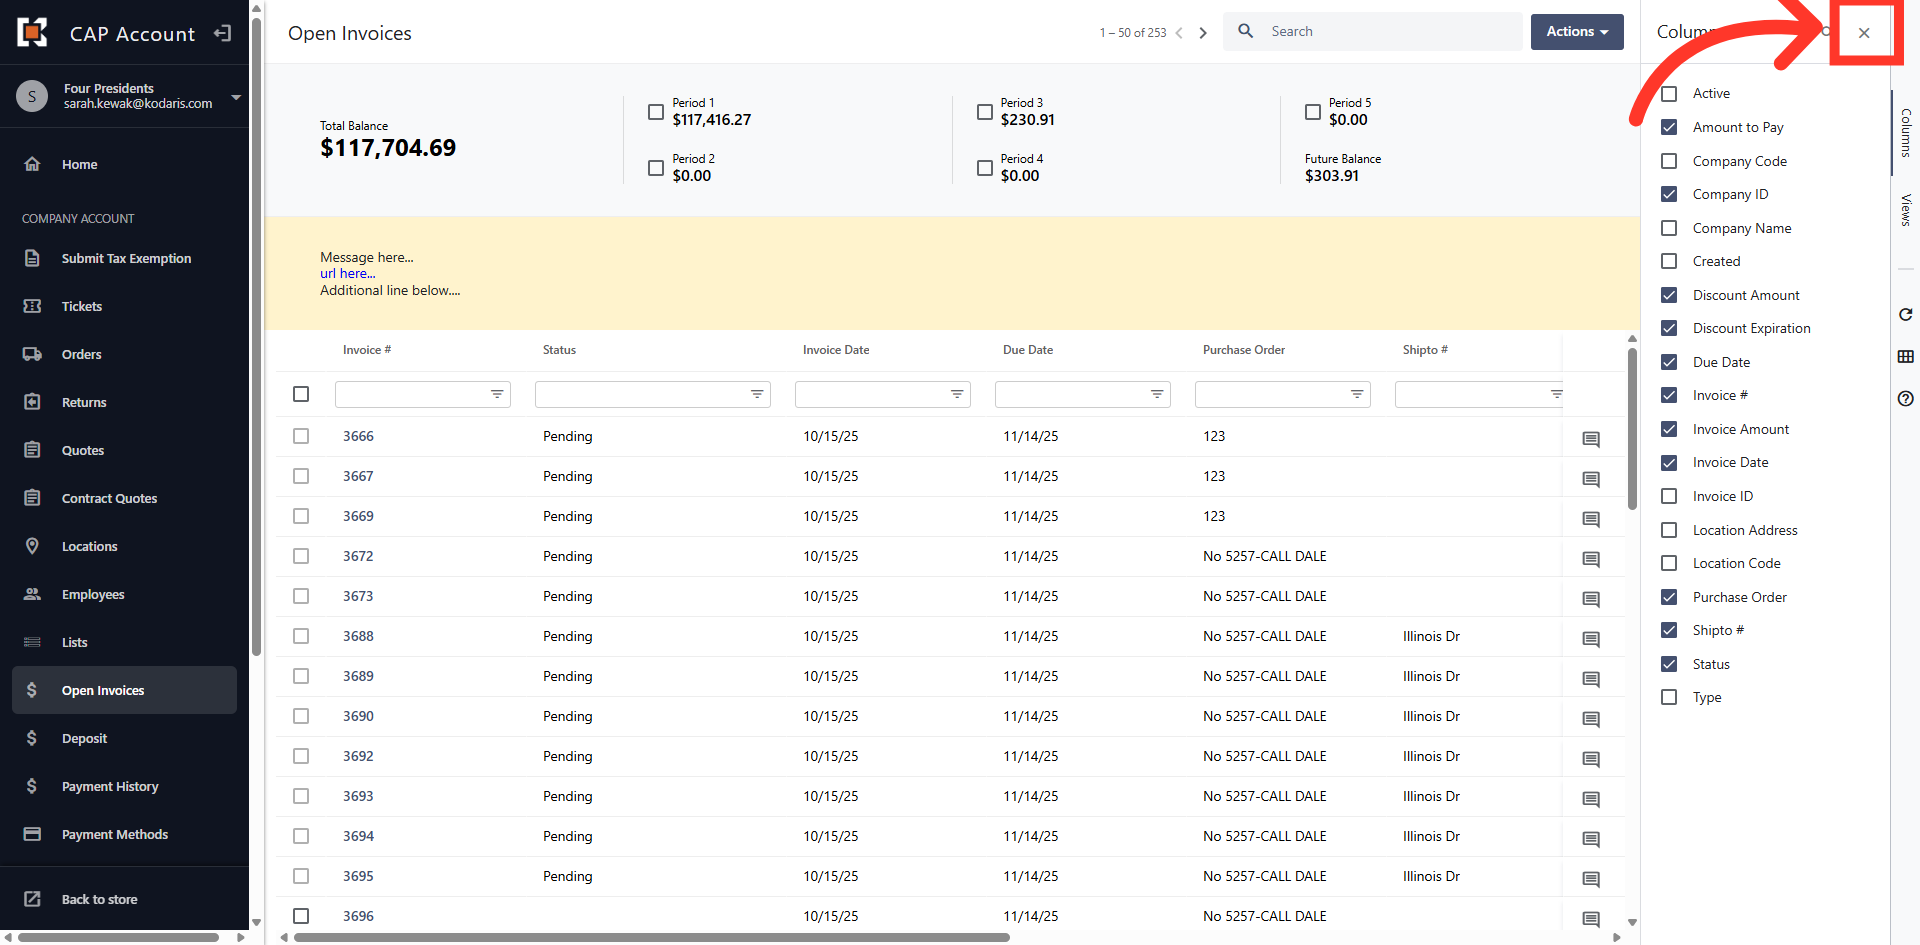
Click "x"
Click the "x" to close the Columns menu and return to the grid.
Click on Column Header
You can reorder columns by clicking in the header and dragging them around within the grid view.
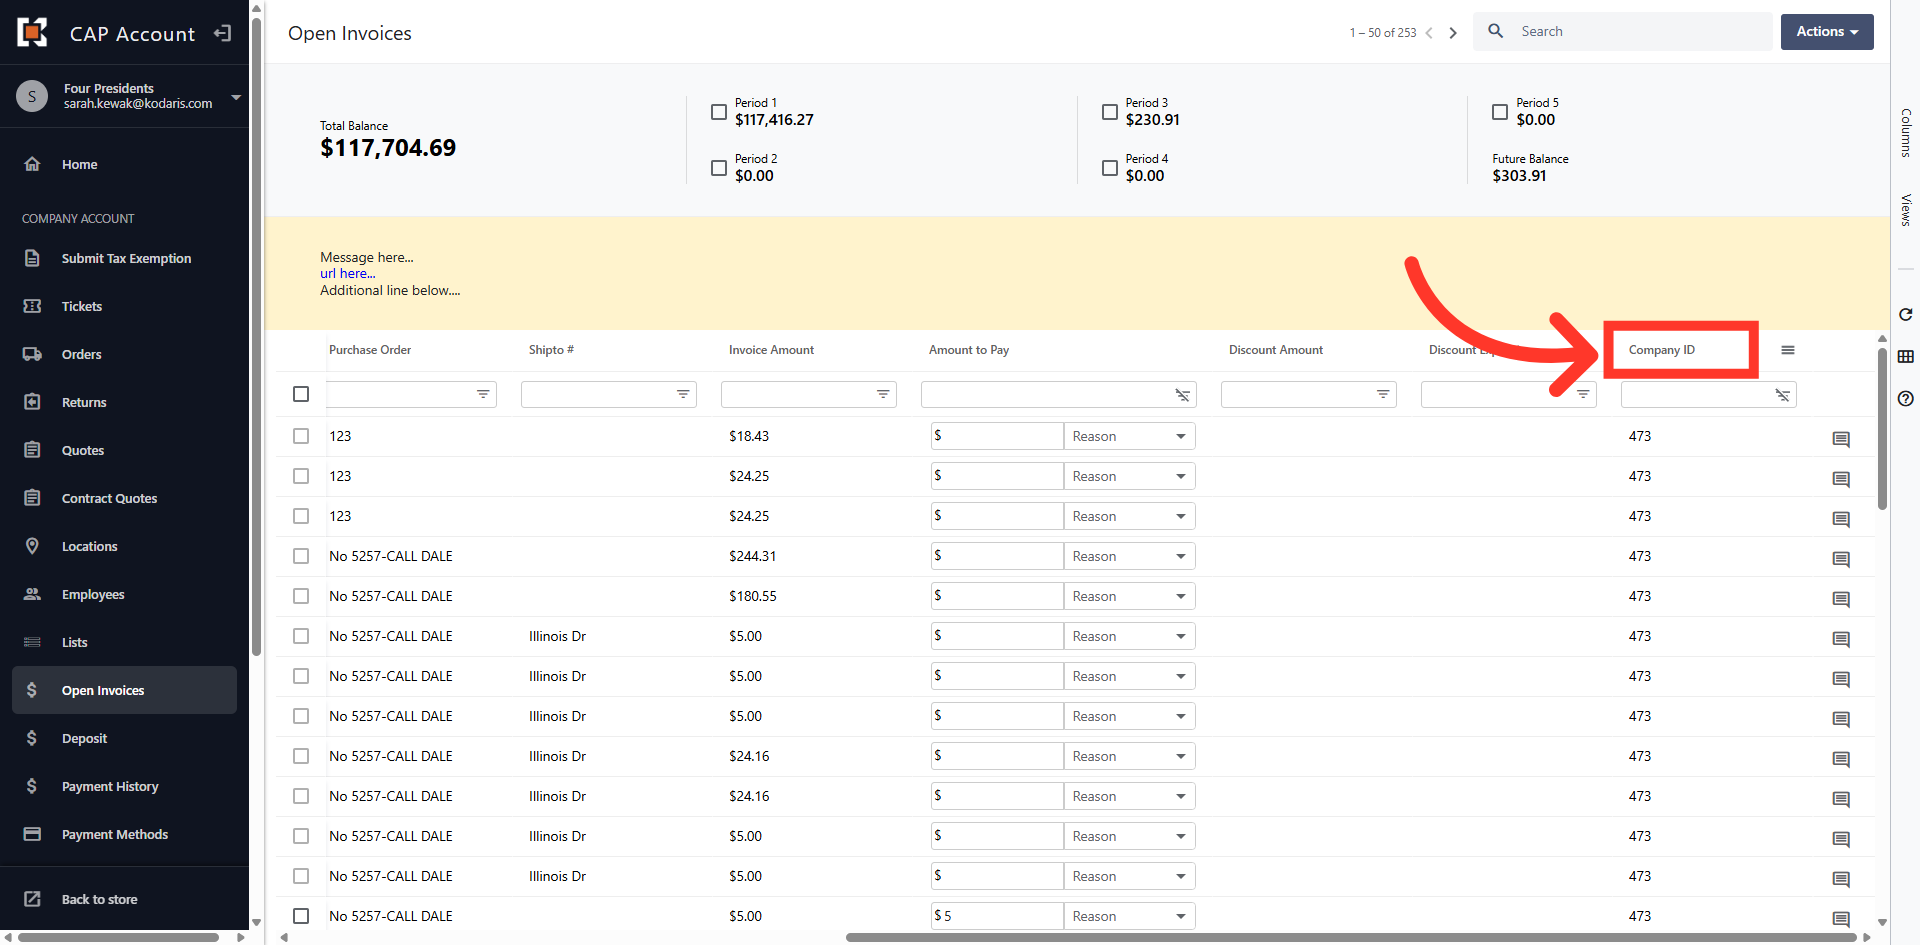
Verify Column Location
The column has been moved.
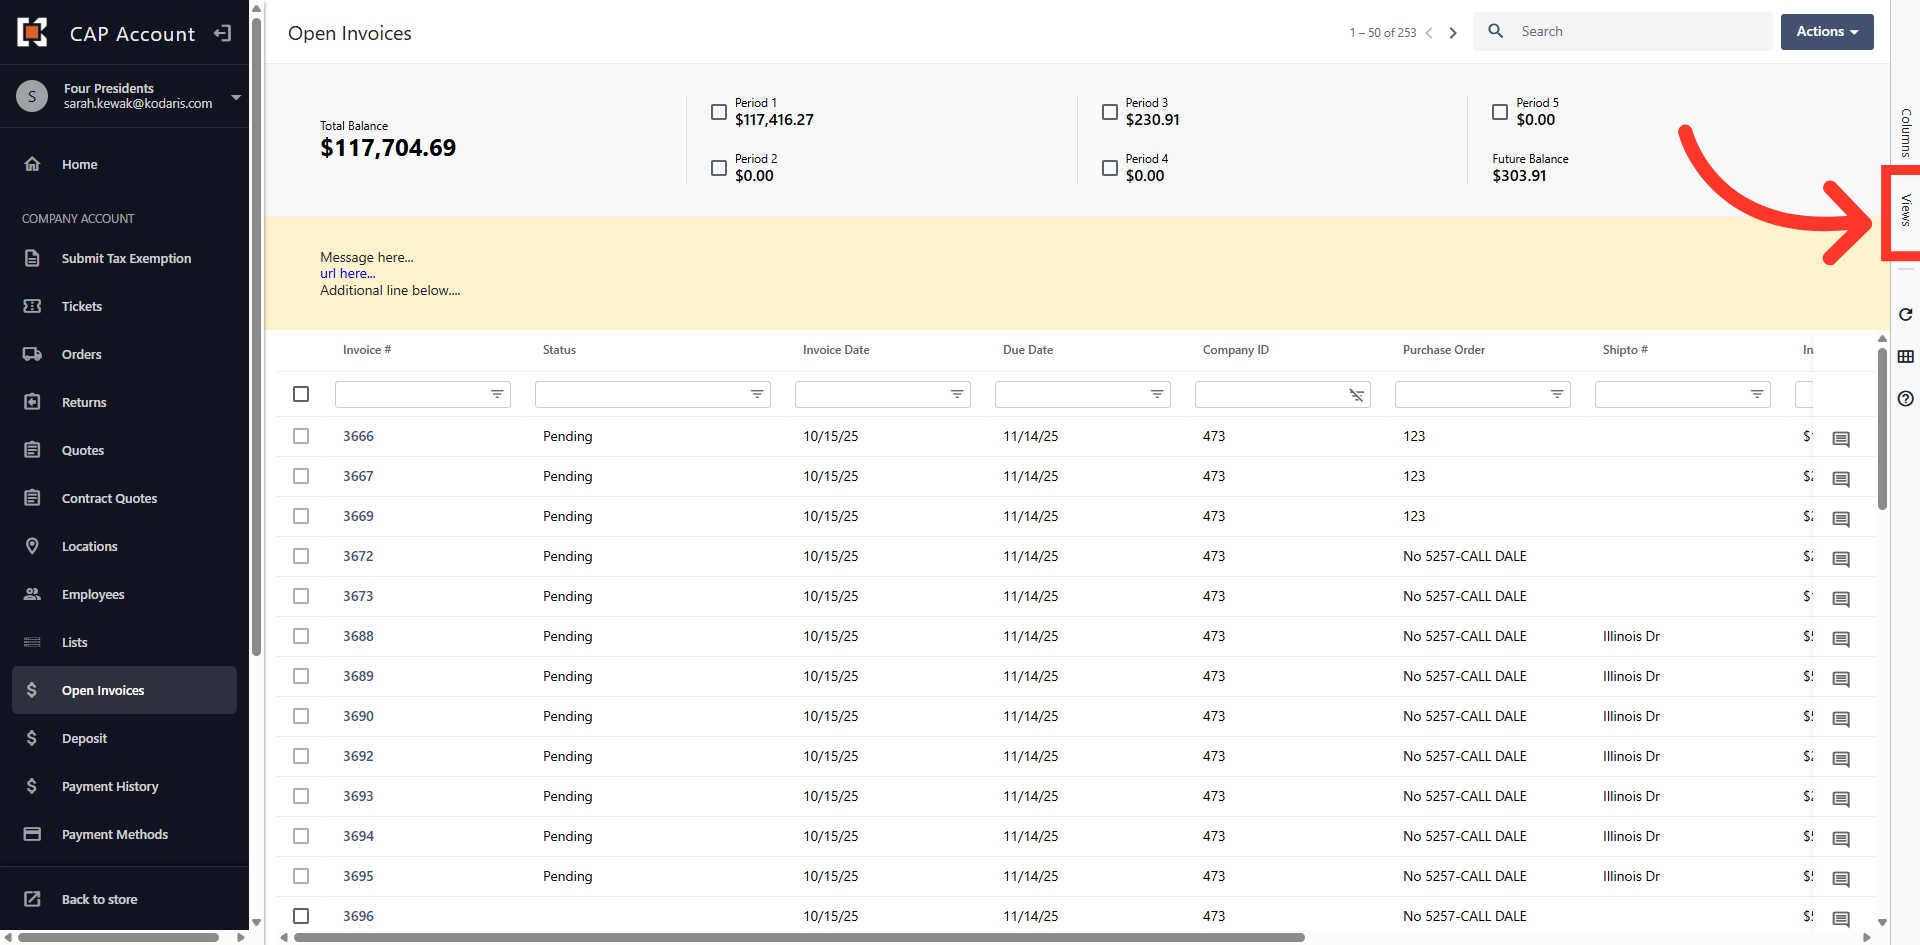
Save View
You can save your custom view by clicking the "Views" tab.
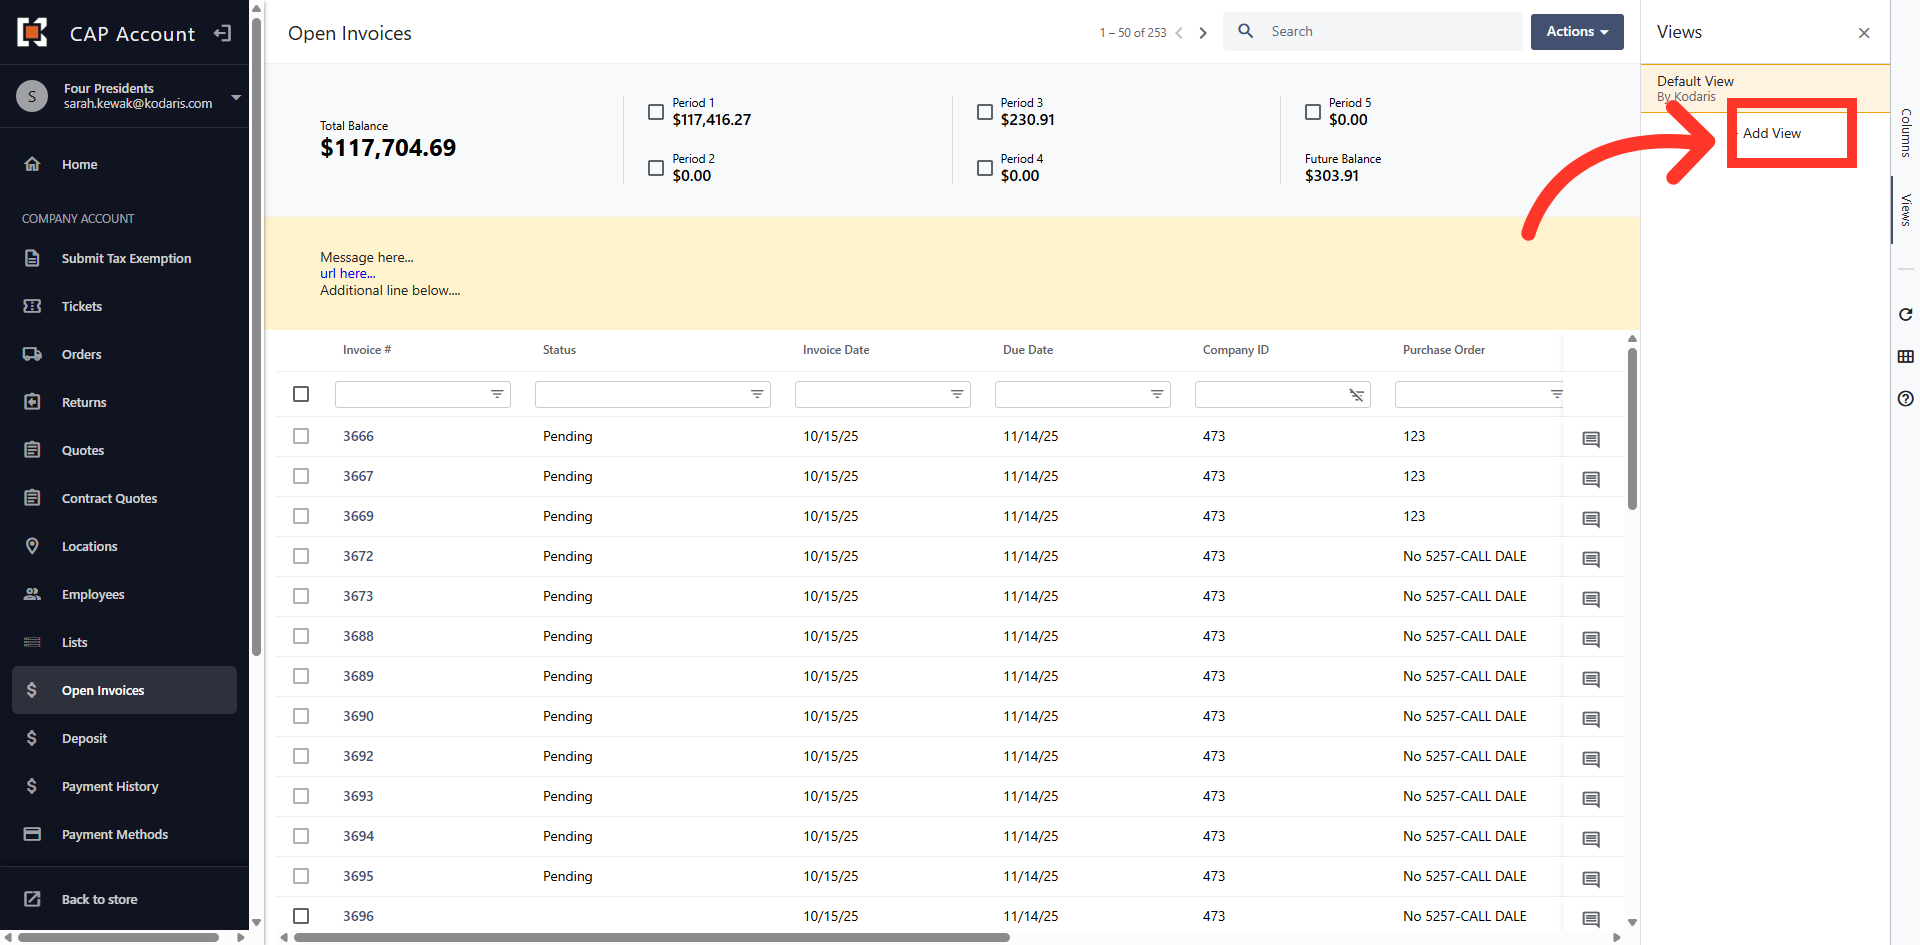
Click "Add View"
Then, click "Add View".
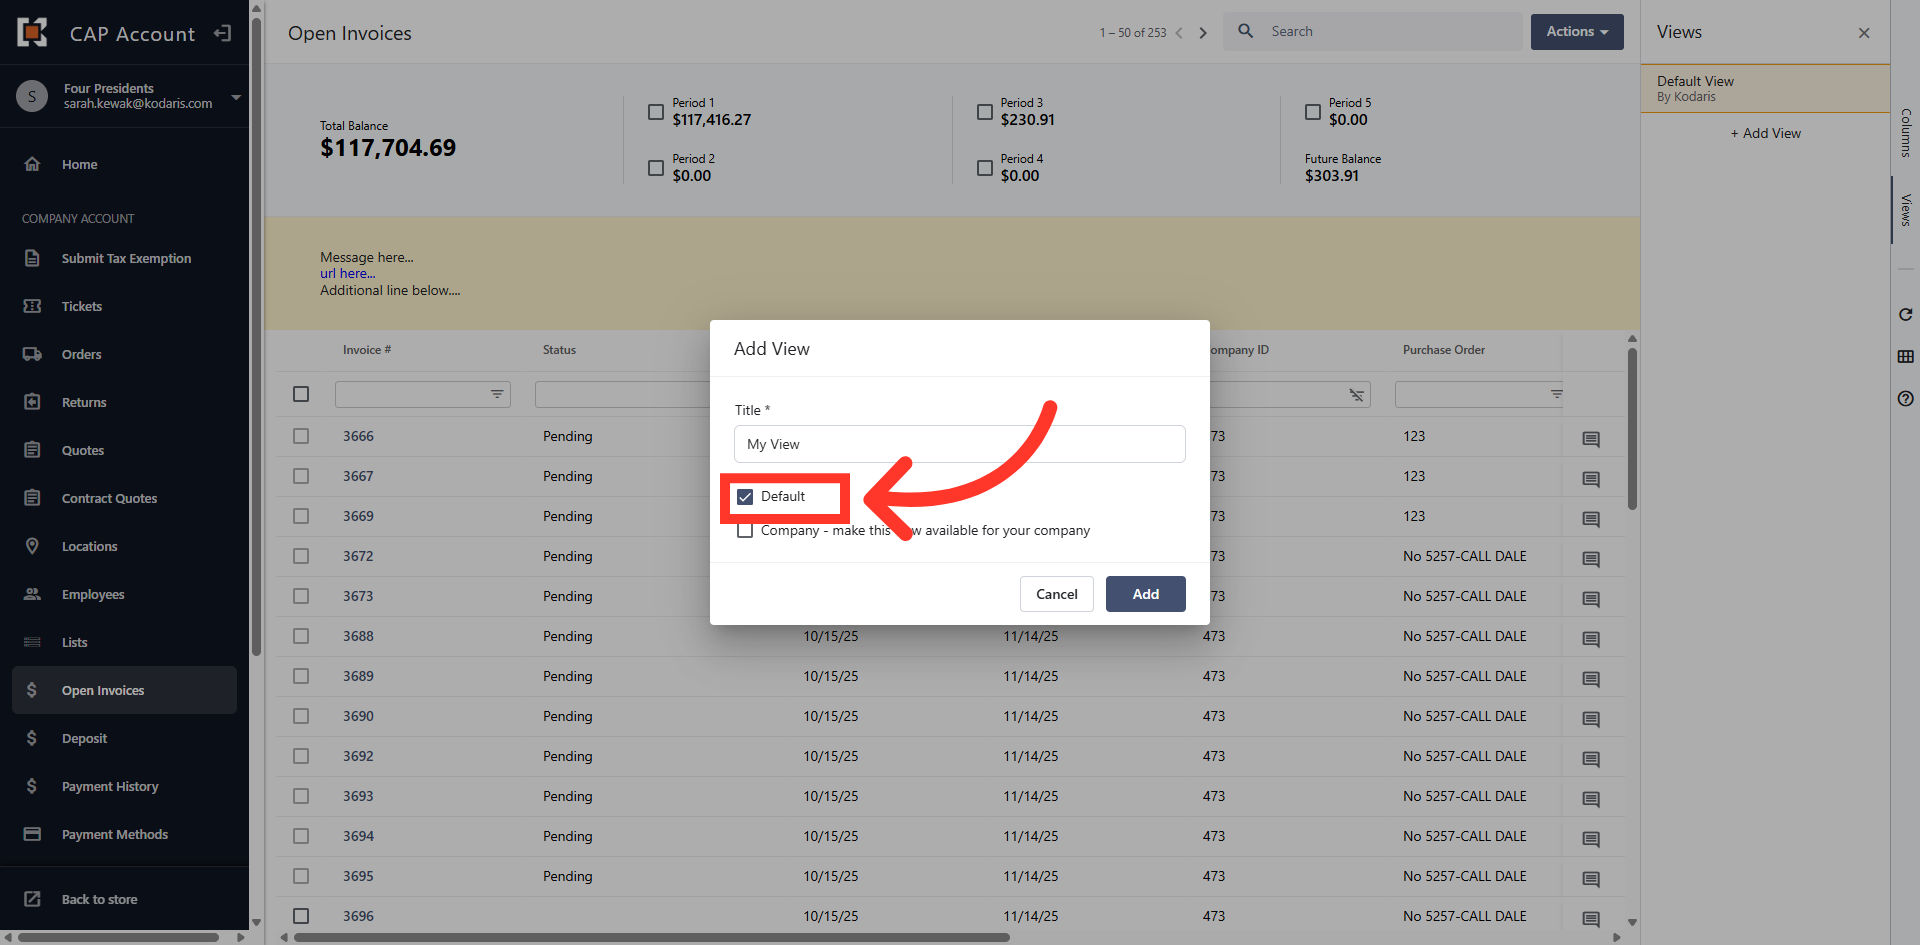
Name your View
Next, add a title for your view.
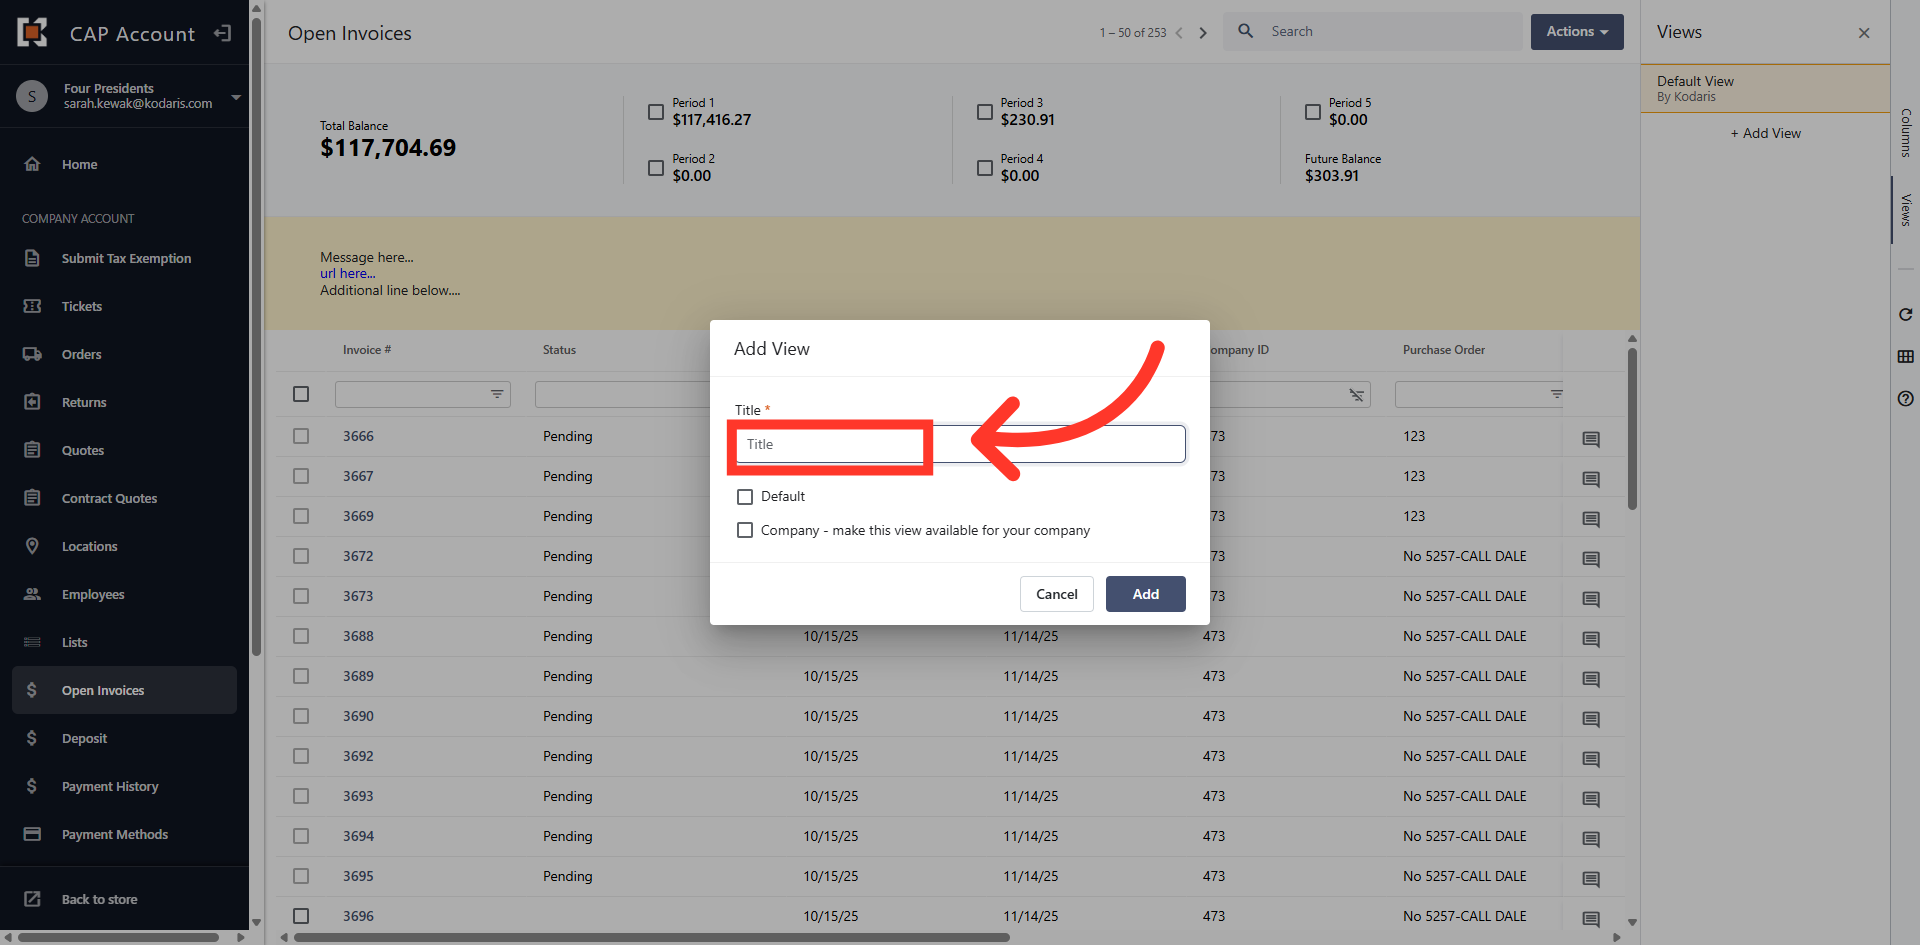
Default View
You can assign the custom view as the default view so that it always populates when you come to this screen.
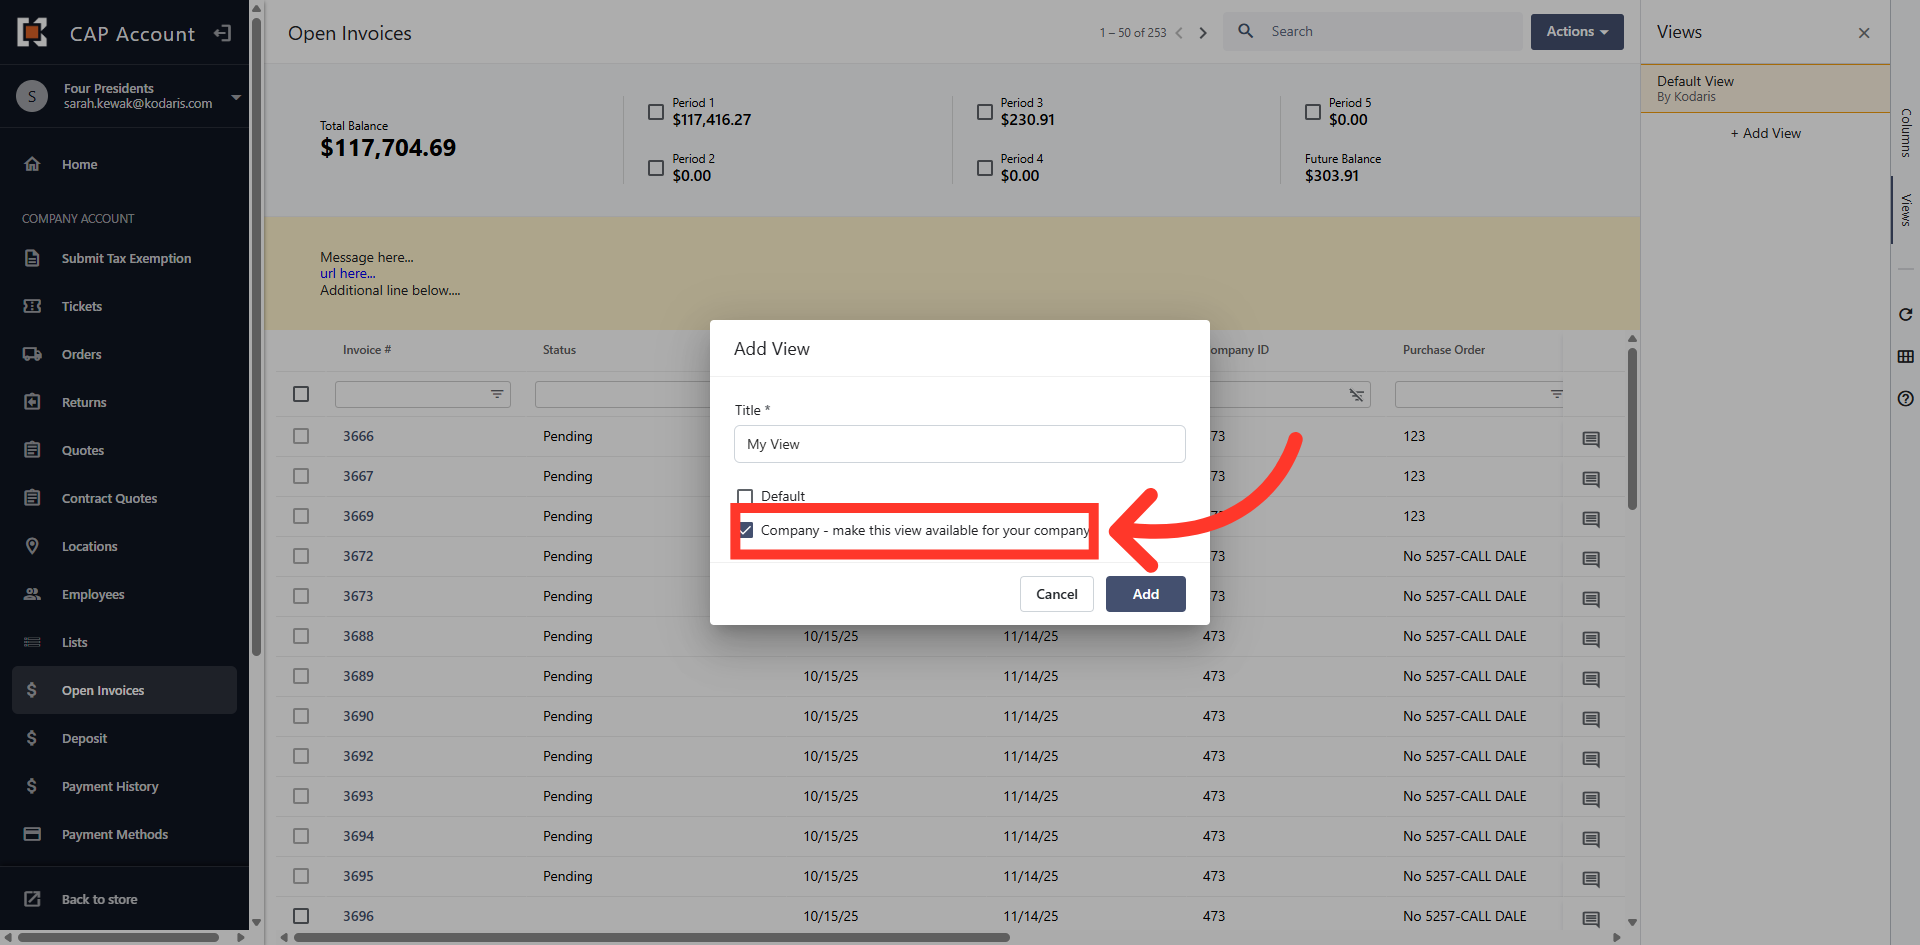
Company View
You can also make it available for all the users across your company.
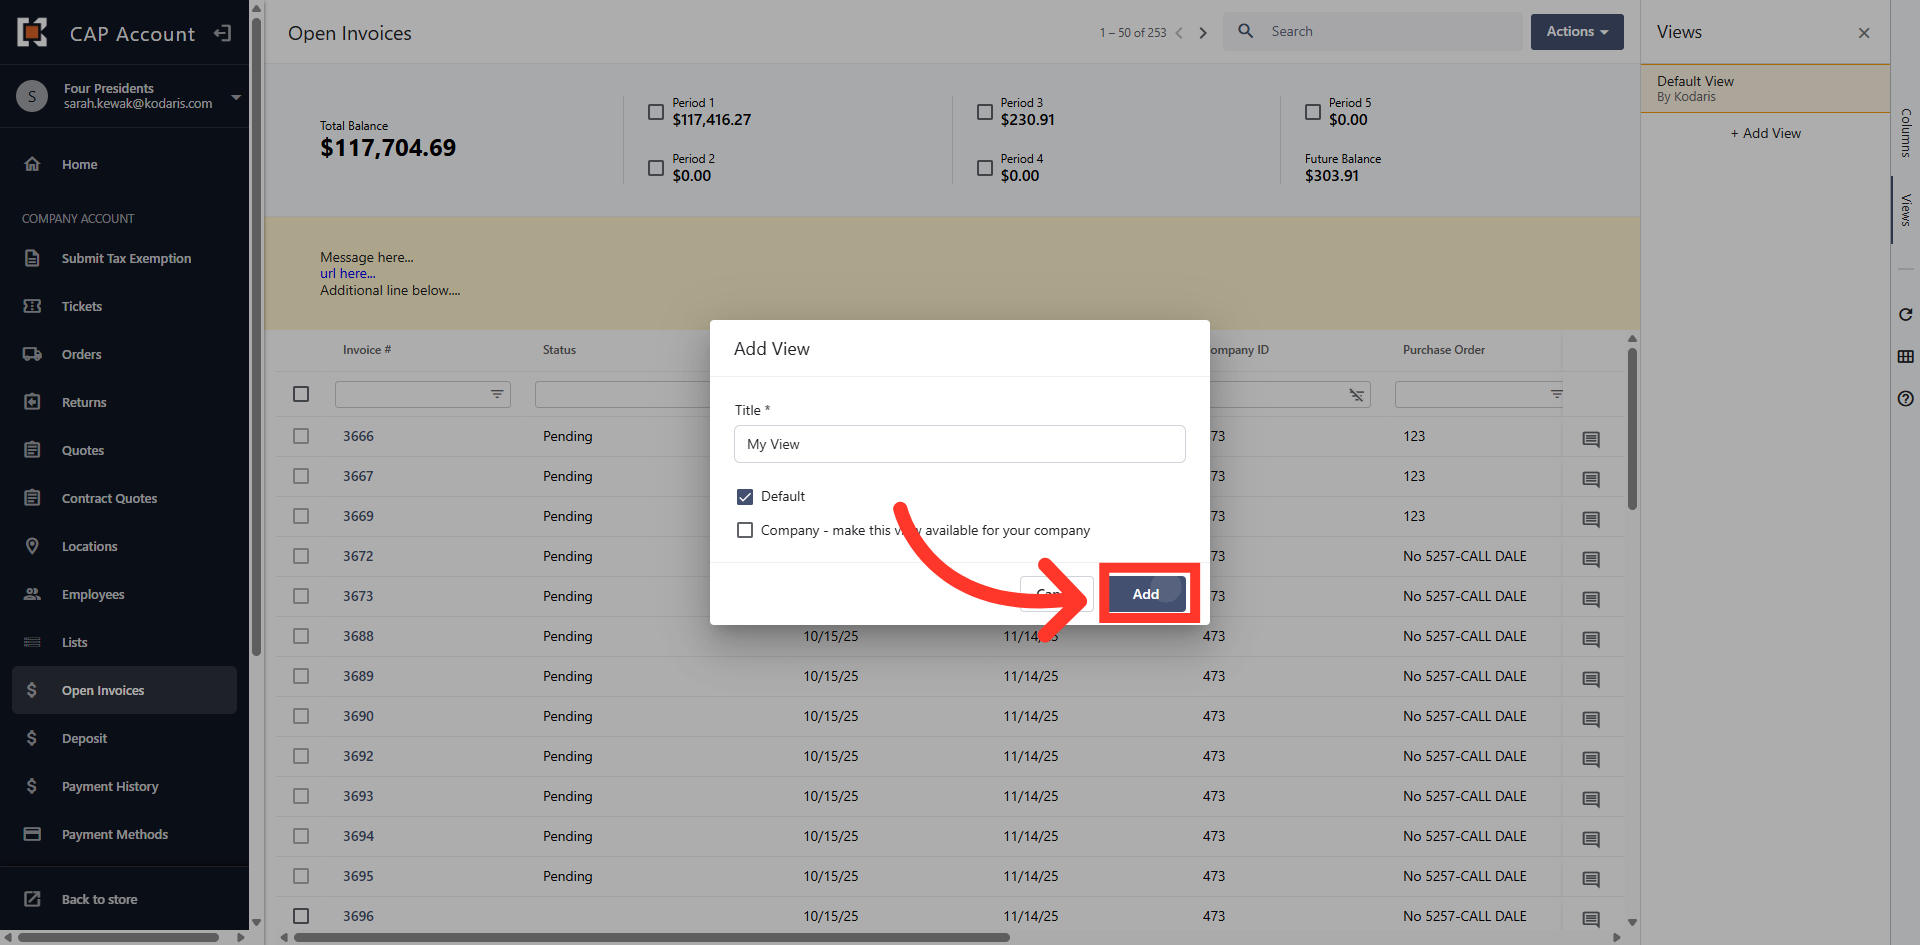
Click "Add"
Click "Add" to save the filter setting.
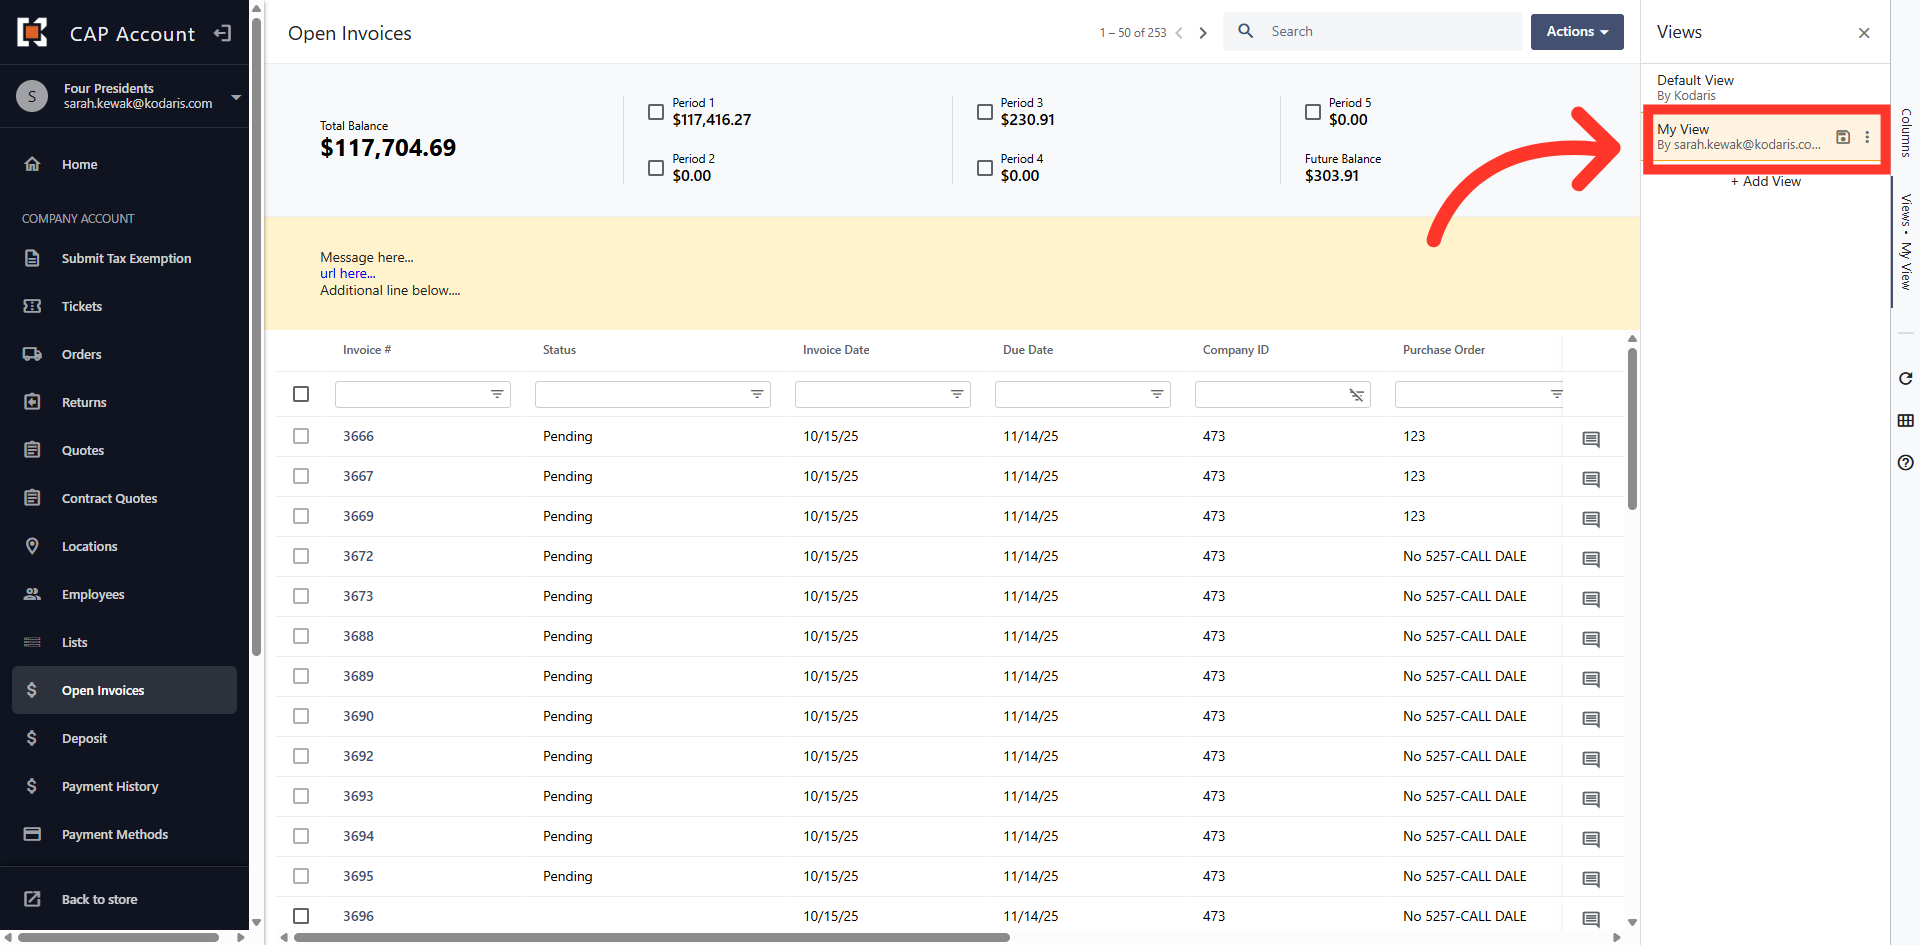
Saved "View"
Your custom view has been saved and appears in the "View" list.
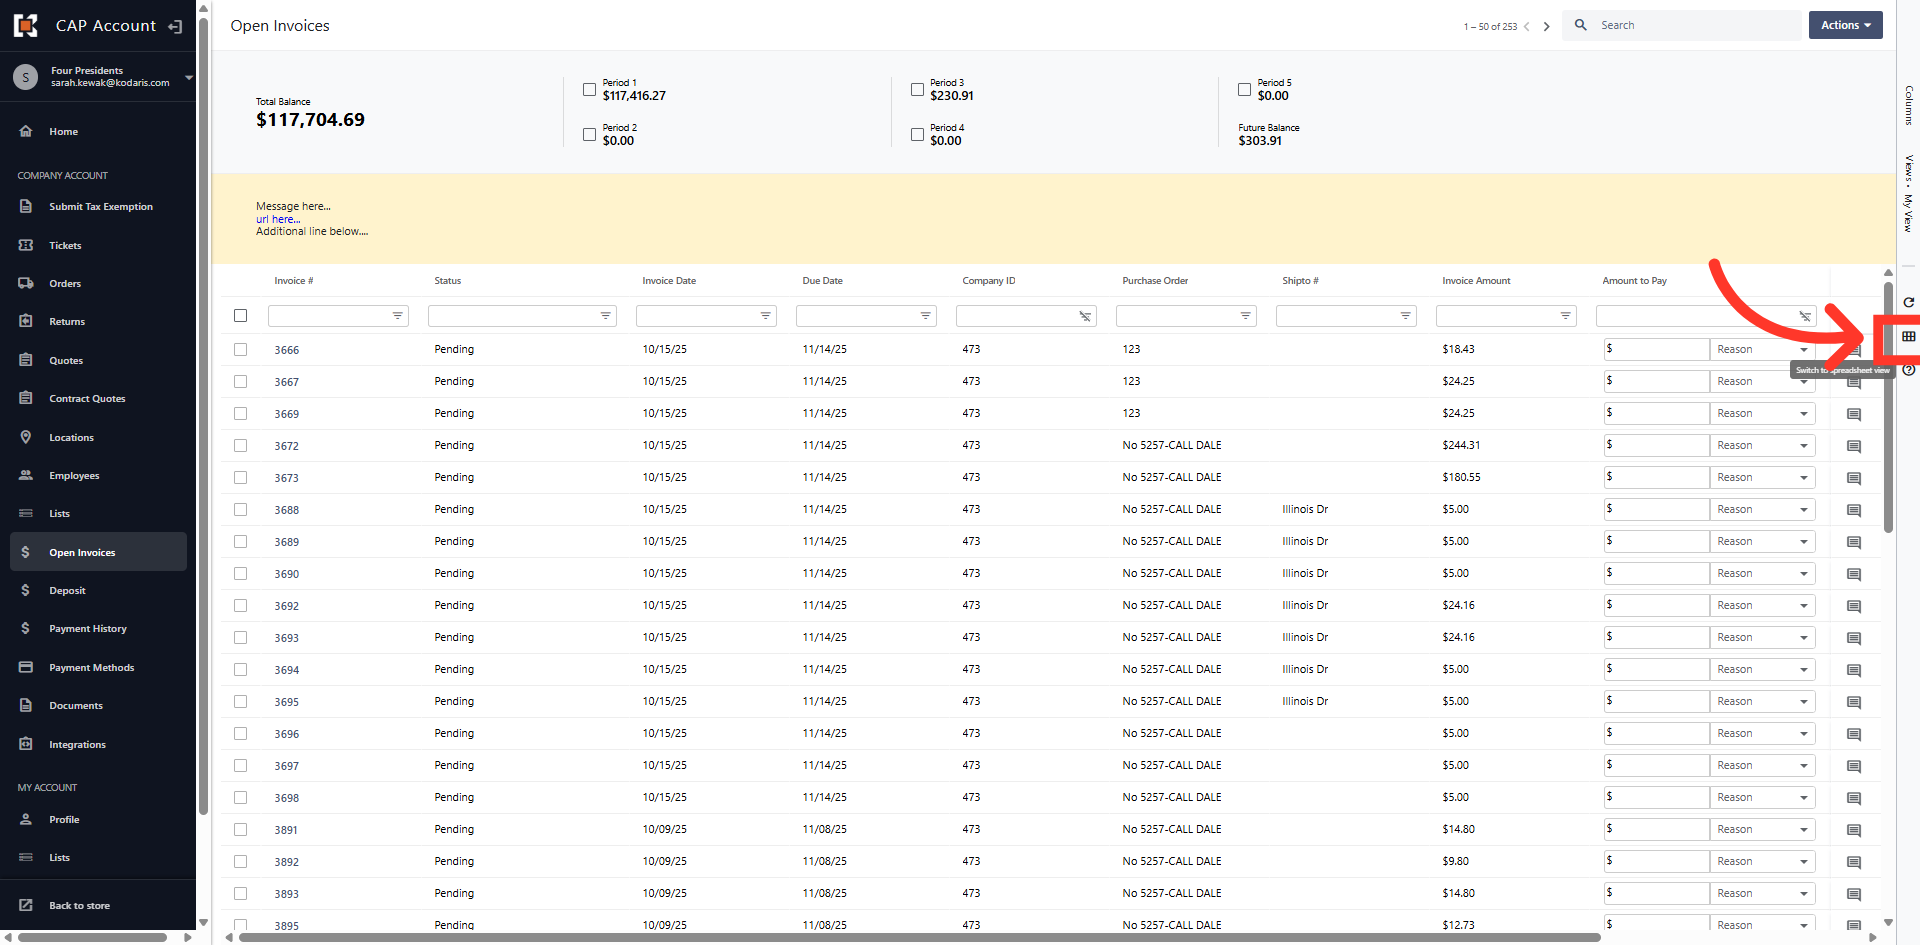
Click the "Spreadsheet" icon
You can export your Open Invoices for use in accounting software or for further analysis, by clicking on the "Spreadsheet" icon on the right hand side of the grid.
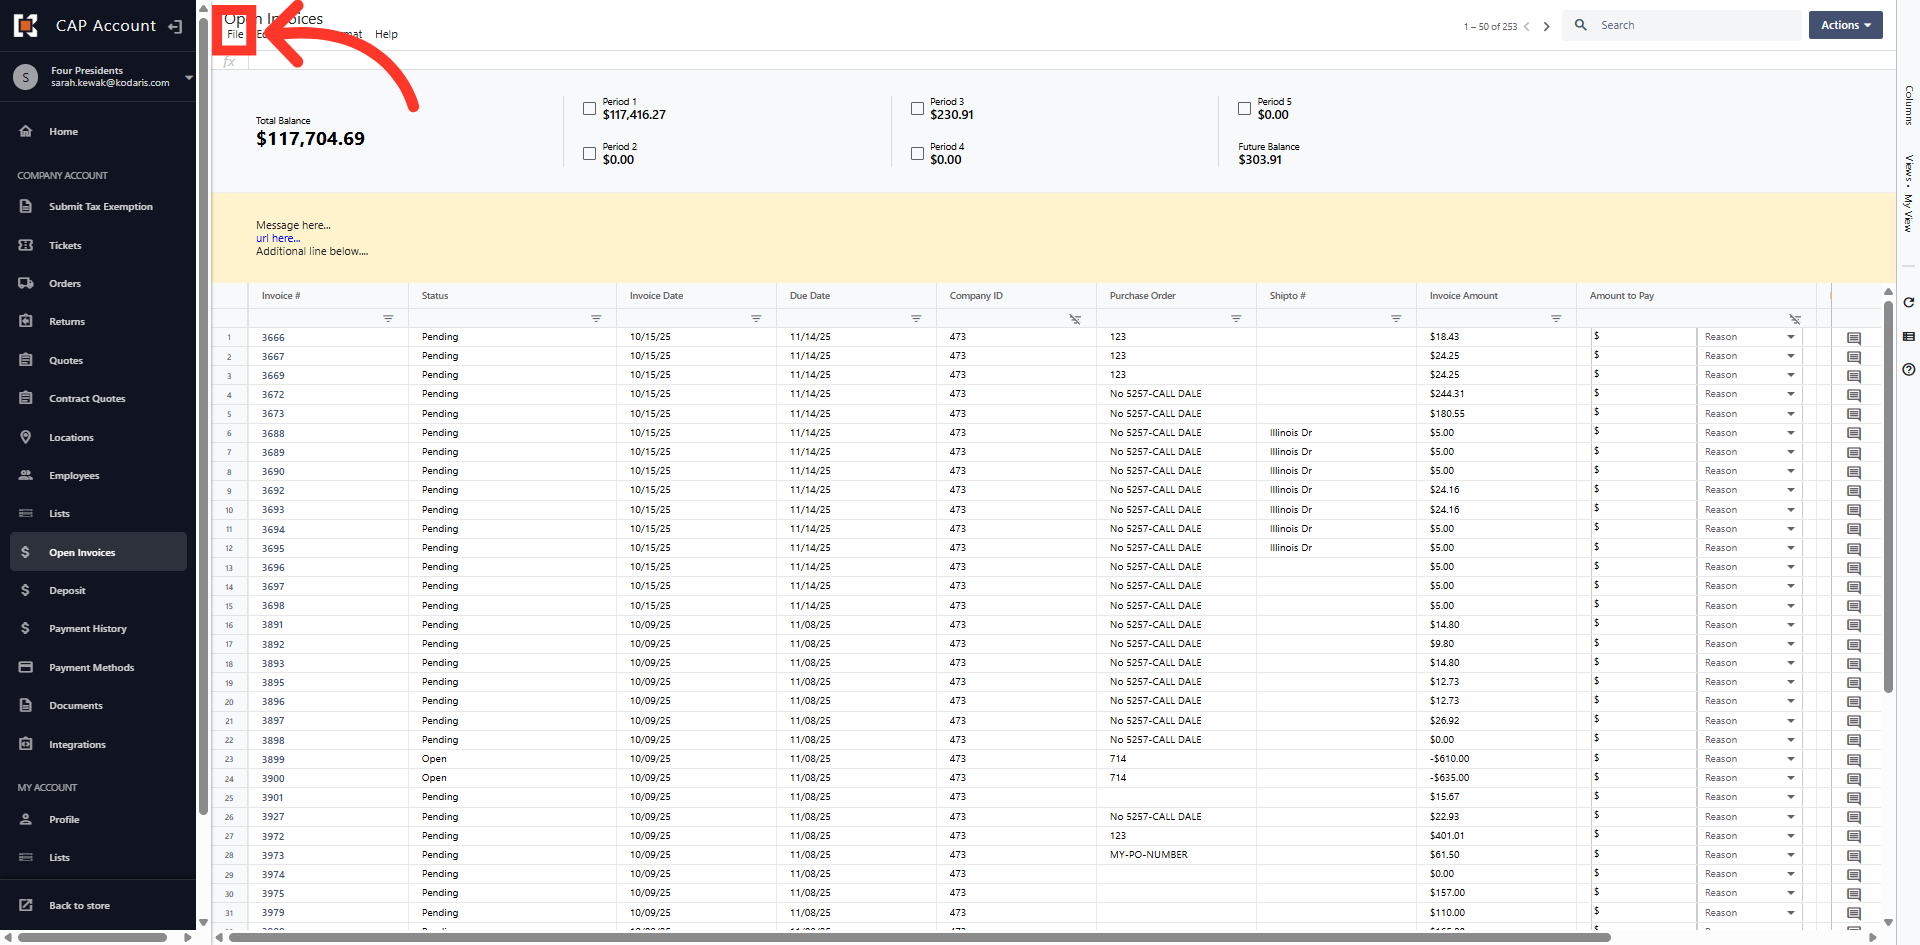
Click "File"
Then, click "File".
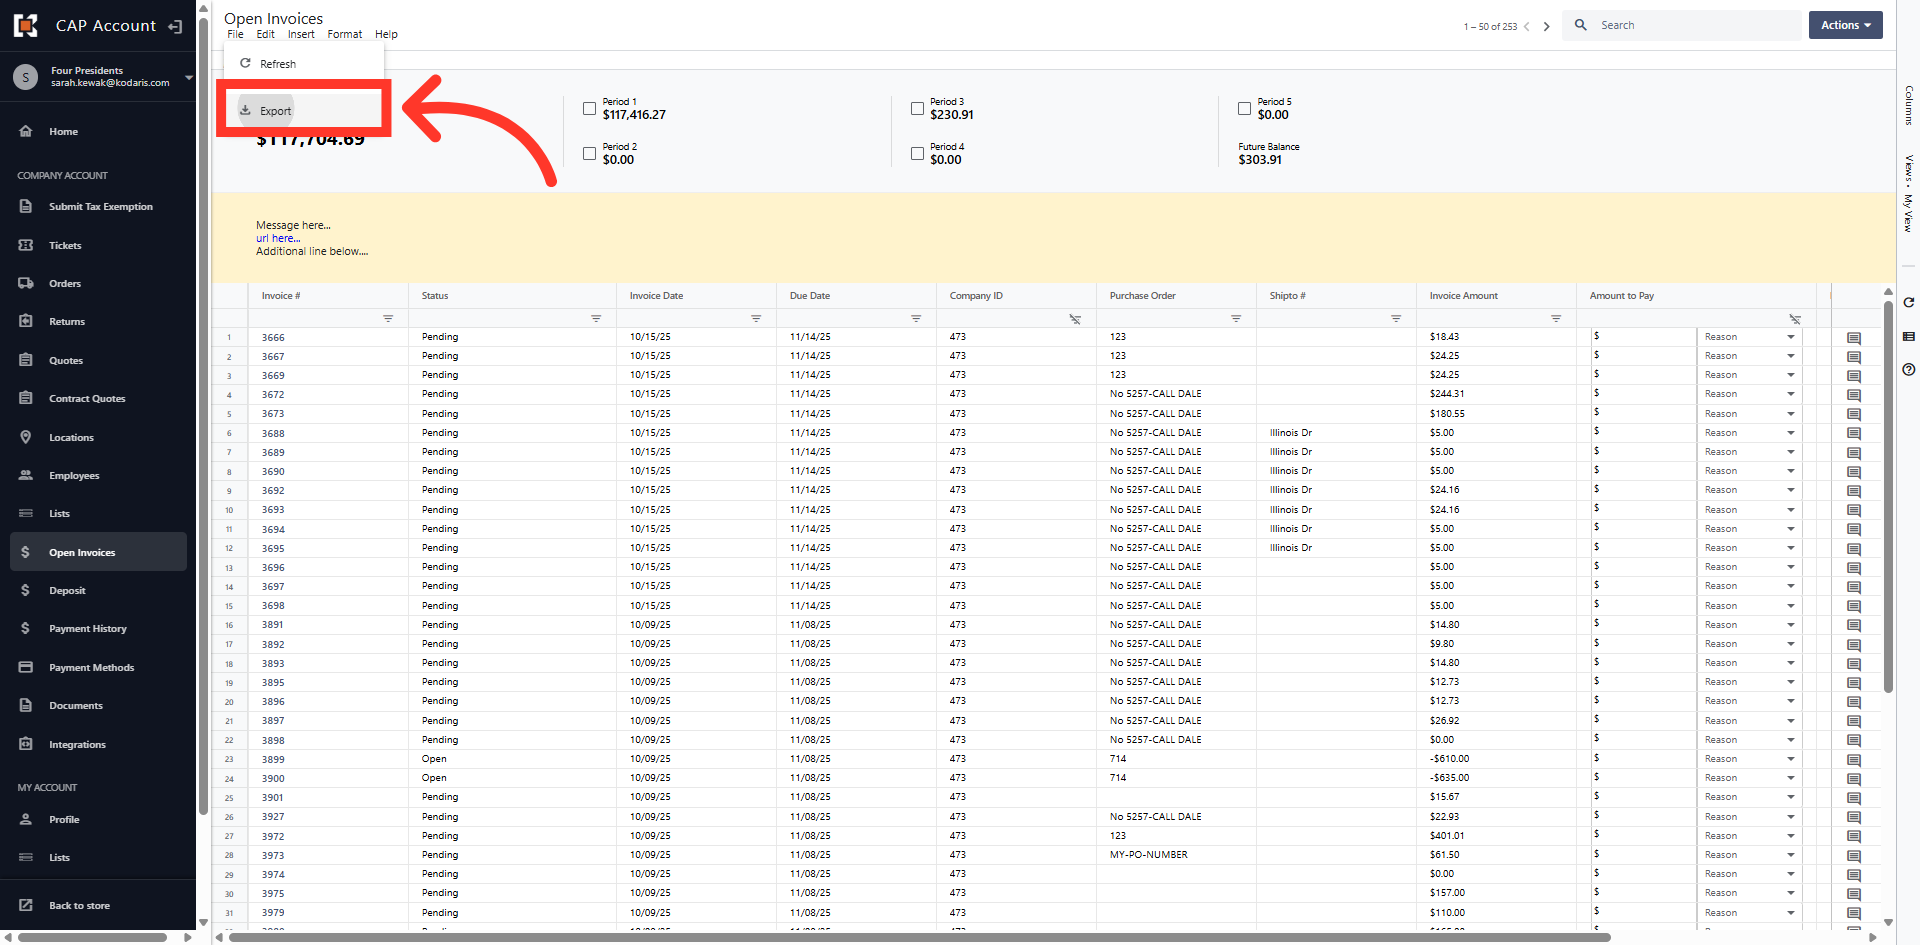
Click "Export"
Next, click "Export".
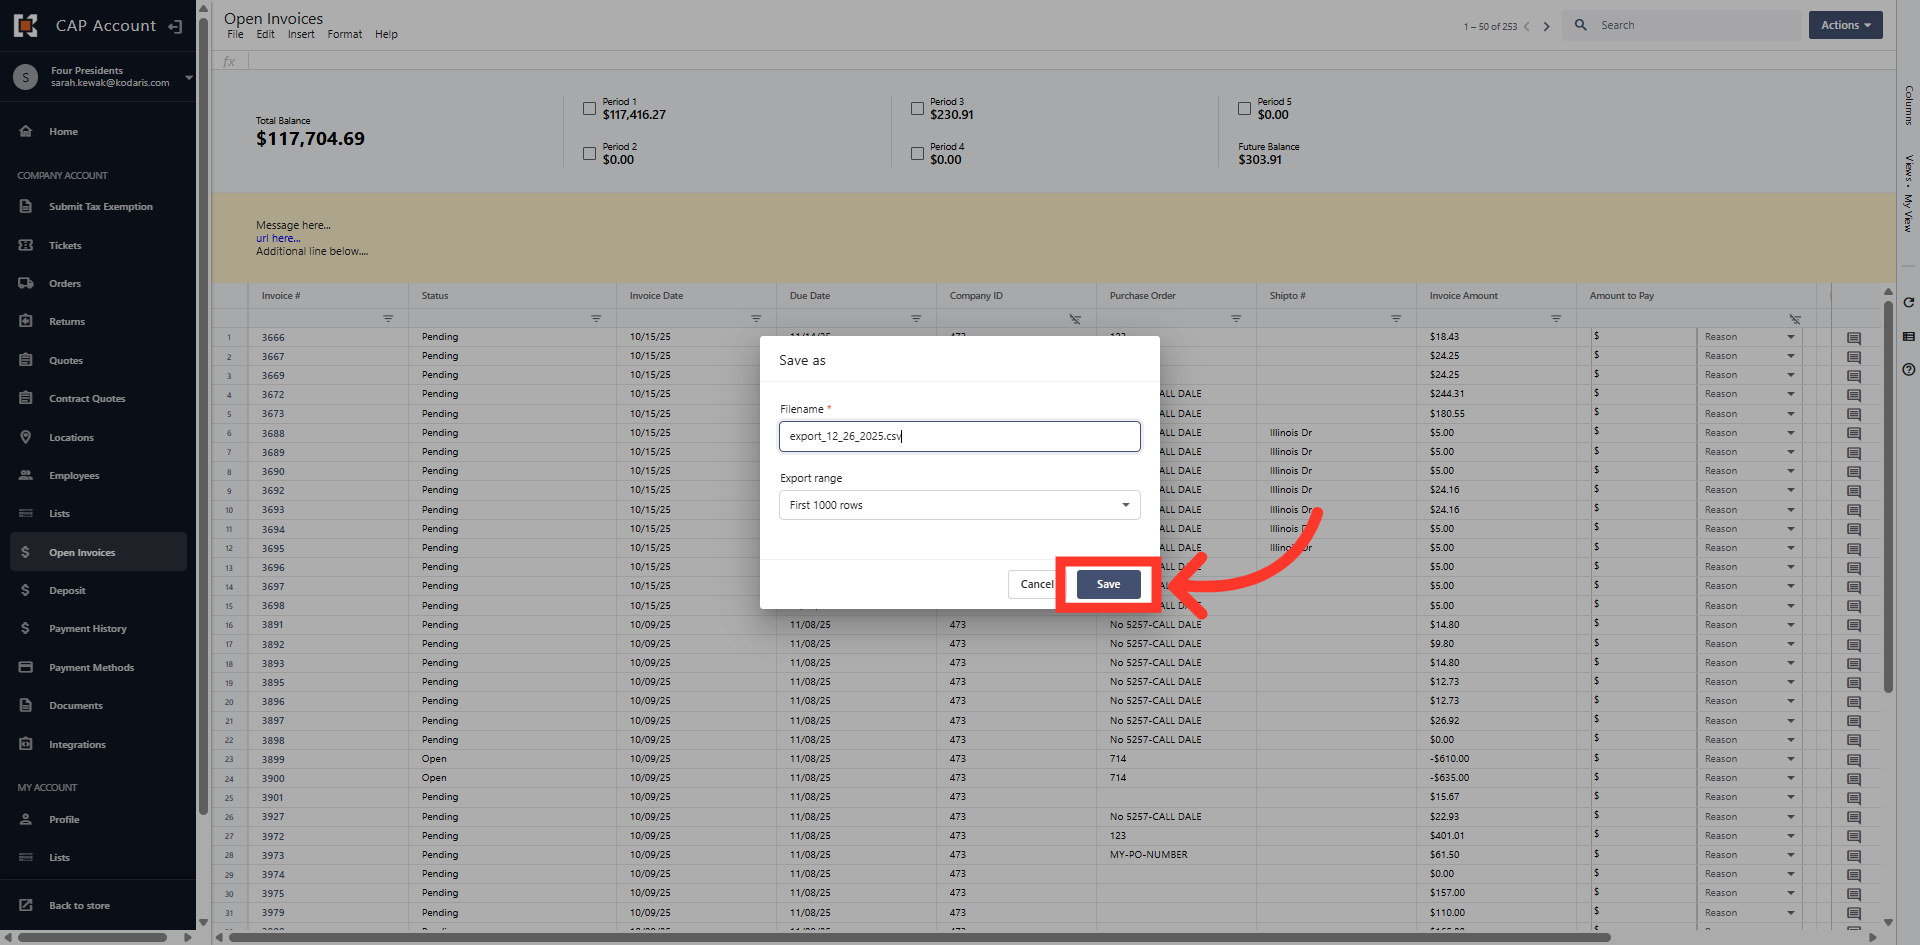
Save As Dialog Box
In the "Save As" dialog box, enter a File name and click "Save" to save the export to your computer.
Grid View
The file has been saved and you are returned to the grid view.