Commerce - Assign Products to Company Group Catalogs by Import
Prepare Import File
Assigning products to your Company Group Catalogs by import saves time by adding multiple products at once rather than individually. Before importing, we will need to prepare the import file.

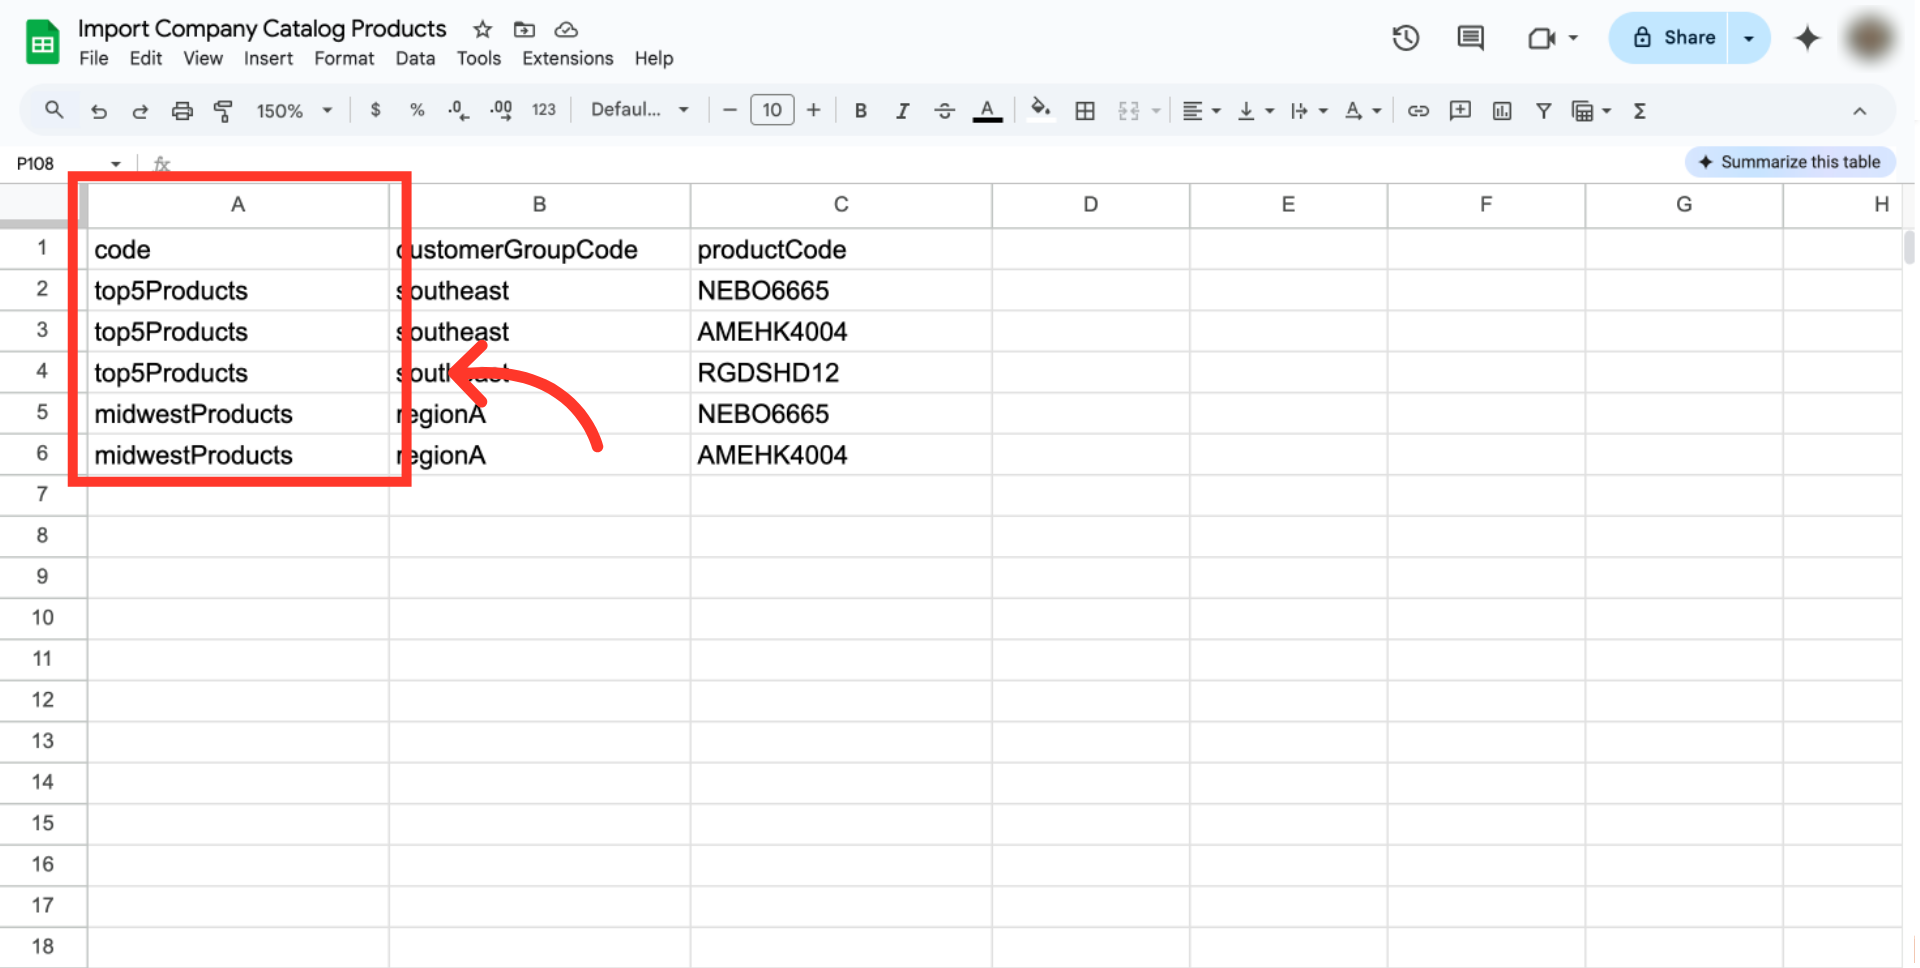
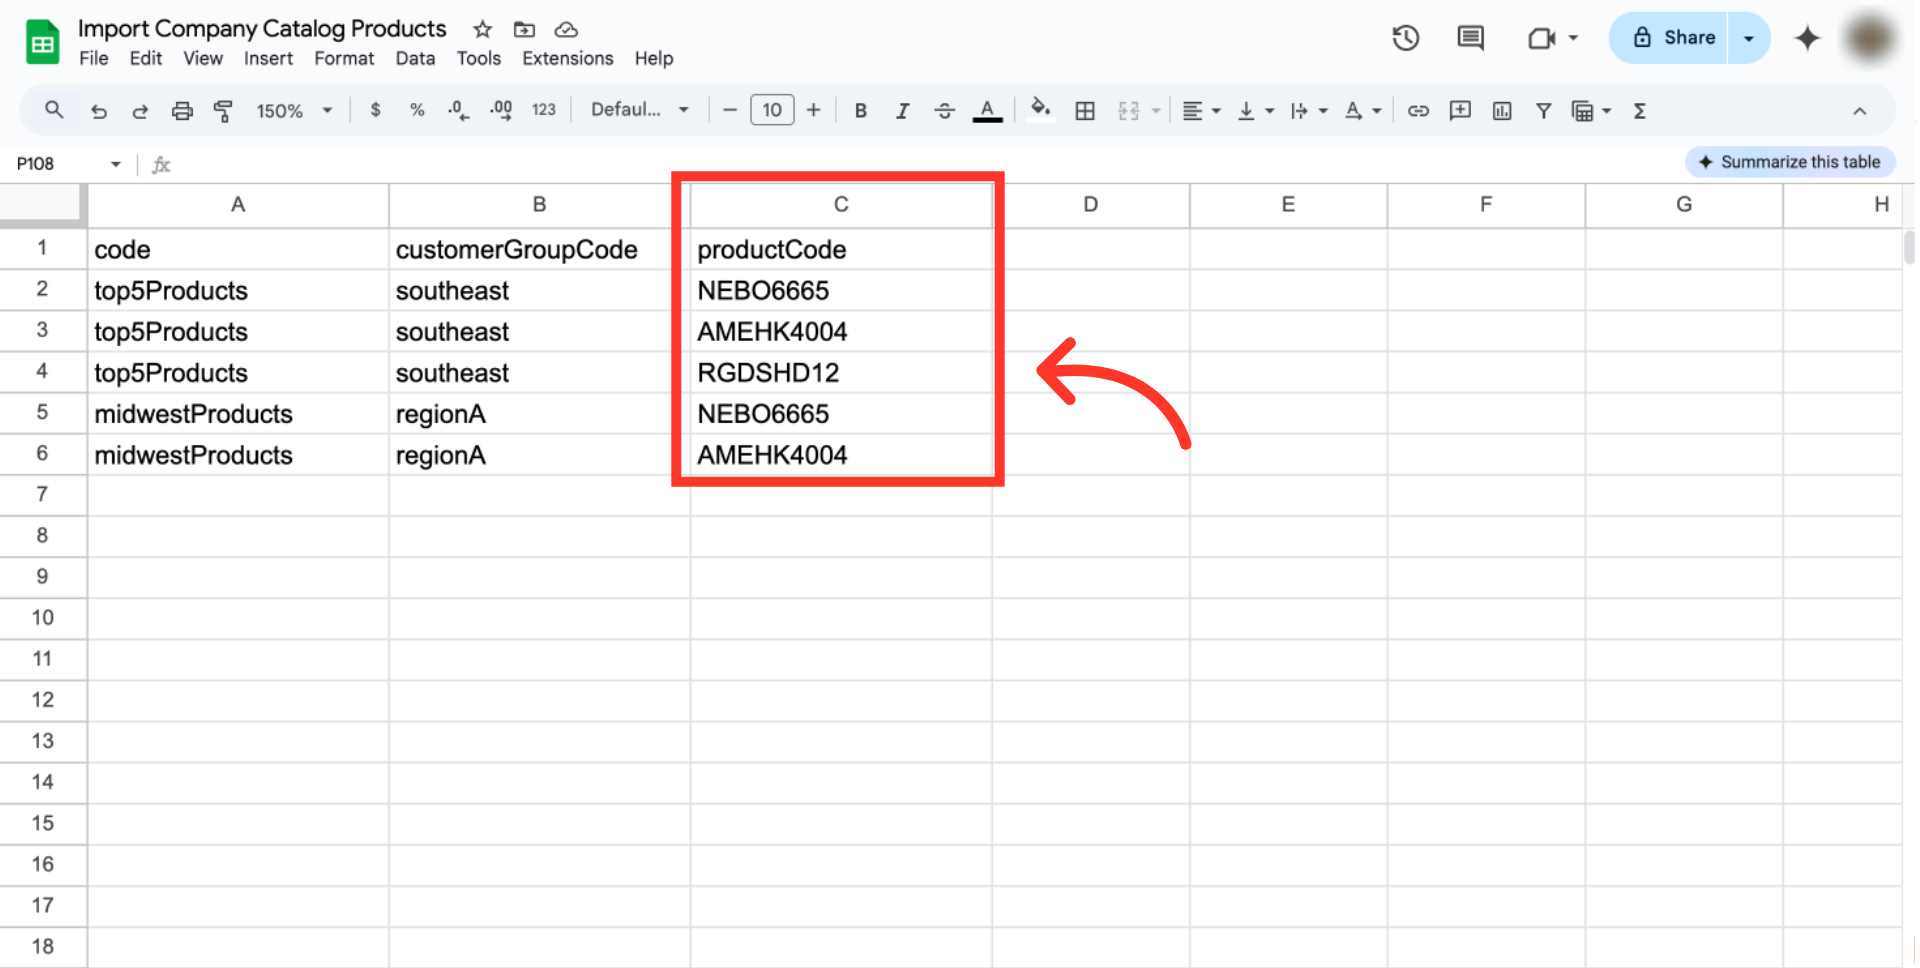
"code" = code value for catalog
In this .CSV file, you will need three columns. The first column header should be "code". This is the catalog code value for the catalog to which you would like to add products. This column is required.
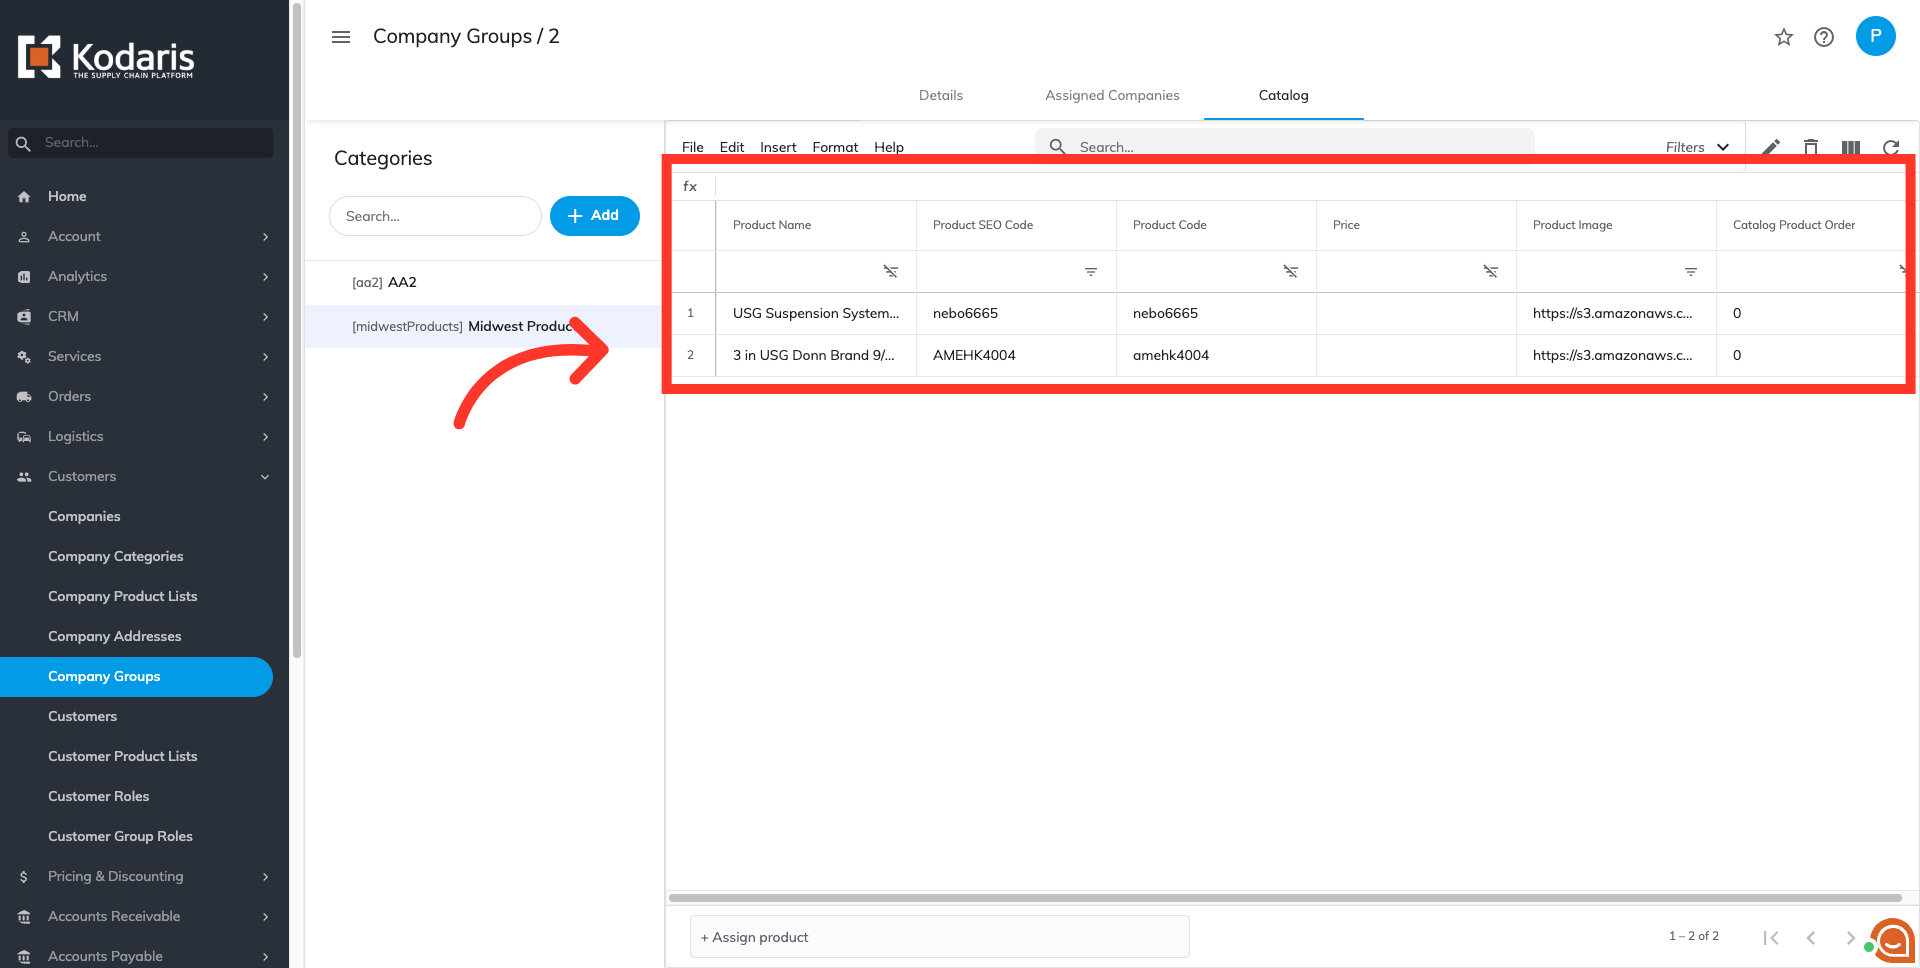
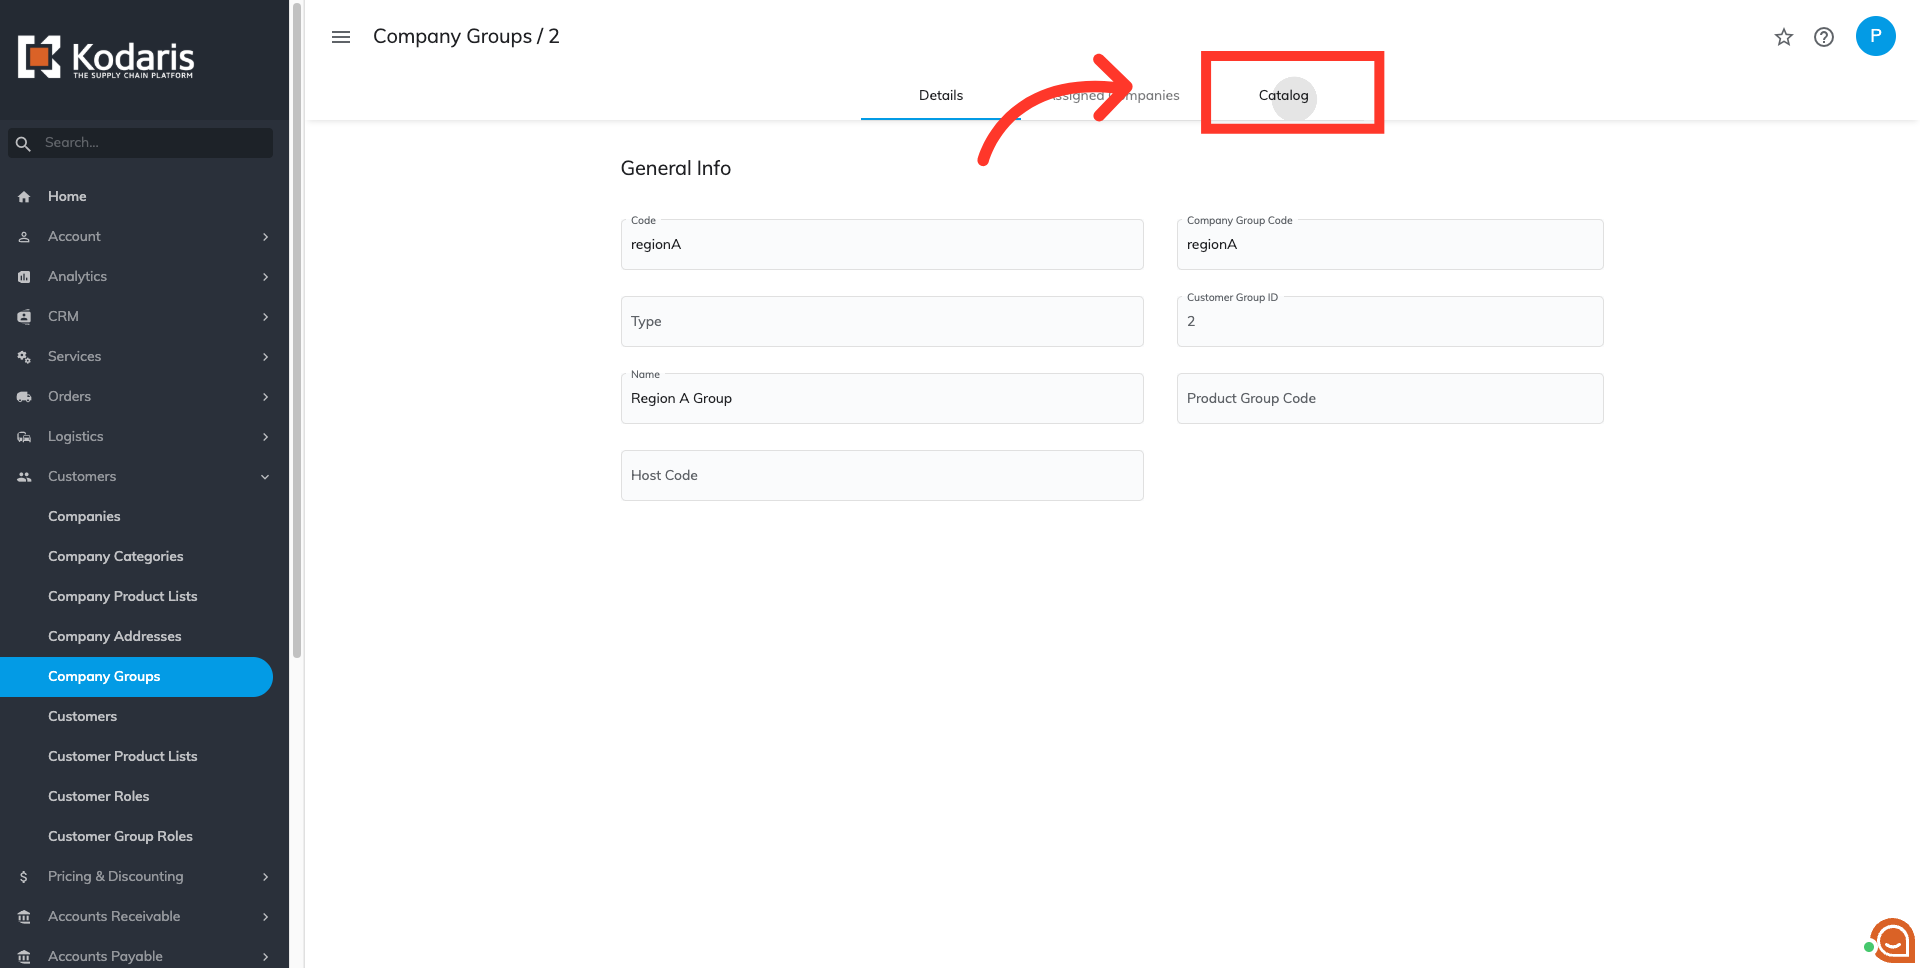
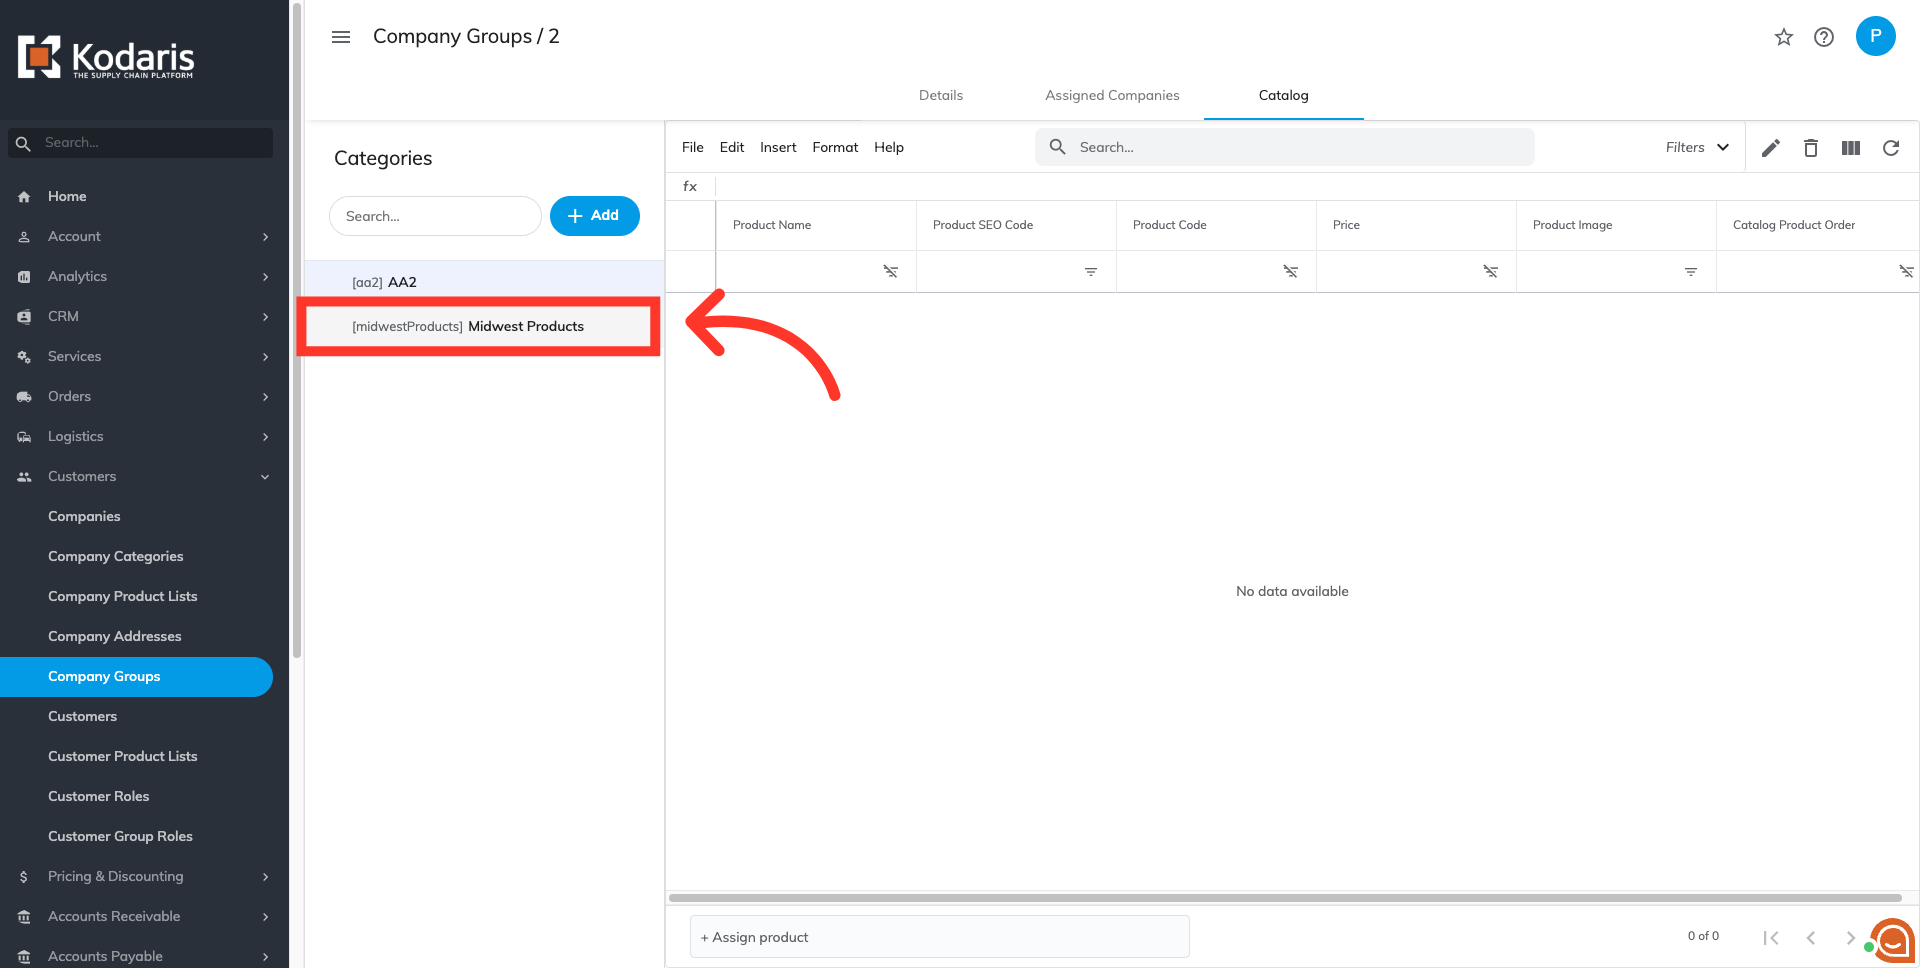
Click the category code
The "code" or the catalog code can be found if you navigate to "Company Groups", then, "Catalog" tab. Look for the catalog where you want to assign your products. The code can be found beside the Catalog Name. In order to access "Company Groups" you will need to be set up either as an "administrator" or a "superuser", or have the appropriate roles: "customerGroupView" and "customerGroupEdit".
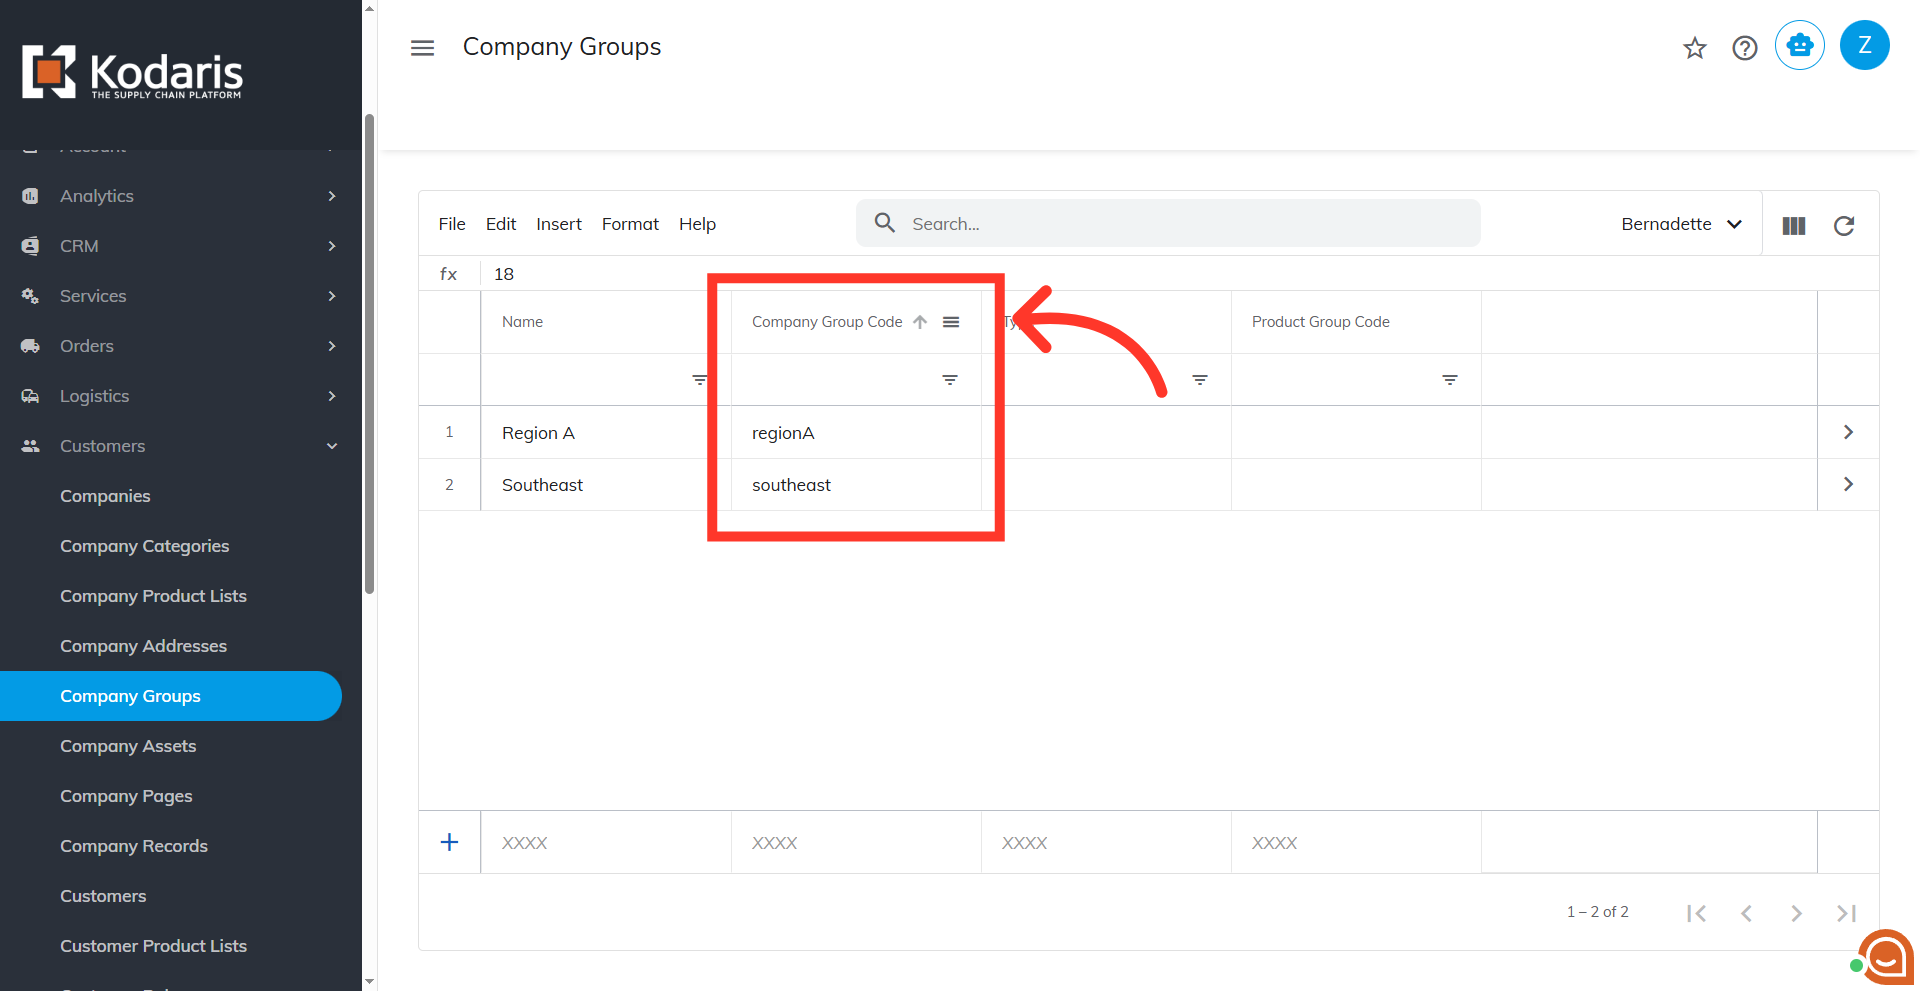
"customerGroupCode" = company group code
The second column header should be "customerGroupCode". This is the code value of the company group of which the catalog is a part. This column is required.
Navigate to "Company Groups"
To know which customerGroupCode to use, navigate to the "Company Groups" section.

See "Company Group Code" column
See the "Company Group Code" column to view the unique codes assigned to each company group.
"productCode" = product code
The last column header should be "productCode". These are the product codes associated to the products that are being added to the catalogs. This column is also required.
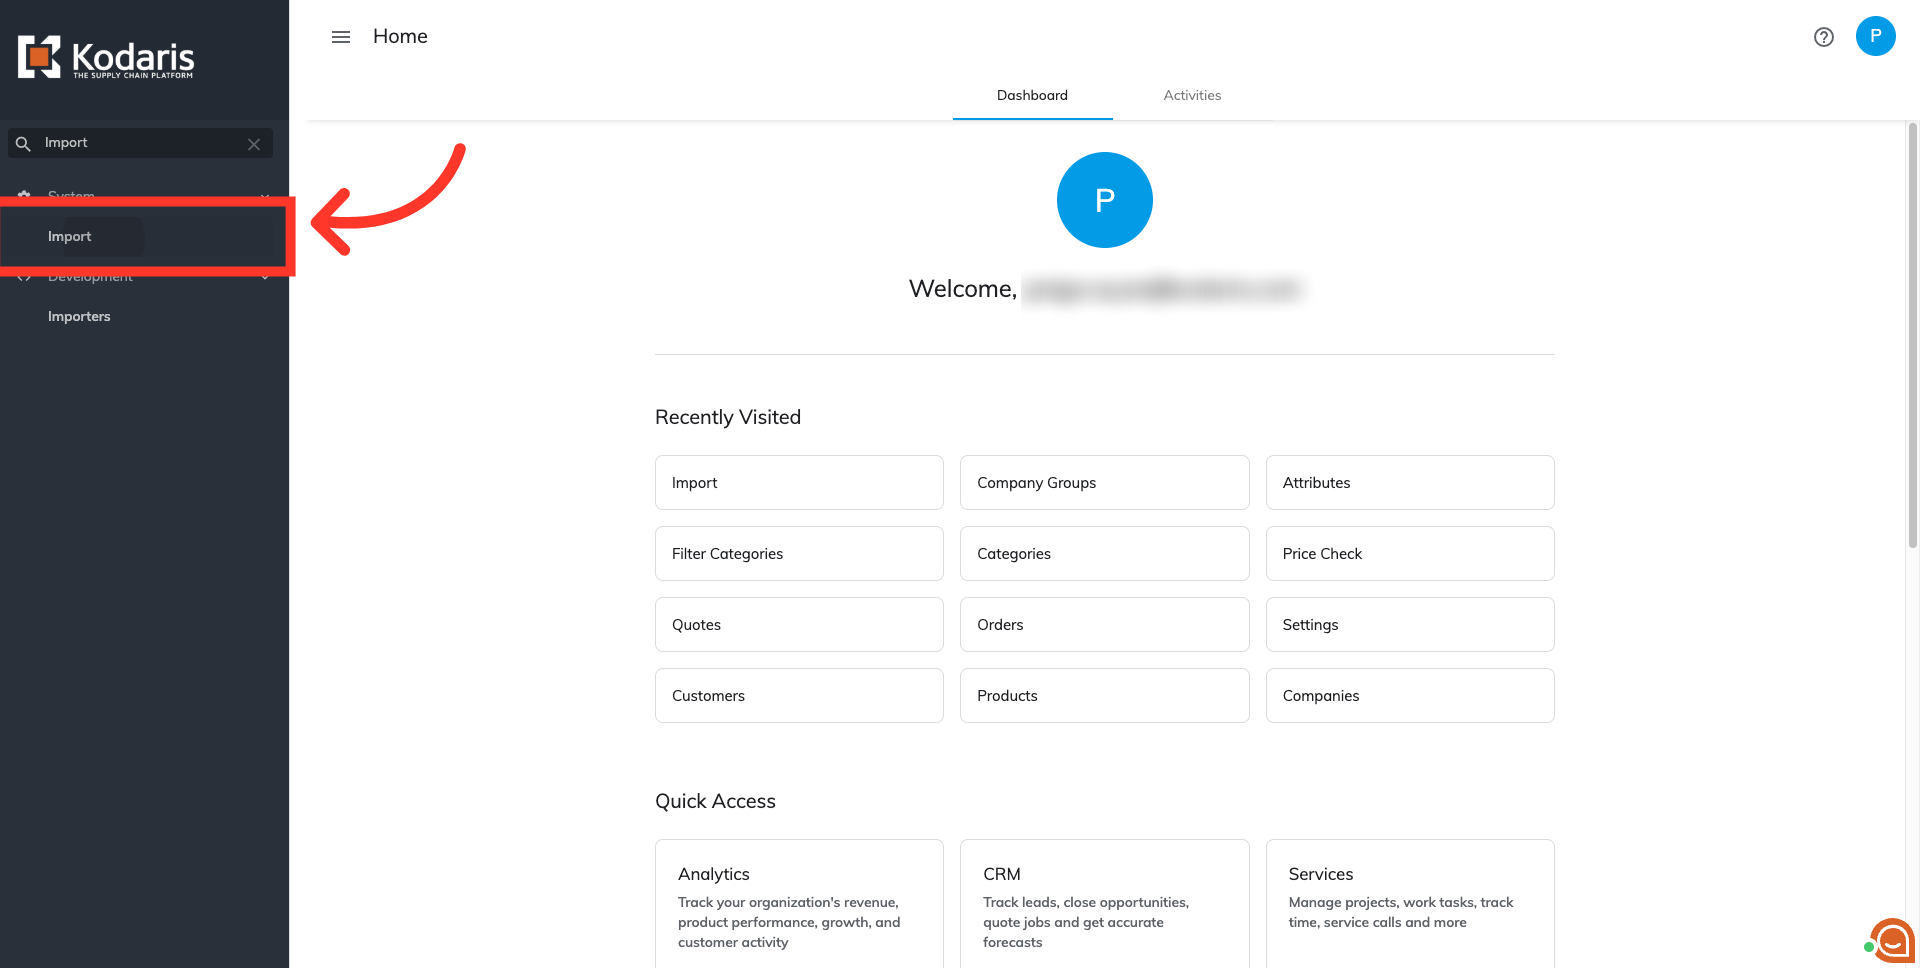
Navigate to "Import"
Once your file is ready, navigate to the "Import" screen in the Operations Portal. In order to access "Import" screen, you will need to be set up either as an "administrator" or a "superuser", or have the roles of: "importEdit".
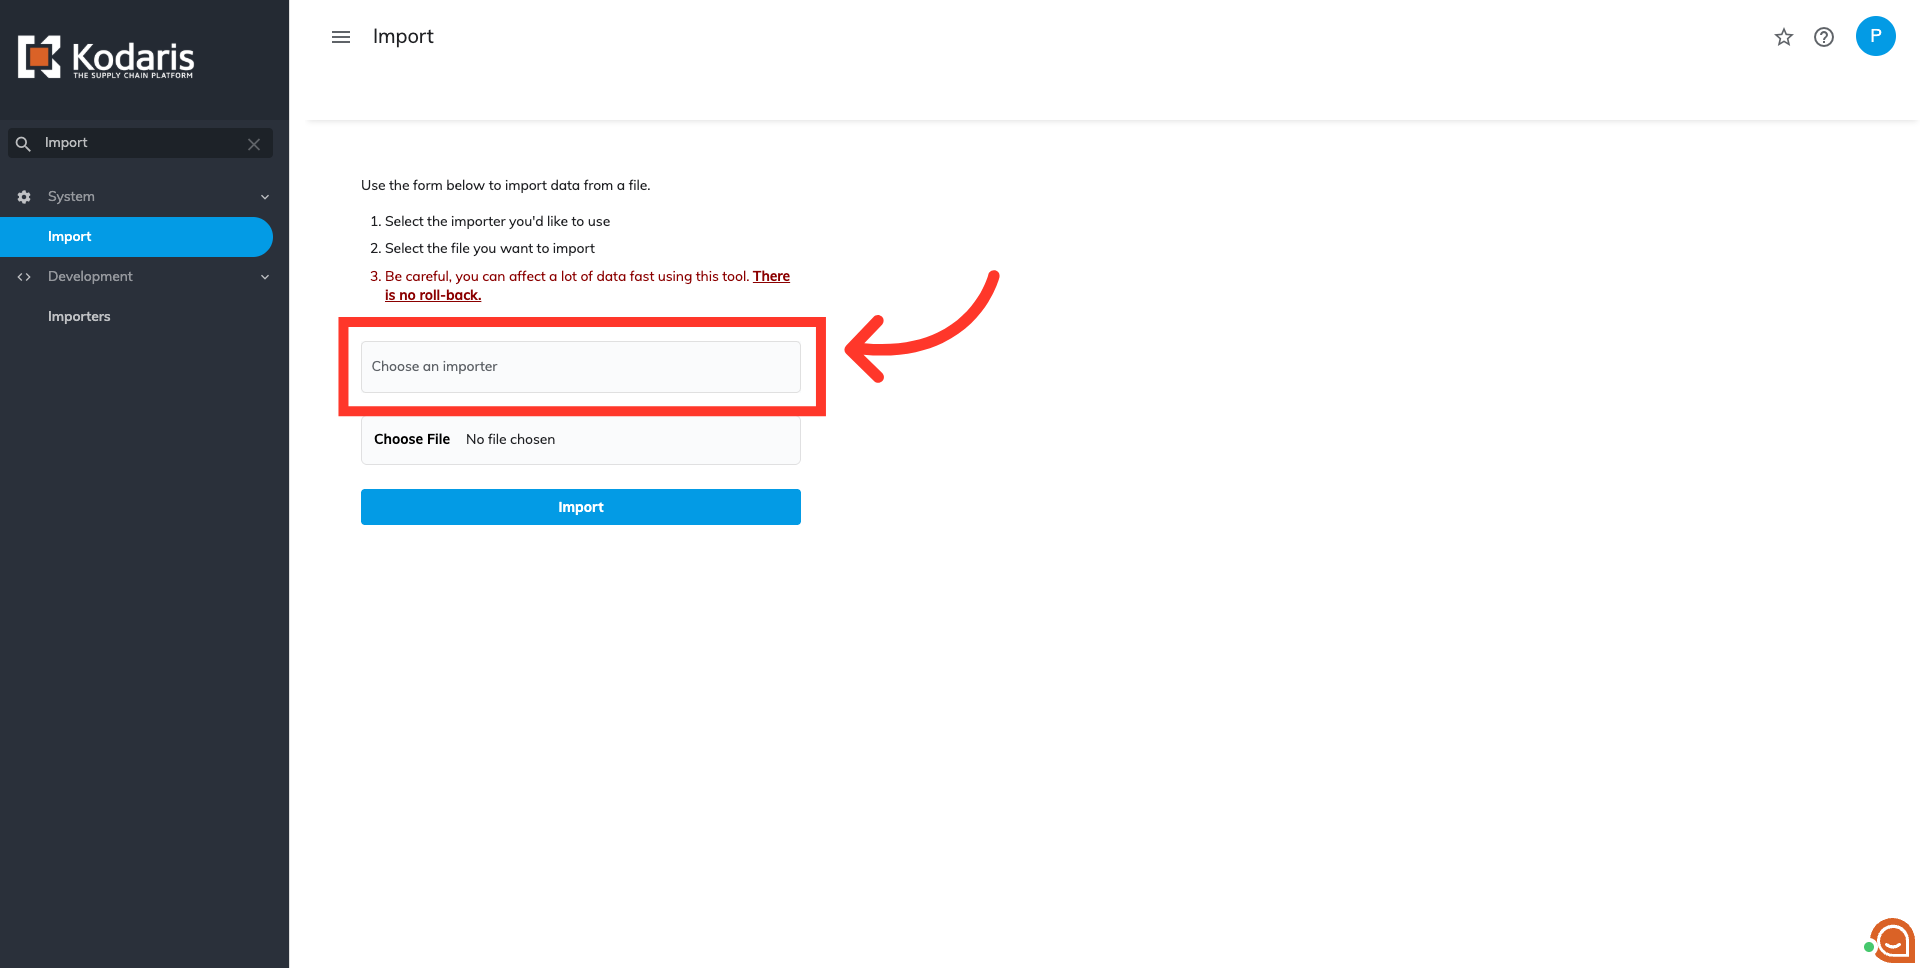
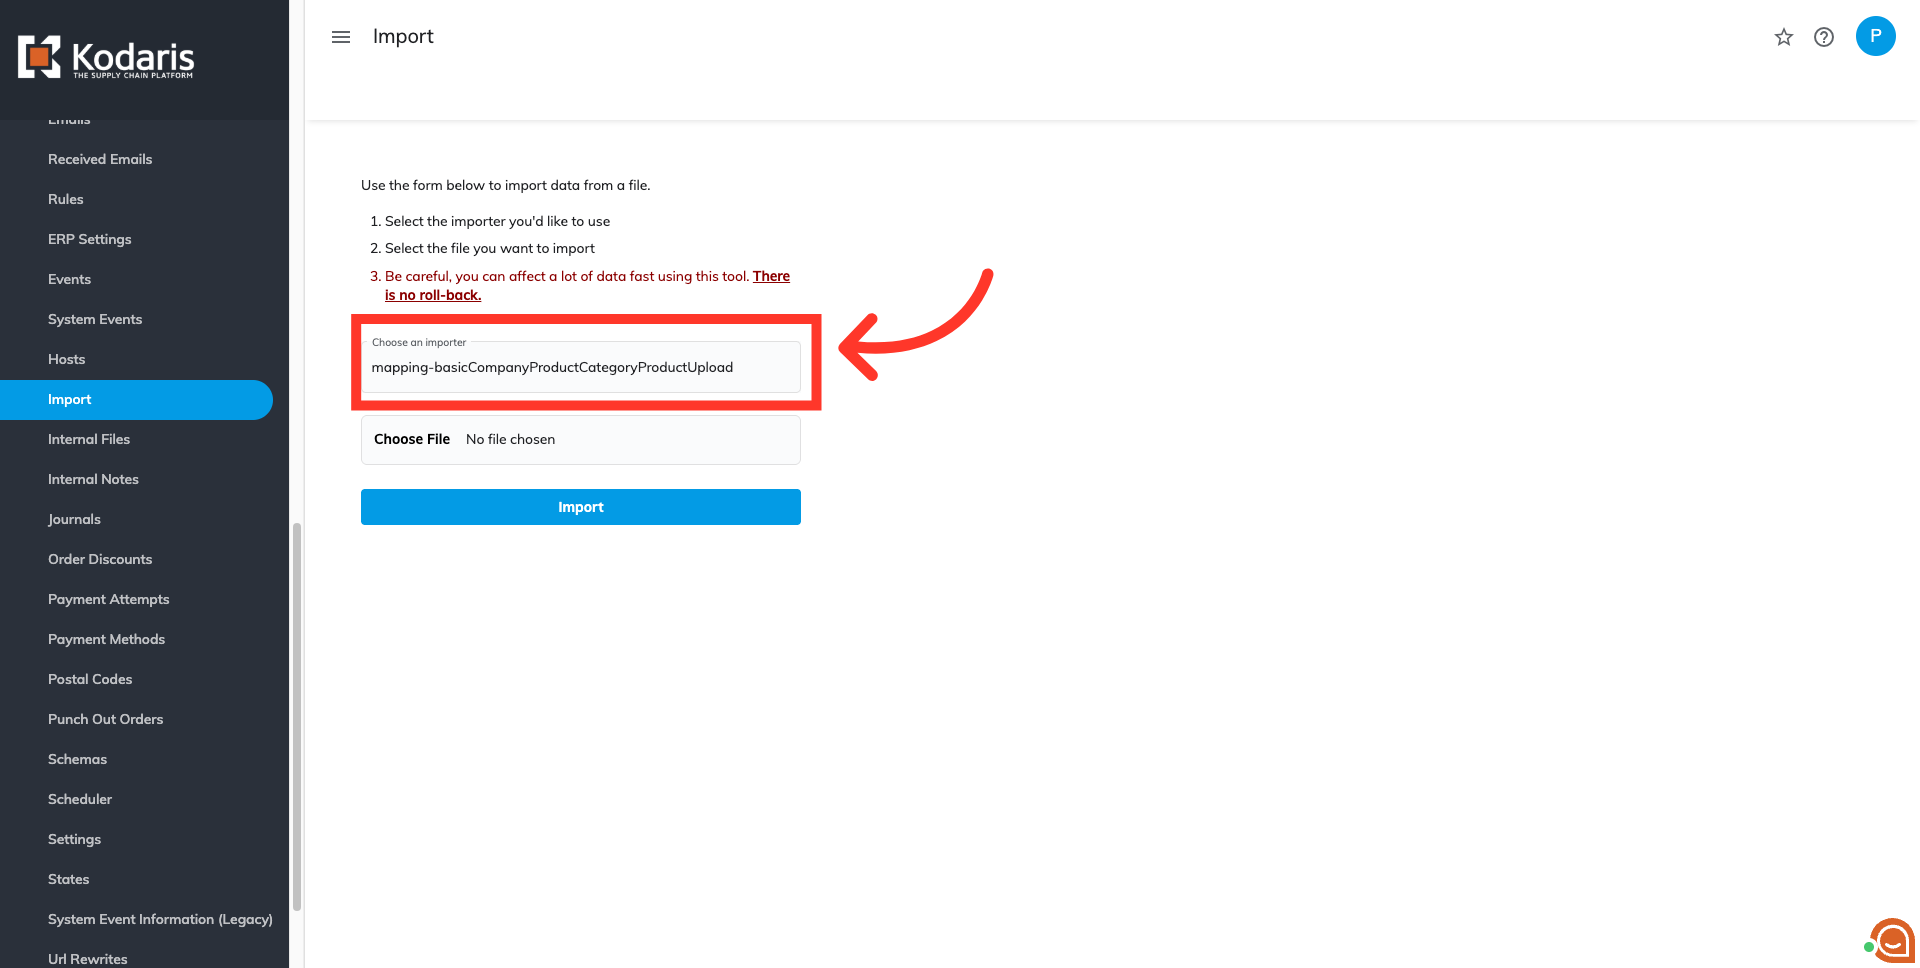
Click on the "Choose an importer" field
Click on the "Choose an importer" field to select the type of import you would like to use.
Type in "mapping-basicCompanyProductCategoryProductUpload"
Type the import code "mapping-basicCompanyProductCategoryProductUpload".
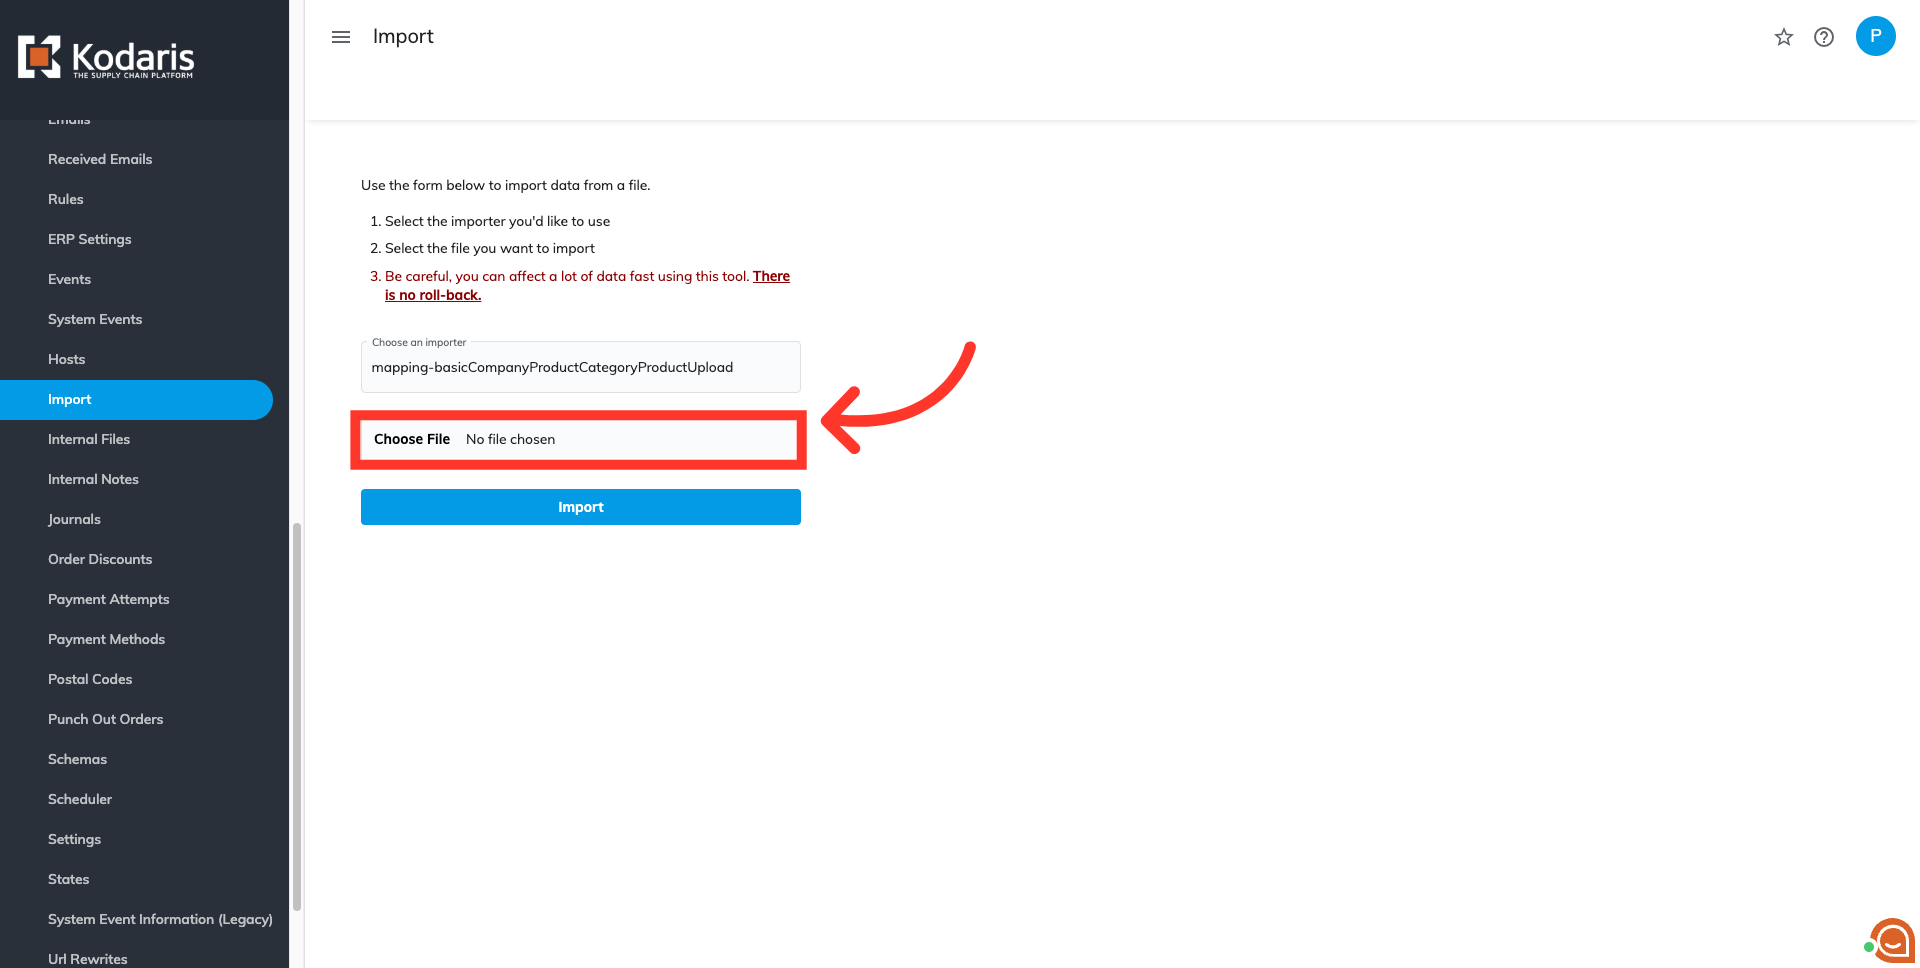
Click on the "Choose File" field
Next, you will need to choose the .CSV file to upload from your computer. Click "Choose File".
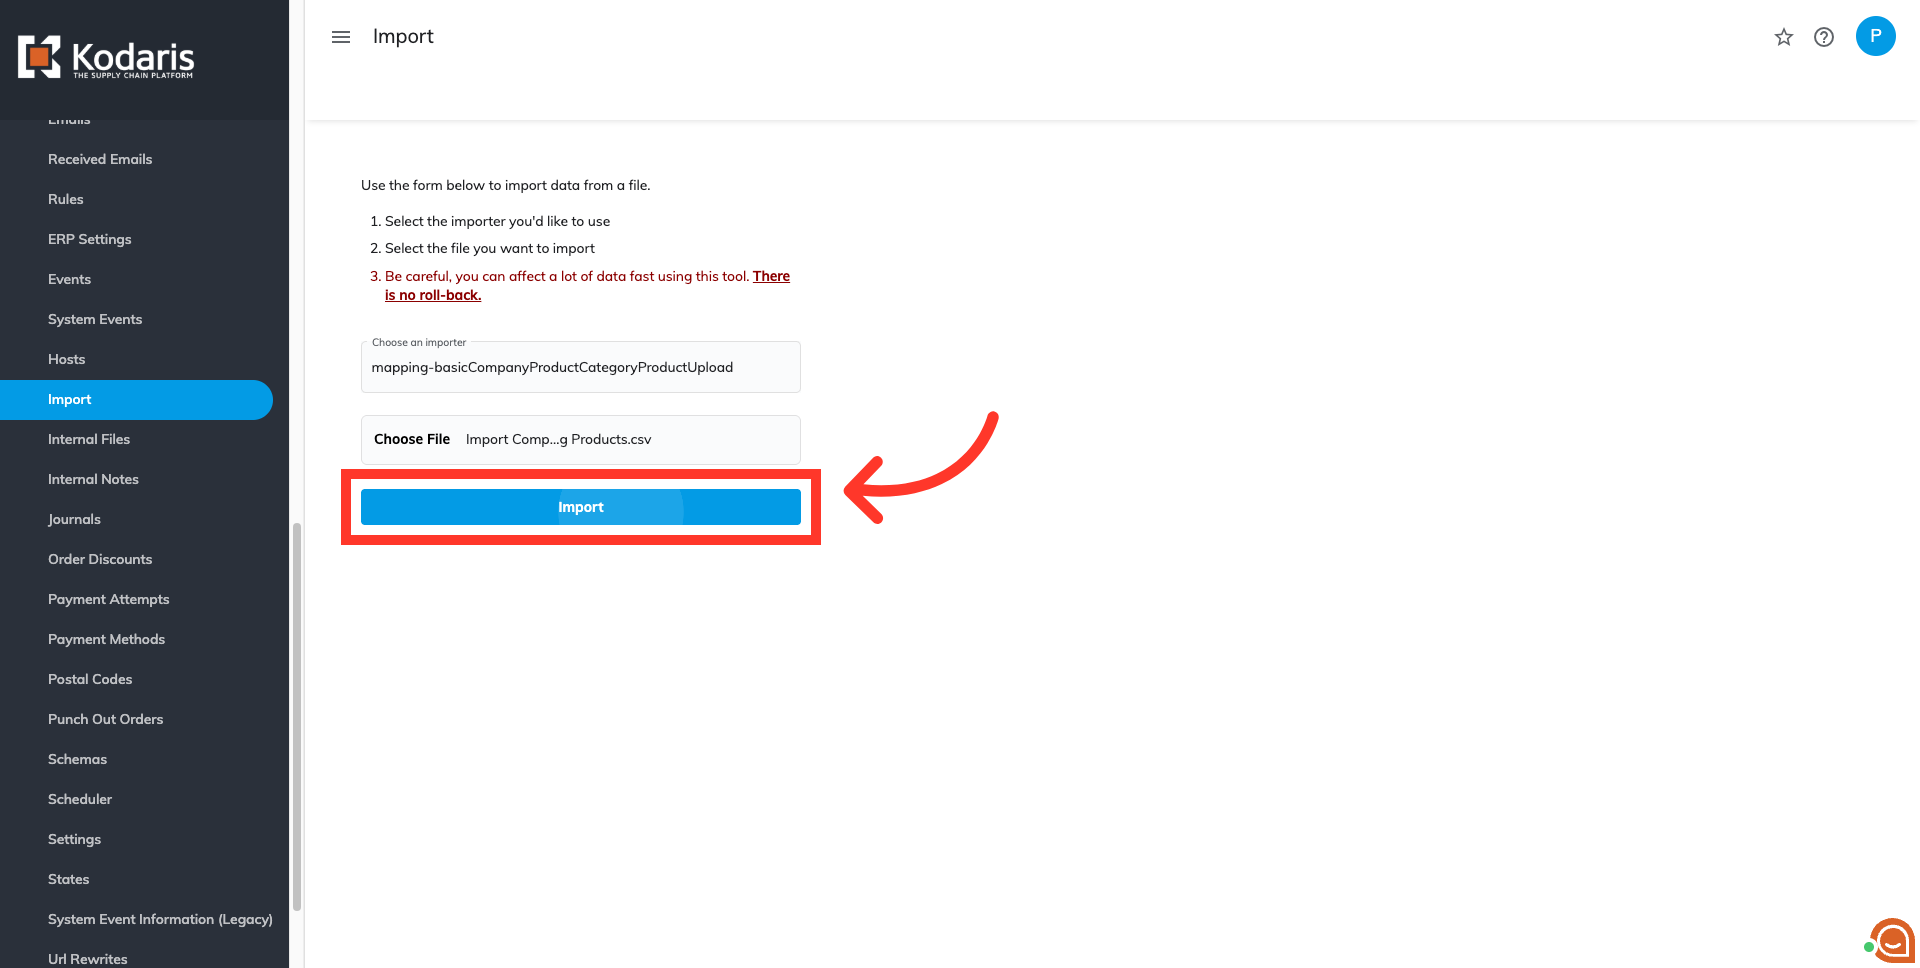
Select the "Import" button
Once you have chosen your file, select the "Import" button. Please be sure that you select the correct file, as there are no rollbacks for imports. If you are importing a large amount of data, it may take a short amount of time to complete. The import will continue to run in the background.
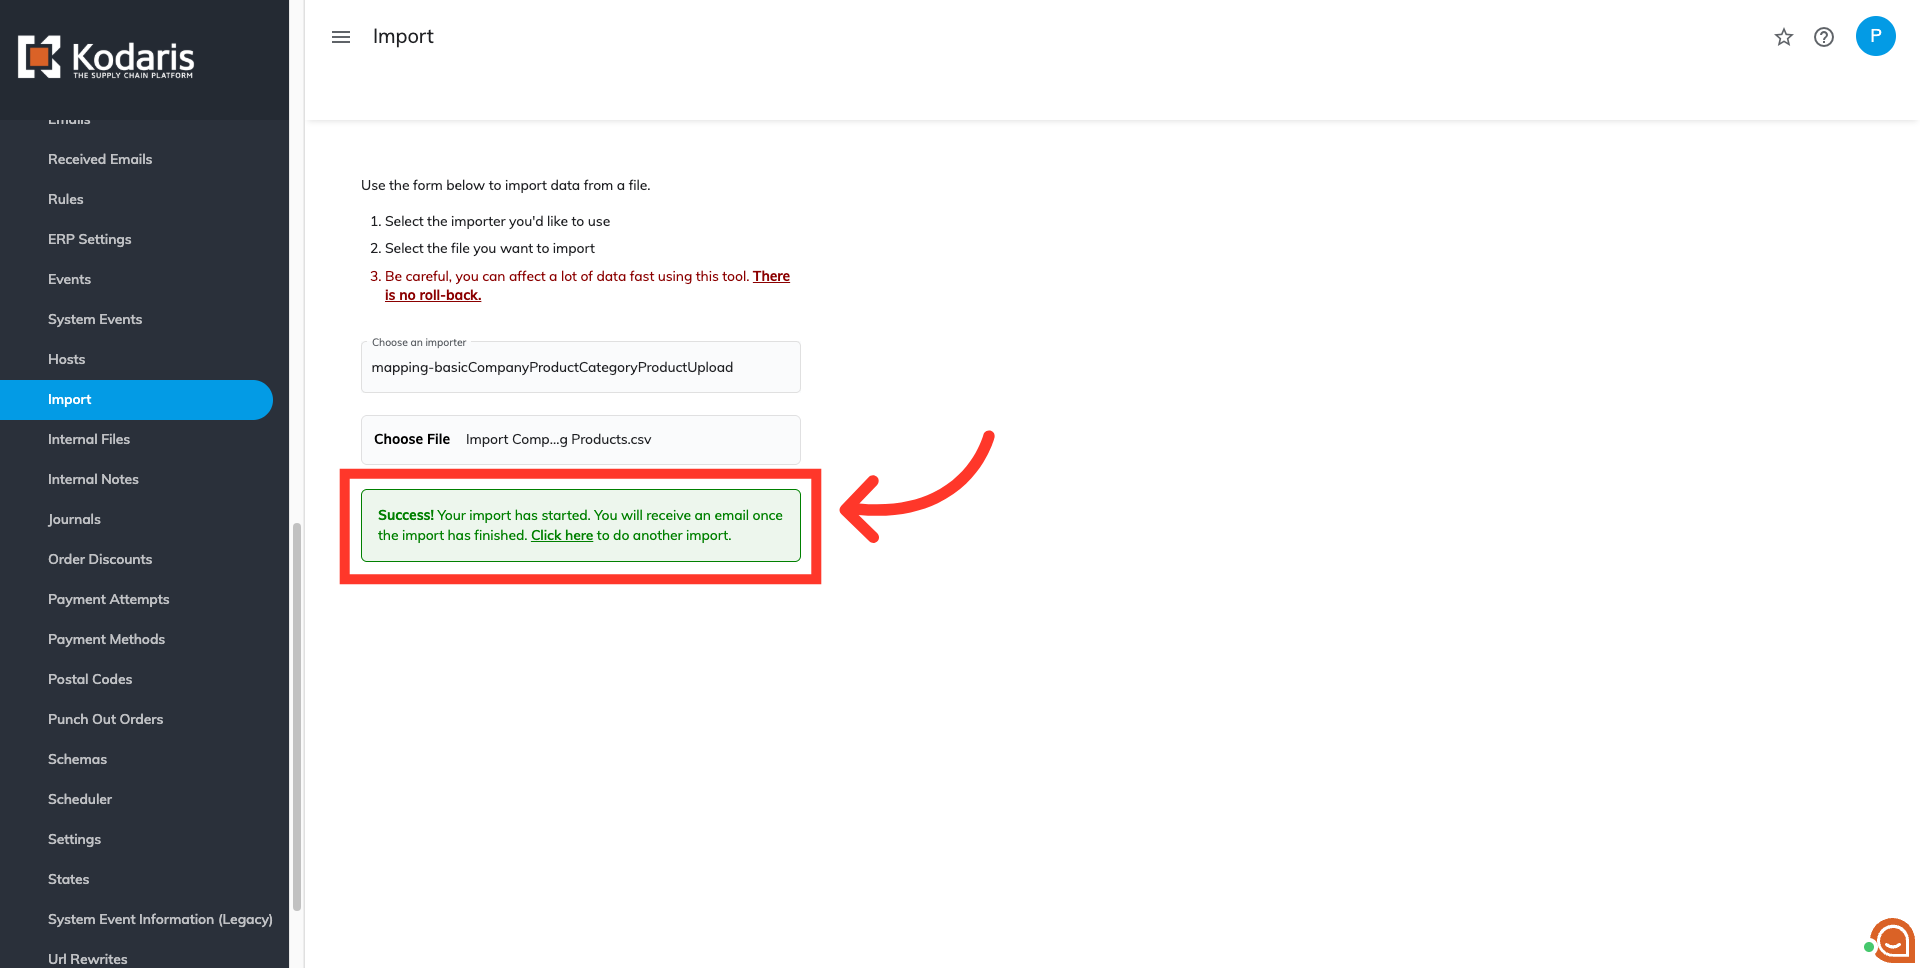
Confirm import
If the import is initiated successfully, you will see a success message. You will also receive an email once the import has finished.
Navigate to "Company Groups"
To ensure your products were added to the catalogs, navigate to the "Company Groups" screen.

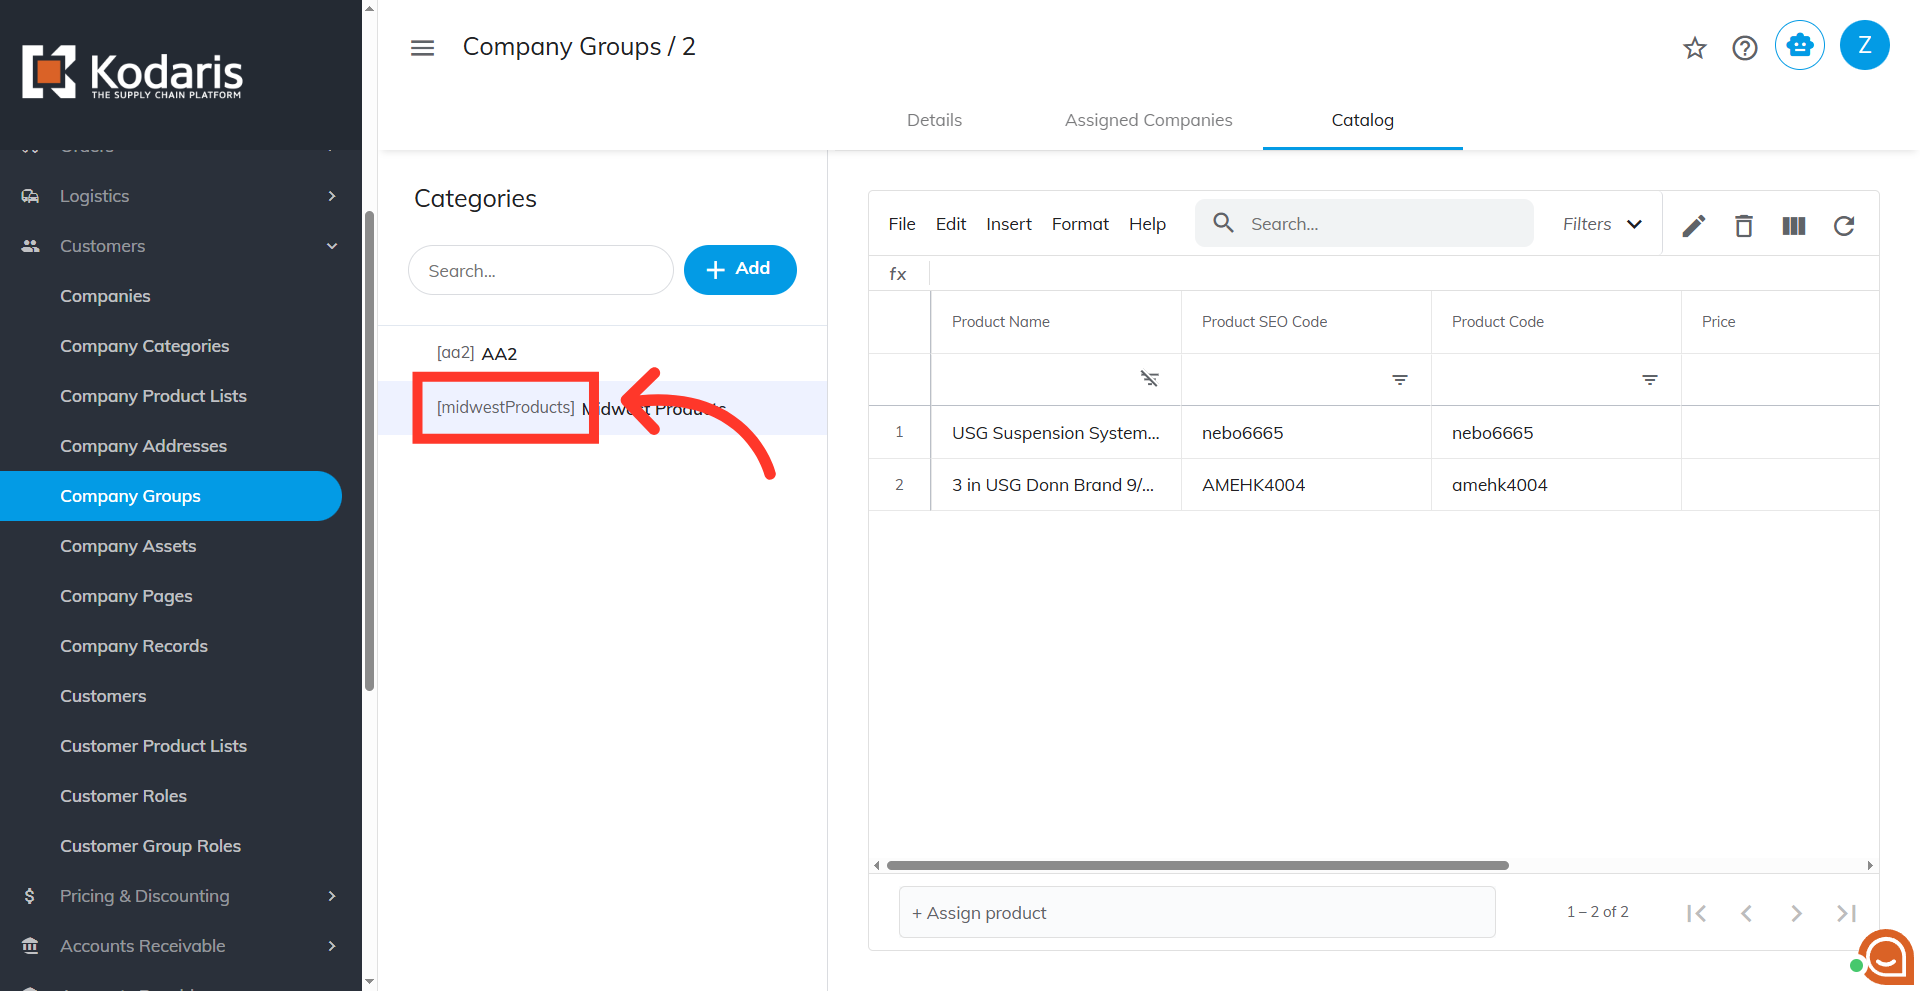
Click on the more details icon
Click on the more details icon associated with the company group code you added products to.

Click on "Catalog"
Click on the "Catalog" tab.
Select the catalog
Select the catalog where you added the products.
View products
Your newly added products will appear in the grid.