Find A Dealer - Adding Dealers
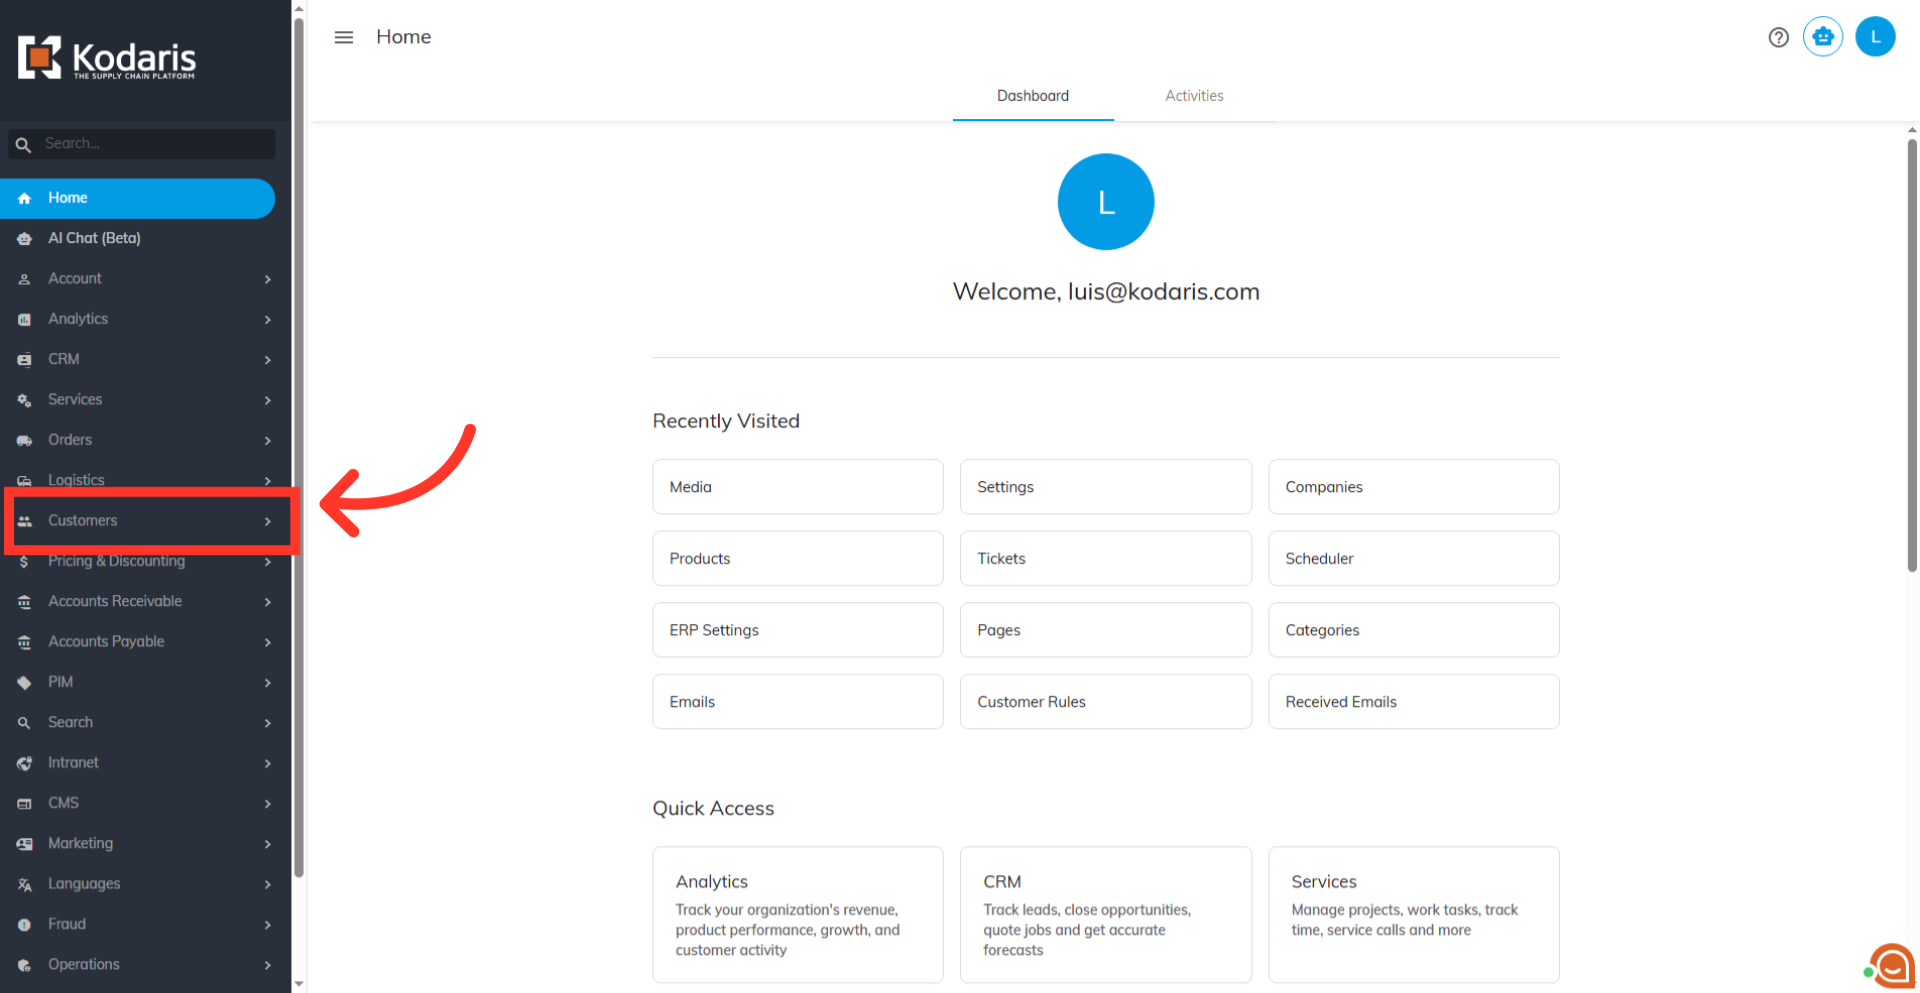
Navigate to "Customers" section
To add "Dealers" to your "Find A Dealer" page, a few things need to be checked and updated. First, in order to use Google Maps your site will need to be configured using the googleApiKey setting. This can be done by your developers, or our team will be able to update this setting for you. Second, if ERP syncs are turned on for companies, the sync must be properly configured so that the updates in the portal are not overwritten by the data coming from the ERP. For example, if the website field is hand-populated in the portal, the ERP sync will overwrite this change unless it is configured to not update that field. Third, before adding dealers you will need to set up and populate the "brands" setting to link dealers to the brands they carry. Once these items have been updated, you will be able to add the dealers for your "Find a Dealer" page. To begin, navigate to the "Customers" section in the Operations Portal.
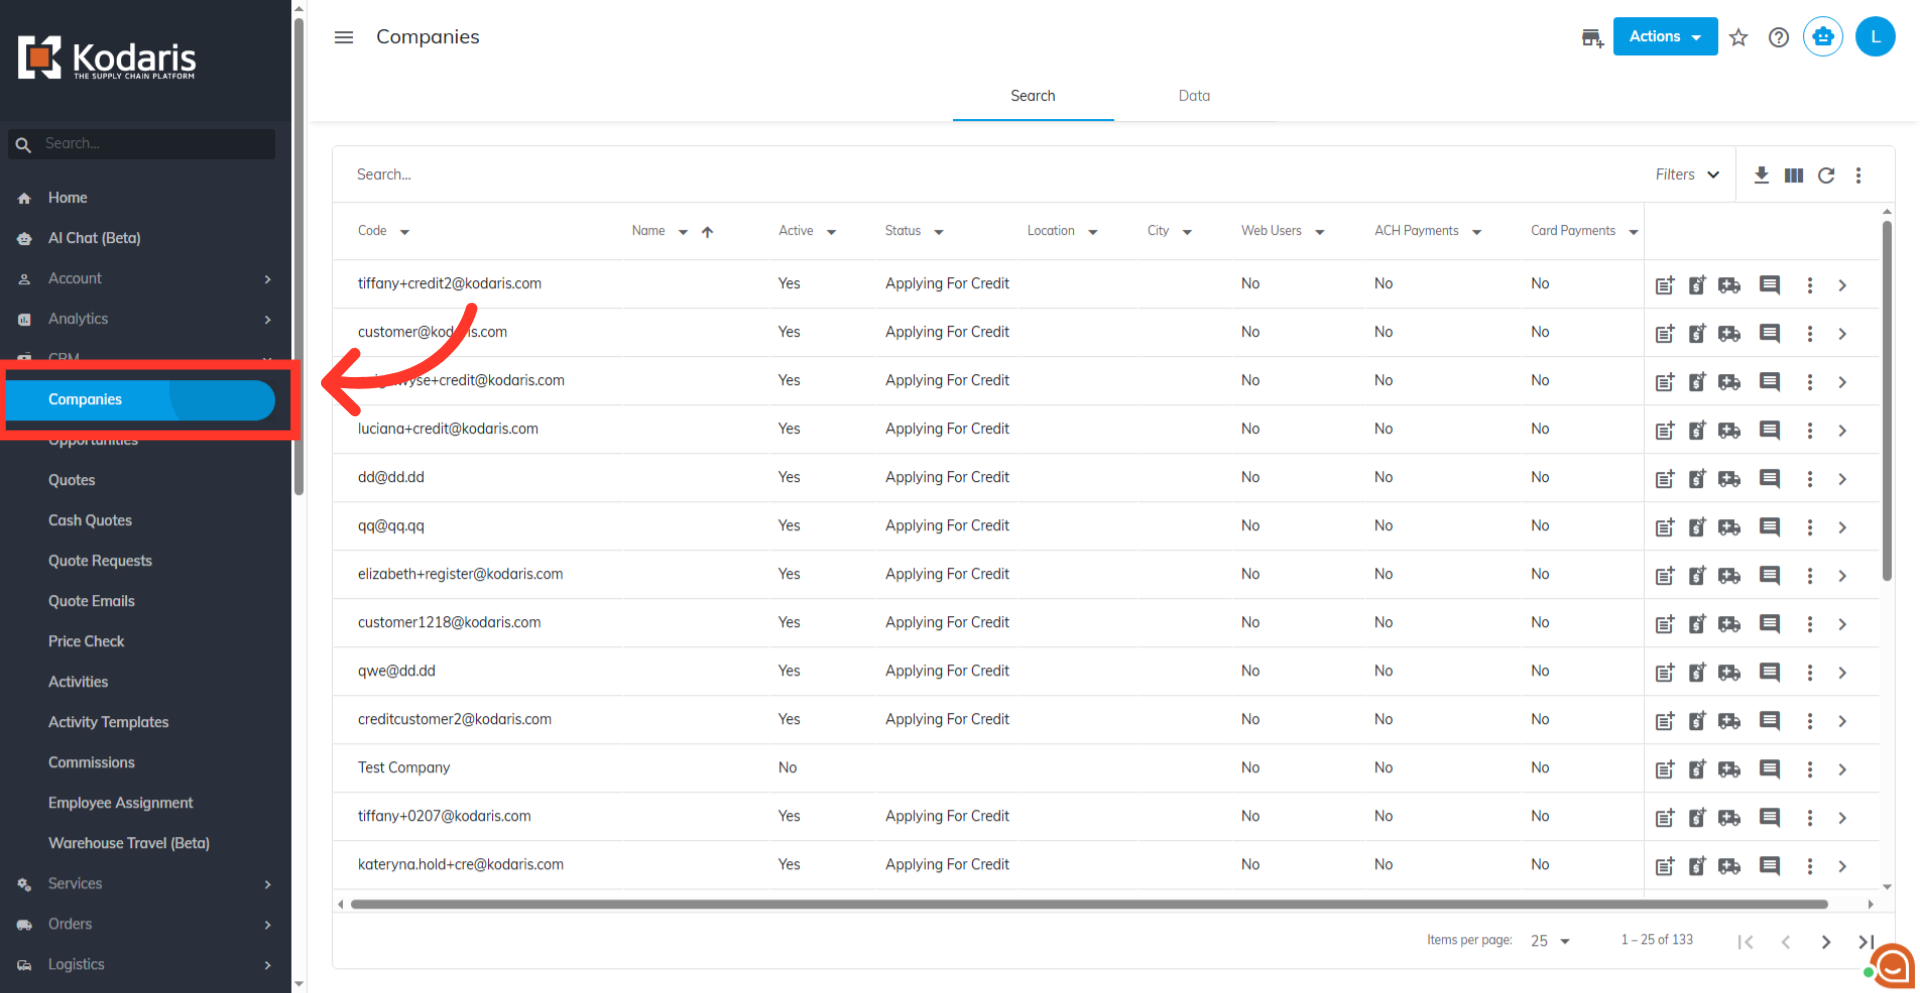
Go to "Companies"
Then, click on "Companies." You can also access "Companies" in the CRM. In order to access "Companies" you will need to be set up either as an "administrator" or a "superuser", or have the appropriate roles: "companyView," "crmCompanyView," "companyEdit," "crmCompanyEdit," and "dispatch".
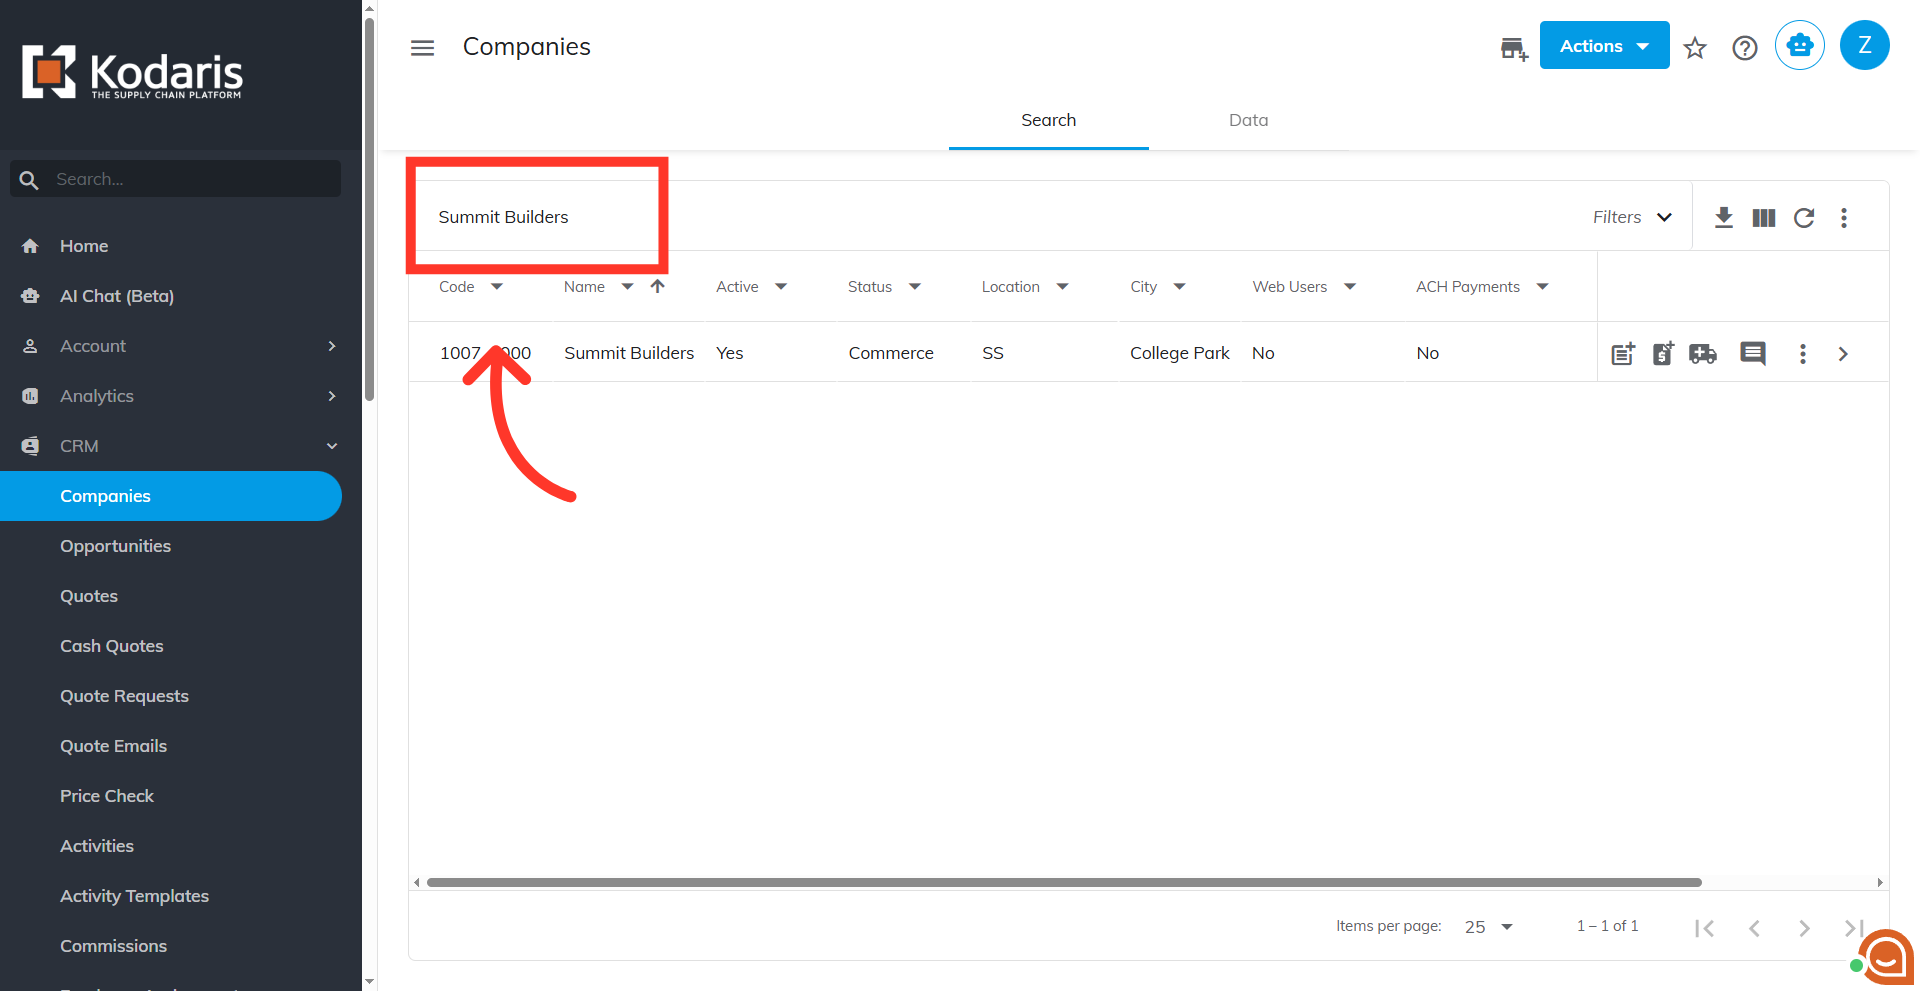
Search for the company
Enter a company name or code to search.
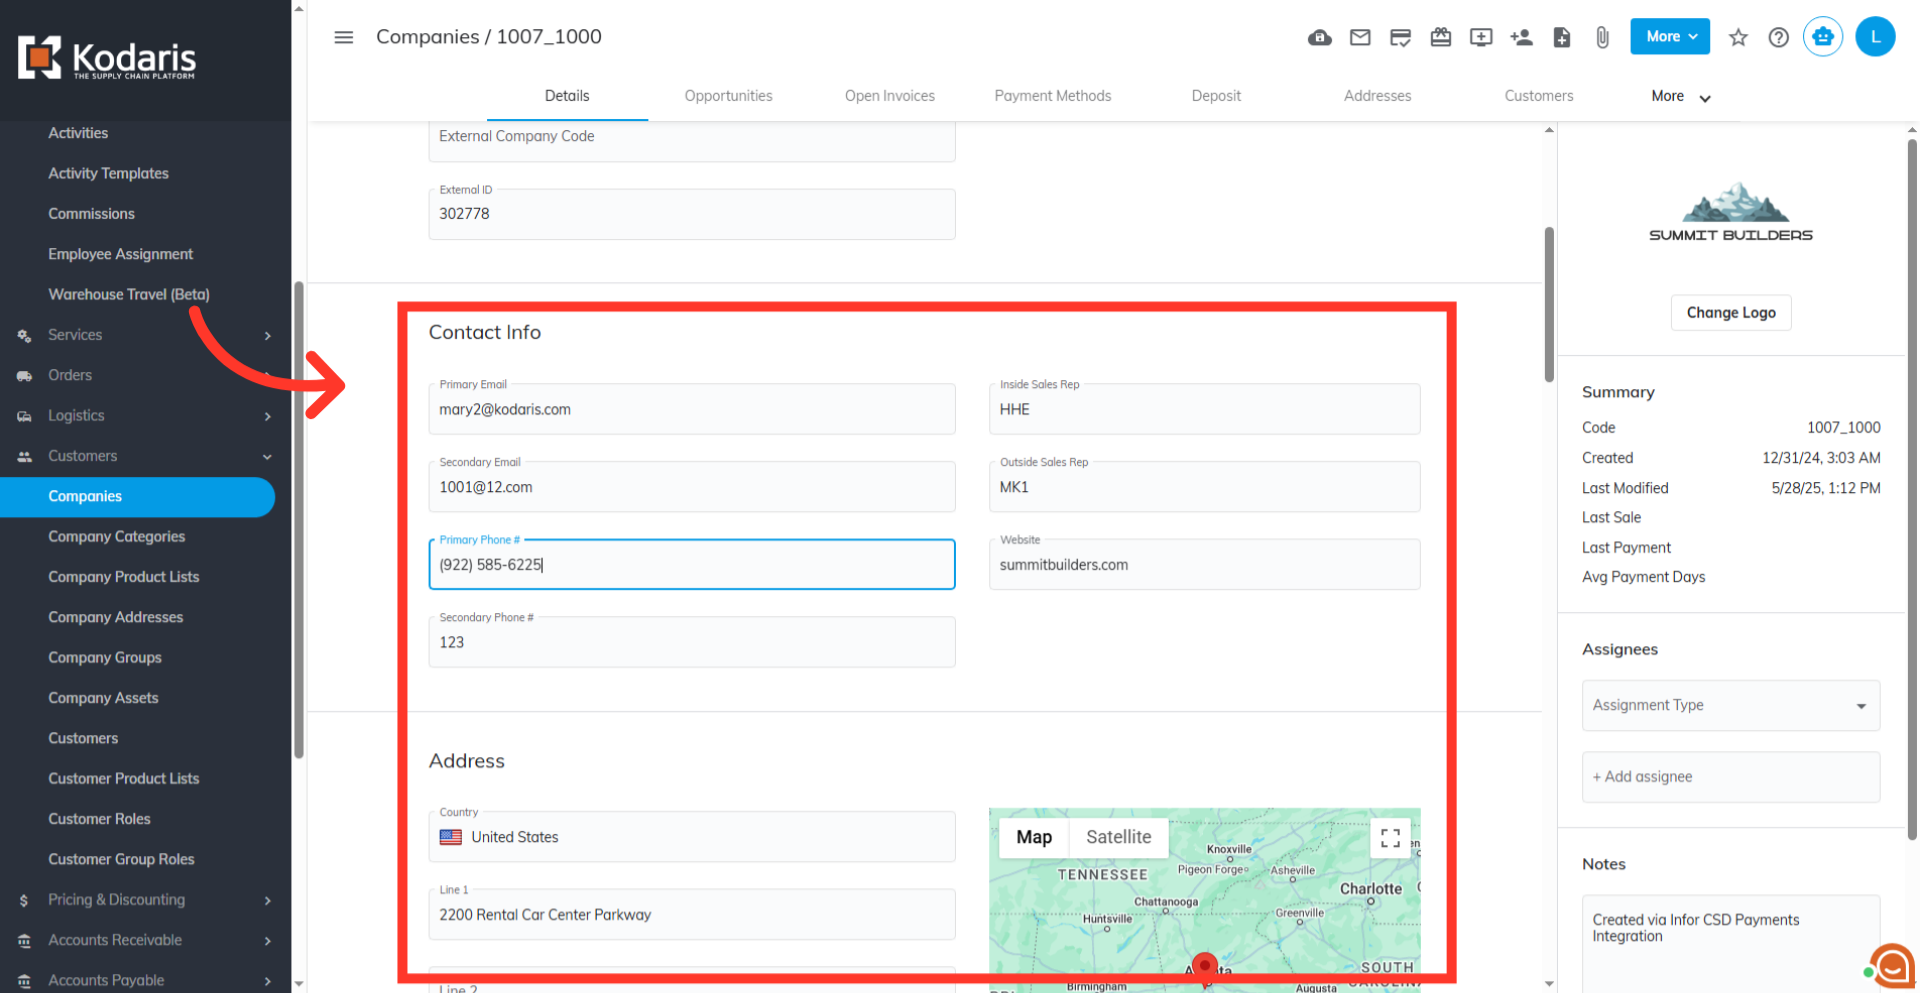
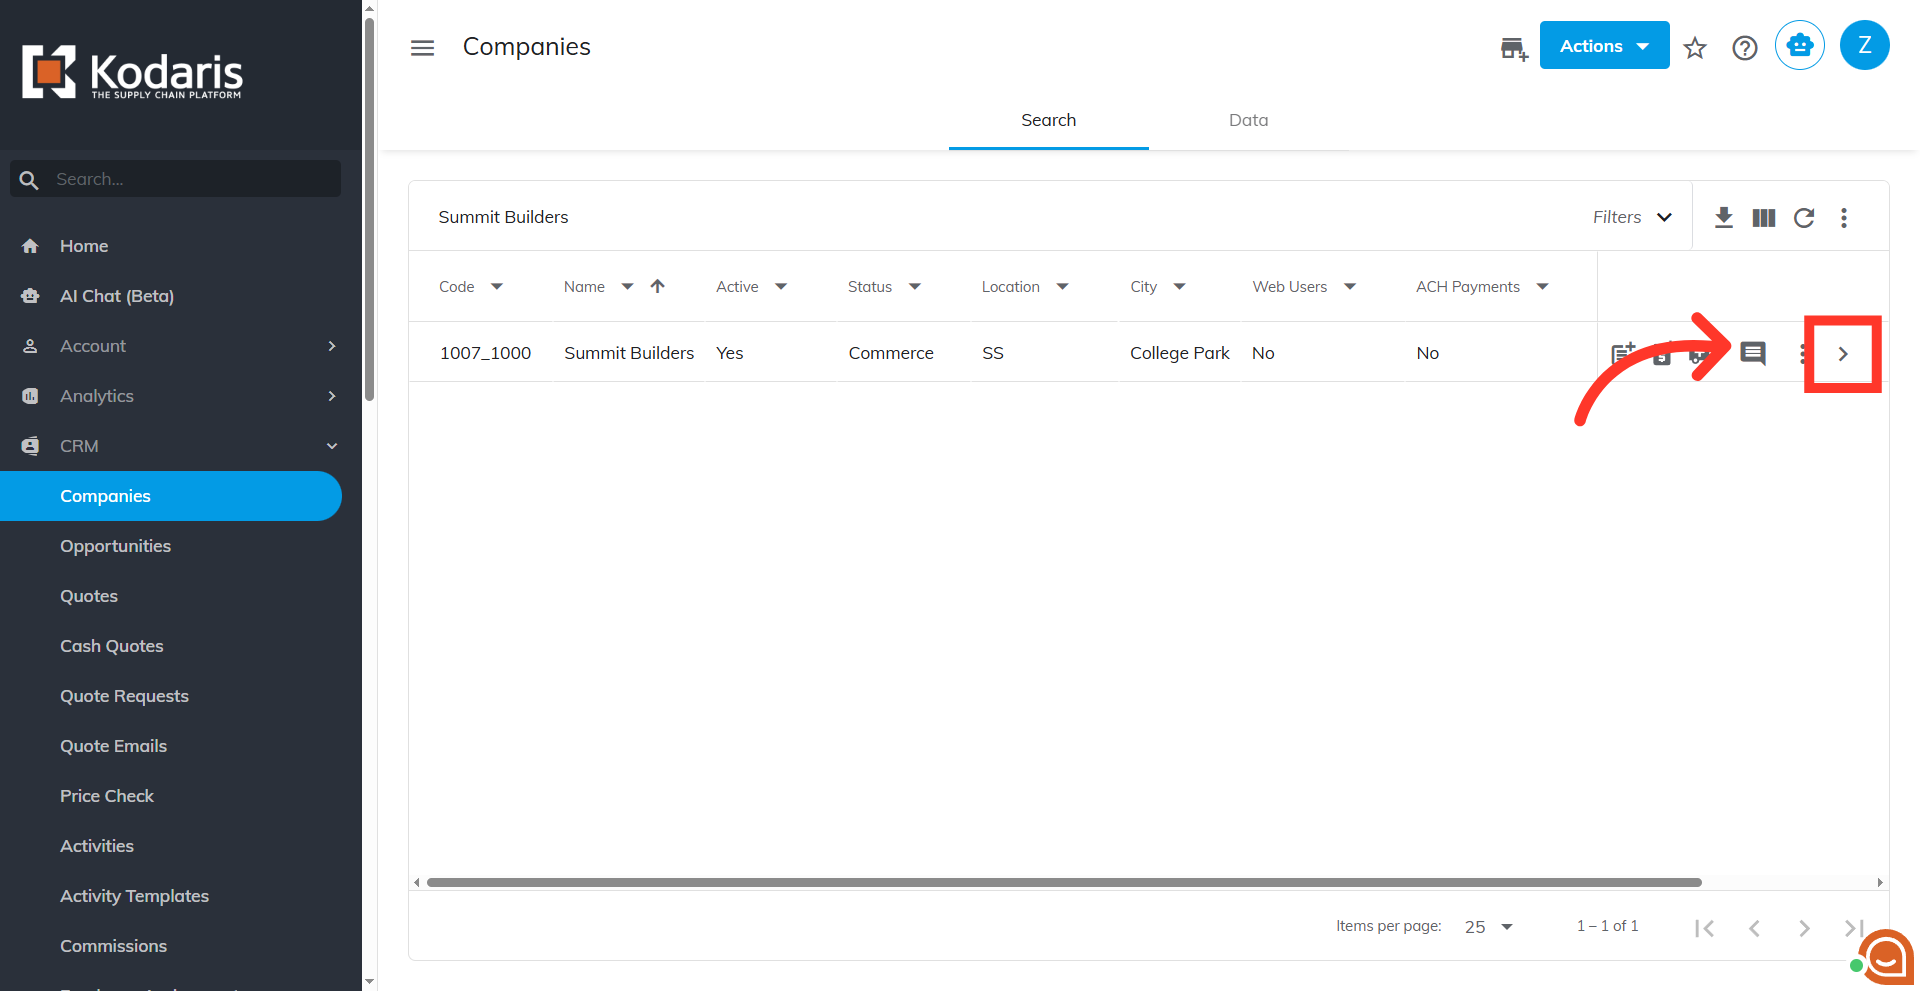
Click the more details icon
Click the more details icon.
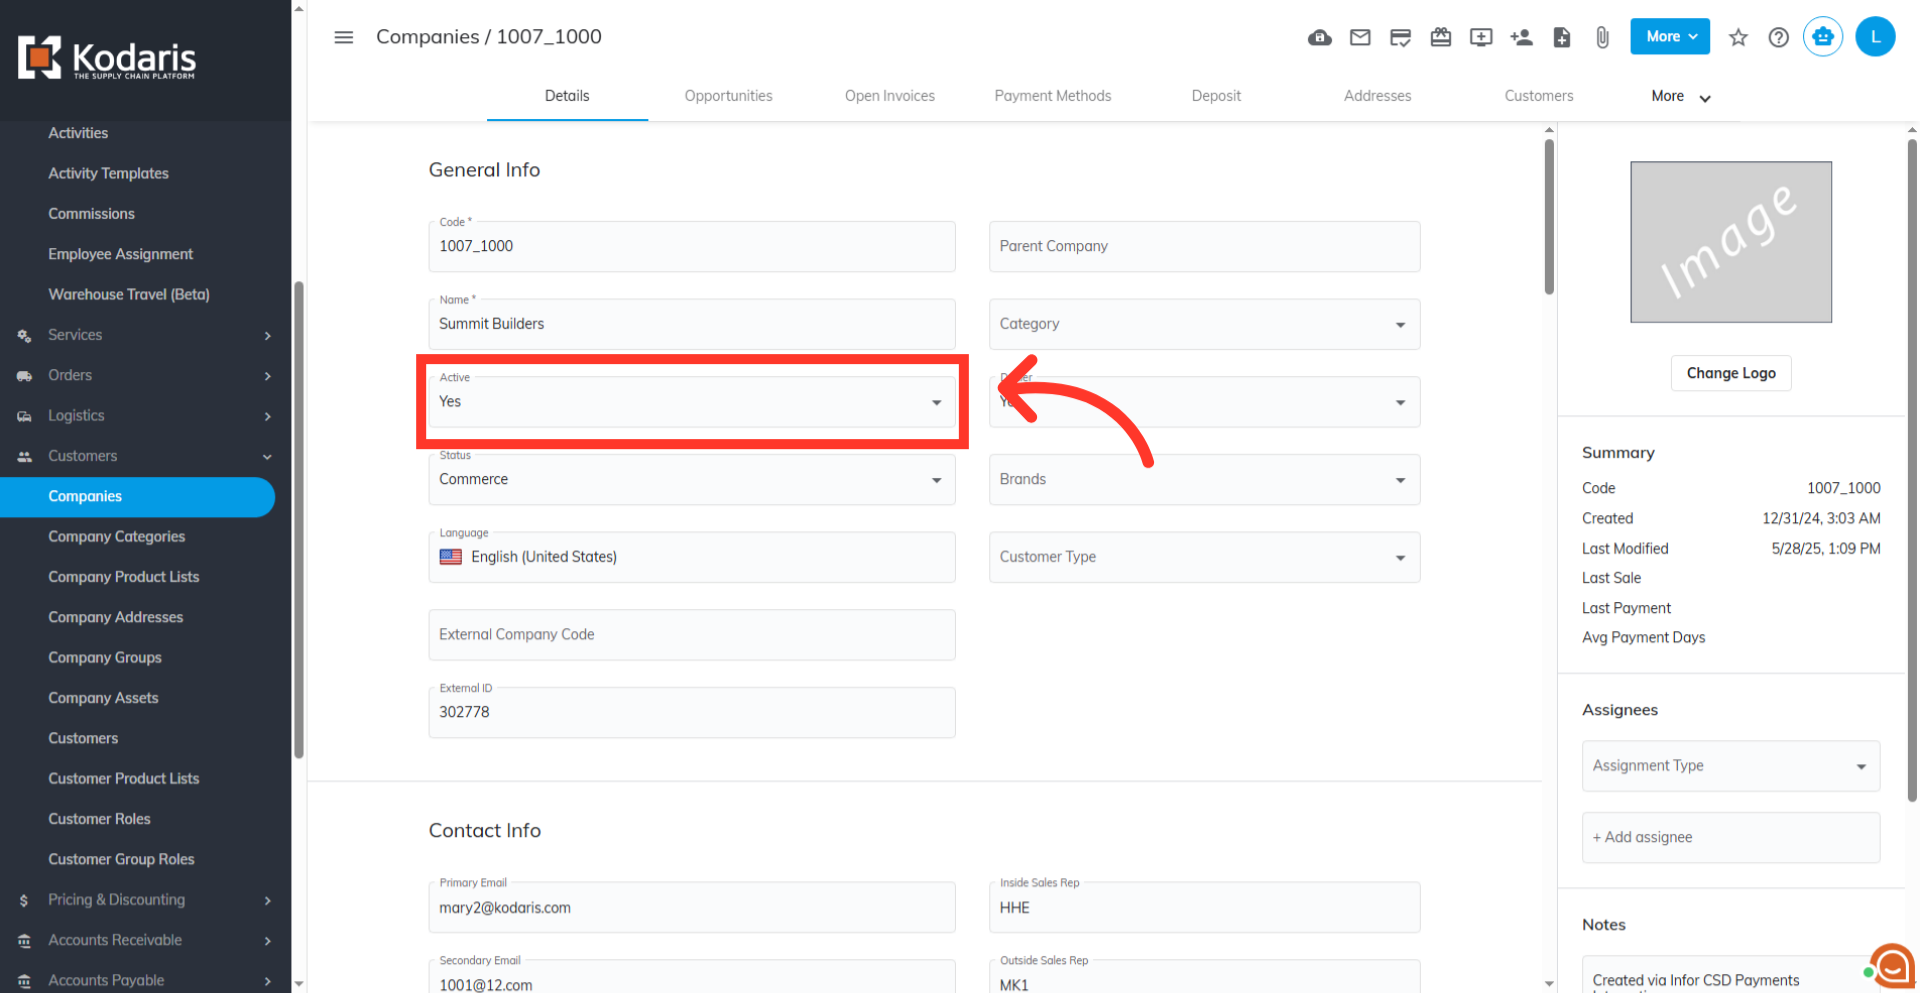
"Active" = "Yes"
In order for a company to be visible on the "Find A Dealer" page, it will need to be an "Active" company. If you are using an ERP to sync data to the operations portal, make sure that the company is tagged as "Active" in your ERP. If you are not using an ERP to sync data, make sure that "Active" is updated to "Yes" in the operations portal.
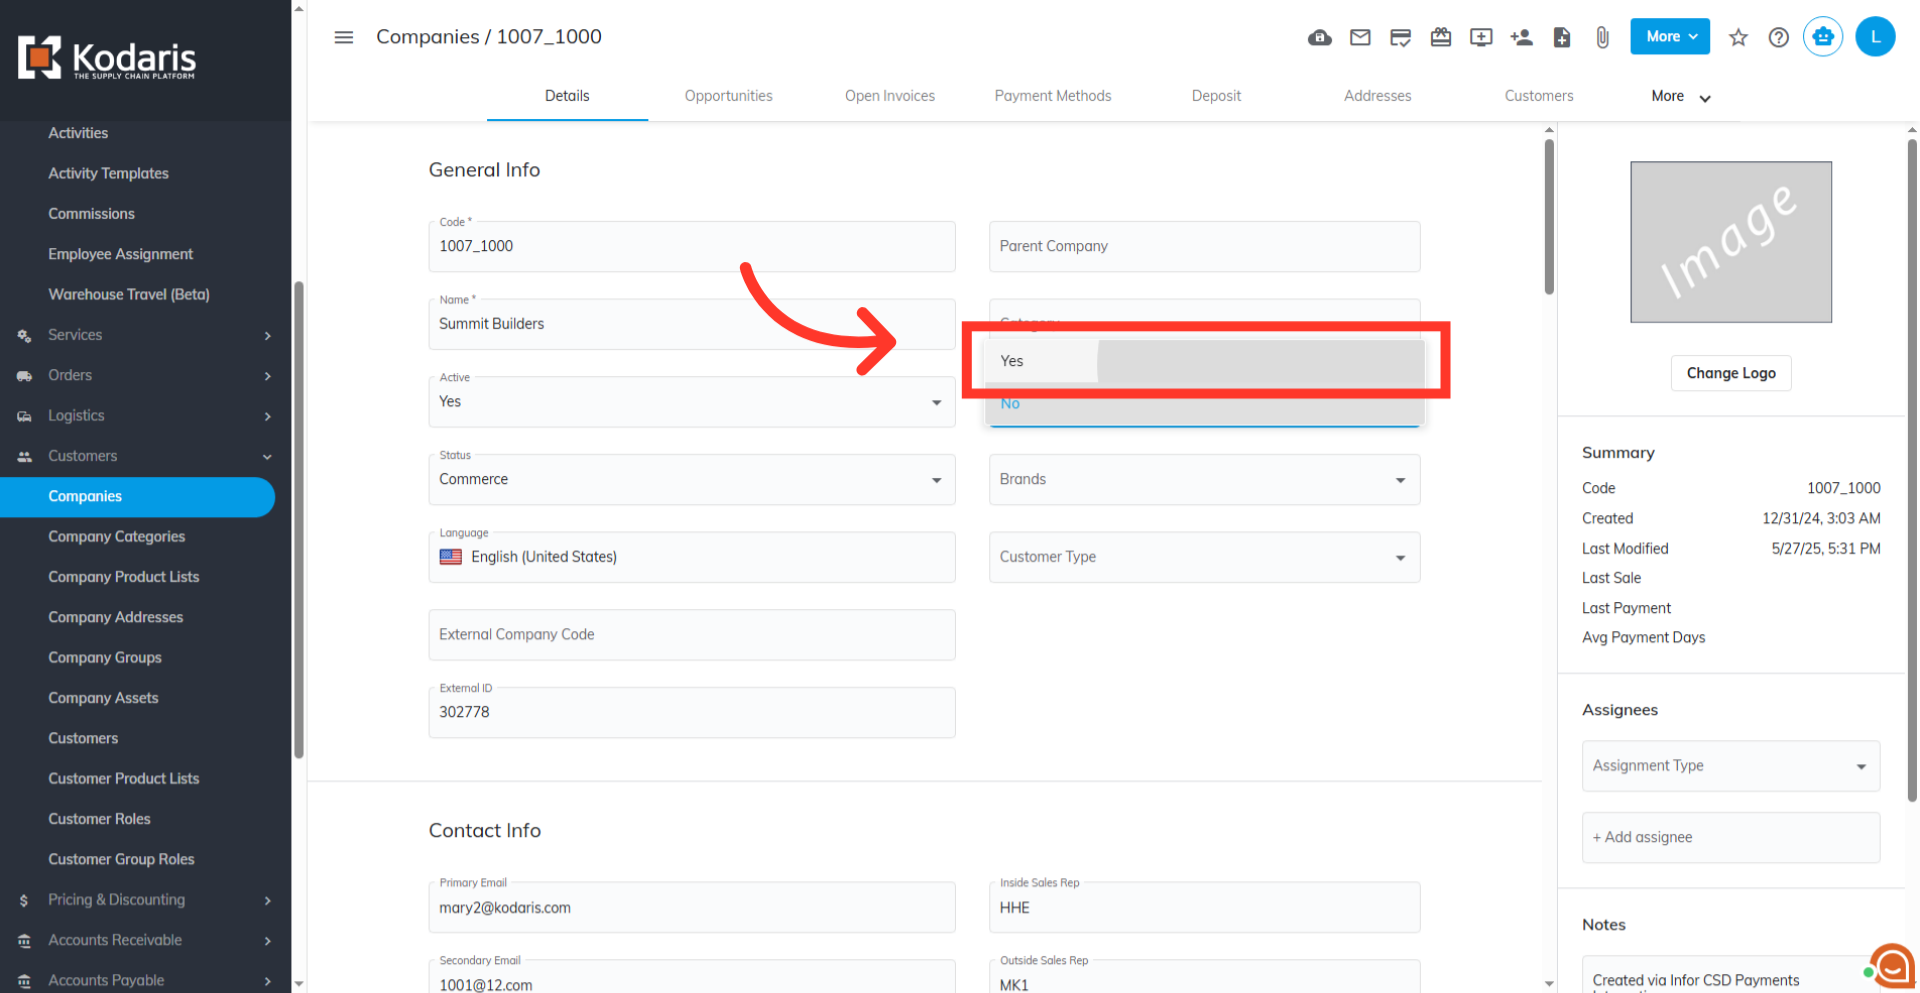
"Dealer" = "Yes"
Once the company is activated, you will need to flag the company as a dealer. Click the "Dealer" dropdown and select "Yes."
"Change Logo" button
Next, upload a logo for your "Dealer." This logo will be visible to customers and will display on the page next to the dealer name. Upload an image by clicking the "Change Logo" button.

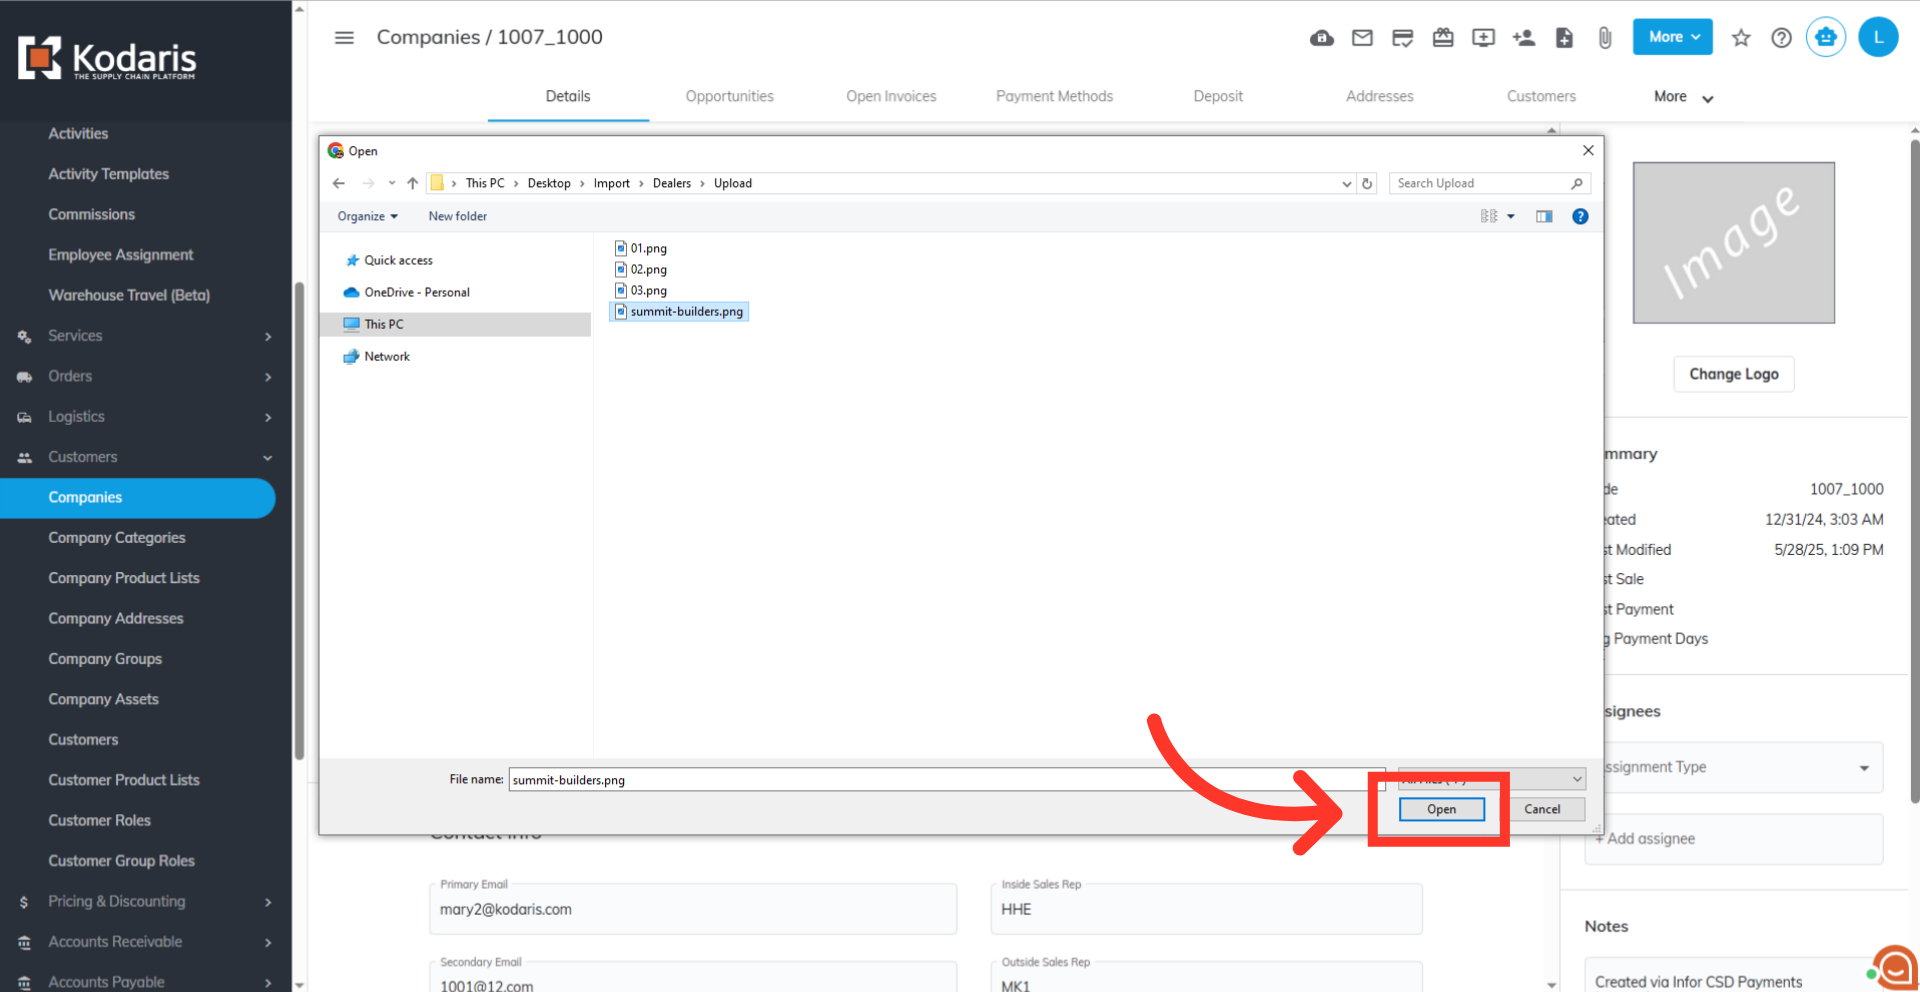
Select your logo
Find the file on your computer, then click the image and tap "Open." Wait for the upload to finish.
Confirm logo upload
You can verify that the dealer's logo has successfully been uploaded by viewing the update on the "Find a Dealer" page.
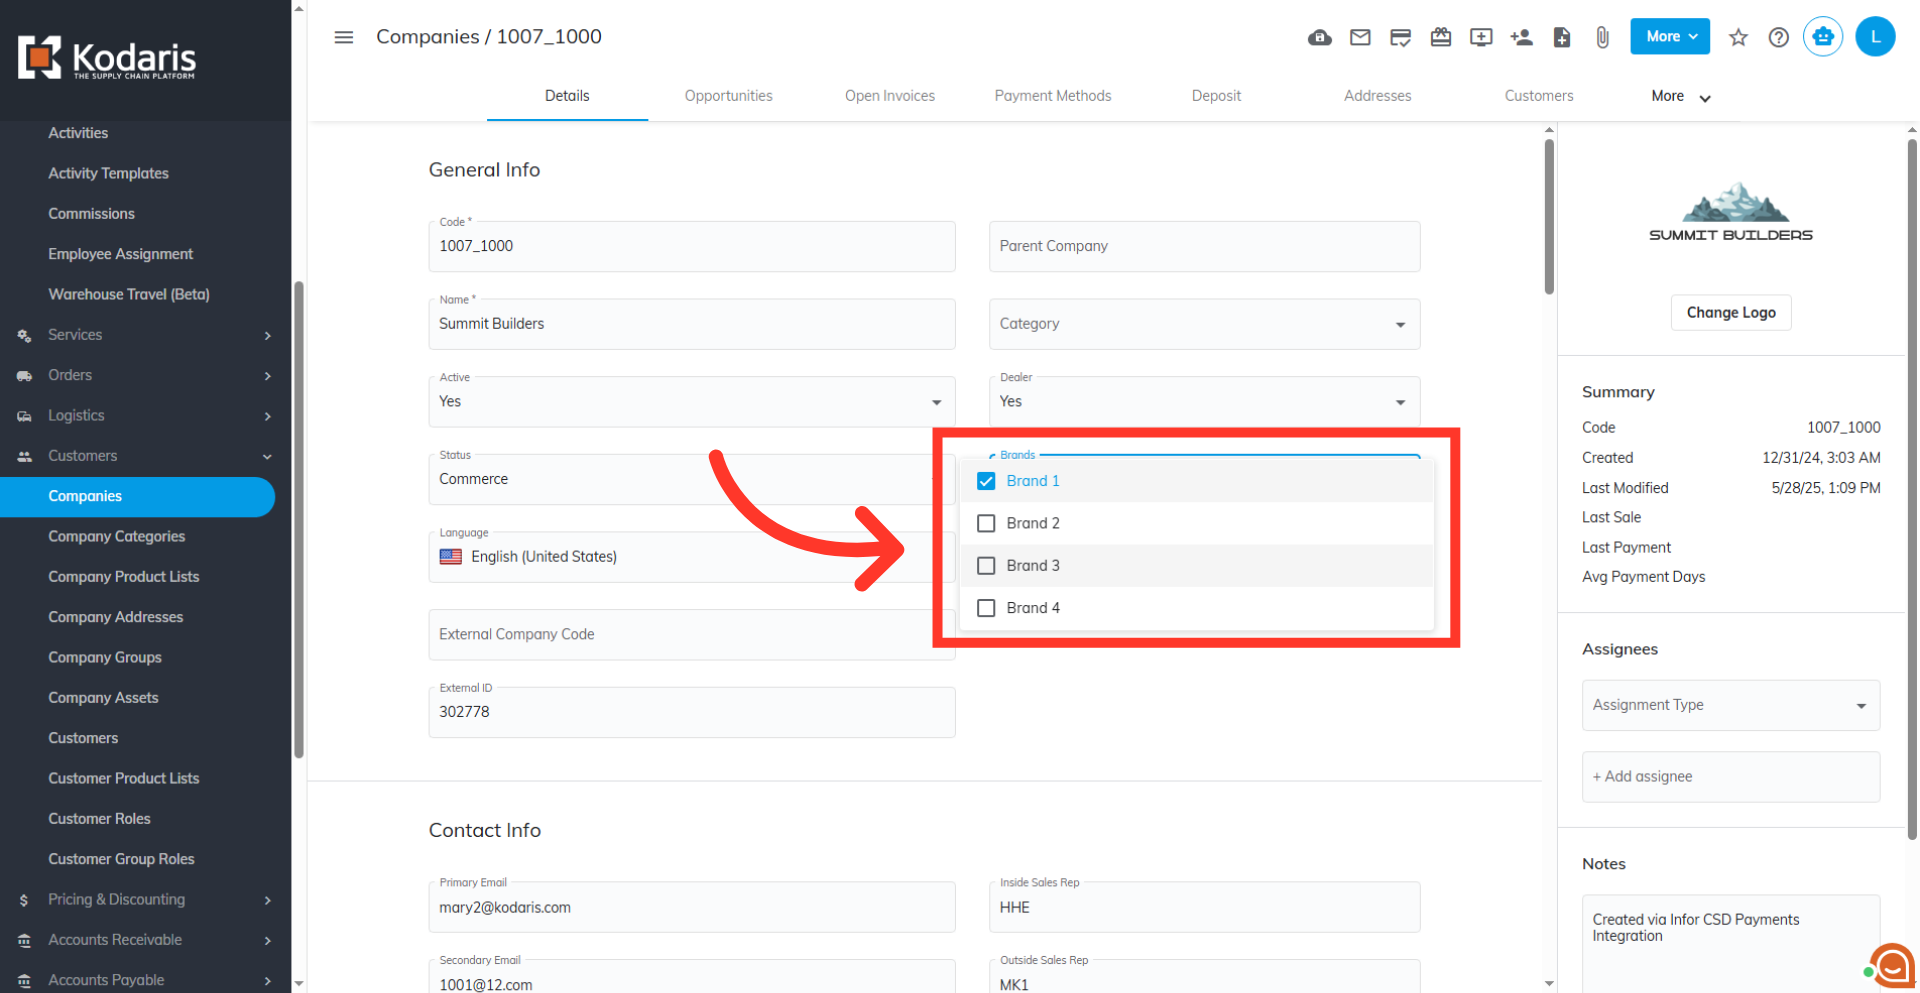
Select associated brands from the list
As mentioned, adding dealers before your brand settings will need to be configured. Once the brand settings are all set, the brands you added will appear in the "Brands" dropdown. Go back to your operations portal and click the field and select any or all of the brands available. The logos that are attached to those brands will now be displayed below the Dealer logo in the "Find a Dealer" layout.
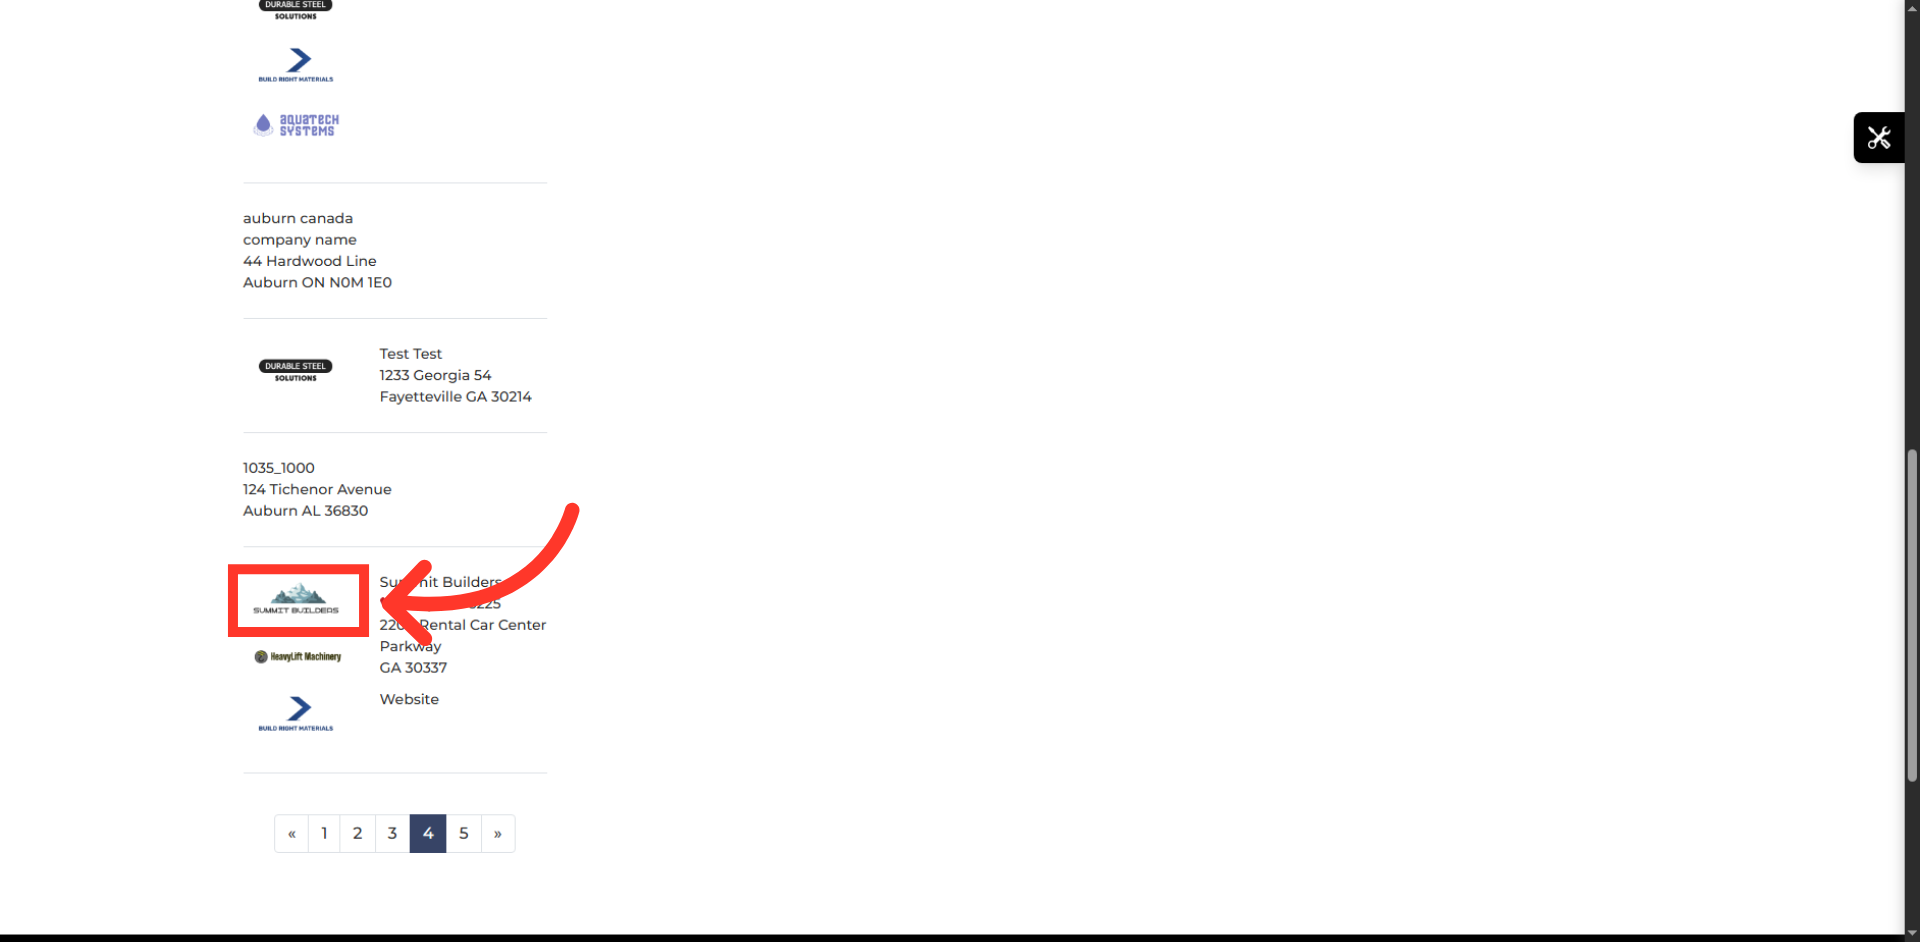
Verify added brand
On your dealers page, verify that the associated brands are correctly listed and displayed beneath the company logo for this dealer, and check that this is consistent across all other dealers in the list.

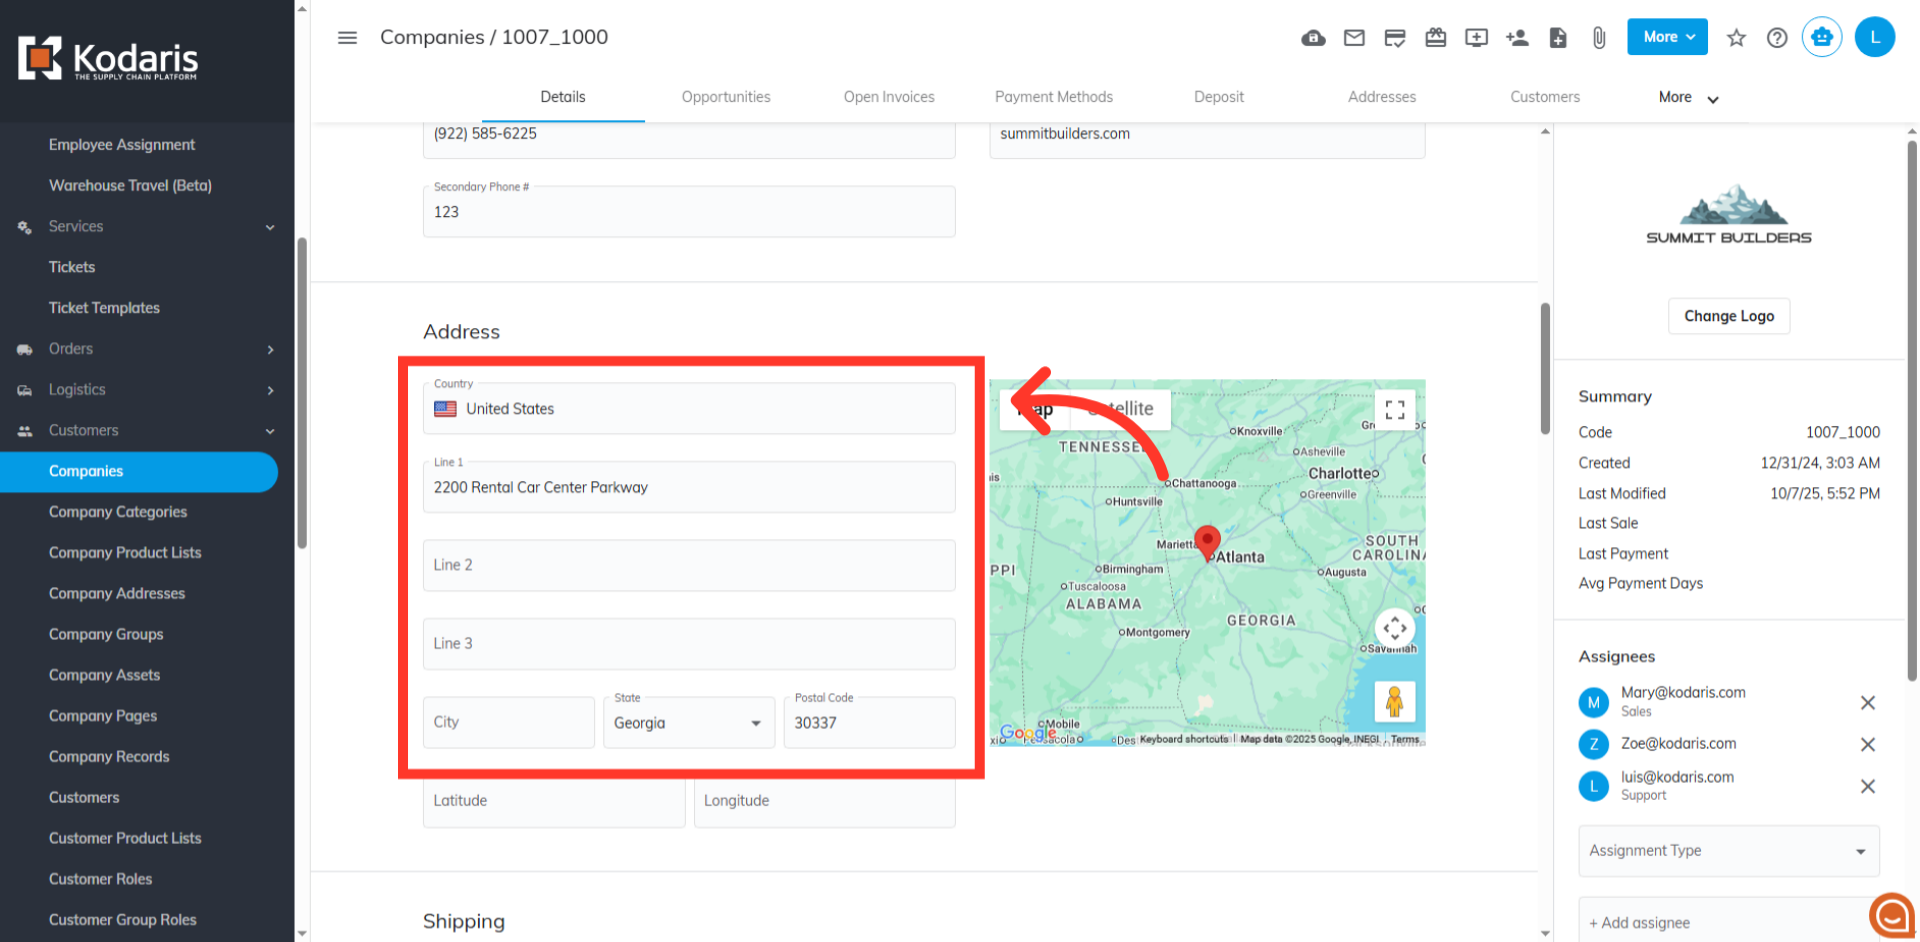
Enter full address
Go back to your operations portal and if needed, complete all required fields for the address to accurately identify the dealer’s physical location. If you are using an ERP to sync data to the operations portal, the information will already be populated. If this is the case, any changes will need to be made in your ERP.
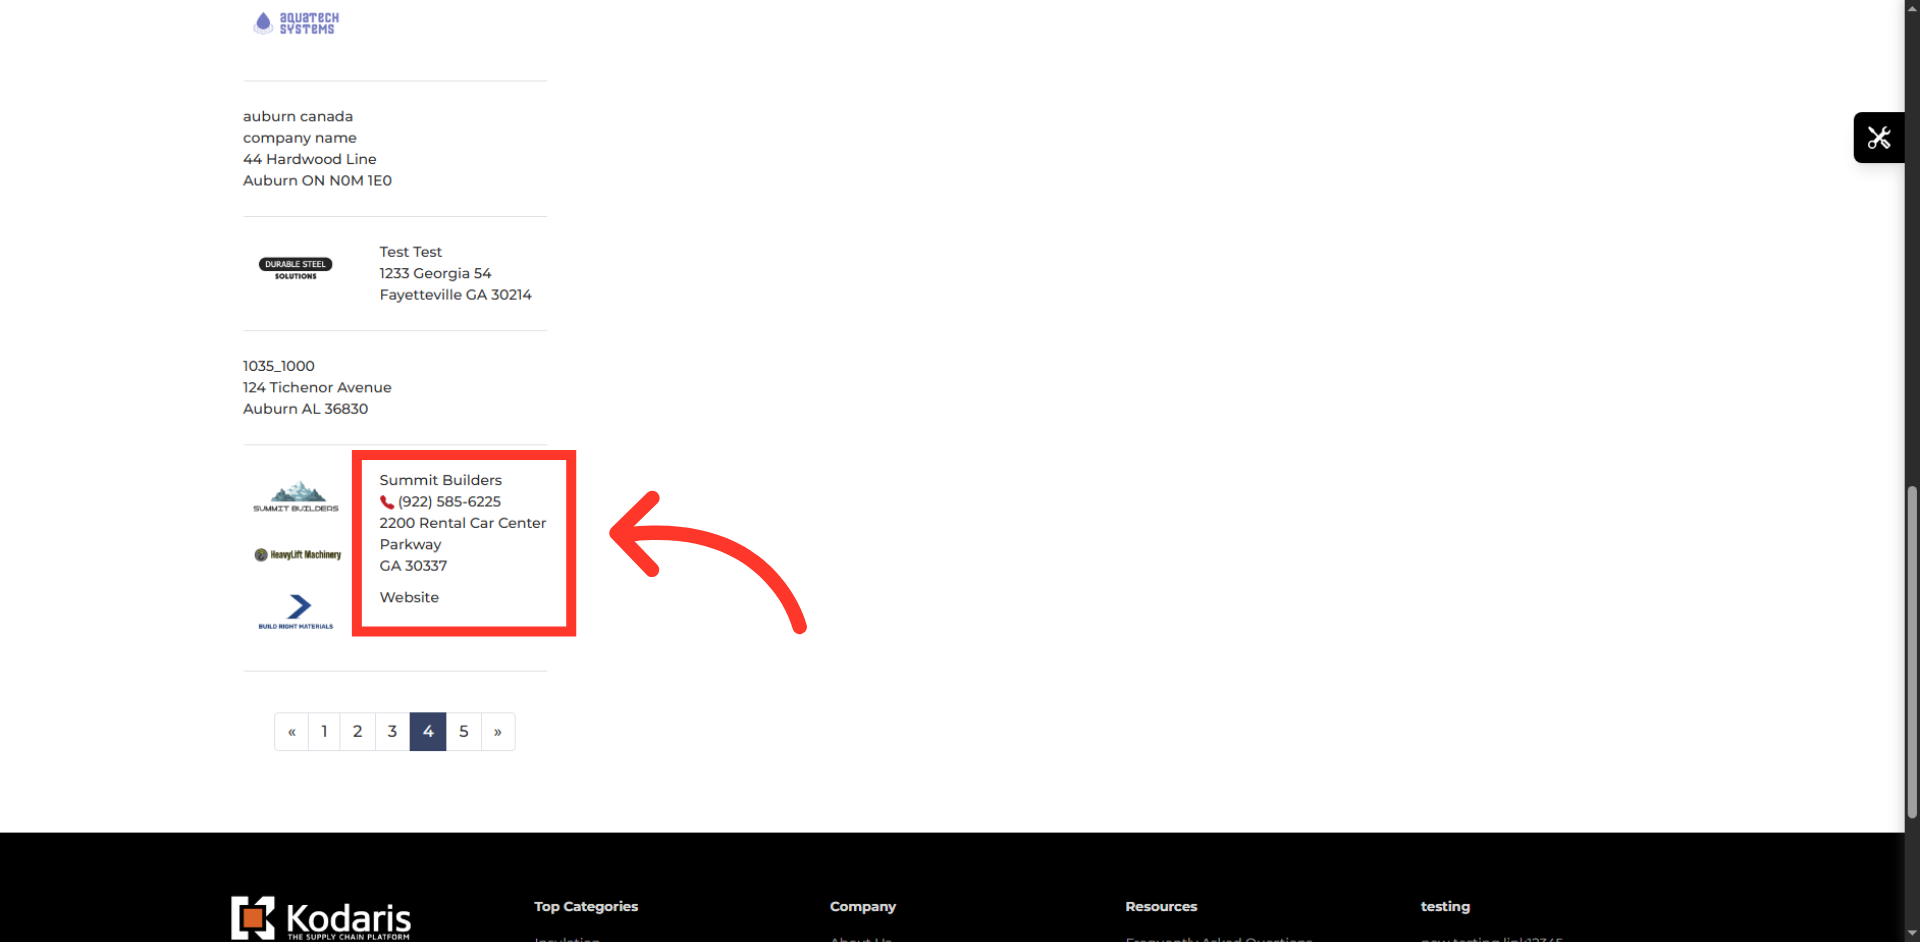
Confirm dealer’s address
Go back to your dealers page and verify that the updated information appears correctly as a detail element within the dealer's listing on the dealers page.
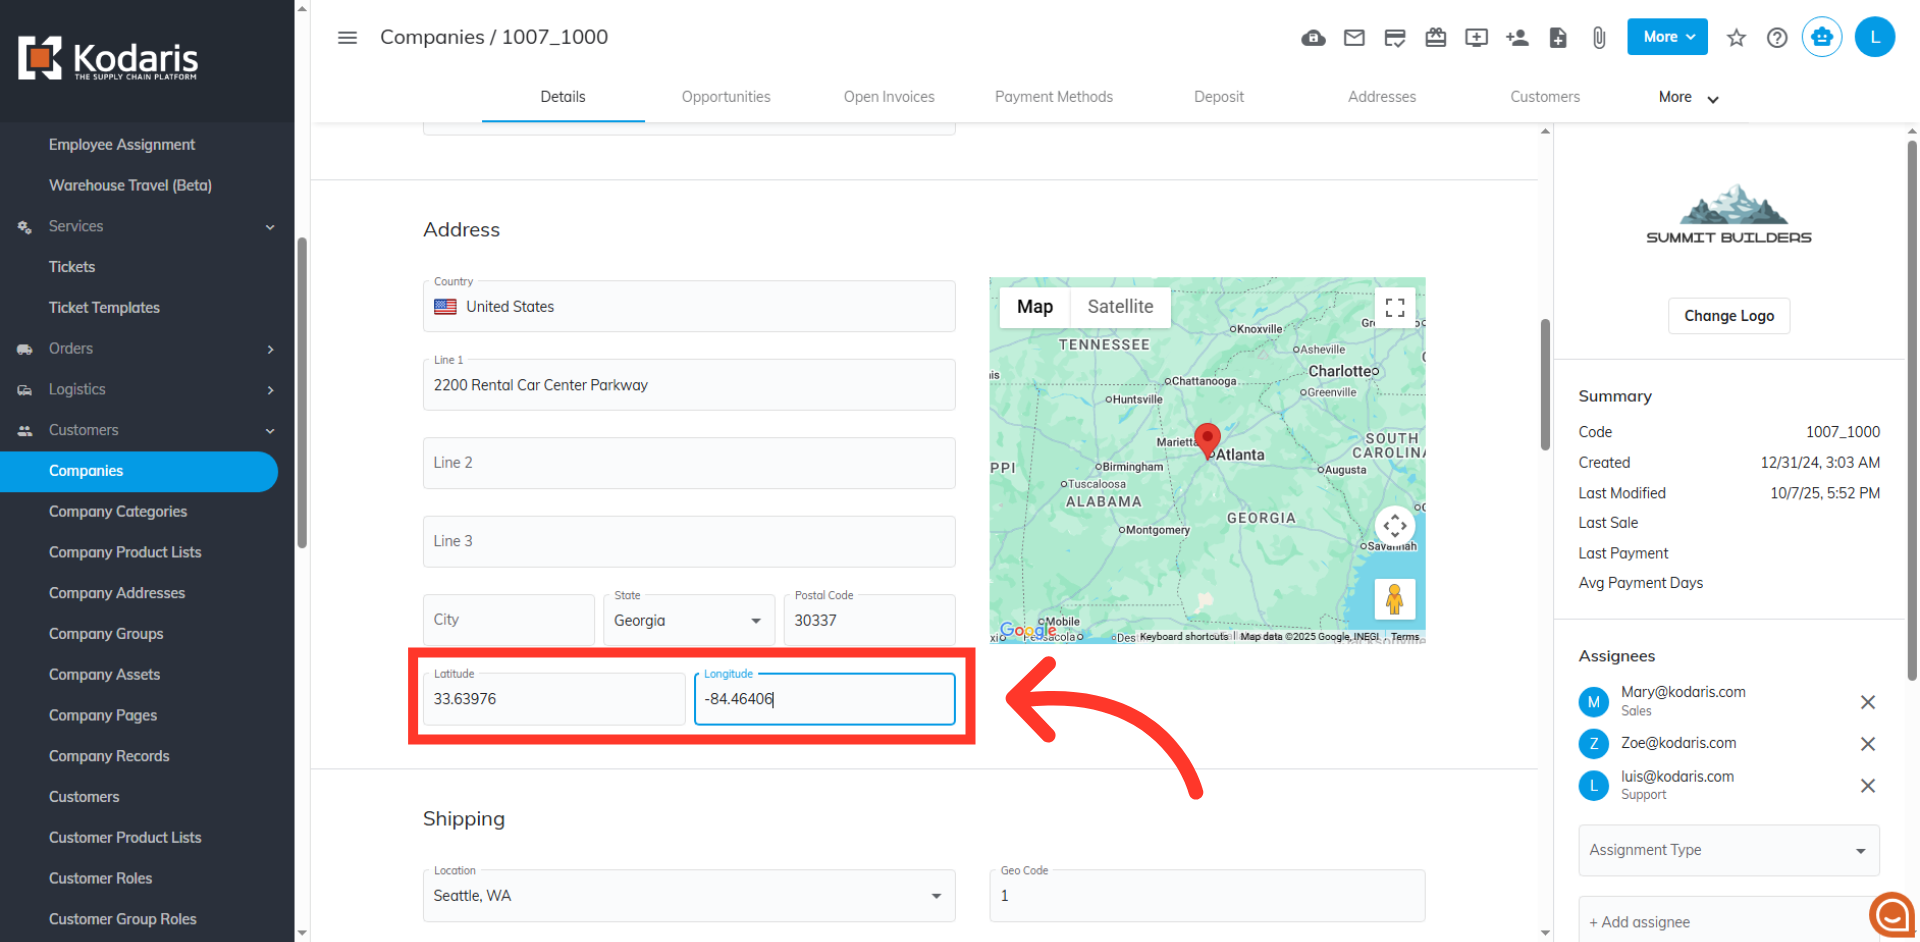
Input latitude and longitude
Manually enter or verify the Latitude and Longitude coordinates for this company's primary address. This step is crucial for the delivery radius feature in the map to work correctly.
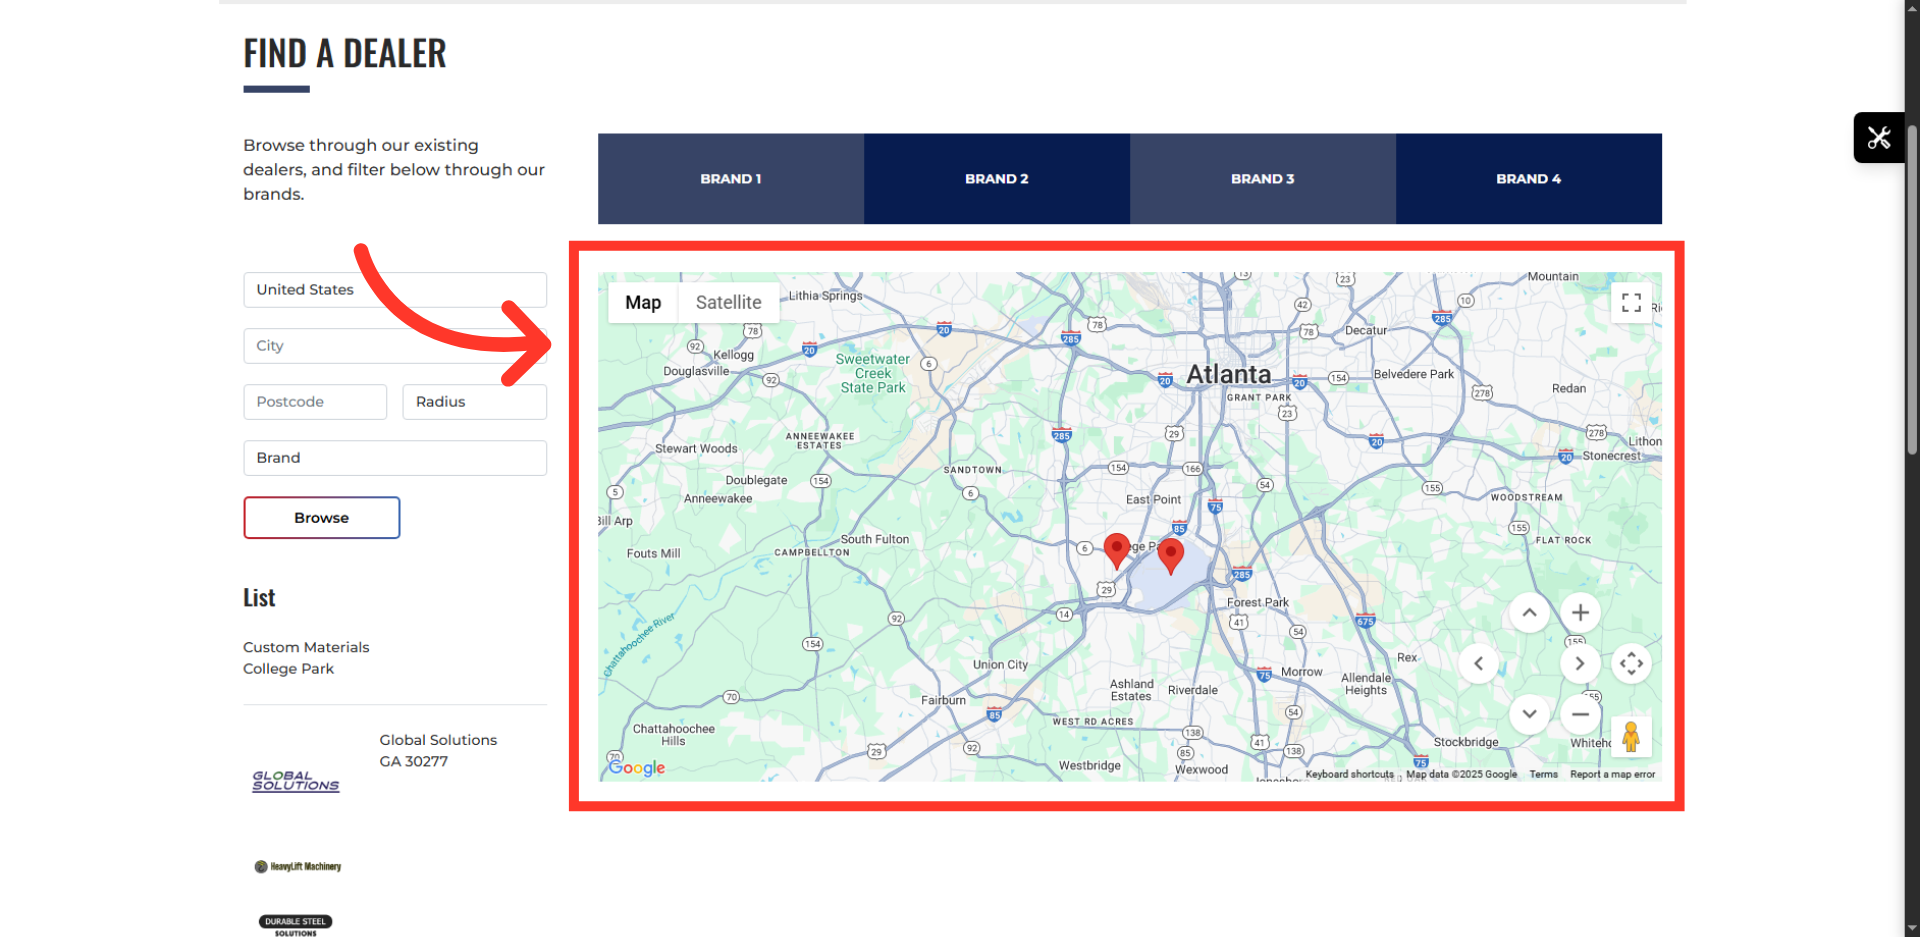
Verify map pin
Go back to your dealer page and verify that the map successfully displays the pin corresponding to the address for the company you just updated.
Review and confirm all dealer data
Review the data on the company to make sure all the information is correct. You can also add a website URL which will add a link to the dealer info. This will enable a user to visit the dealer’s own website. If you are syncing any of this data from an ERP and adjustments need to be made, these adjustments will need to be made in your ERP.