Commerce - Create Company Catalogs by Import
Navigate to "Customers"
To create company catalogs by using the import feature in the operations portal, navigate to the "Customers" section in the Operations Portal.

Click "Companies"
Then, go to the "Companies" screen to determine the code or codes of the company where the catalogs will be created. In order to access "Companies" screens the account will need to be set up either as an "administrator" or a "superuser", or have the appropriate roles: "companyView," "crmCompanyView," "companyEdit," "crmCompanyEdit," and "dispatch." along with "importEdit" and "importView". These last two roles are needed for importing.

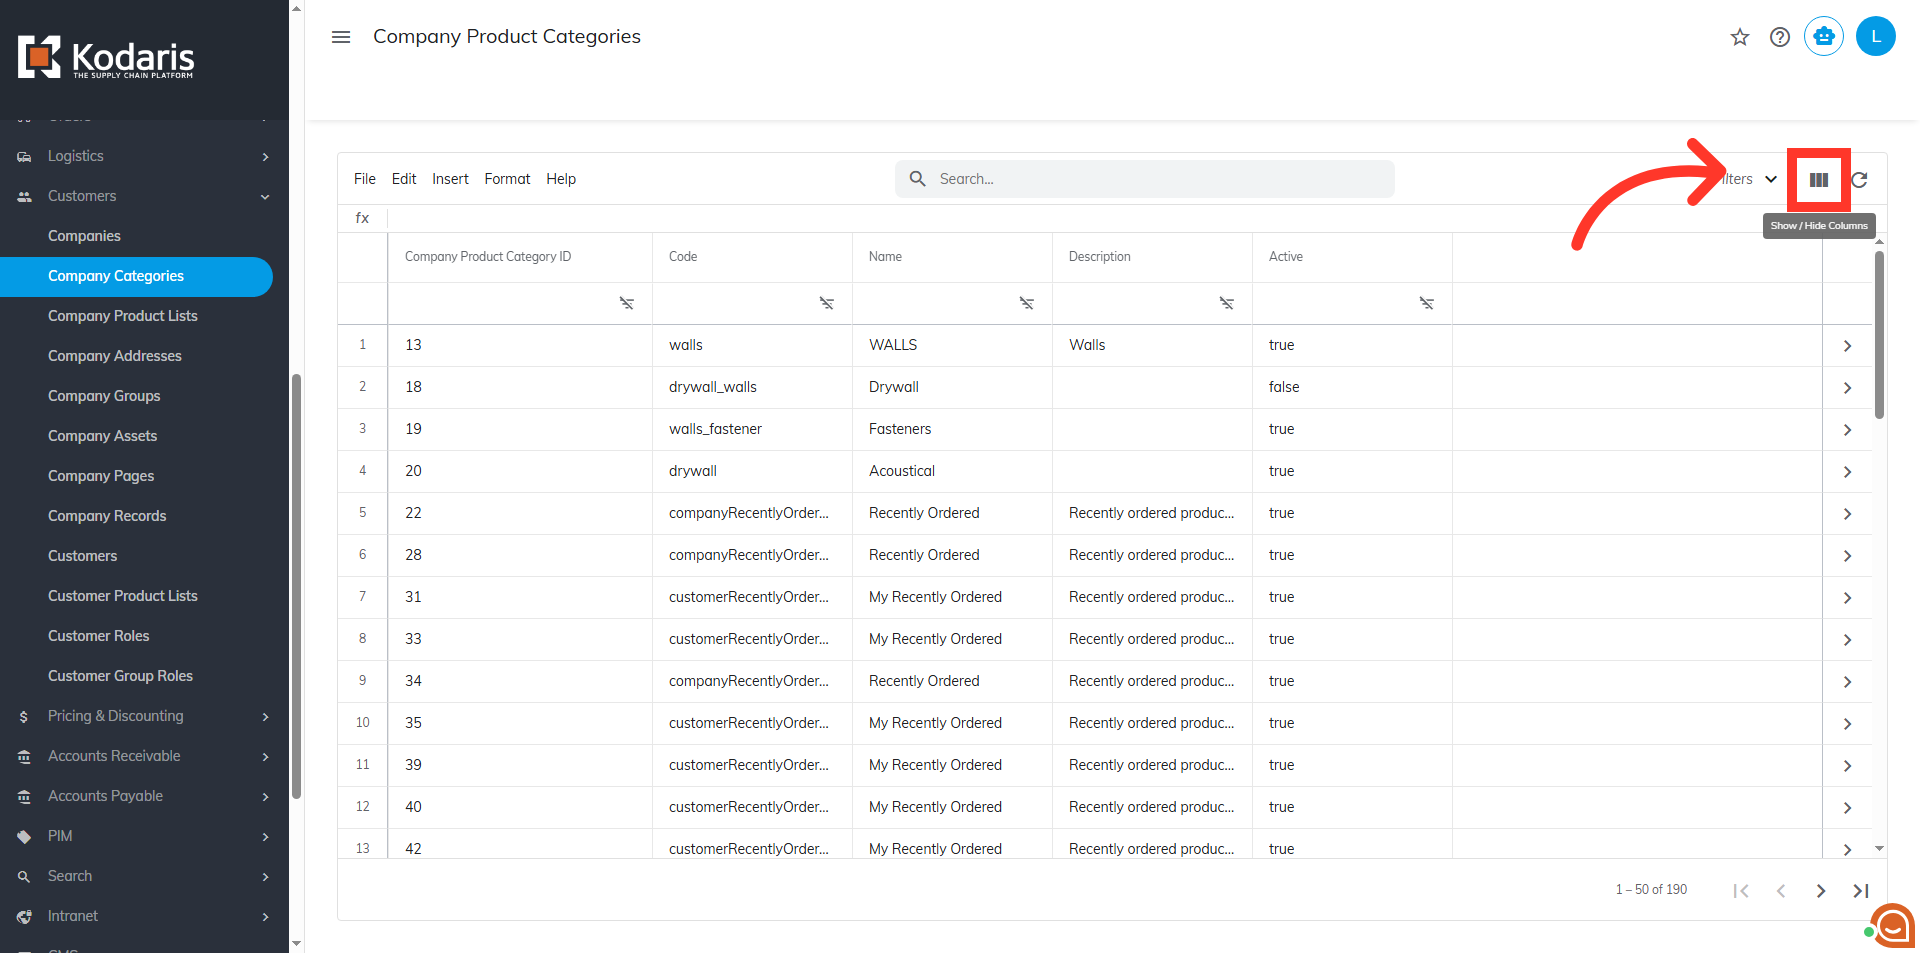
Click "Show/Hide Columns" icon
Click "Show/Hide Columns" icon.

Select the "Code" column
Be sure the code column is viewable in the grid.

Enter a keyword to search
Use the search bar or column filters to refine the list and locate the desired company. Enter the company name or a relevant keyword into the search bar to identify the company efficiently.

Copy the company code
Once you find the company, copy the value found in the "Code" column for use in the subsequent import file.

Go to "Company Categories"
Next, go to the "Company Categories" screen. In order to access "Company Categories" screen the user will need to be set up either as an "administrator" or a "superuser", or have the appropriate roles: "companyCategoryView," and "companyCategoryEdit."

Click "Show/Hide Columns" icon
Click "Show/Hide Columns" icon.
Select the needed columns
To prepare the .CSV file for export, ensure the "Code" and "Name" columns are displayed on the screen. These two columns are required for creating a new catalog.

Click the "File" menu
When ready to export, click the "File" menu.

Select the "Export" option
From the menu, click "Export."

Rename file, if needed
Rename file, if needed.
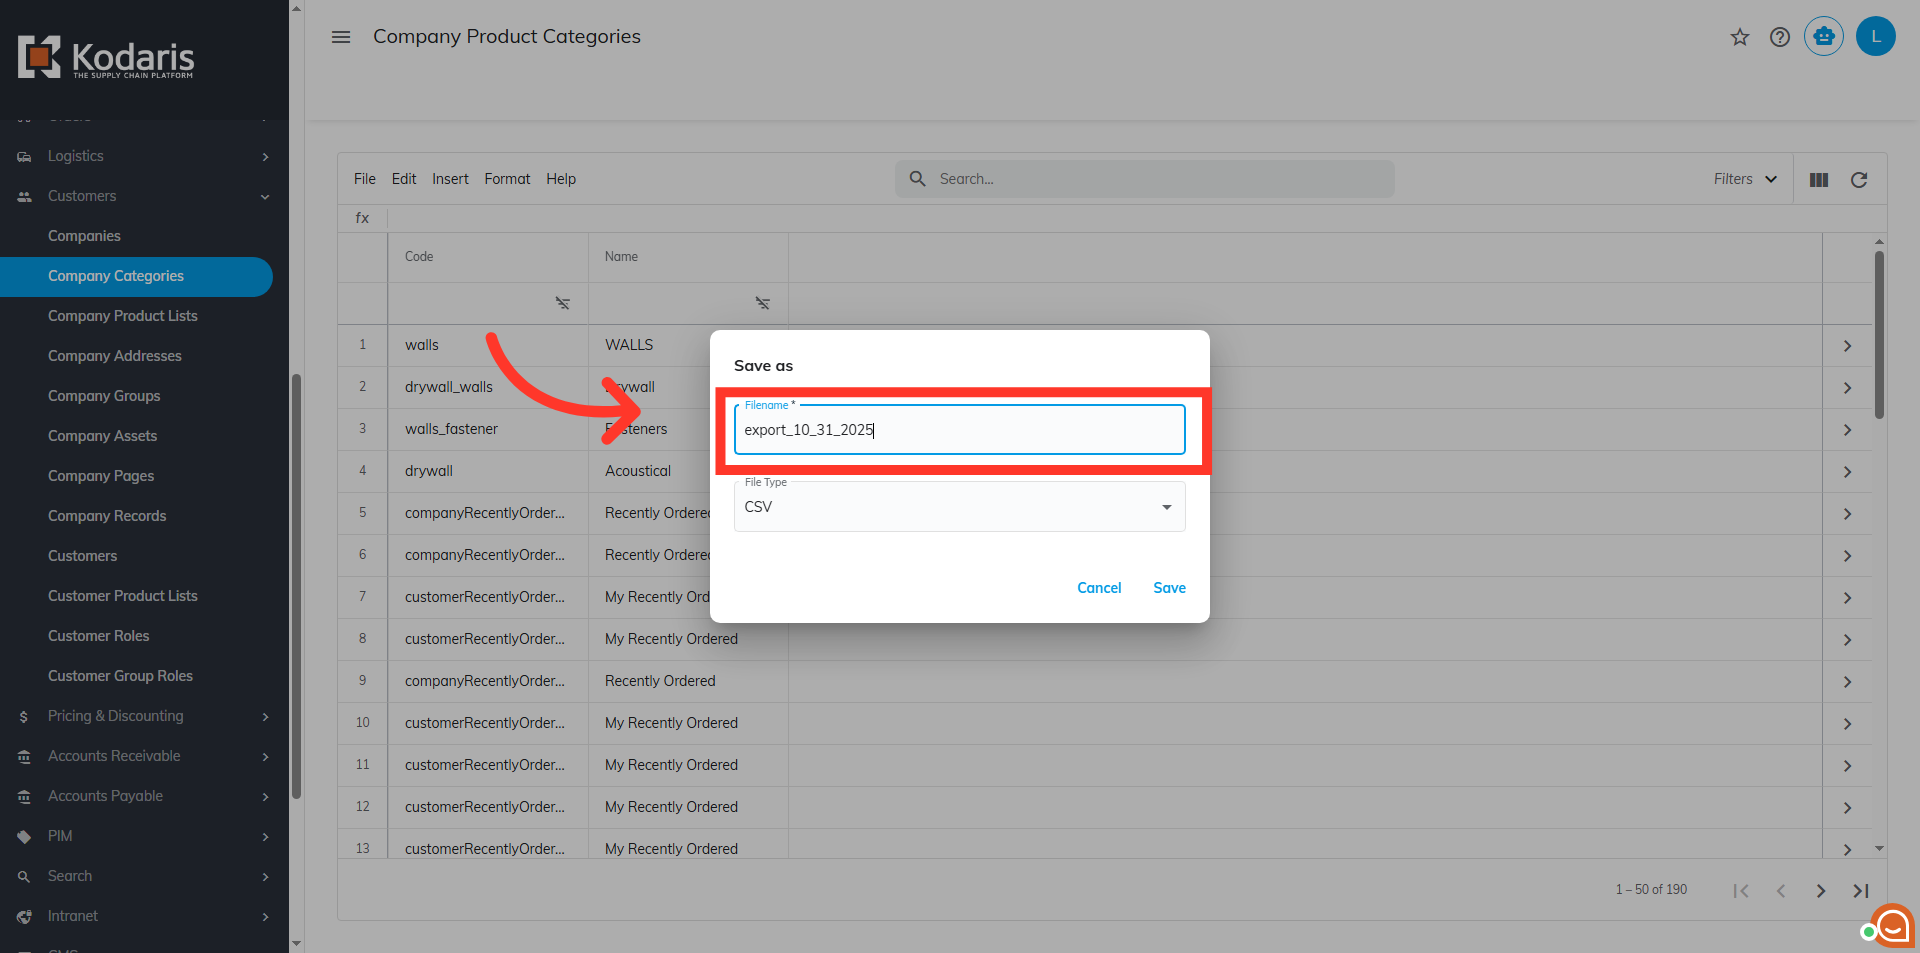
Click "Save"
Then, click on the "Save" button. This action will generate a file in CSV format.

Prepare spreadsheet
The exported file displays the necessary header rows and data. Update the spreadsheet with the needed data.

"code" = catalog code
The code assigned to the catalog must be a unique and is a required value.

"name" = catalog name
This is the name of the catalog. While not required, it helps differentiate catalogs and does not need to be unique.

"companyCode" = company code
Add a new column using "companyCode" as the header. This code is required and must exactly match the value noted from the "Companies" screen. Enter the company code for each corresponding catalog entry. This would be the value copied previously from the company.

Save the CSV file
After implementing all necessary changes, save the spreadsheet as a ".CSV" file for the import. Ensure the spreadsheet contains only the data intended for creation to prevent accidental updates or errors.

Navigate to "Company Categories" screen
Navigate back to the "Company Categories" screen to the import the file.

Click "File"
Click the "File" menu

Click "Import"
Click "Import".

Choose "Company Catalog Create Only"
Then, choose "Company Catalog Create Only" since we are only creating new company catalogs with this import.

Select the file
The system will prompt for the upload of a CSV file. It is essential to select the correct file, as all imports are irreversible.
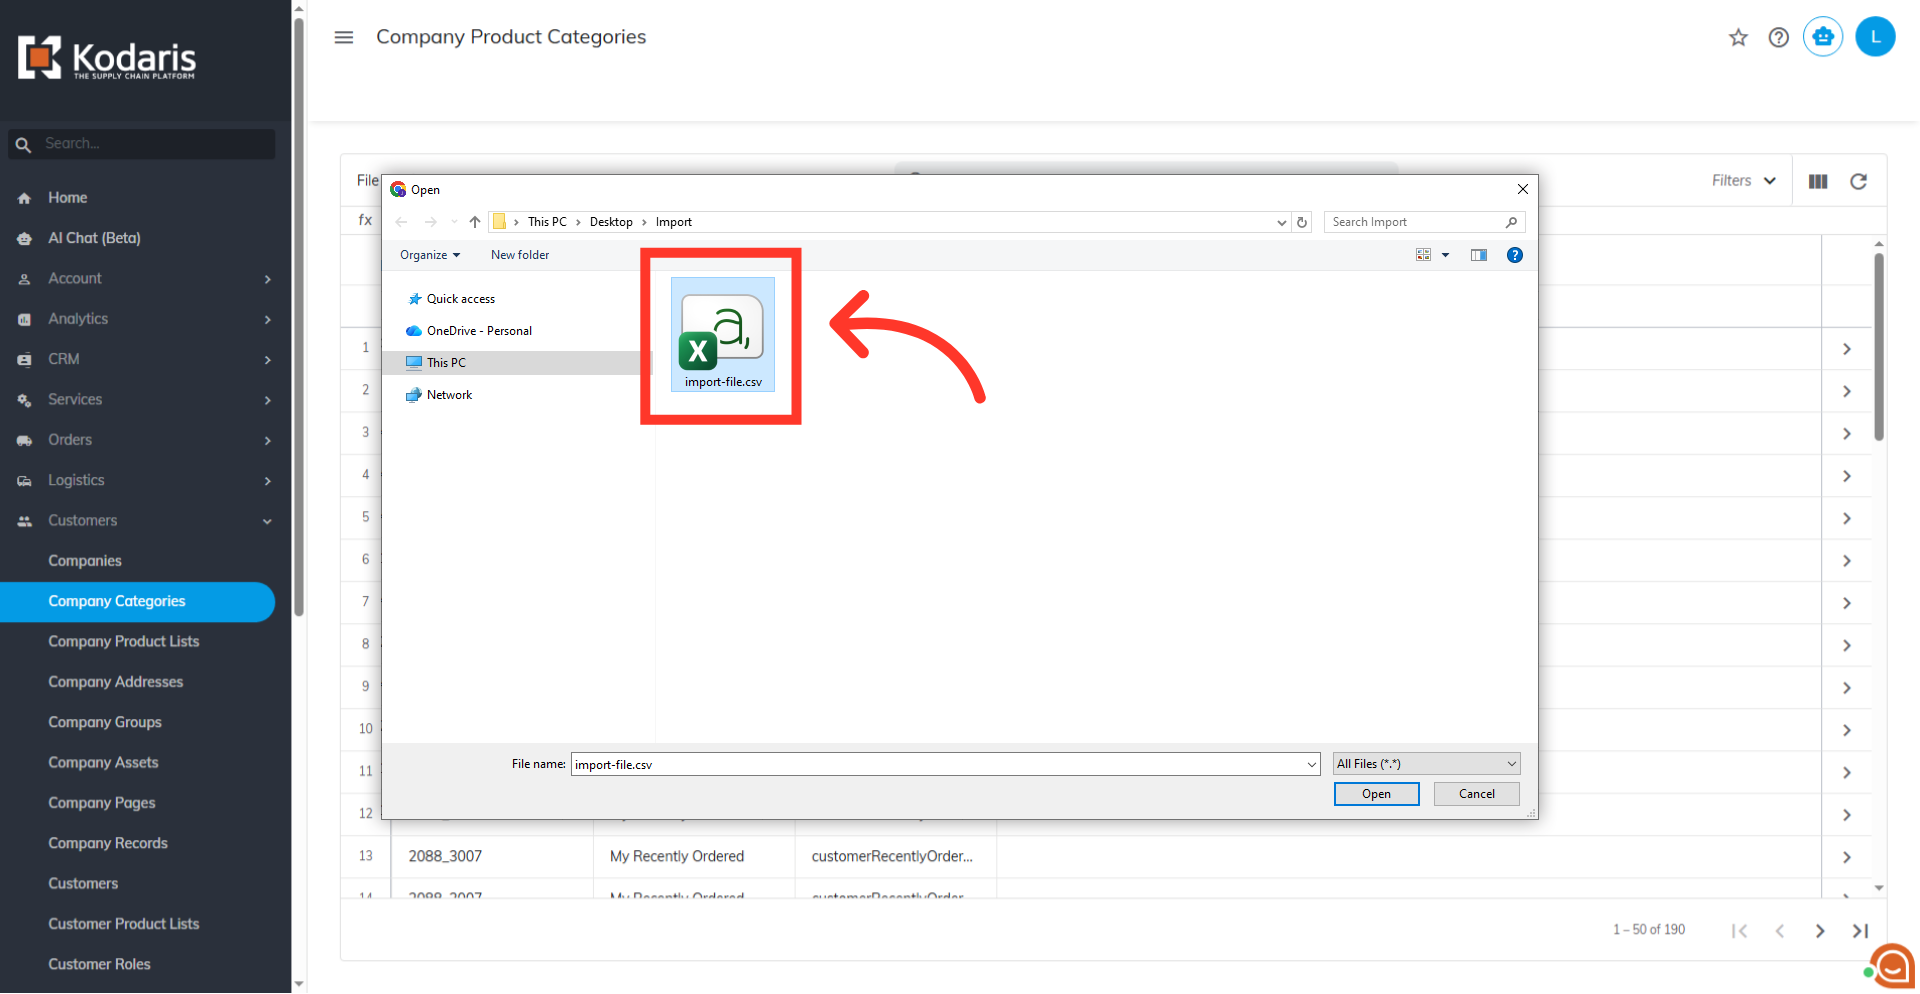
Click the "Open" button
Click the "Open" button. The process will run in the background, allow a few minutes for data import, noting that larger files may require more time.

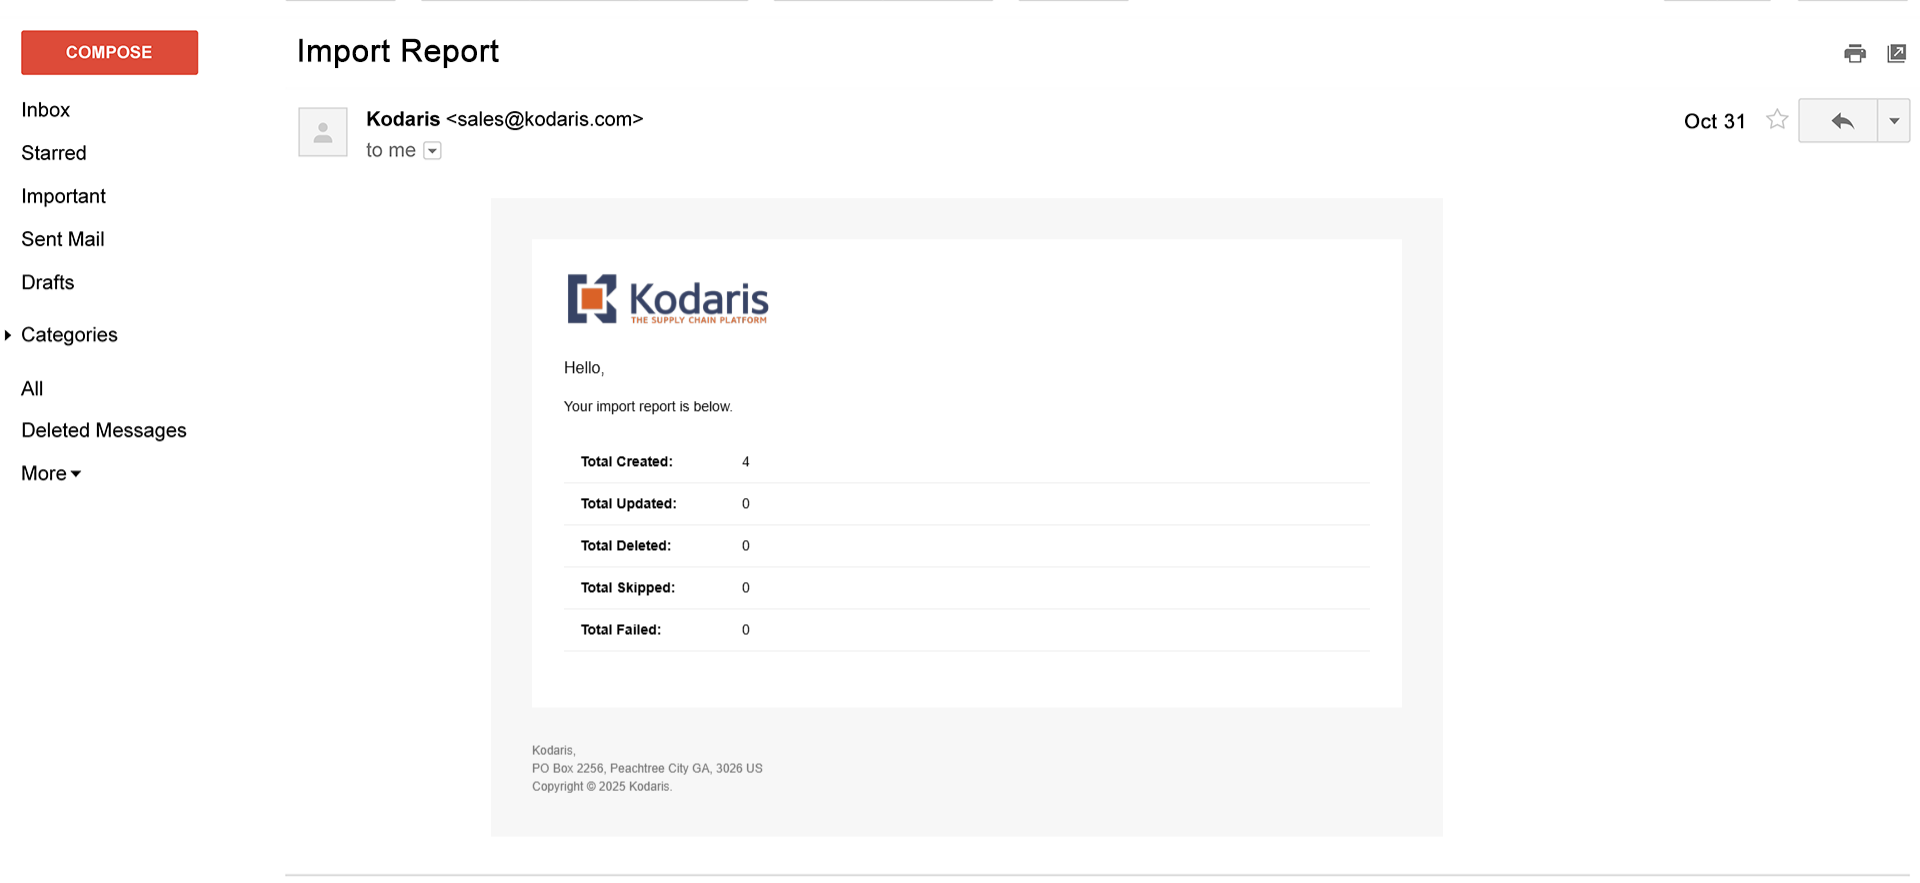
Email Report
An email confirmation will be received indicating that the catalogs have been successfully created in the system.
Navigate to "Companies"
To verify the new catalogs have been created, return to the "Companies" screen and search using the company code associated with the newly created catalogs.

Search for the company
Use the search bar or column filters to refine the list and locate the desired company. Enter the company name or a relevant keyword into the search bar to identify the company efficiently.

Click the more details icon
Click the more details icon of the company where the catalog was created.

Click "More"
Click "More".

Go to "Catalog" tab
Go to "Catalog" tab.

View new catalogs
On the "Catalog" tab, the newly created catalogs will appear in the left pane of the screen.
