Operations Customers - Filter Open Invoices by Date Range
Navigate to "Customers"
To filter open invoices by date range, navigate to the "Customers" section of the operations portal.

Click on the "Companies" screen
Then, click on the "Companies" screen. In order to access the "Companies" screen the account needs to be set up either as an "administrator" or a "superuser", or have the appropriate roles: "companyView," "crmCompanyView," "companyEdit," "crmCompanyEdit," and "dispatch."

Type in a keyword
On this screen, use the search bar to find a company.

Click on the more details icon
Click on the more details icon of the company.

Go to the "Open Invoices" tab
Go to the "Open Invoice" tab to view the grid that displays all the company's open invoices.

View the open invoices
A list displaying all open invoices for the selected company will be shown.

Click "Show/Hide Columns" icon
Click "Show/Hide Columns" icon.

Enable the "Invoice Date" column
Select the "Invoice Date" column to make sure it is displayed on the grid.

Find the "Invoice Date" column
Find the "Invoice Date" column on the grid where the open invoices are displayed.

Click the column filter icon
Click the column filter icon located just under the "Invoice Date" column title to open the filter options window.

Click on the date filter operator dropdown
Click the date filter dropdown to select the specific filtering method required, such as filtering for a single date or defining a range.

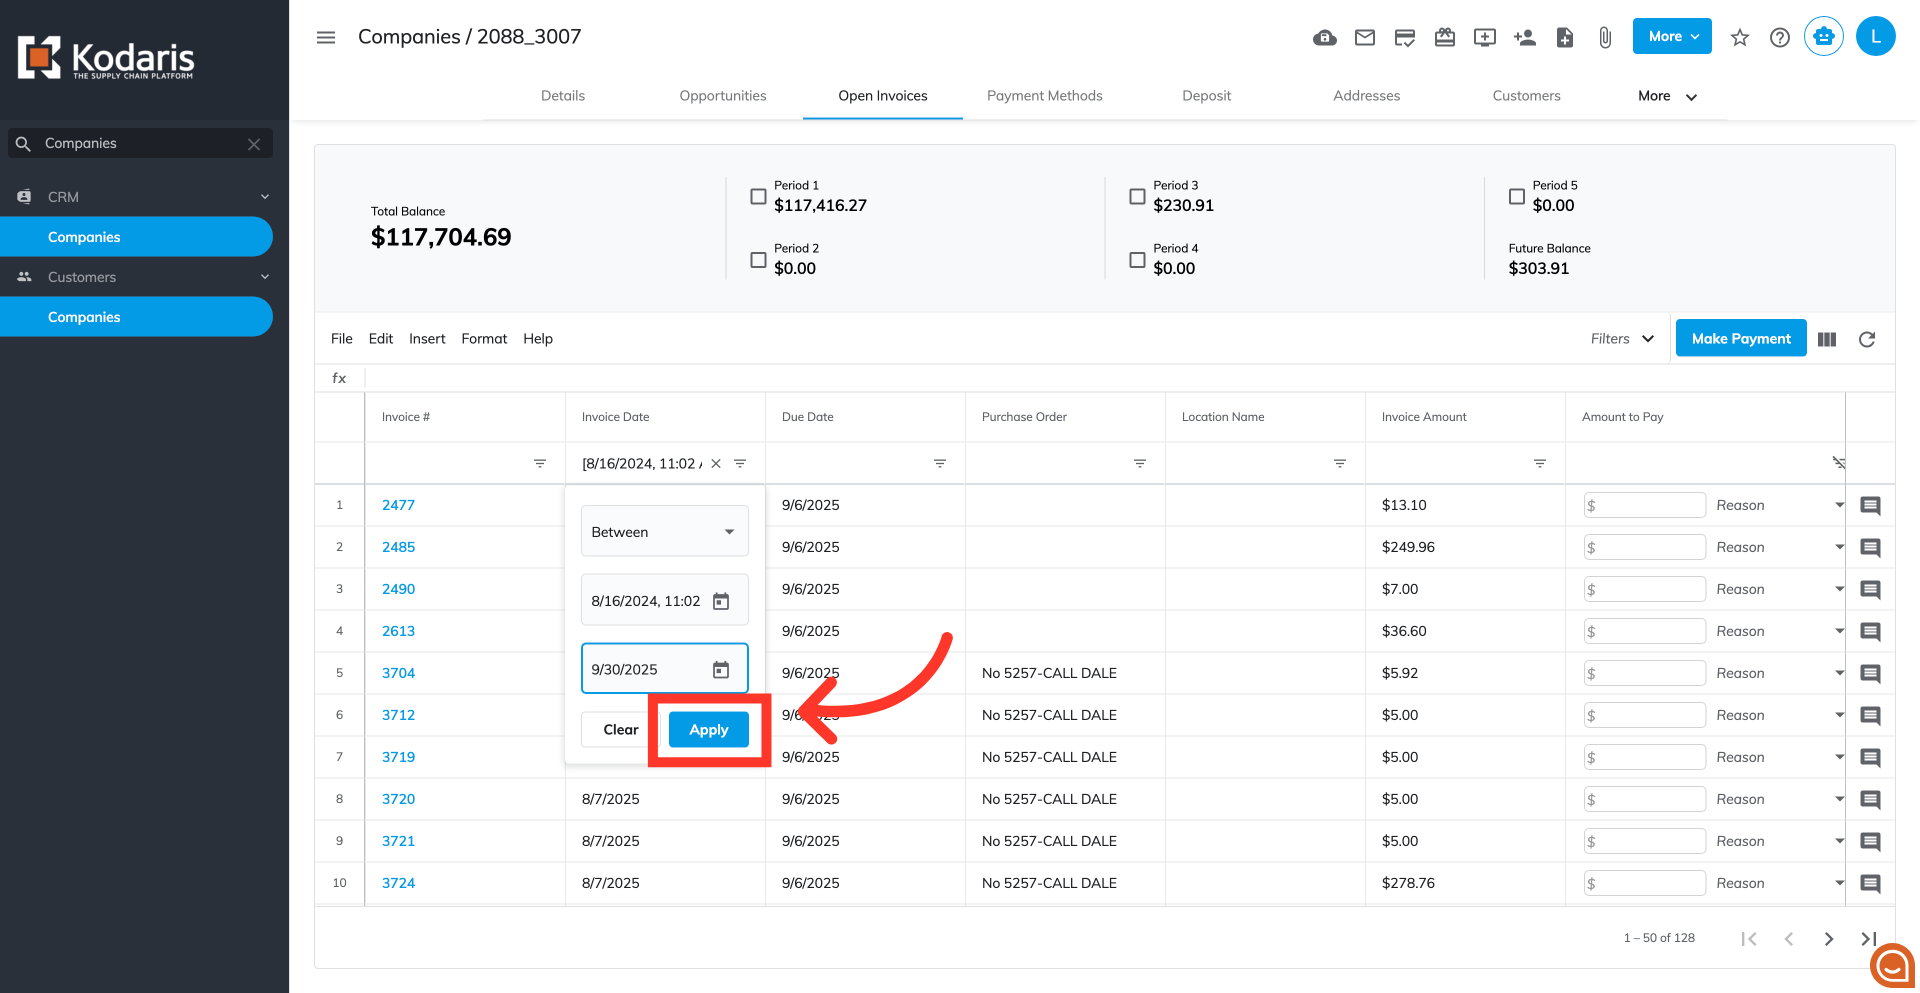
Select "Between"
Select the "Between" option from the dropdown to access two fields to set the start and end dates.

Click on the date picker icon
Click the date picker icon to open the calendar and select the desired start date for the filter range.

Click on the "Month and Year" icon
Click on the displayed month and year in the calendar view to quickly select a different month or year.
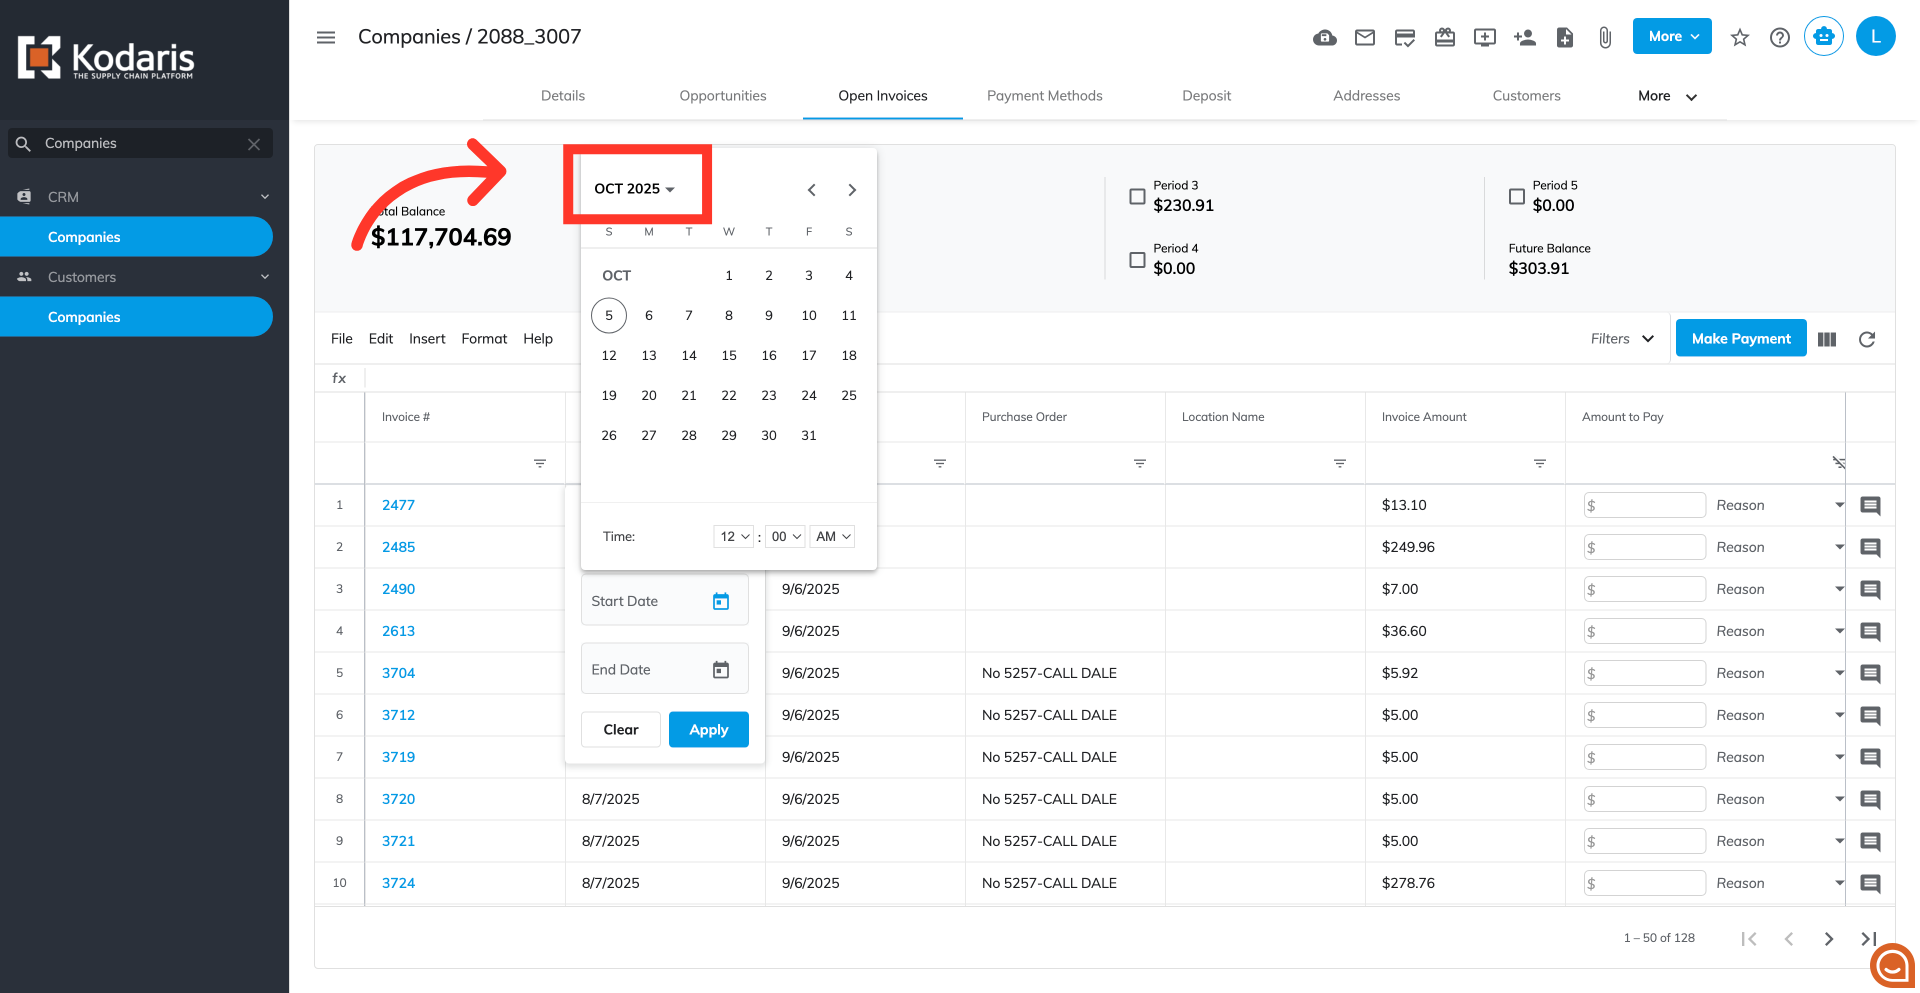
Select a year
Click on the year within the calendar view to select and display a specific year for preview.

Select a month
Select the month to display its calendar dates.

Click on the right arrow
Click the right arrow icon to advance the calendar view by a month, a year, or a range of years, depending on the current calendar setting.

Select a day
Once the month and year are set, click on a day to set.

Click on the "Time" dropdowns
Set from the "Time" drop downs on the calendar to further narrow your search.

Click on the "End Date" field
Click the "End Date" field to manually enter the date using the Month/Day/Year format, followed by the time using HH:MM and the meridiem (AM or PM).

Type the end date and time
Manually type the end date and the corresponding time directly into the "End Date" filter field.

Remove the time
The time component can be removed from the date field to ensure the search retrieves all records that match the specified calendar date.

Click on the "Apply" button
Click the "Apply" button to update the grid.
Filtered result
Verify that the grid shows only the open invoices with an invoice date that falls between the selected date range.

Clear the filter criteria
You can clear the filter by clicking on the "Clear" button.
