Operations PIM - Add, Remove, and Update Product Resource Files
Resource files
Resource files on product pages on your commerce website can be updated once they have been added.

Select "Products"
To update resource files on a product, navigate to the Operations Portal and select "Products" from the menu. In order to access and update “Products”, you will need to be set up either as an “administrator” or a “superuser”, or have the roles of: “productView” and “productEdit”.

Click "More Details"
Locate the product you wish to edit and select the "More Details" icon.

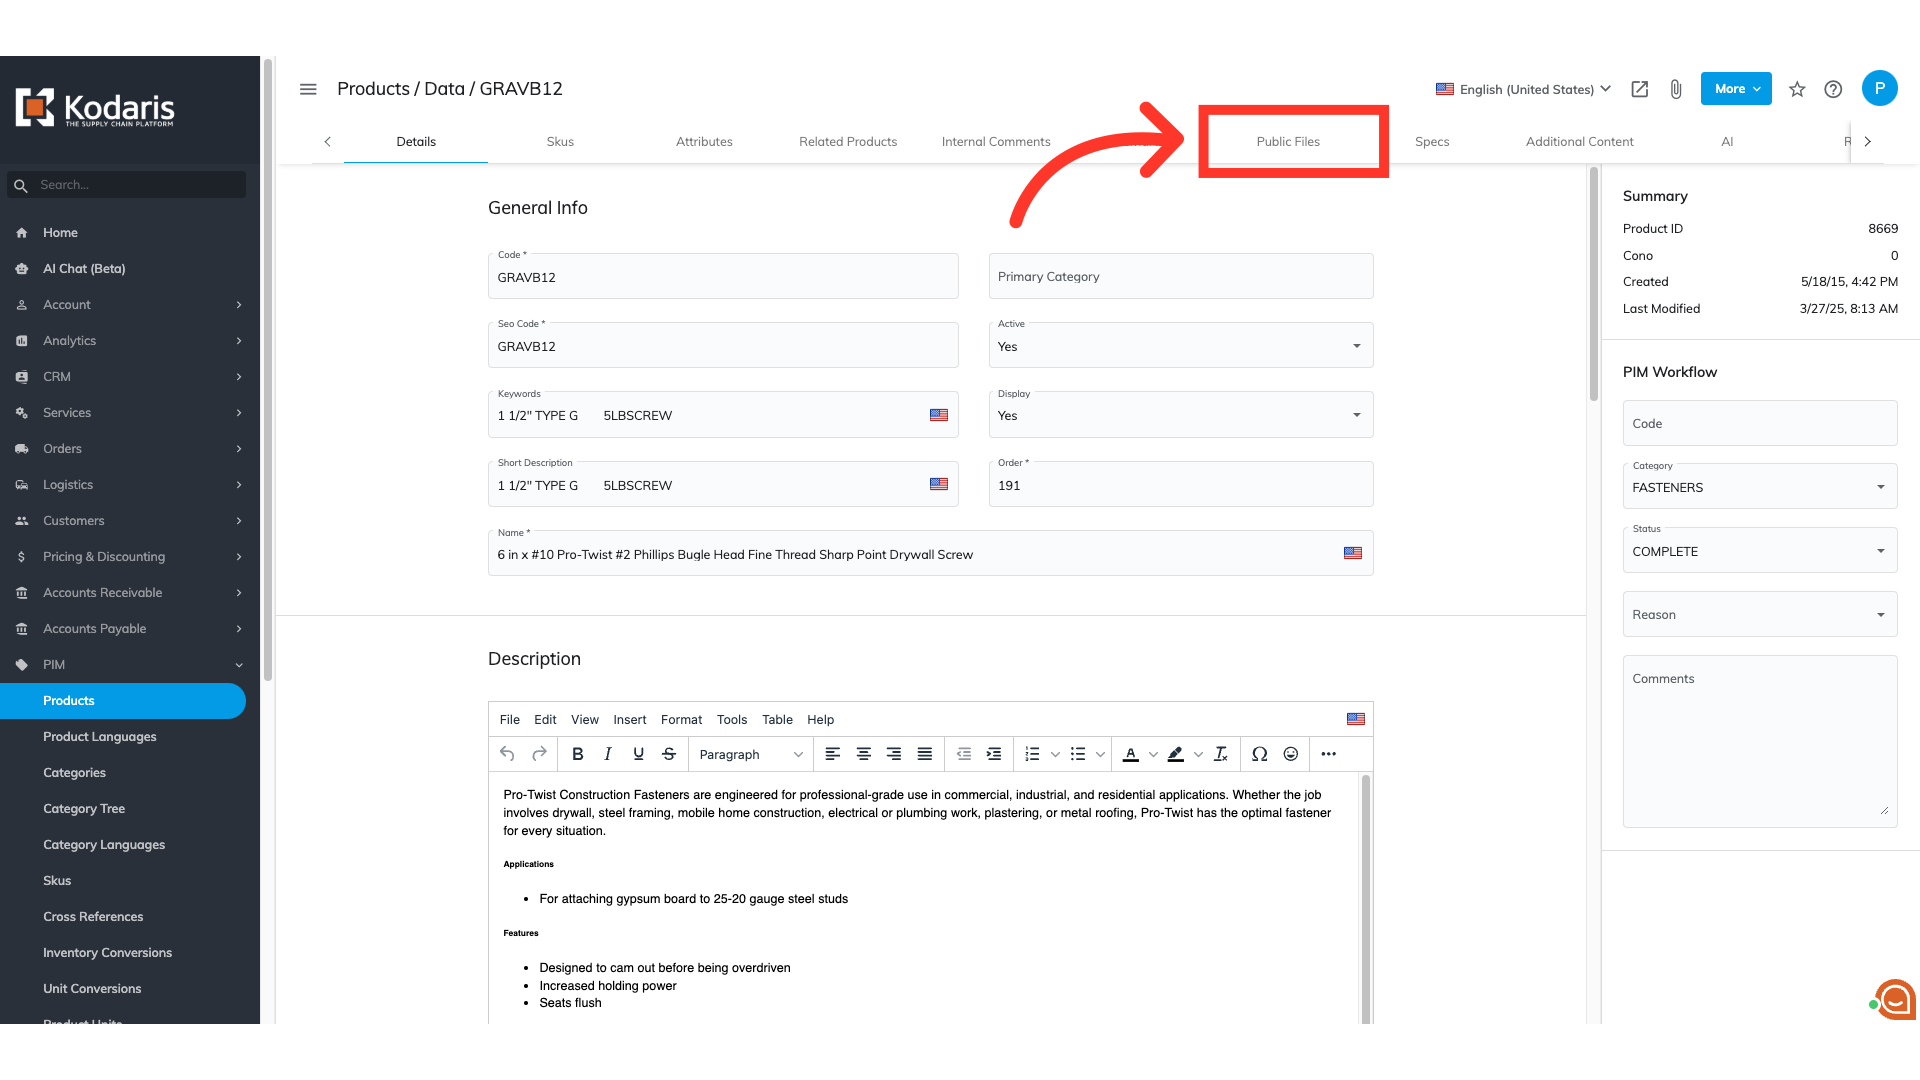
Select "Public Files"
To access the product's public resources, select the "Public Files" tab.
Select rows to delete
This tab is where you will be able to view all the current files that are associated with the product. You can edit, delete, and add files. To delete a file, select the file's row from the spreadsheet. You can select one or multiple files at a time. Resource files will have the "Type" value of "media".

Click "Edit"
Click "Edit" from the menu.

Click "Delete selected rows"
To remove the selected row or rows, choose "Delete selected rows" from the dropdown options.

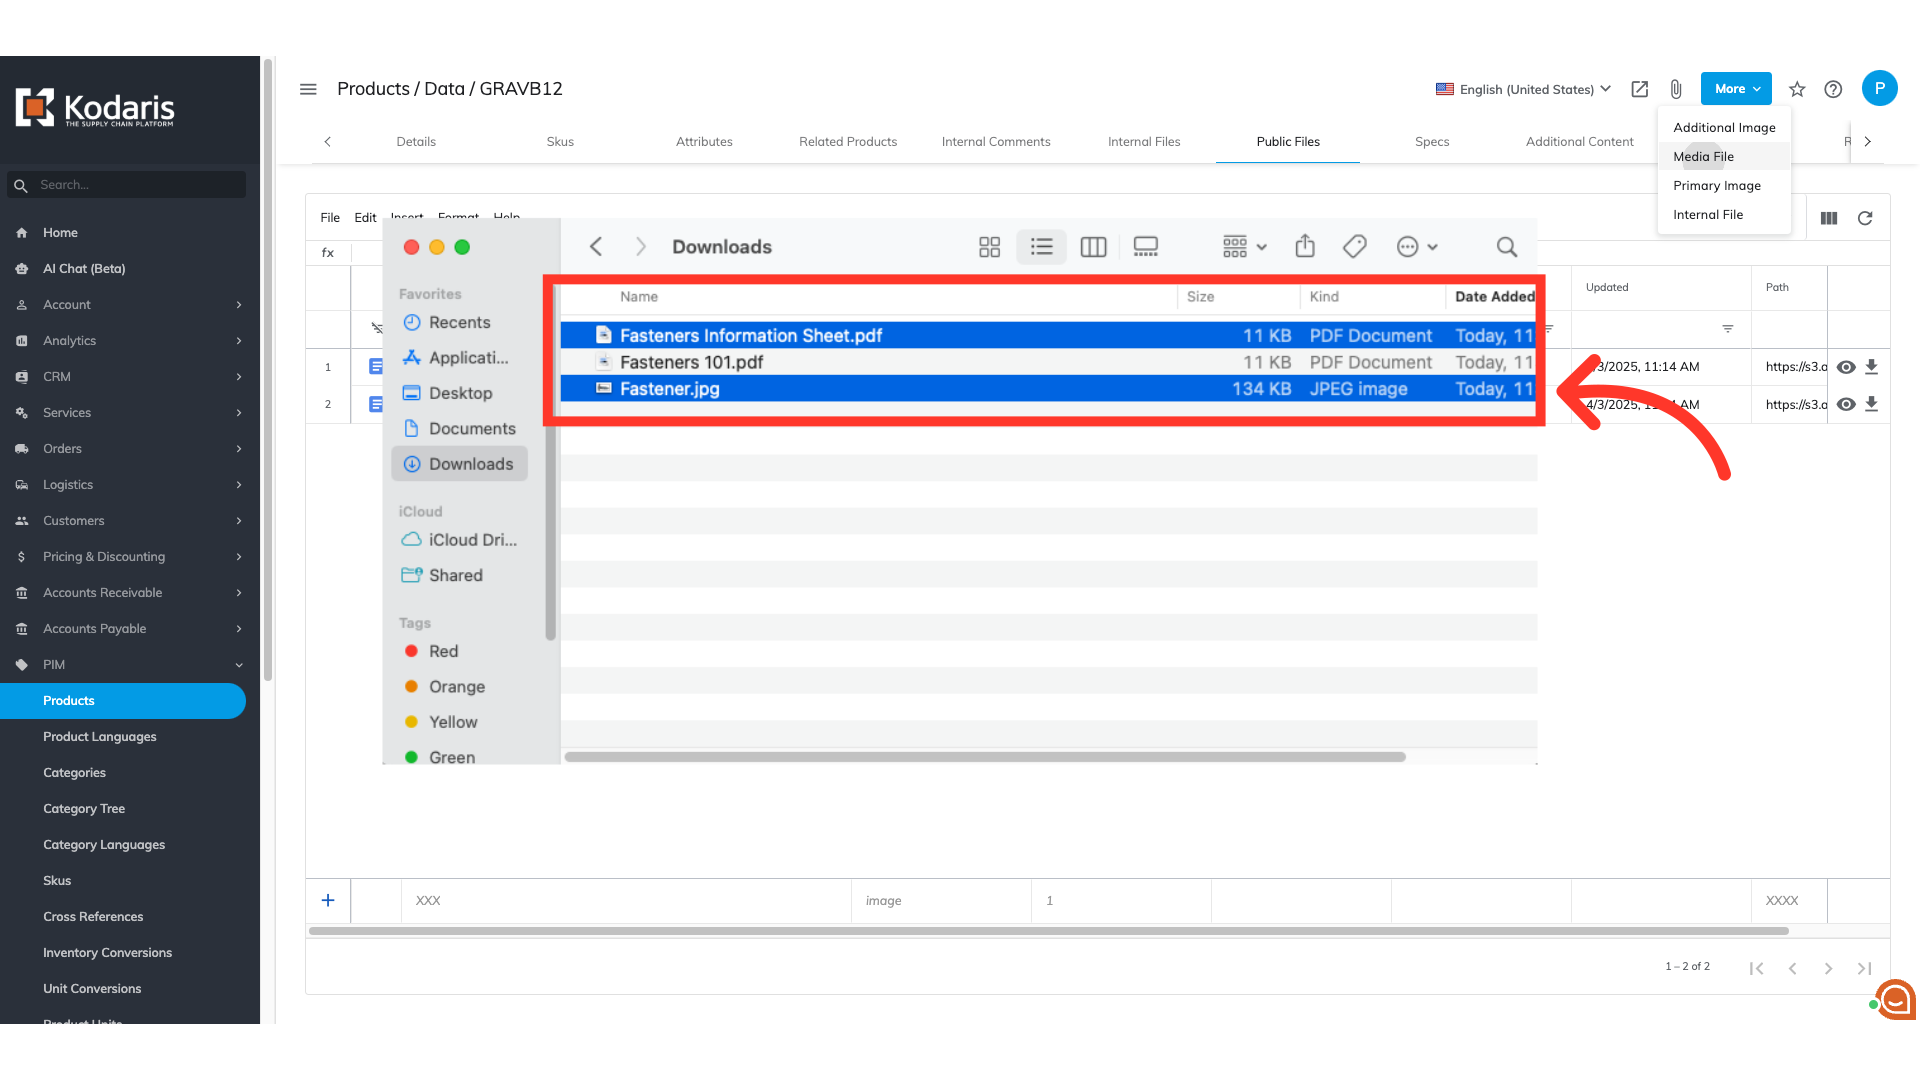
Click "Attach File" to add a file
To add a media file, select the "Attach File" icon.

Select "Media File"
From the dropdown options, select "Media File". You can upload media files, such as .PDF, .CSV, .DOC, .JPG, .PNG, audio files, video files, etc.

Select file(s)
You will be able to browse to select a file from your computer to upload. You can select one or multiple files.
Rename the file
When you are on the "Public Files" screen, you also have the ability to edit the files directly via the embedded spreadsheet. For example, you can edit the name of the file by double-clicking on the file name cell and making your desired edits.

Manage file order
If you would like to adjust the order the files are displayed on your commerce website, you can manually adjust their order by editing the "File Order" field. Double-click on a "File Order" cell and input a numerical value. The lowest numbered file will appear first.

View changes
Once you've made all the changes you would like to product resources, head back to the live product page on your commerce website and reload your page. You will see the file updates under the "Resources" tab.
