Operations Order Management - Create Return Reasons
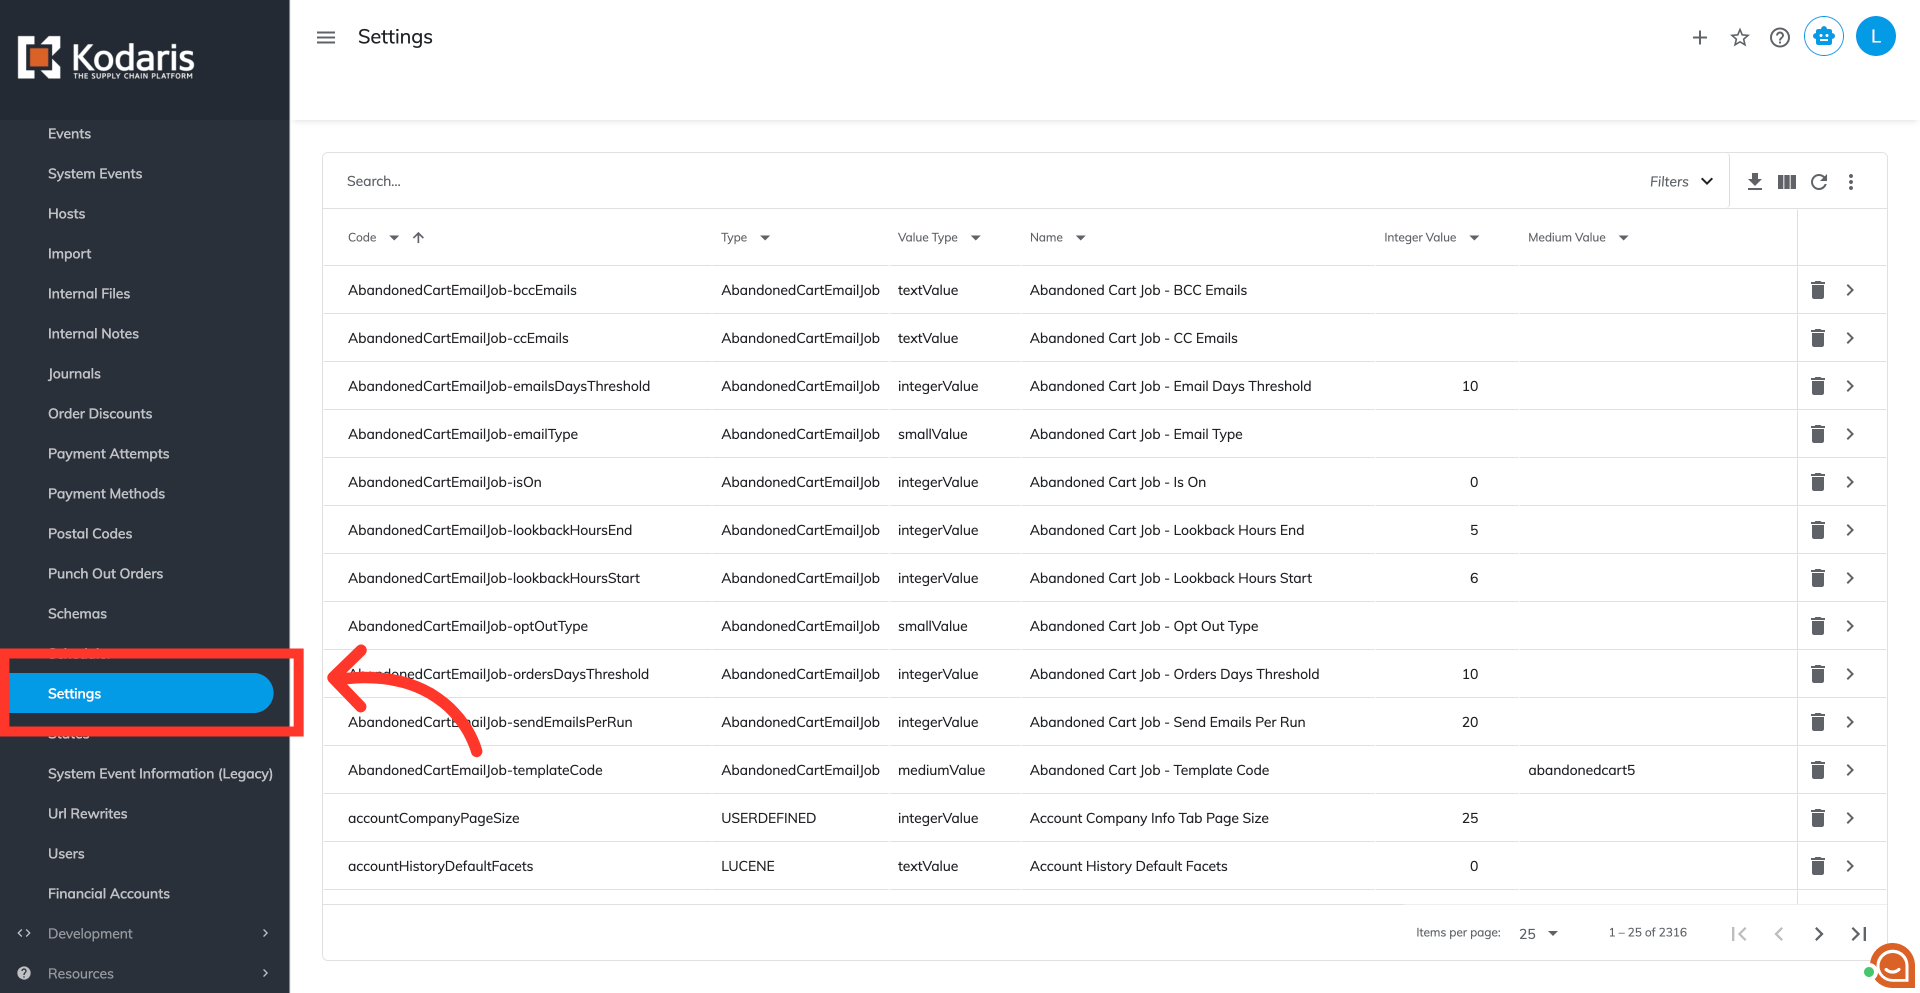
Navigate to the "Settings"
To create specific return reasons that customers can select when initiating a return when using the customer portal, navigate to the "Settings" screen within the "System" menu. In order to access "Settings" you will need to be set up either as an "administrator" or a "superuser", or have the appropriate roles: "settingEdit," and "settingView".
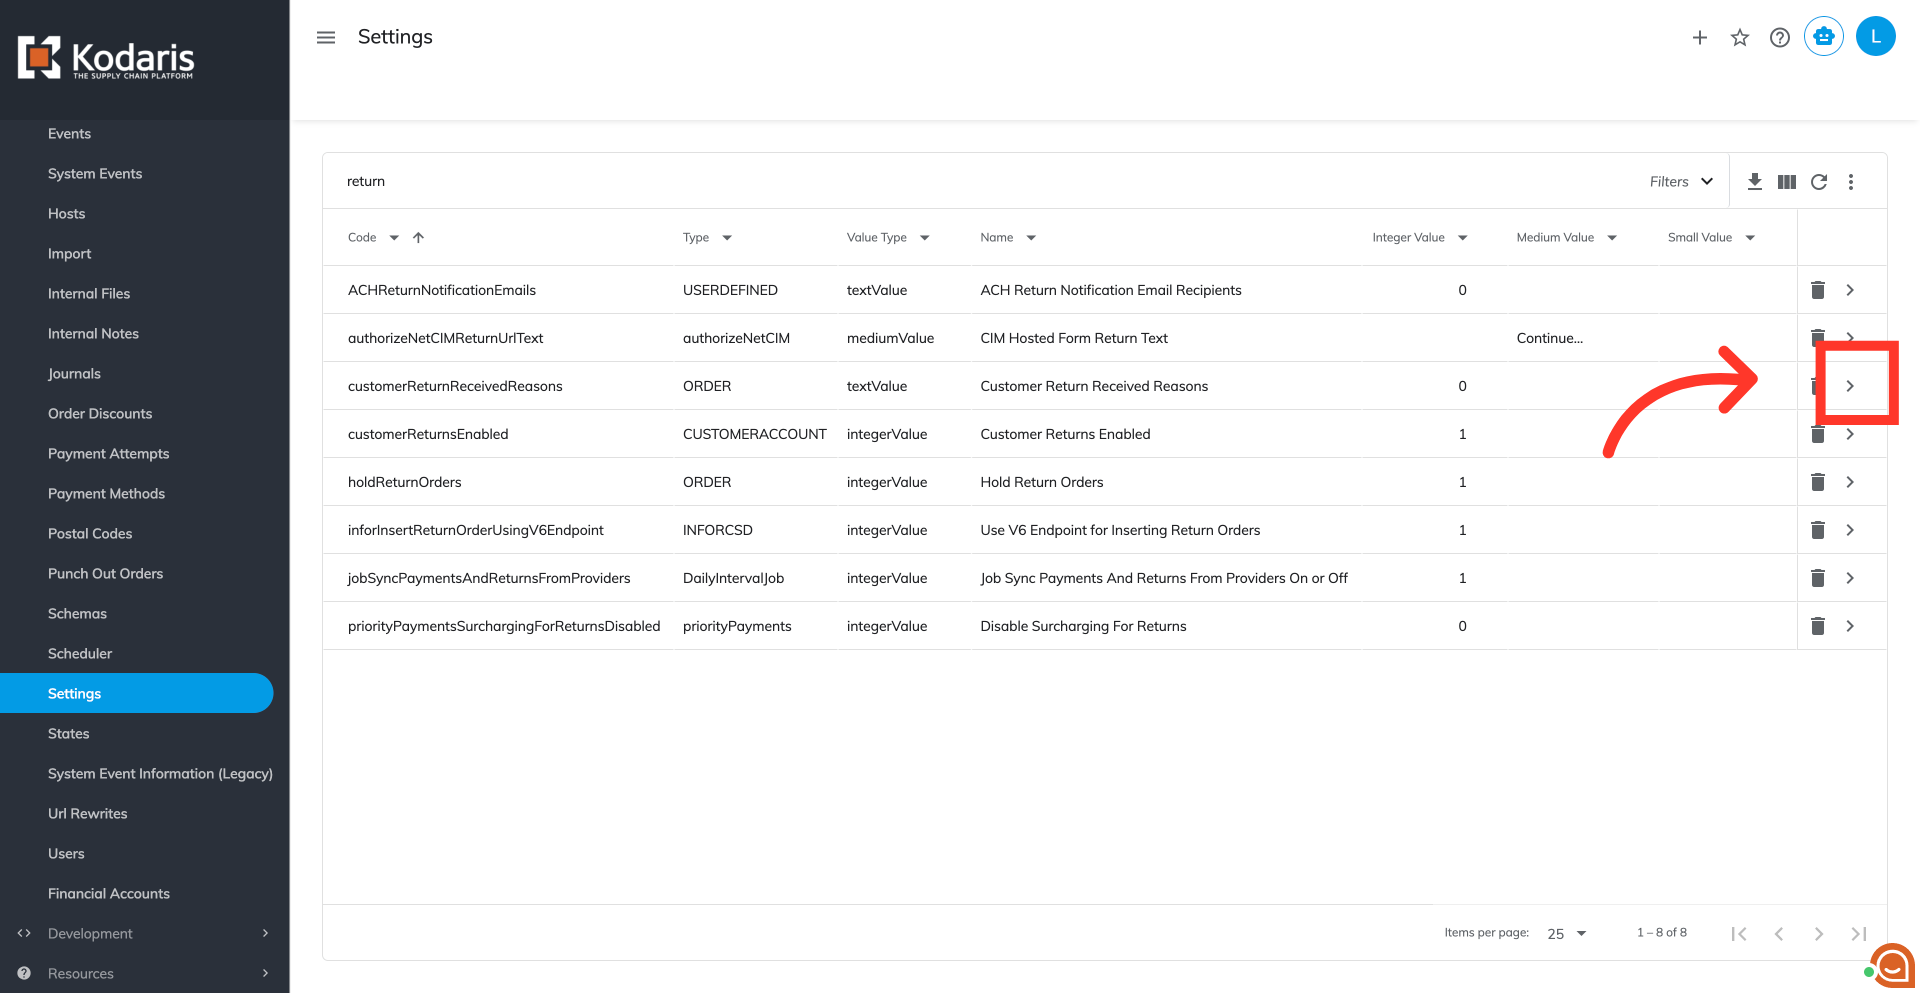
Search for "Customer Return Received Reasons" settings
Use the search bar to find return-related settings by typing "return."

Click the more details icon
Locate the "Customer Return Received Reasons" setting from the search result and click its more details icon
Create customer return reasons
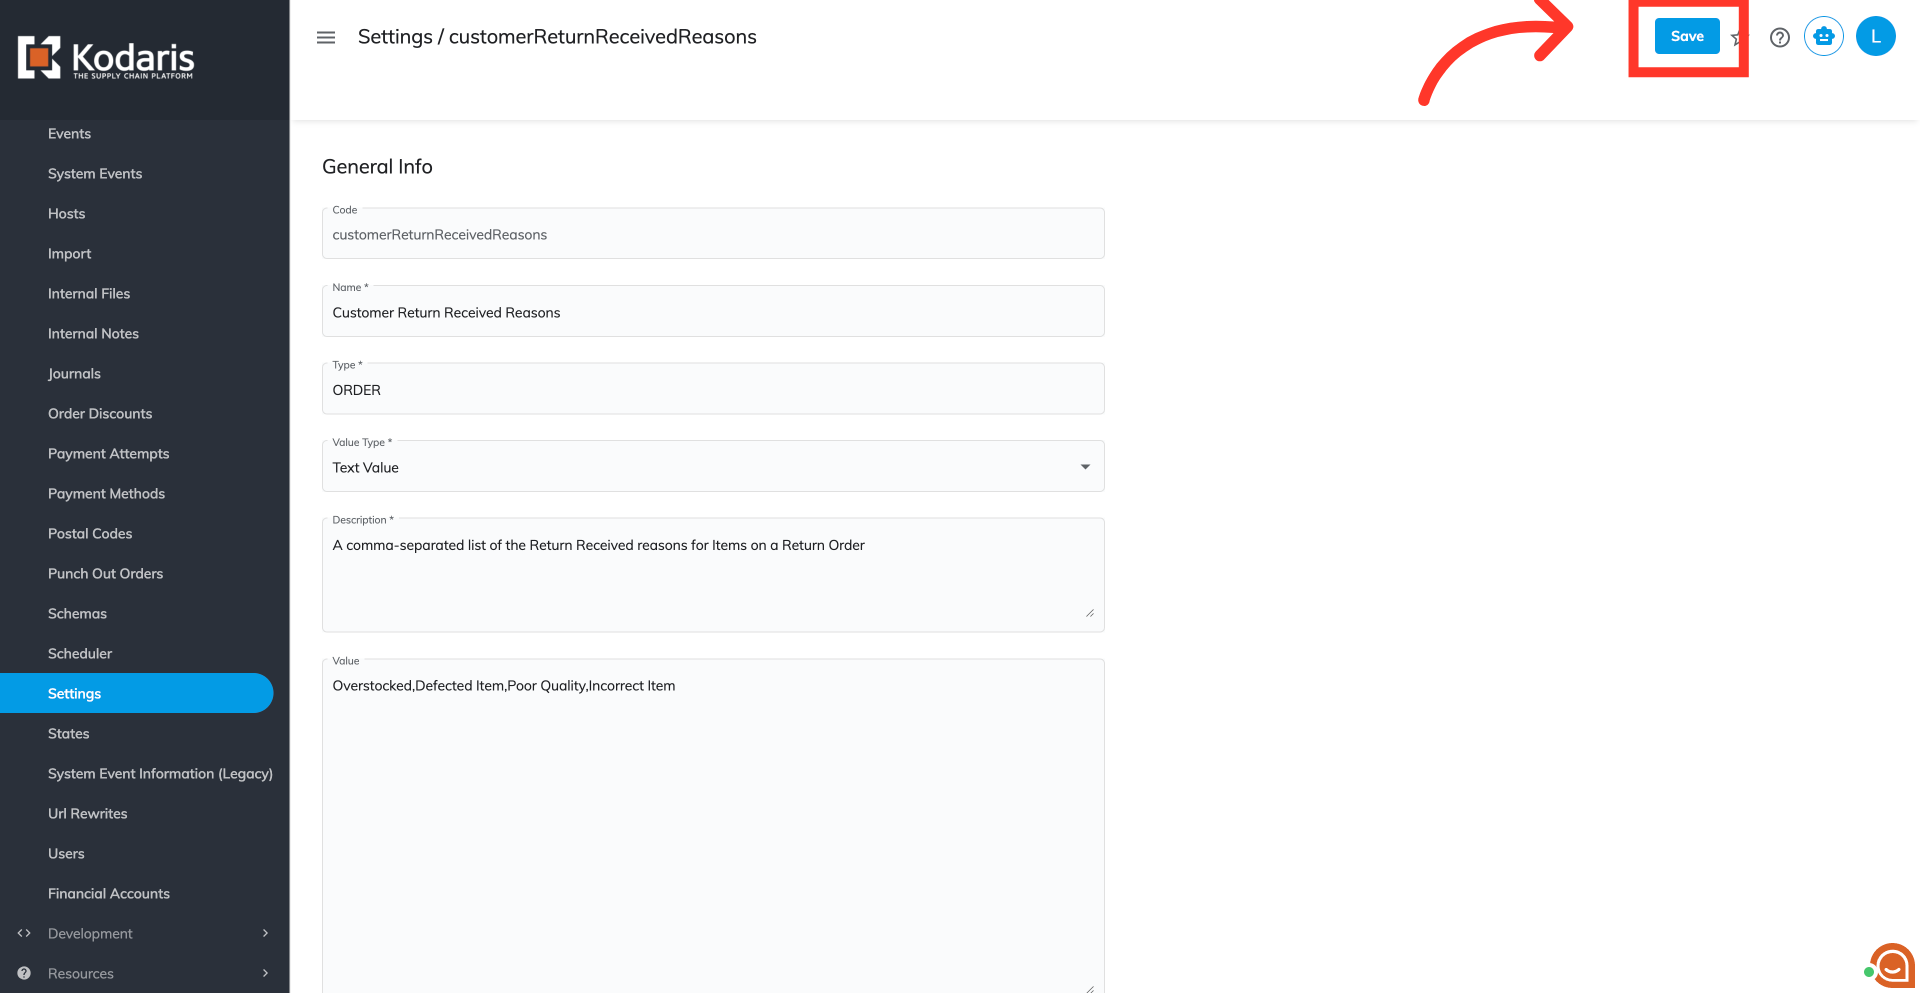
Populate the "Value" textbox with your desired return reasons. Ensure each reason is separated by a comma with no spaces. These reasons will be viewable by customers. Once they are configured, customers will be able to view and select from from a dropdown menu when adding items to their return requests.
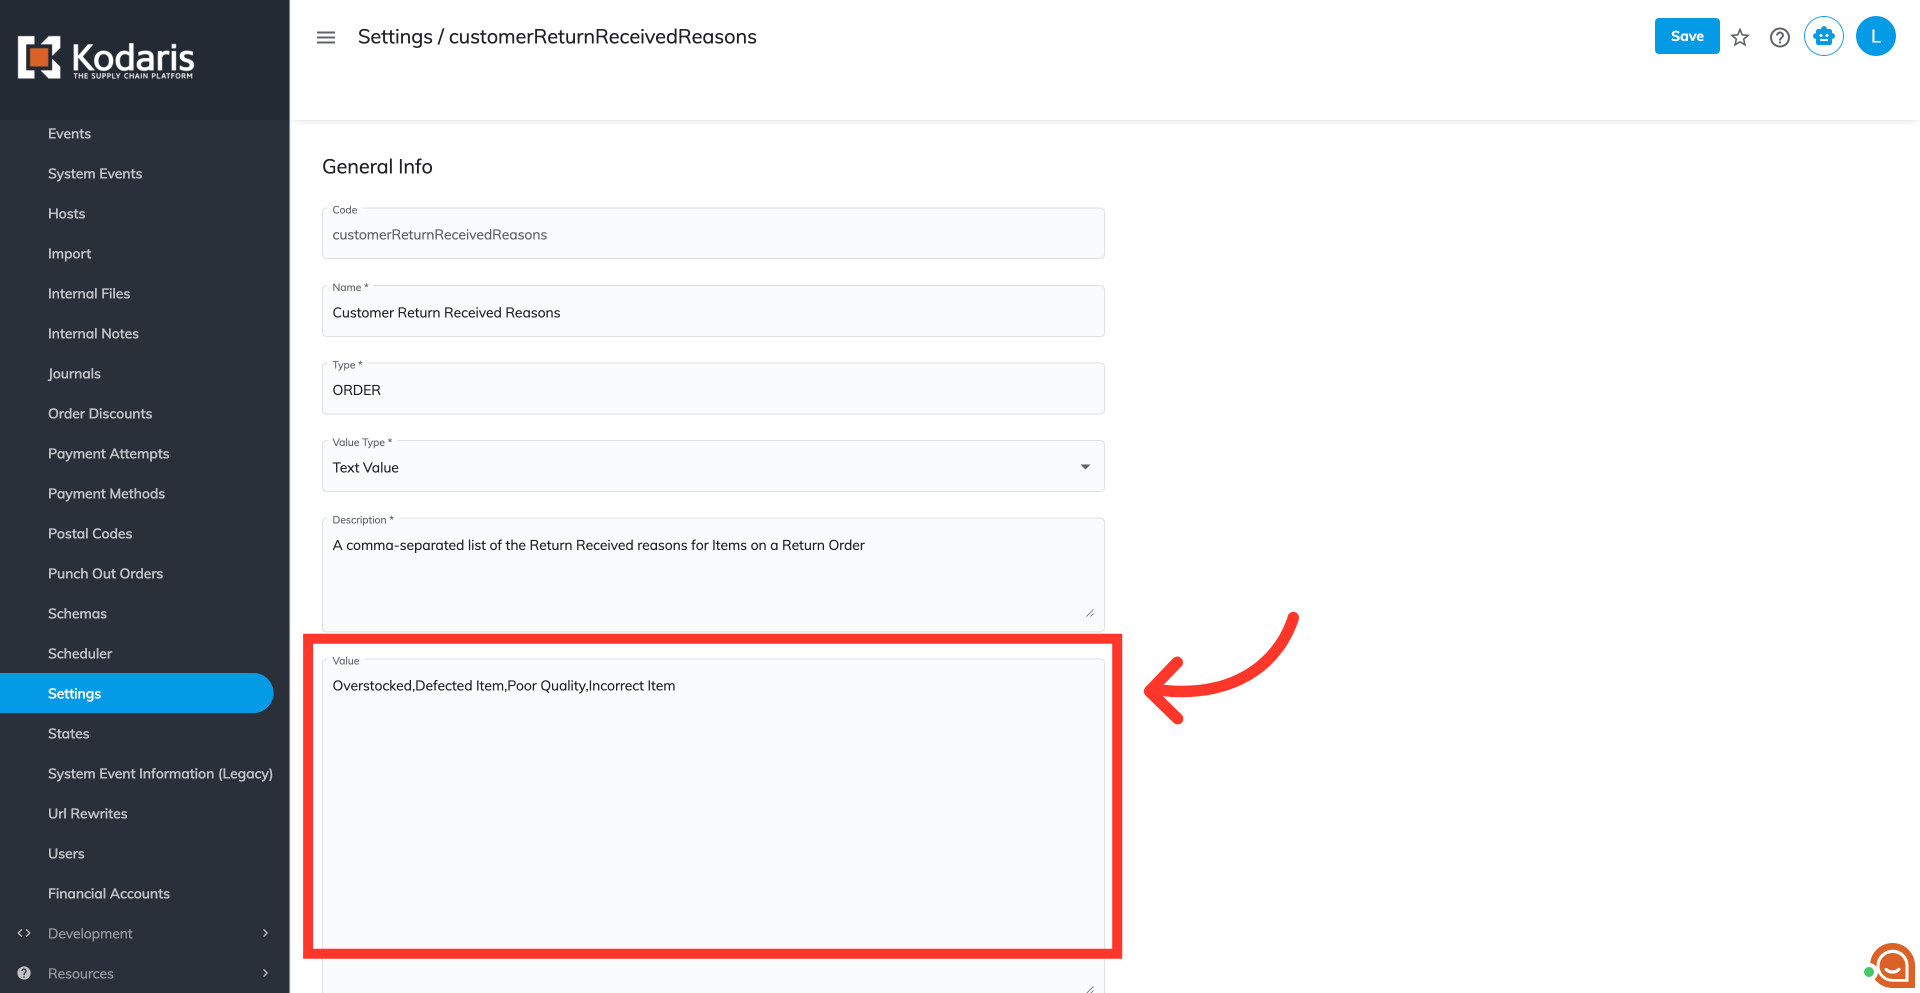
Click "Save"
Then, click "Save" to store these configured return reasons.
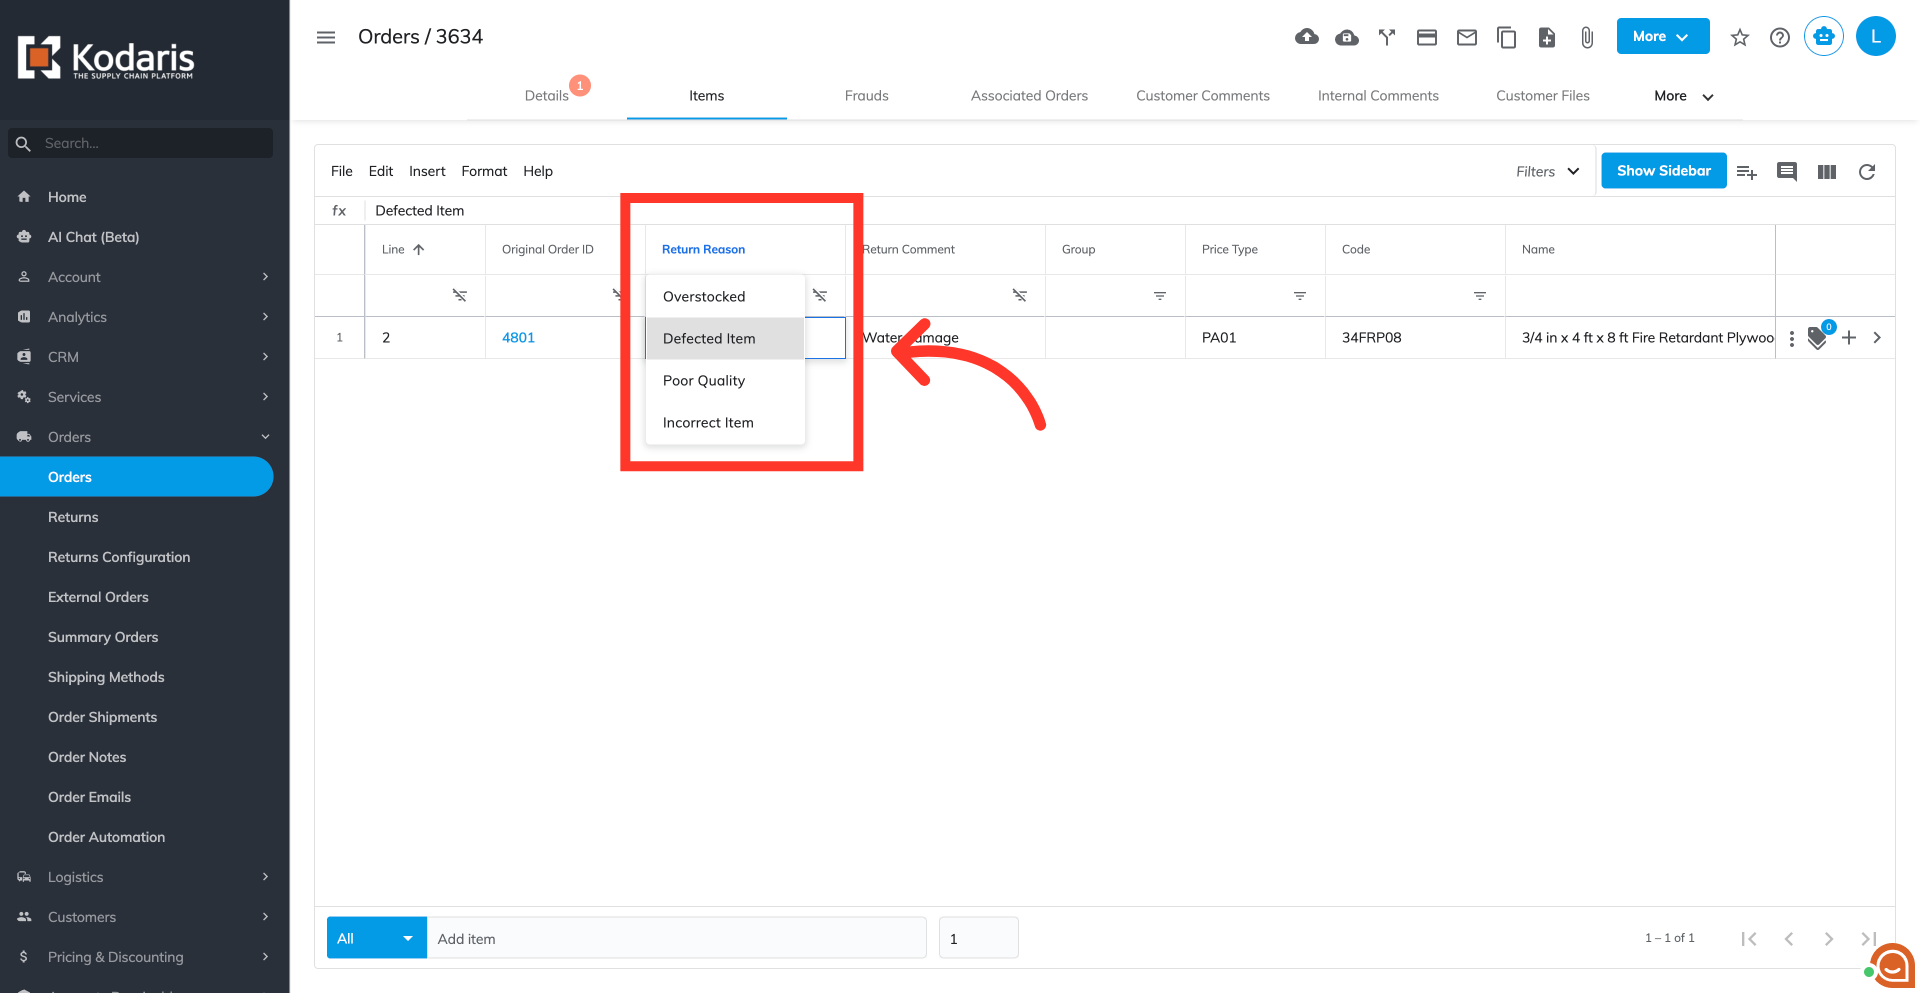
Verify return reason availability
Once saved, verify that they are available in the "Return Reasons" dropdown selection throughout the system.