Operations PIM - Delete Primary Category Assignment by Importing
Navigate to "PIM" section
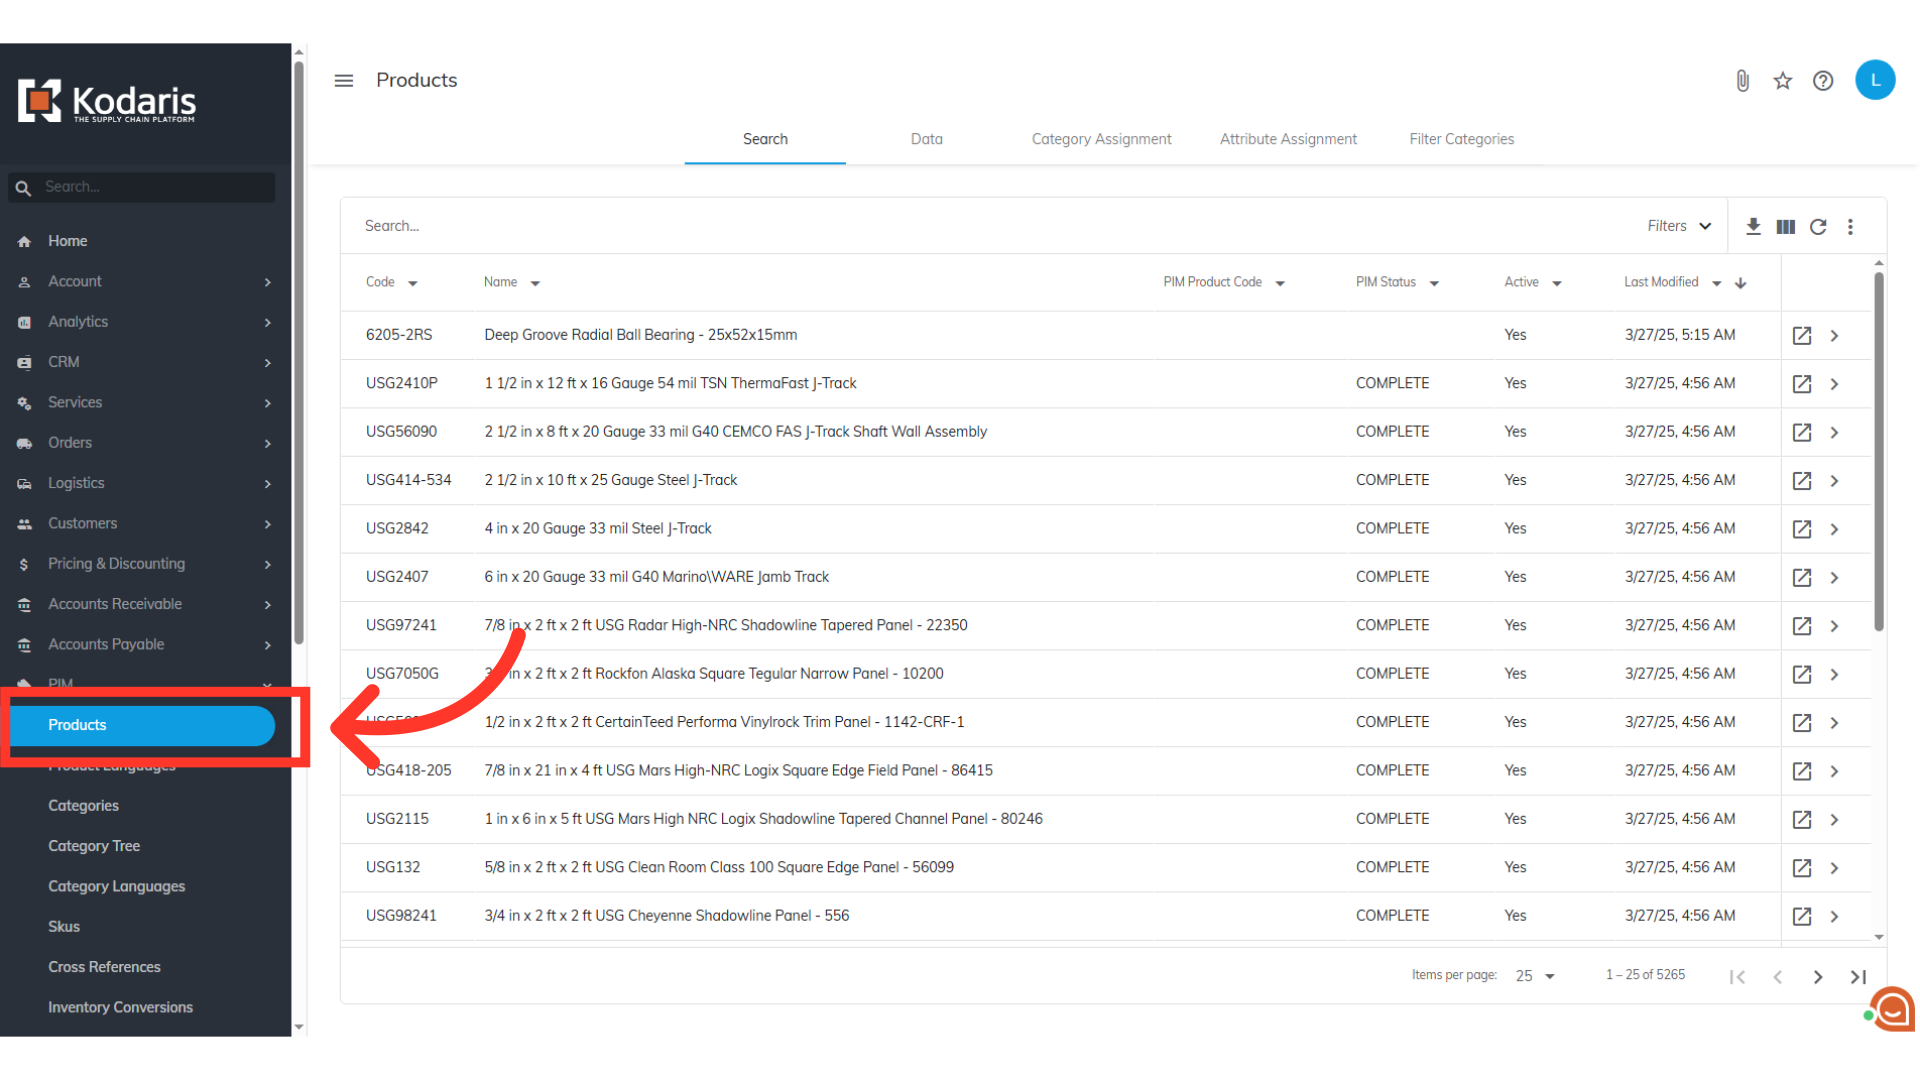
To mass delete primary category code assignments from products by importing, navigate to "PIM" in the operations portal.

Click "Products"
Then, click "Products". In order to access and edit products, you will need to be assigned the role of "administrator" or "superuser". Or have the roles of: "productView" and "productEdit" along with "importEdit" and "importView". These last two roles are needed for importing.
Go to the "Data" tab
Go to the "Data" tab.

Click "Show/Hide Columns" icon
Click "Show/Hide Columns" Icon
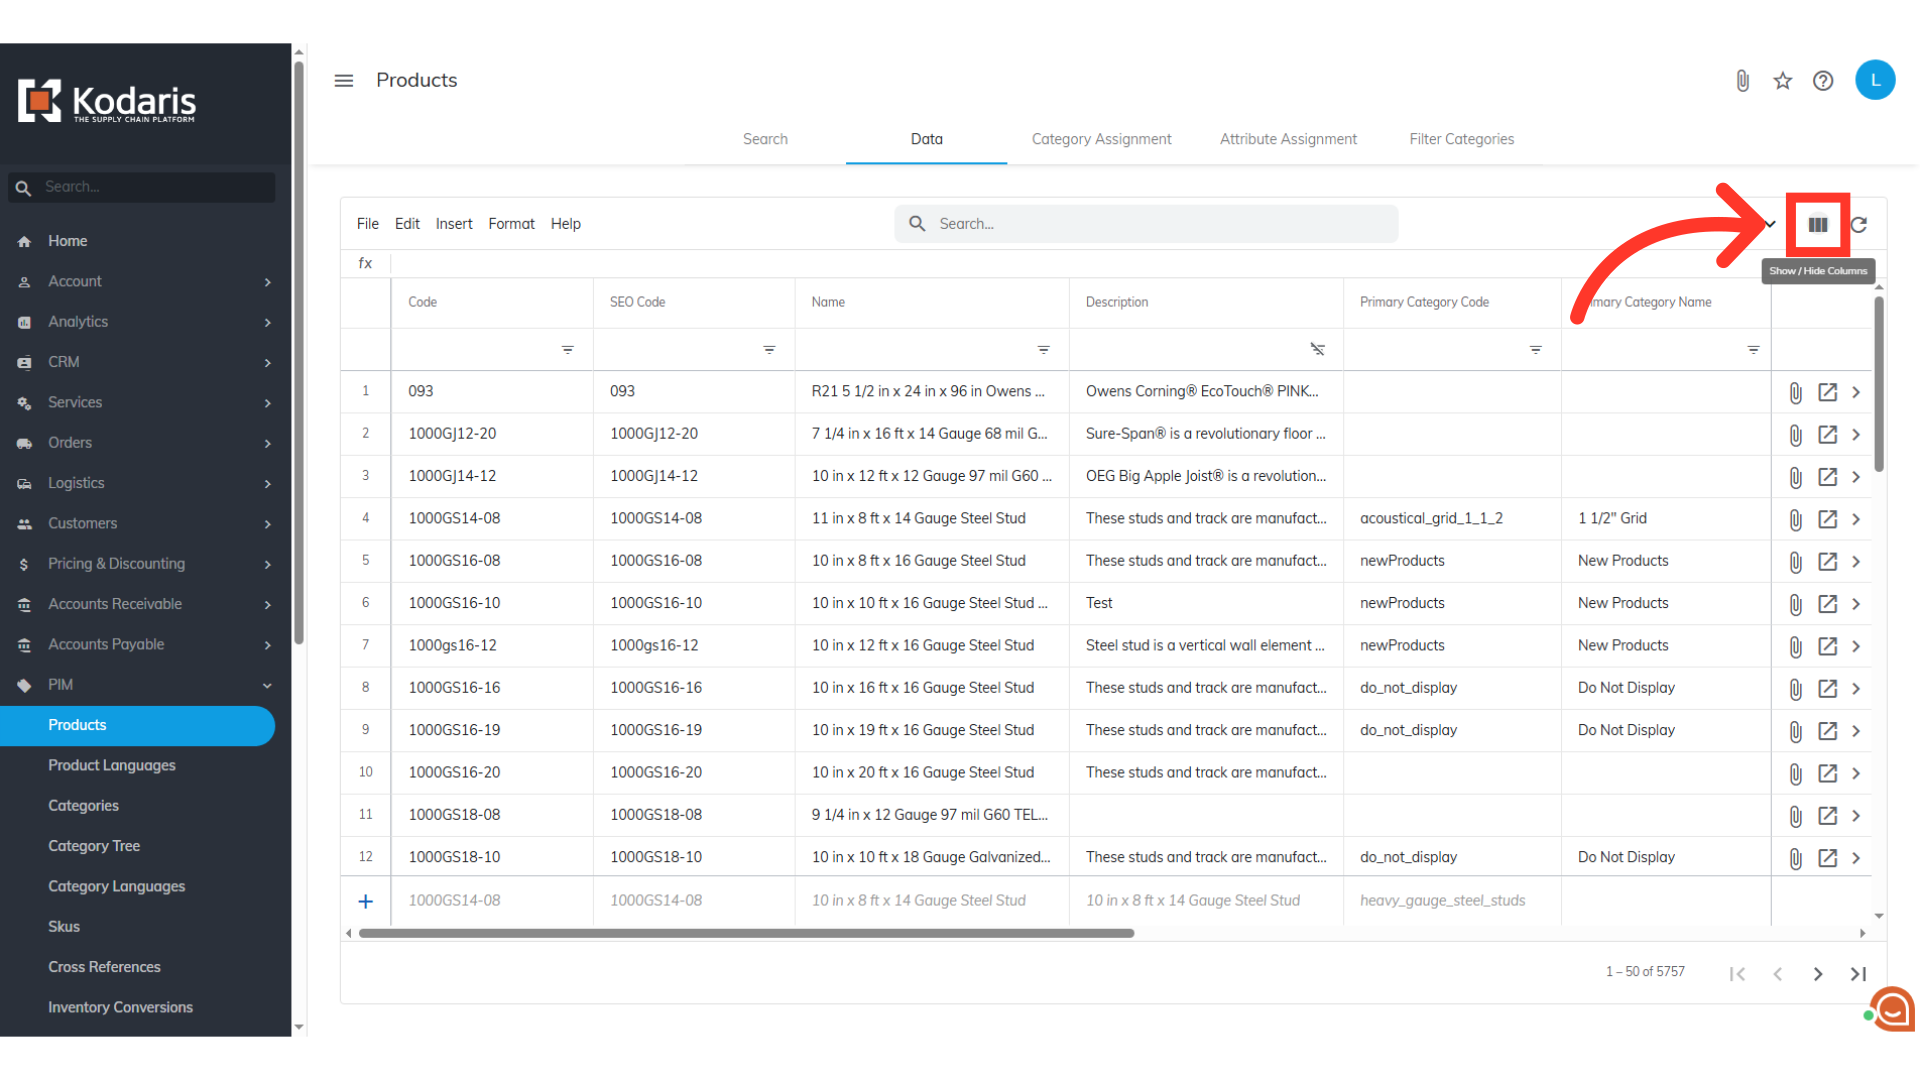
Select the needed columns
To prepare your screen for exporting, be sure that your screen displays the "Primary Category Code" and "Code" columns. You can also add additional columns if needed. For this example, we will also select the "Name" column. Uncheck any columns you don't need for the import.

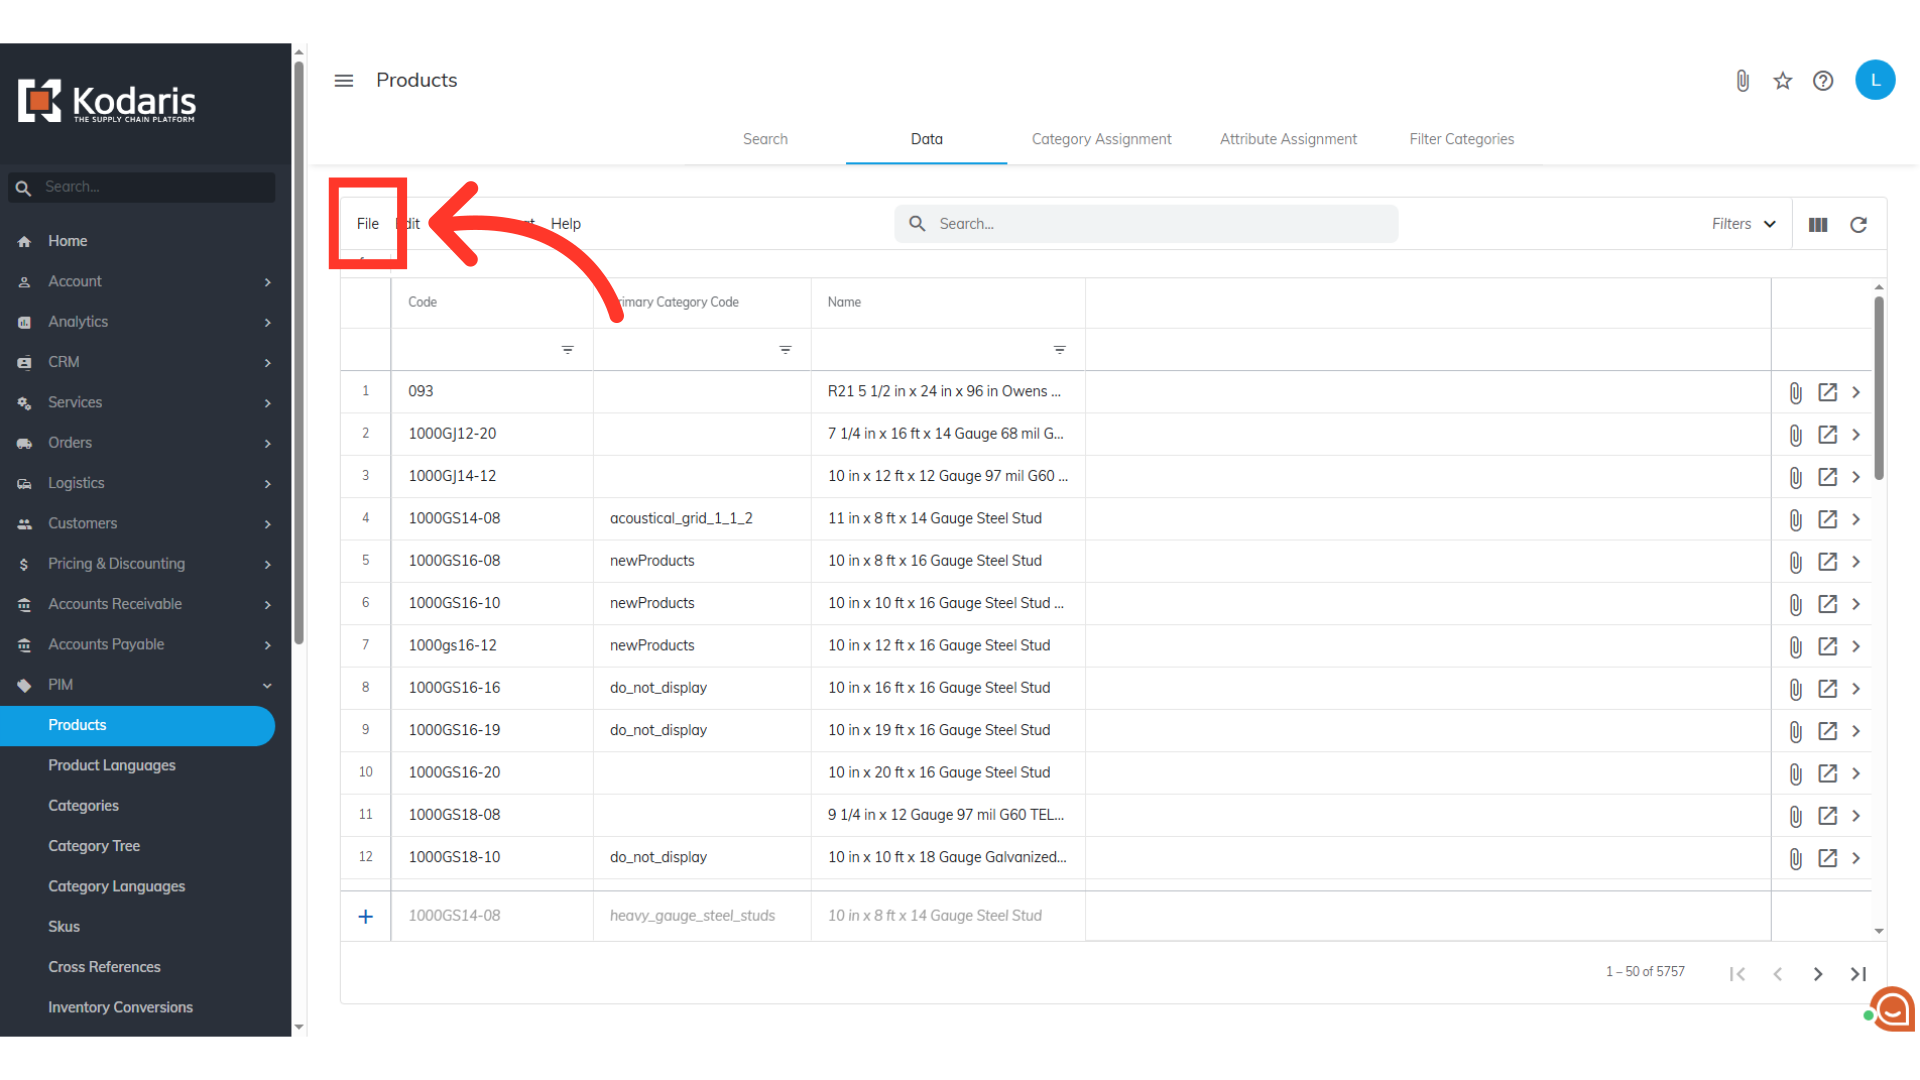
Type in the product code in the "Search" field or filter the columns
If you would like, you can also narrow down the data before exporting by using the search bar or the filters.

Click on "File" menu
When you are ready to export, click "File" from the menu.
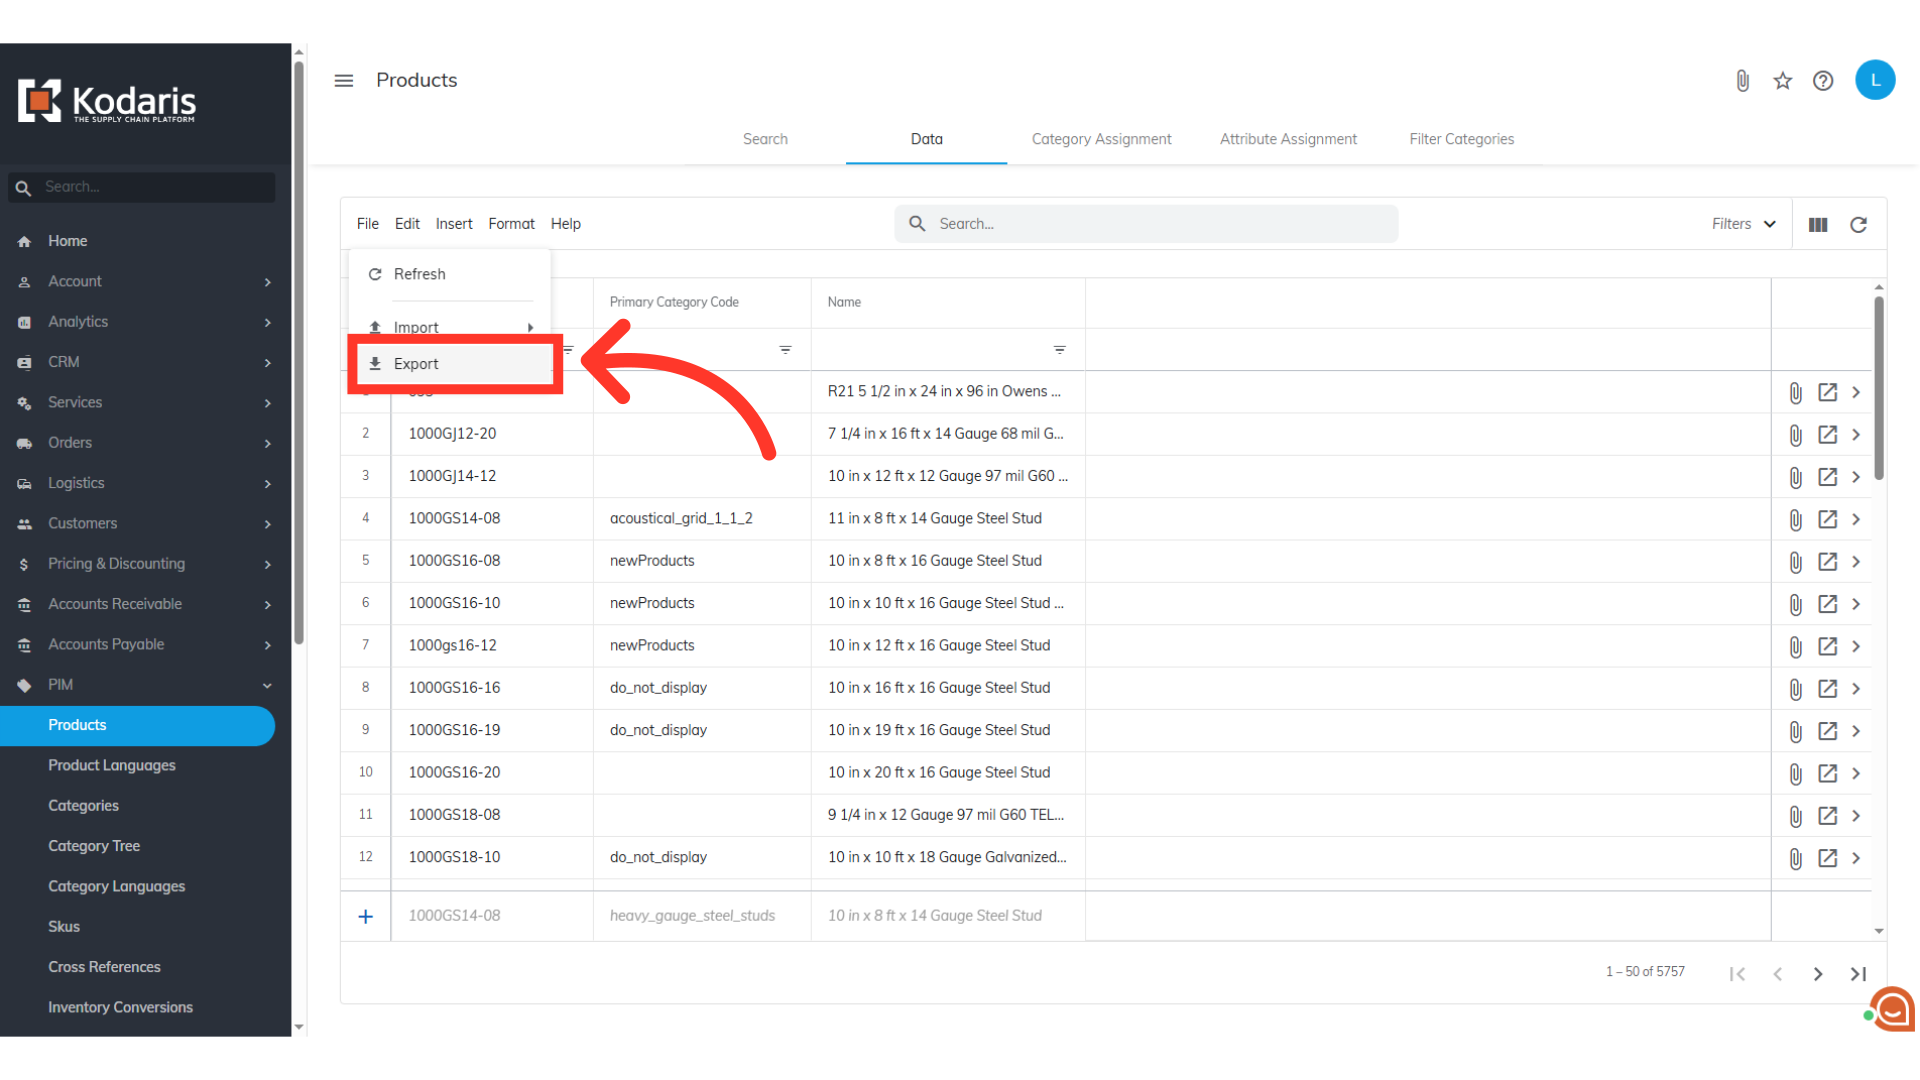
Select the Export option
Click "Export". This will download a file in CSV format.
Type in your desired filename
Type in your desired file name for your file.
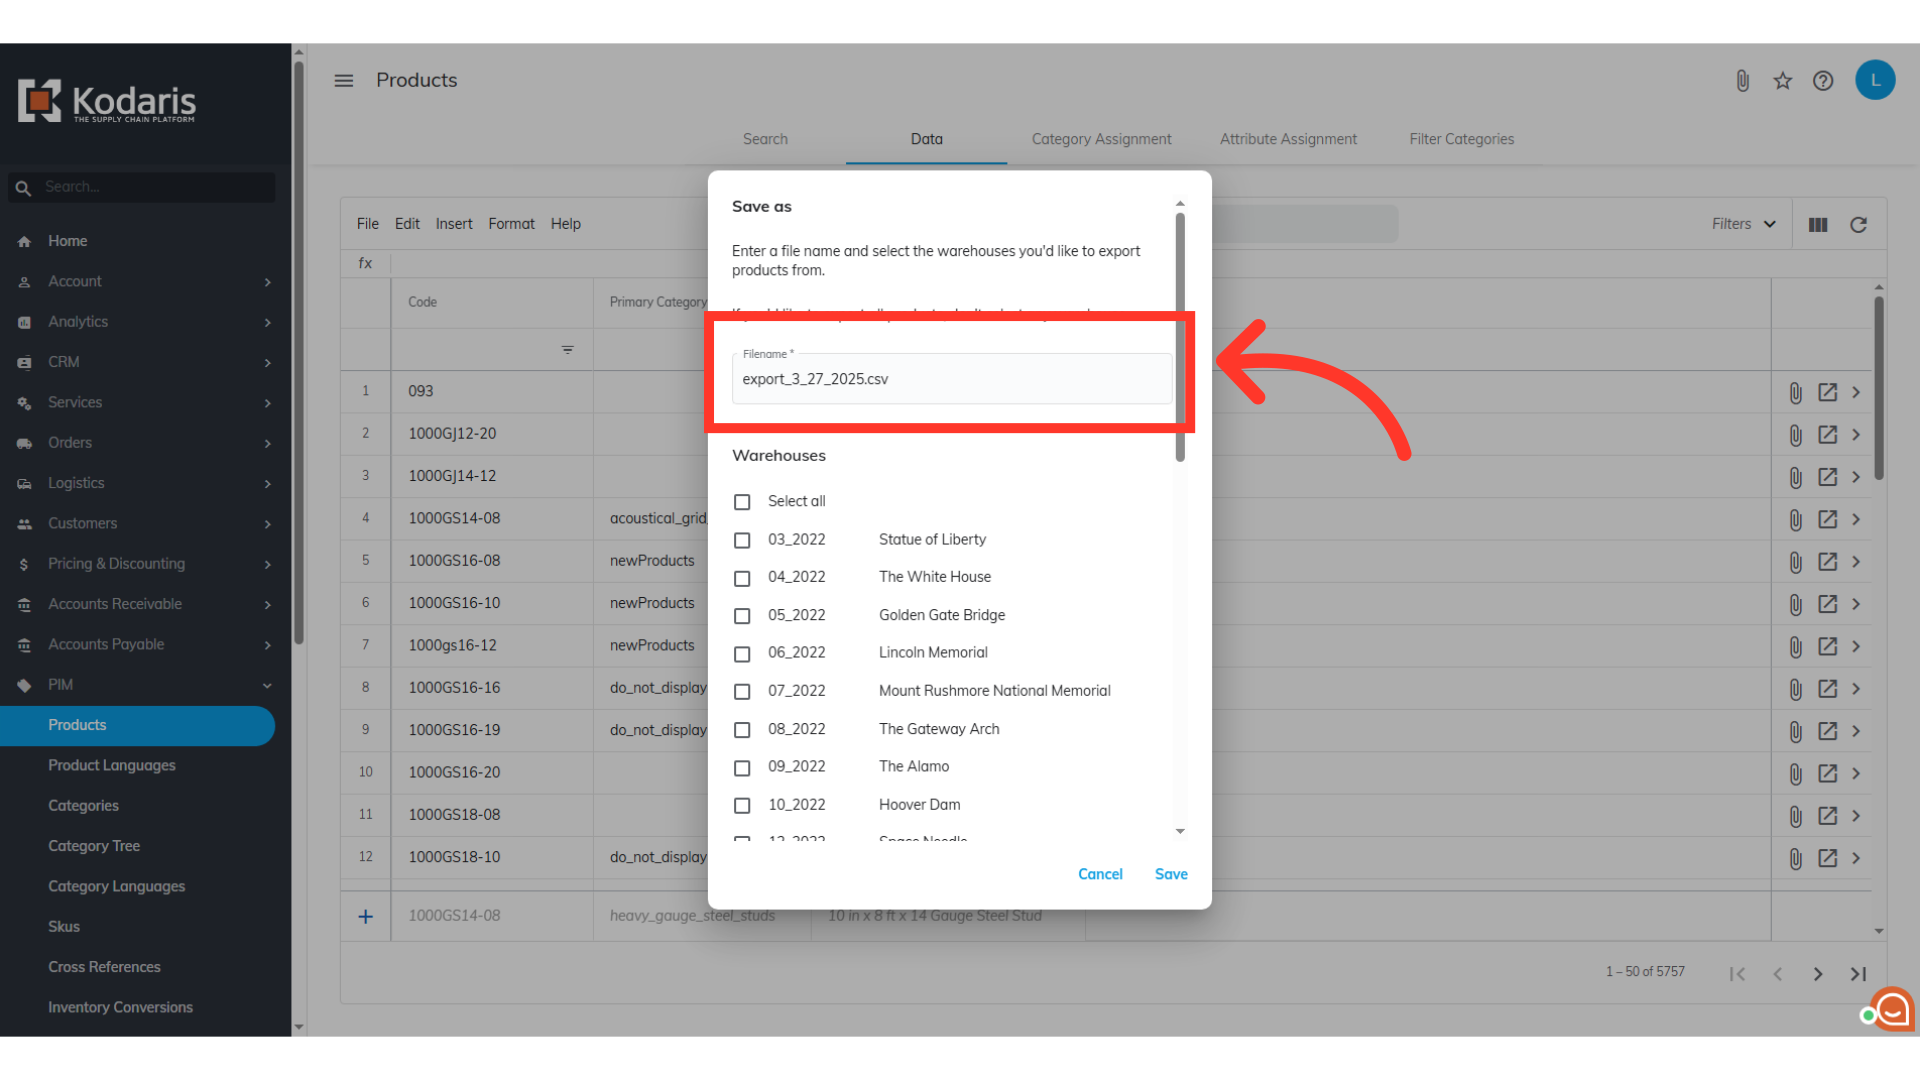
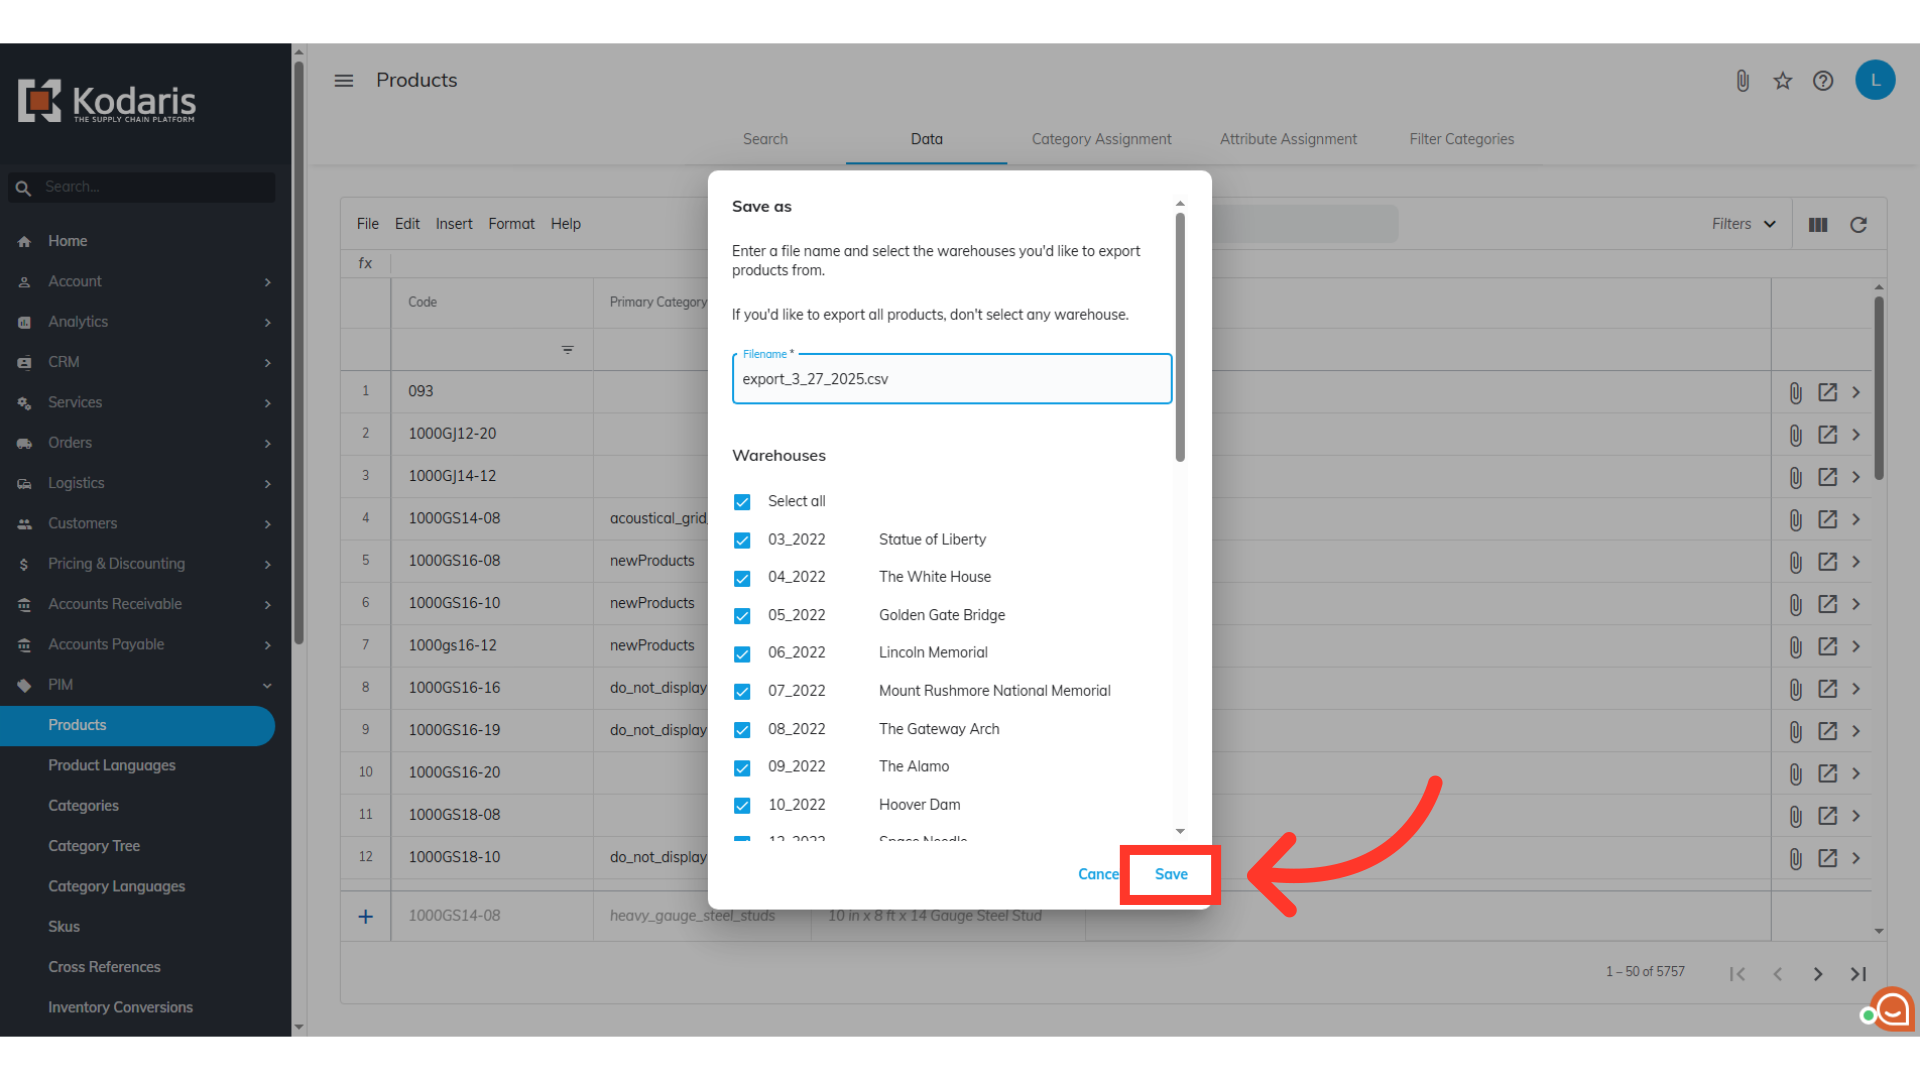
Click "Save"
Then, click on the "Save" button.
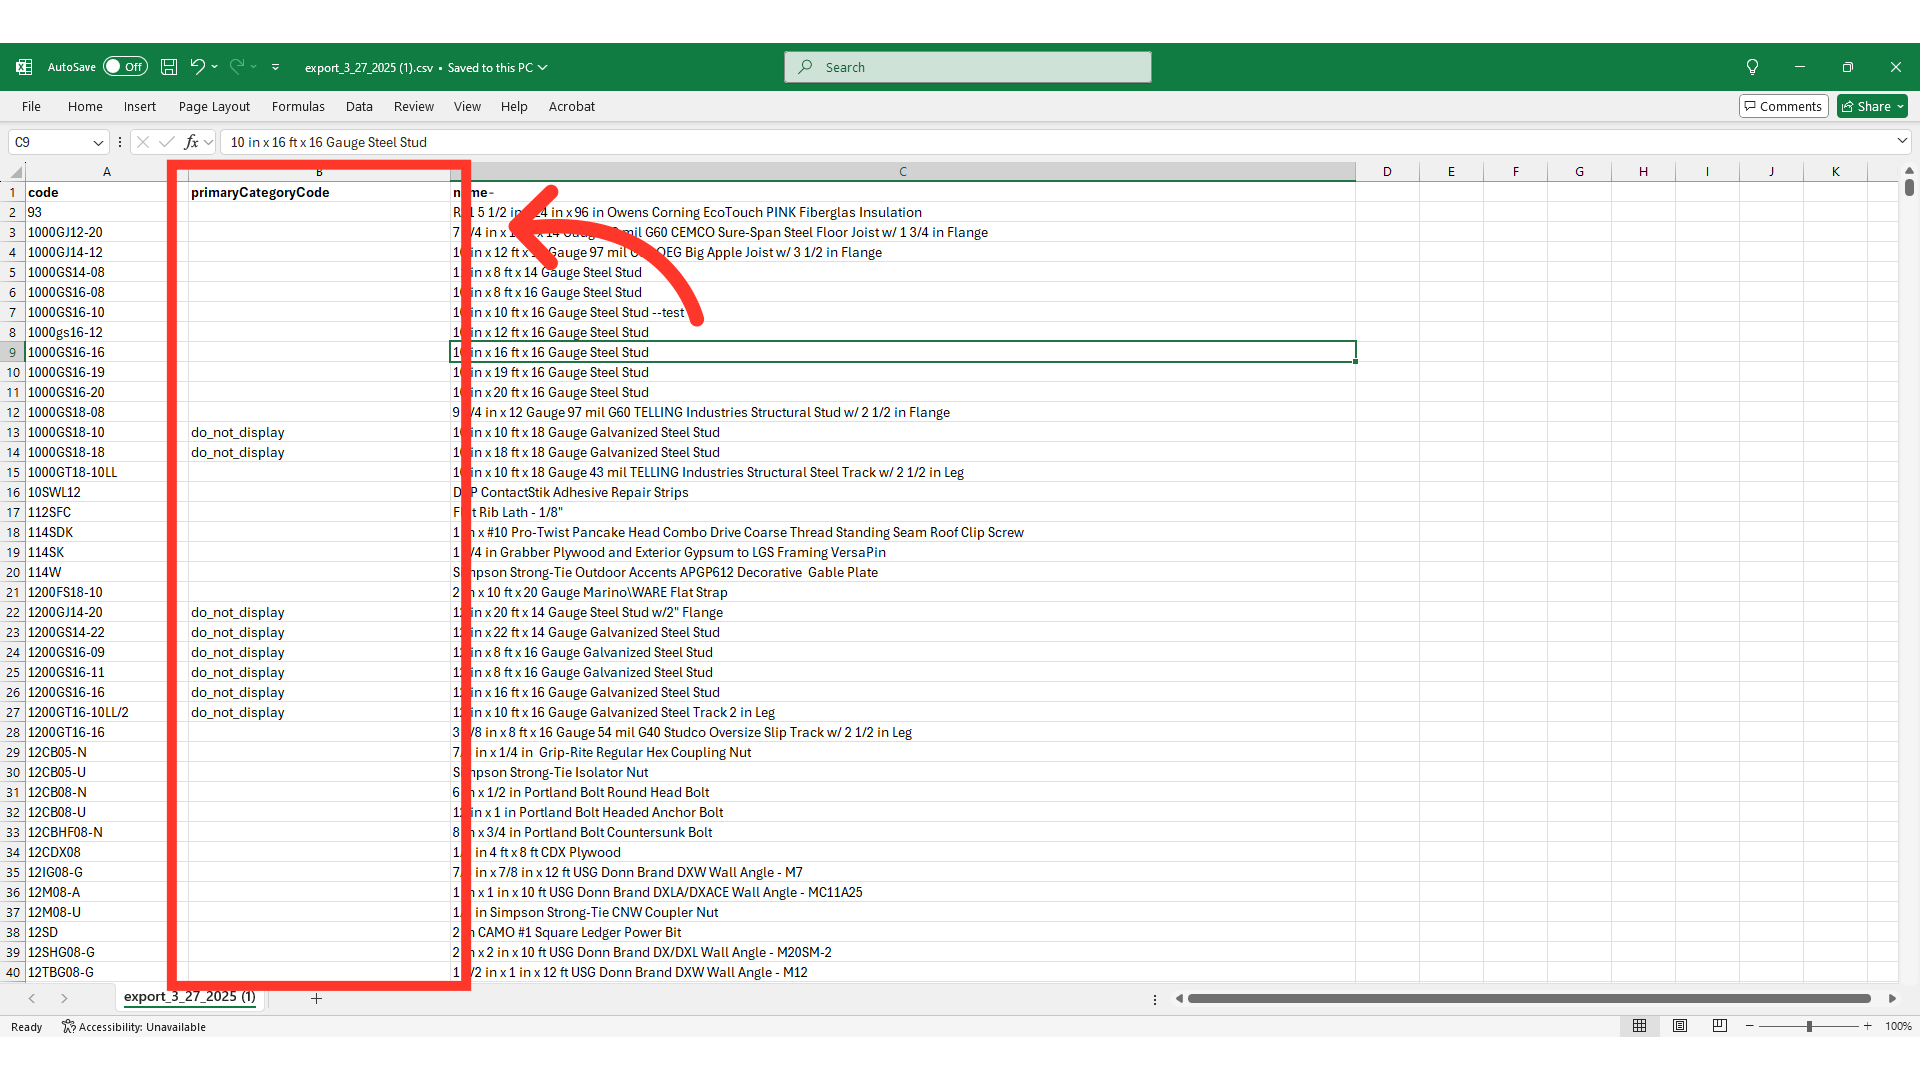
Example Spreadsheet with header row and other columns
Shown here is an example export. It has the necessary header row for importing, and any data that was exported from the product data grid.

"code" = Product Code
The "code" column contains the product code. When importing product data, the code is required as it is the identifying factor for matching information.

"name" = Name
The "name" column was exported to make it easier to differentiate between products as you prepare your import file. If you would like to make sure the system ignores the "name" column during import, add an extra character at the end of the "name" column header or remove the column from spreadsheet.

"primaryCategoryCode" = Primary Category Code
The "primaryCategoryCode" column contains the primary category code. This is the data you will be deleting with this import. Remove the primary category code from any product you wish to remove the primary category code. Deleting data from a cell will result in that information being removed from that field in the system for that product after importing.
Save your CSV for import
After completing the necessary changes, save the spreadsheet as a CSV file for import. Ensure the spreadsheet contains only the data you intend to update.

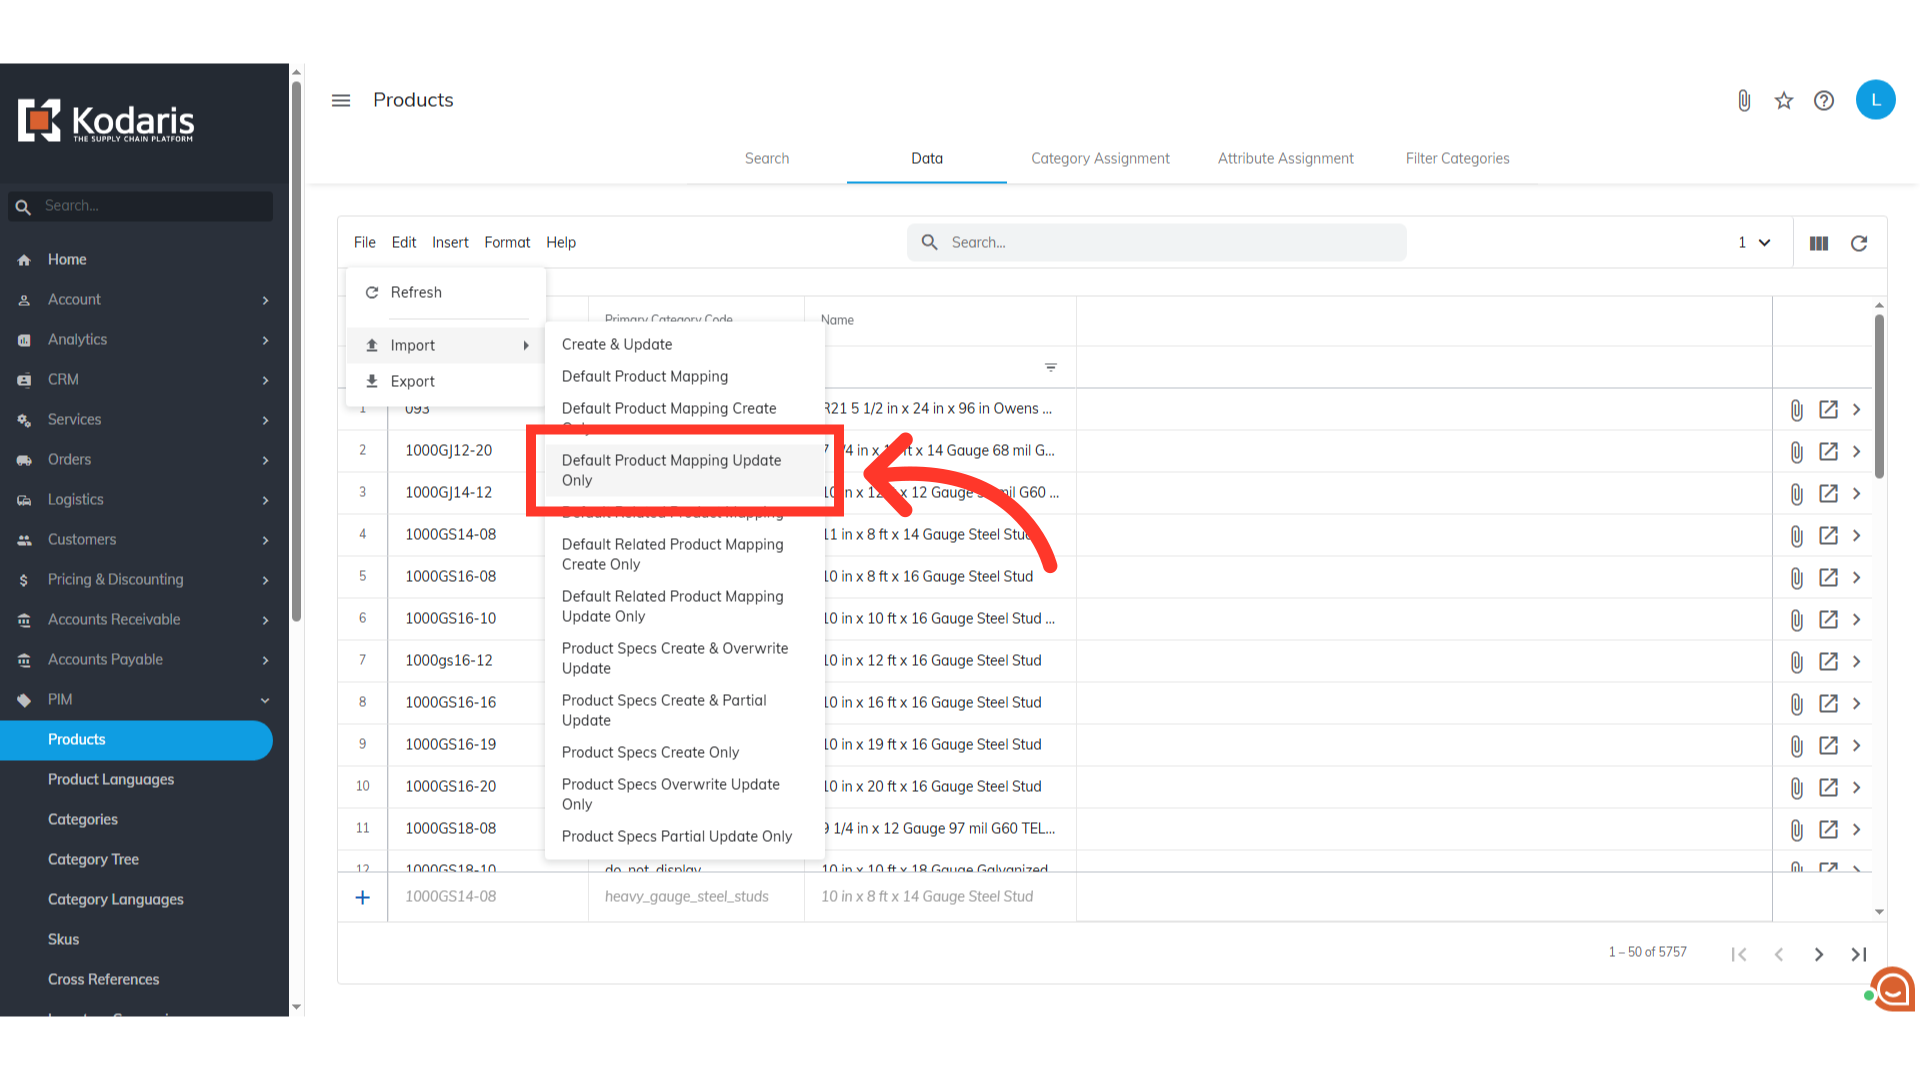
Select "File"
Now that you are ready to import, select "File".

Choose "Default Product Mapping Update Only"
After that, select "Import". Since we are only updating data with this import, choose the "Default Product Mapping Update Only" option.
Select your file and click the "Open" button
You will be asked to upload the file from your computer. Please be sure that you select the correct file, as there are no rollbacks for imports. An import message will appear letting you know that the import file is in process and to check back in a few minutes for the imported data. If you are importing large amounts of data, it may take a short amount of time to complete. The import will continue to run in the background.

The primary category code will now be removed
When the import is done, refresh the product "Data" screen. The screen shows that the primary category assignments have been removed.

Email Report
An email report will also be generated once your import is done.
