Operations Services - Compose an Email from a Ticket
Navigate to "Services"
To compose an email from a ticket, navigate to "Services" in the operations portal.

Click "Tickets"
Then click "Tickets". In order to access and update tickets, users will need to be set up either as an "administrator" or a "superuser", or have the roles of: "ticketView" and "ticketEdit" along with “emailEdit”.

Find your ticket
Scroll down to find your ticket, or use the search bar and filters to narrow the list.
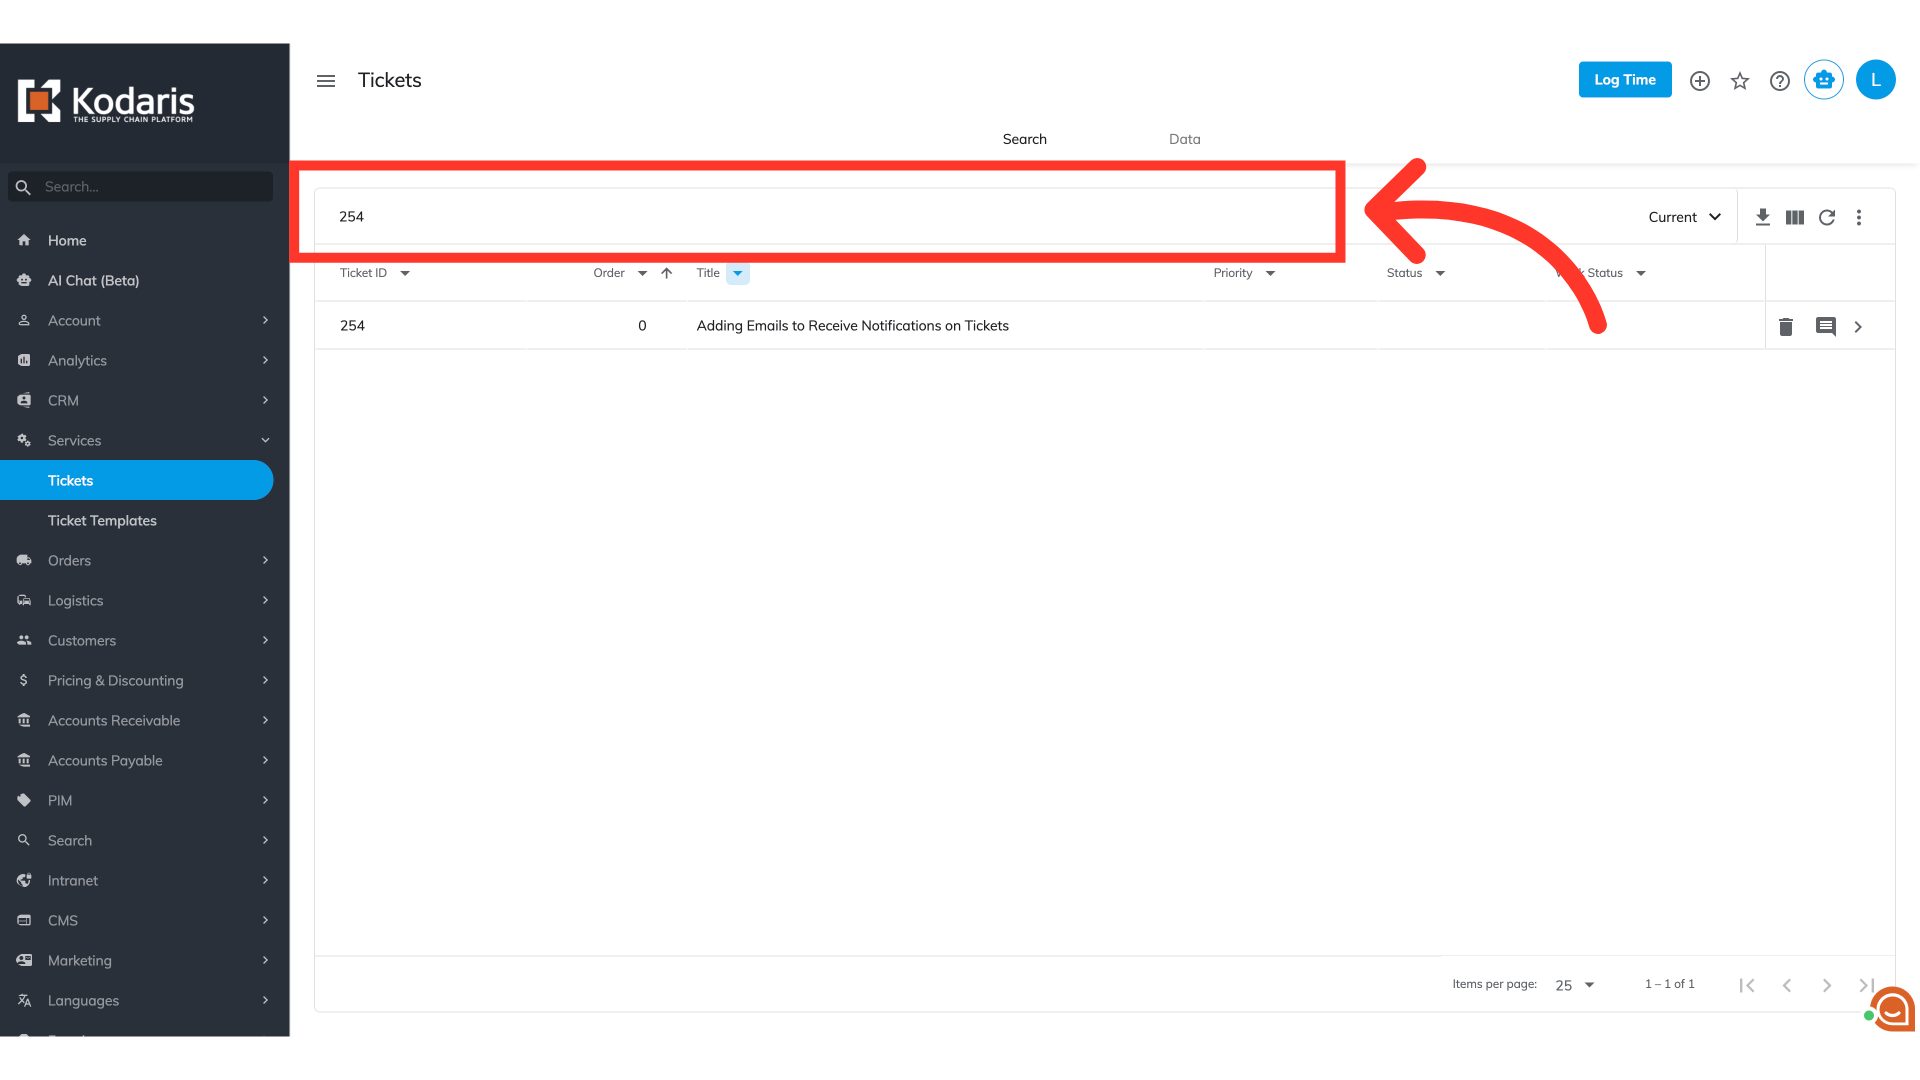
View ticket details
Click the more details icon to access the ticket's full details and recent interactions.

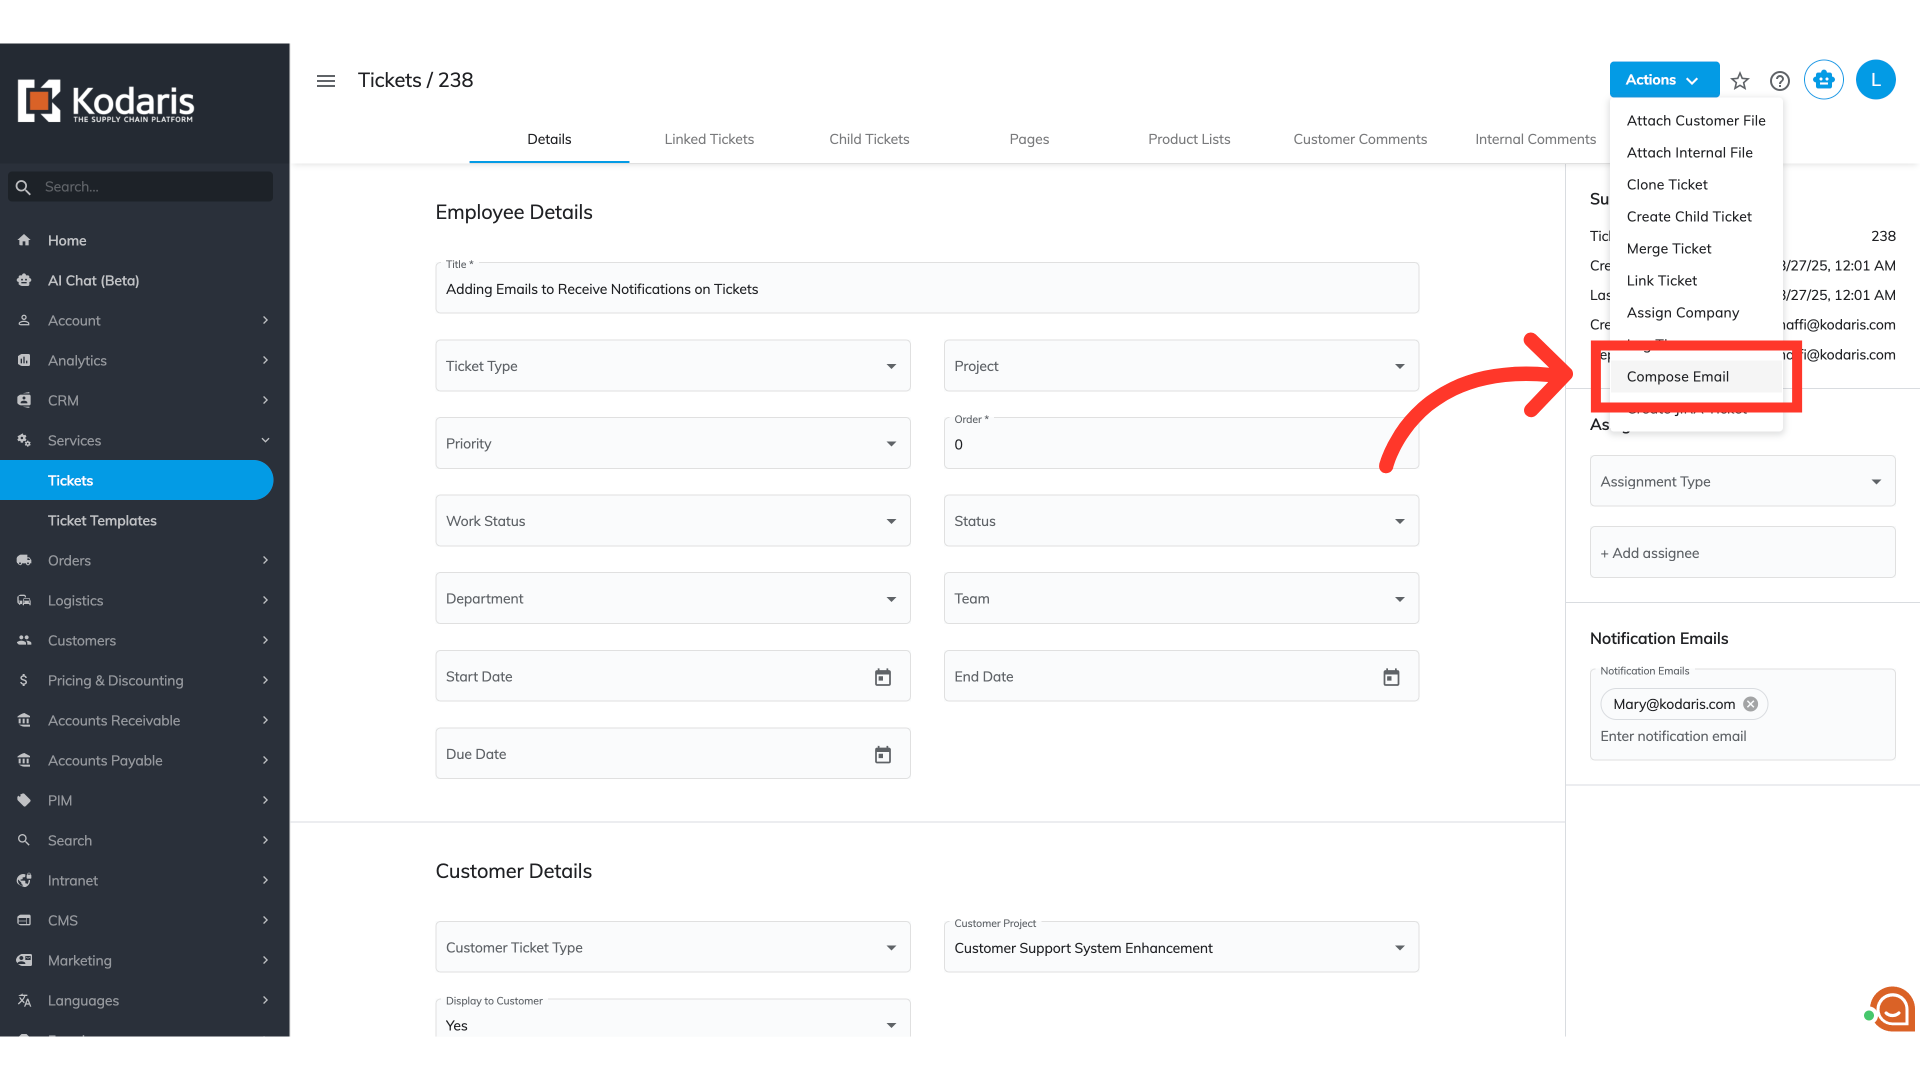
Access "Compose Email" option from the "Actions" dropdown
Click the "Actions" button to reveal an extended menu, then select "Compose Email."
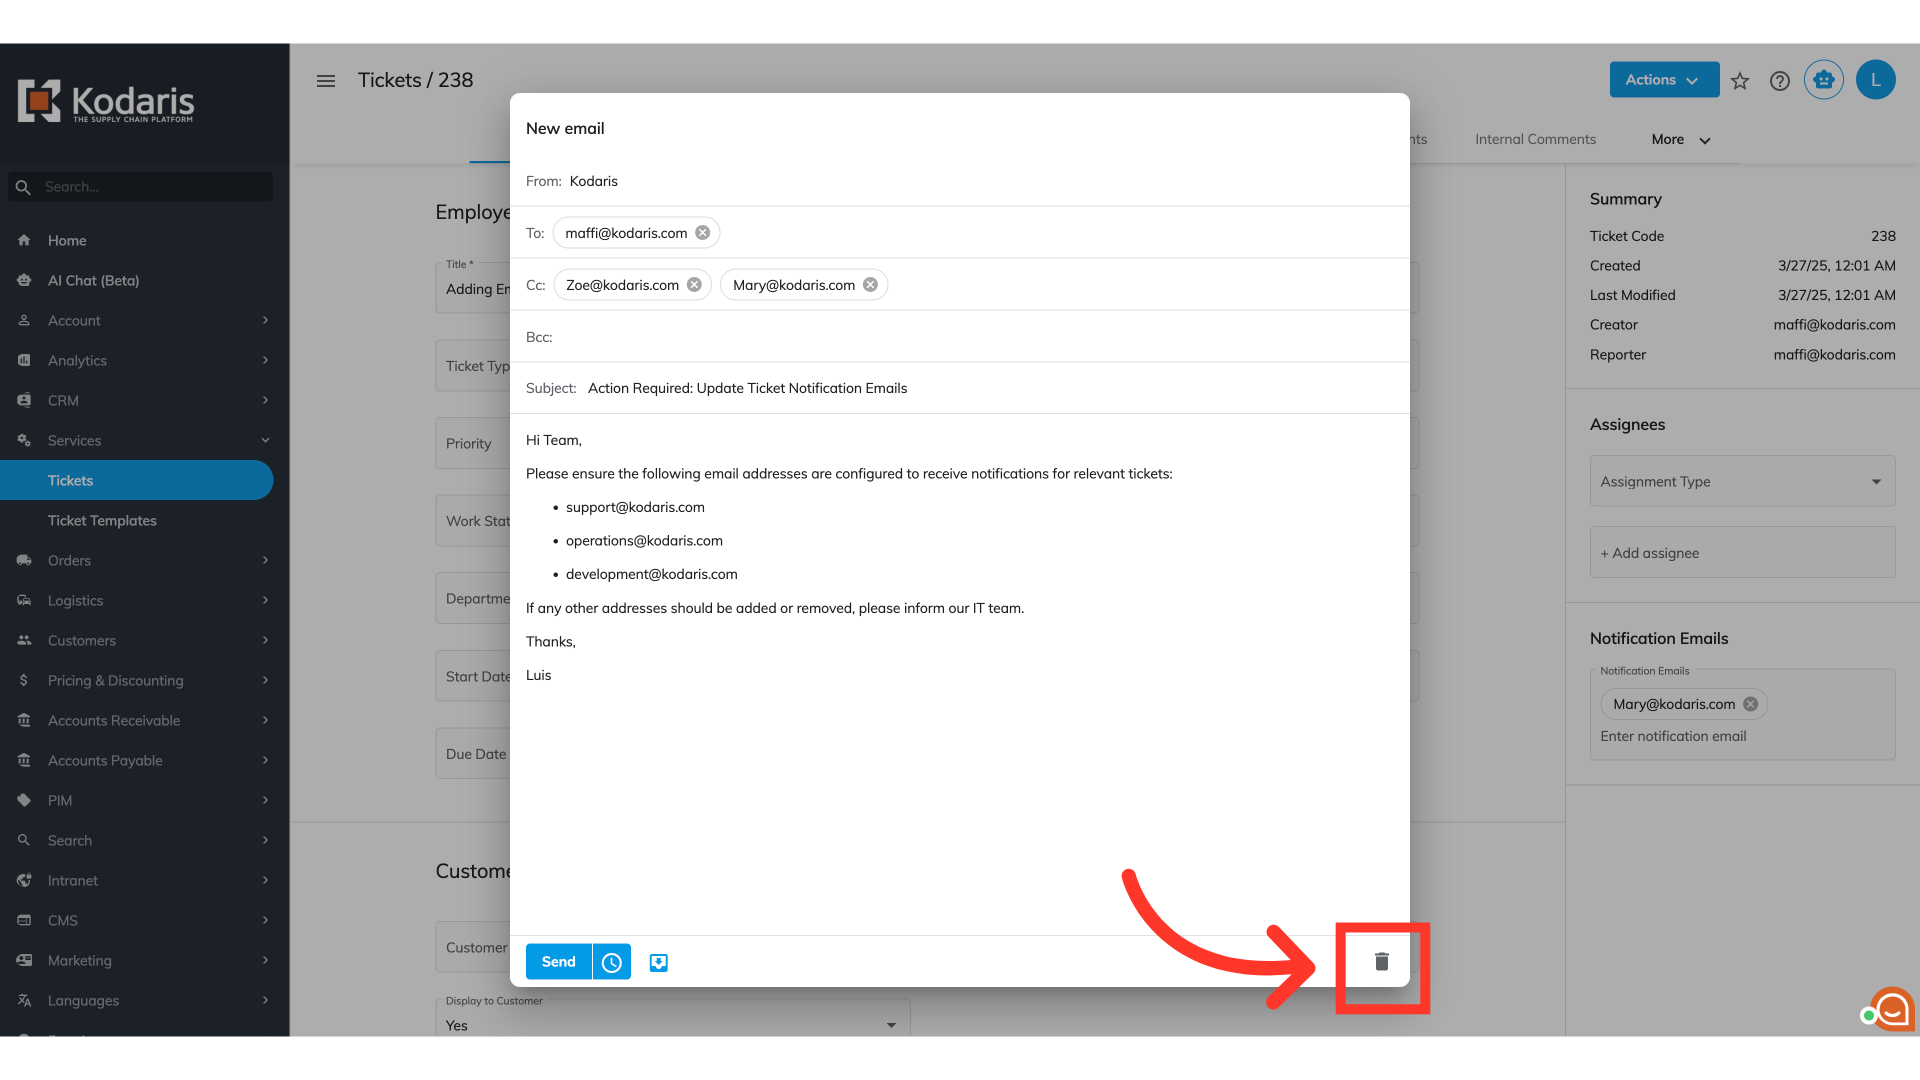
Add the email address of the email recipient
A "New Email" window will open for you to draft your message. You'll be asked to fill in details just like in a regular email form. This includes a "From" address for the sender, a "To" address for the main person receiving the email, a "CC" field to copy others (who everyone will see), and a "BCC" field to privately copy others.

Add the email message
The "Subject" field can summarize the email's content to help recipients understand its purpose before opening. The text area is the primary space for your email's content.

Click "Schedule Send" icon to schedule the email, if desired
Clicking "Schedule Send" allows you to schedule your email for a future send time instead of sending it immediately.

Click “Replies goes to the default email address” icon
This option will turn on the feature, "Replies go to the default email address". This feature will make the default email address that is set up in your system the recipient for all replies. A blue icon indicates it's enabled.

Click the "Send" icon
Once you are done drafting your email, click the "Send" button

Click the "Trash" icon to discard the email
If you need to delete the email, click the trash icon to discard the email and close the window without sending.