Operations PIM - Product Configurator Filter Category & Attribute Value Configuration
Navigate to "PIM"
To create filter categories for your product configurator, navigate to the "PIM" section in the Operations Portal.

Click "Filter Categories"
Then, click "Filter Categories". In order to access and update “Filter Categories” and “Attributes” you will need to be set up either as an “administrator” or a “superuser”, or have the role of “facetGroupEdit”.

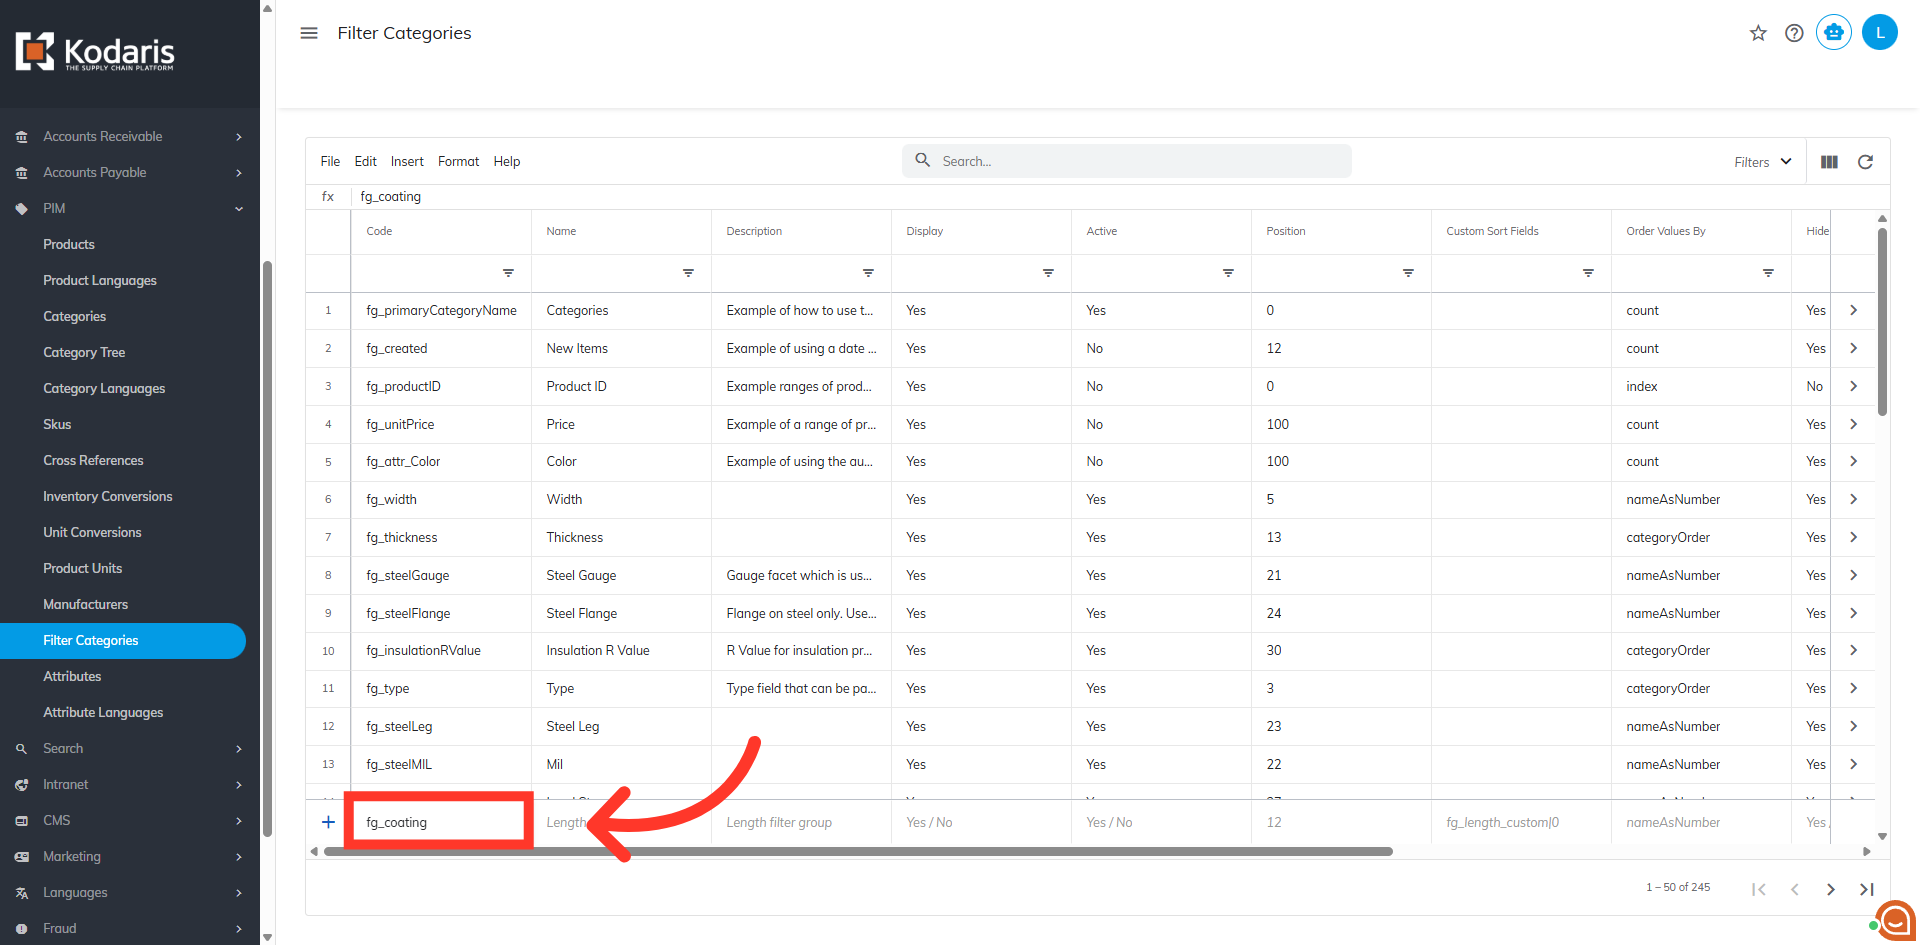
Click the "Show/Hide Columns" icon
In the "Filter Categories" screen, click the "Show/Hide Columns" icon.

Select "Product Display"
Select the "Product Display" option to be added to the grid. This column is needed when creating filter categories for the product configurator.

Enter the filter category code
To create a filter category, enter the filter category code prefaced with "fg_". In this sample, we added "fg_coating". You can also use existing filter categories that have already been set up in your system.
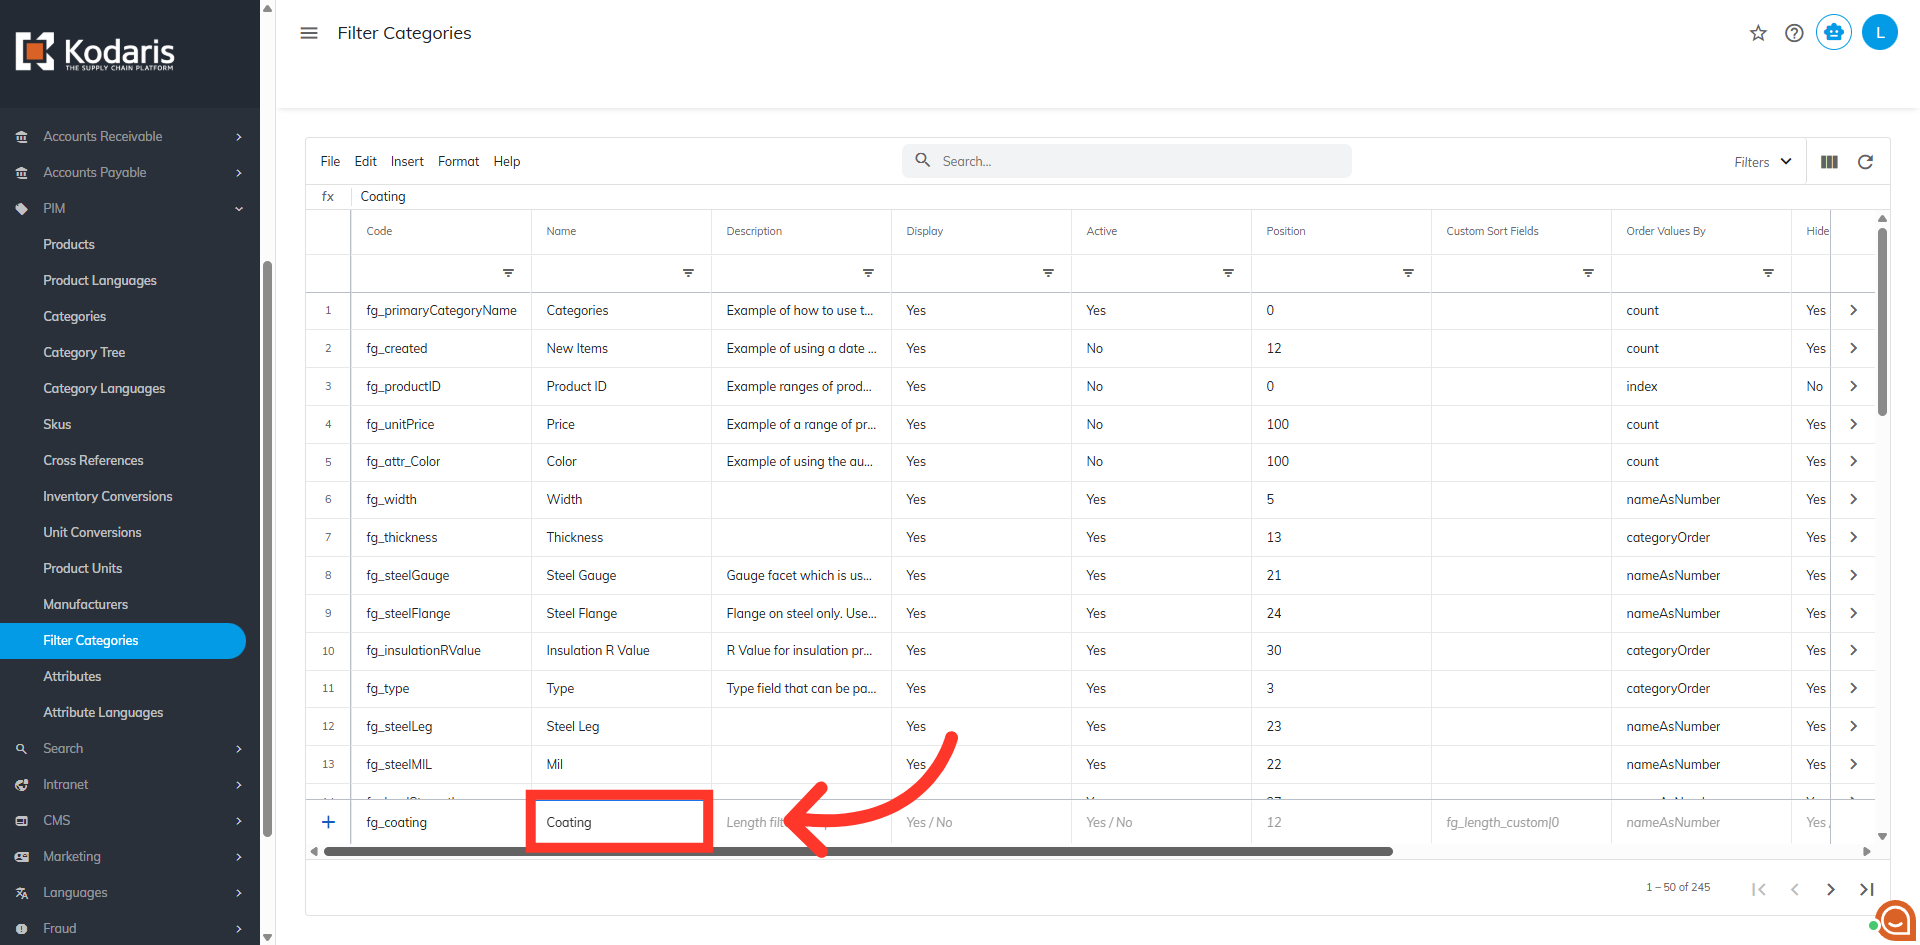
Update the name of the filter category
Update the name of the filter category. This name is visible to customers, and will be the name of your configurator dropdown. For this example we used the name "Coating".
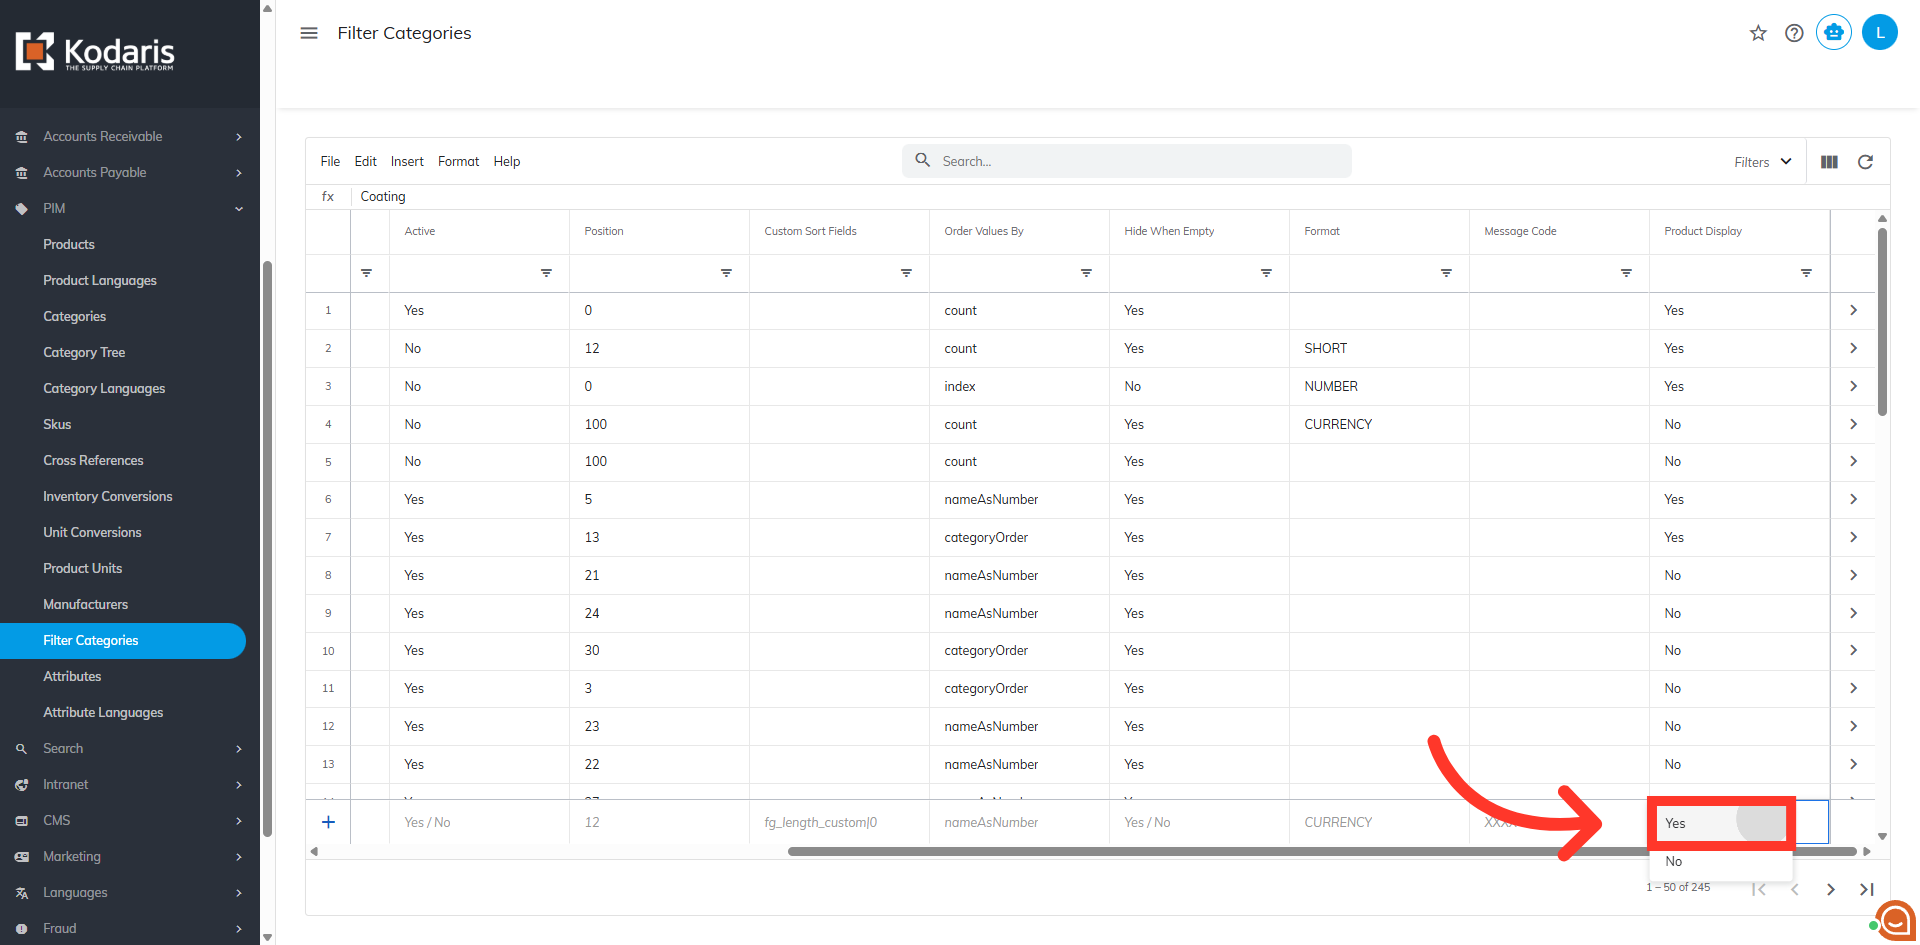
"Product Display" = "Yes"
Update "Product Display" to "Yes" in order for the filter category appear as a dropdown option in your product configurator. Then, hit enter to create the new filter category.
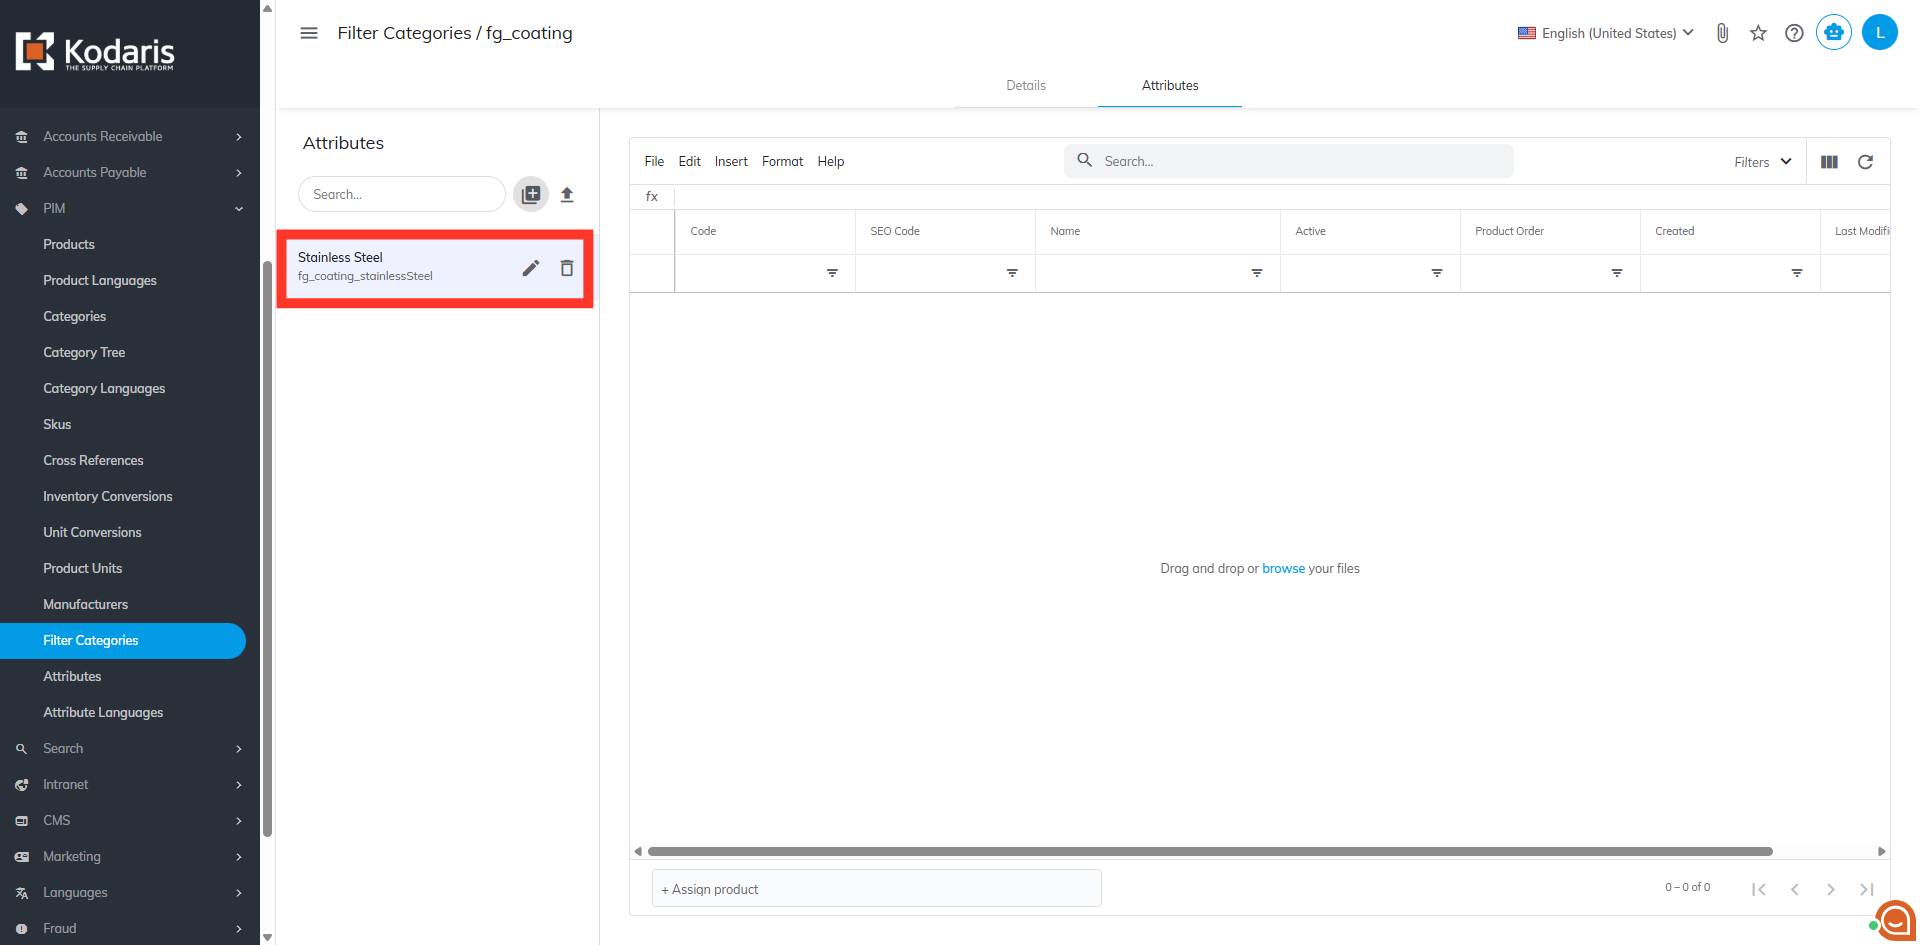
Click on the more details icon
To create the attributes associated with the filter category, click on the more details icon of the filter category. These attributes will appear in the configurator dropdown menu, and can be selected by commerce customers.

Go to "Attributes"
Go to "Attributes" tab.

Click "Add Attribute" icon
Click the "Add Attribute" icon to add a new attribute.

Enter the attribute code
Create any attributes that you would like to appear in the dropdown menu. These attributes represent the options customers can select. In this example, we have added fg_coating_stainlessSteel.
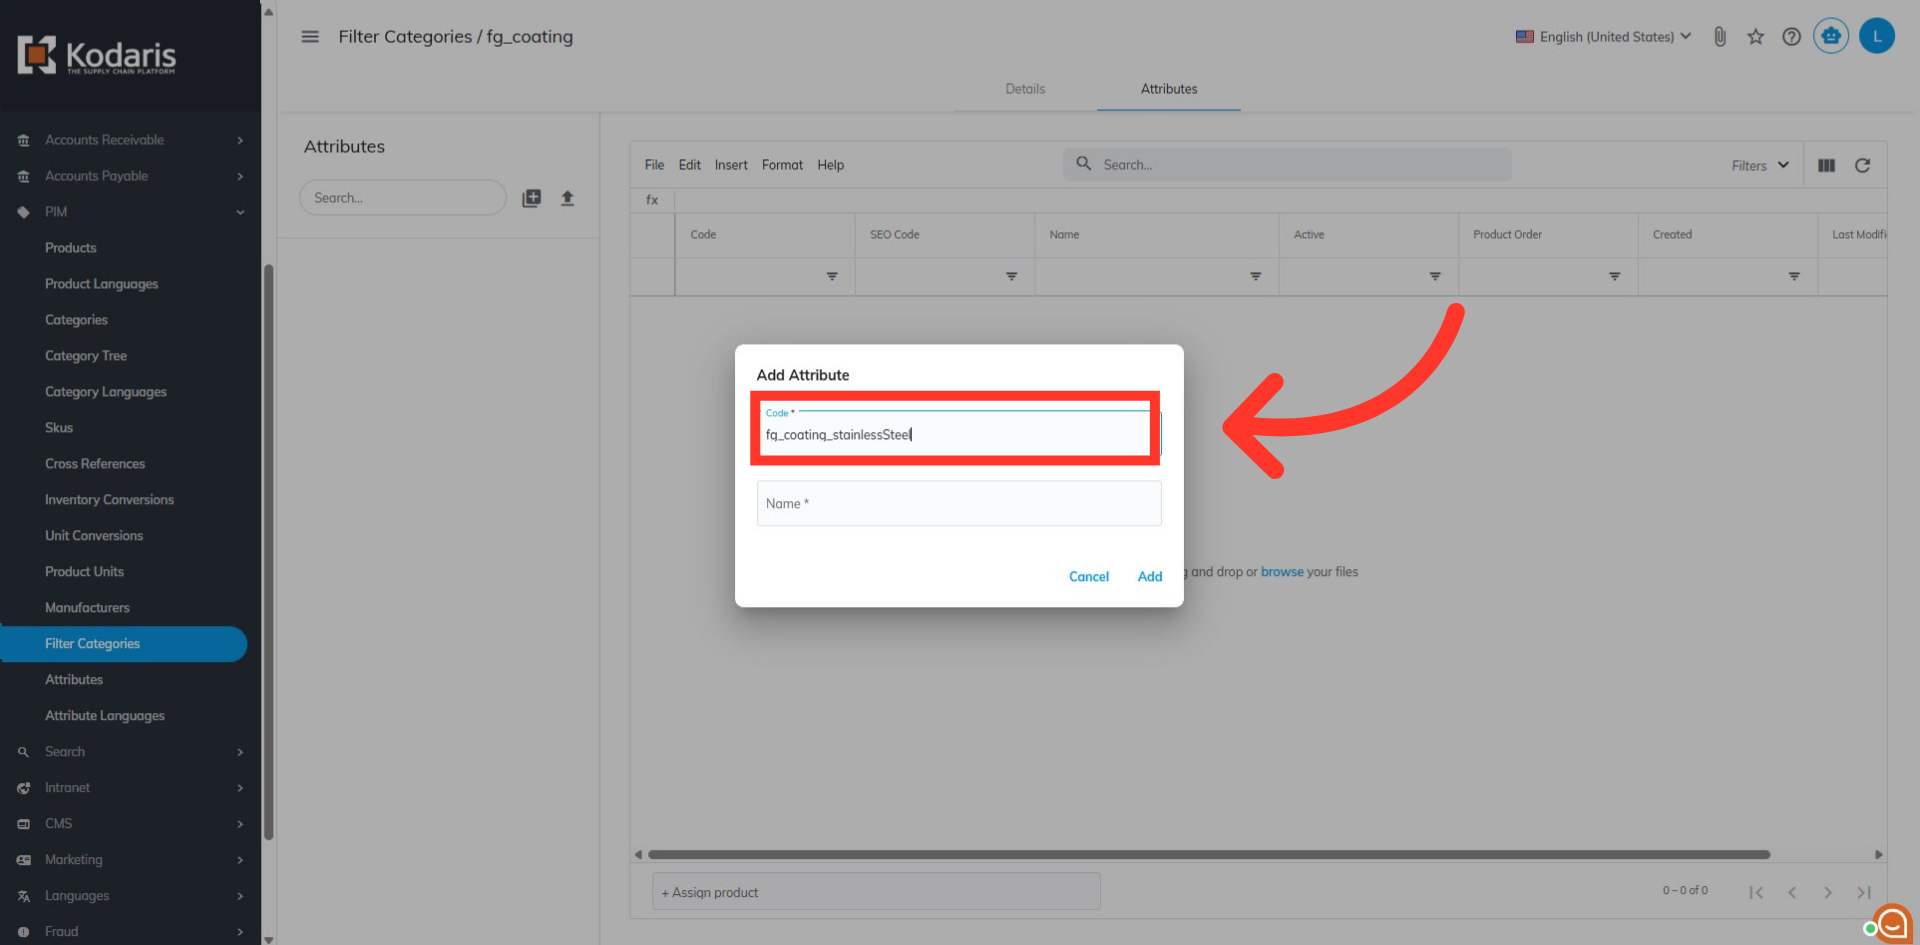
Enter the attribute name
Enter the attribute name. This name will be visible to customers on the commerce site.

Click "Add"
Then, click "Add" to save your attribute.

Added Attribute
Once you have the filter categories and attributes set up, you can assign products to your attributes.