Add "Save to ERP Warning" Using saveOrderToErpValidationManual.js Interceptor
Navigate to "Development"
To add the "Save to ERP" warning, navigate to the "Development" section in the operations portal.
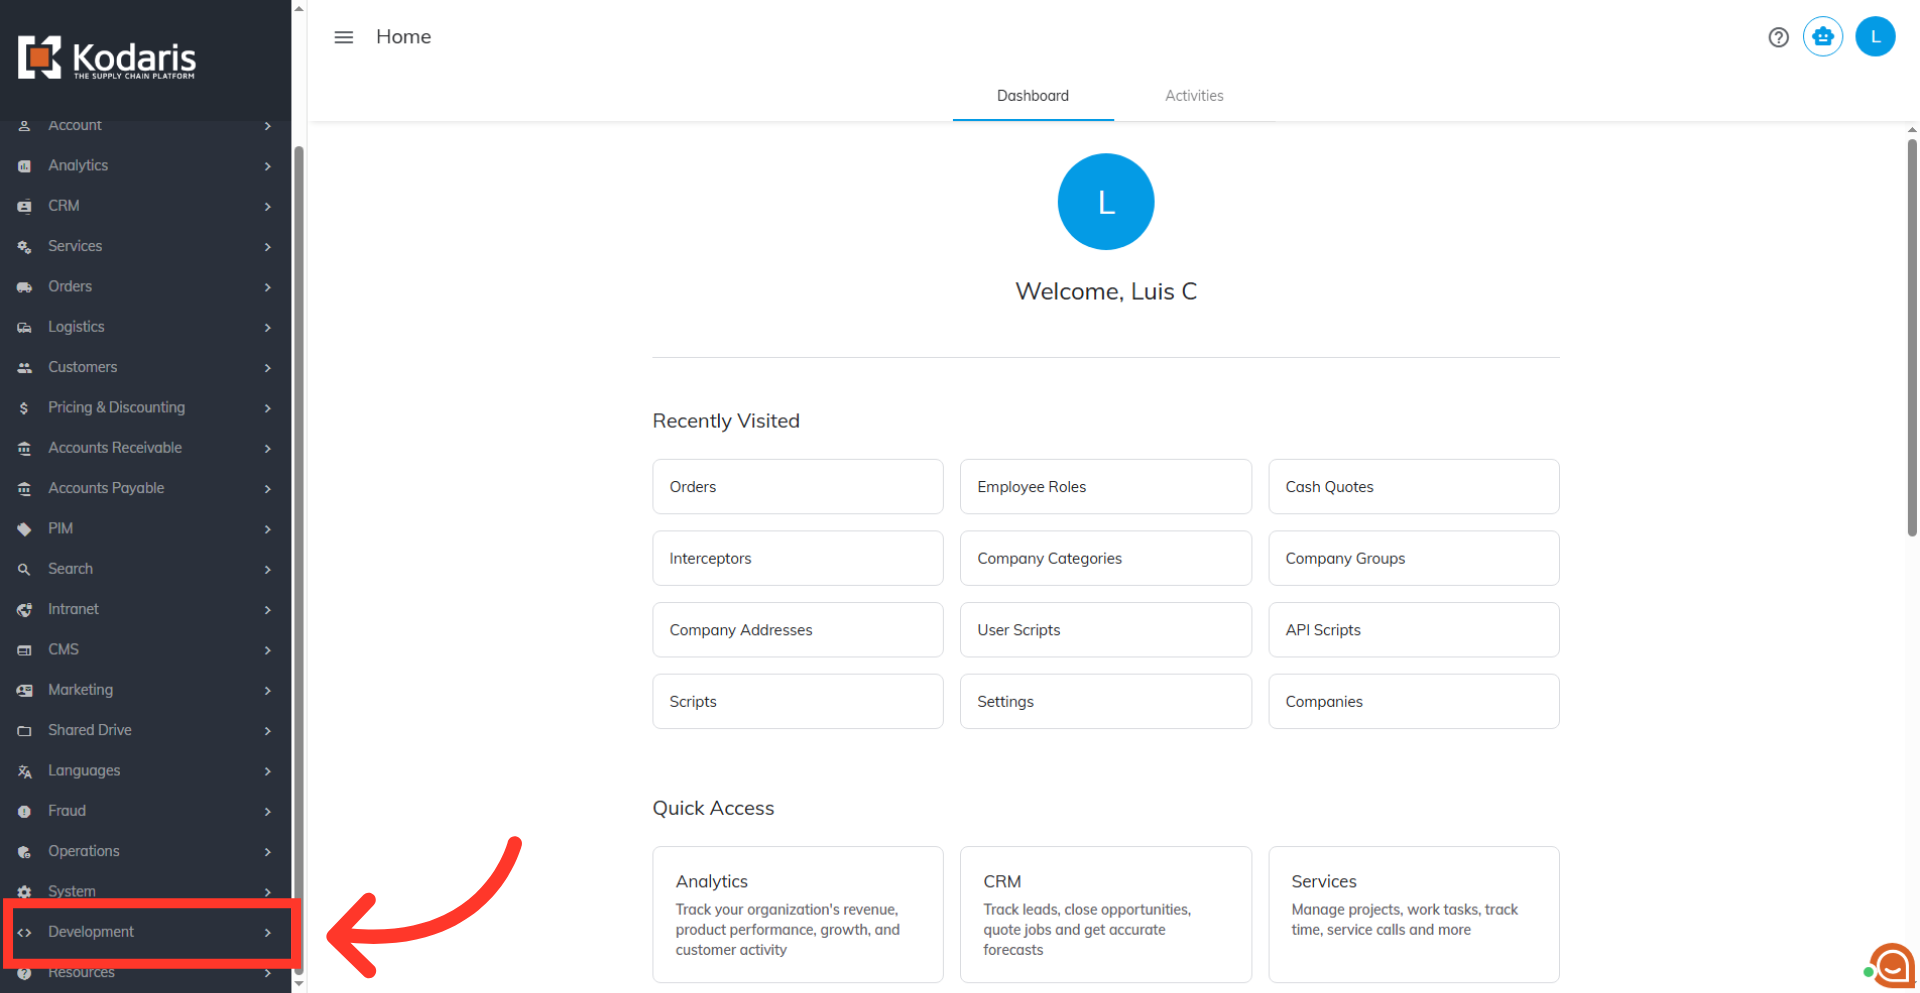
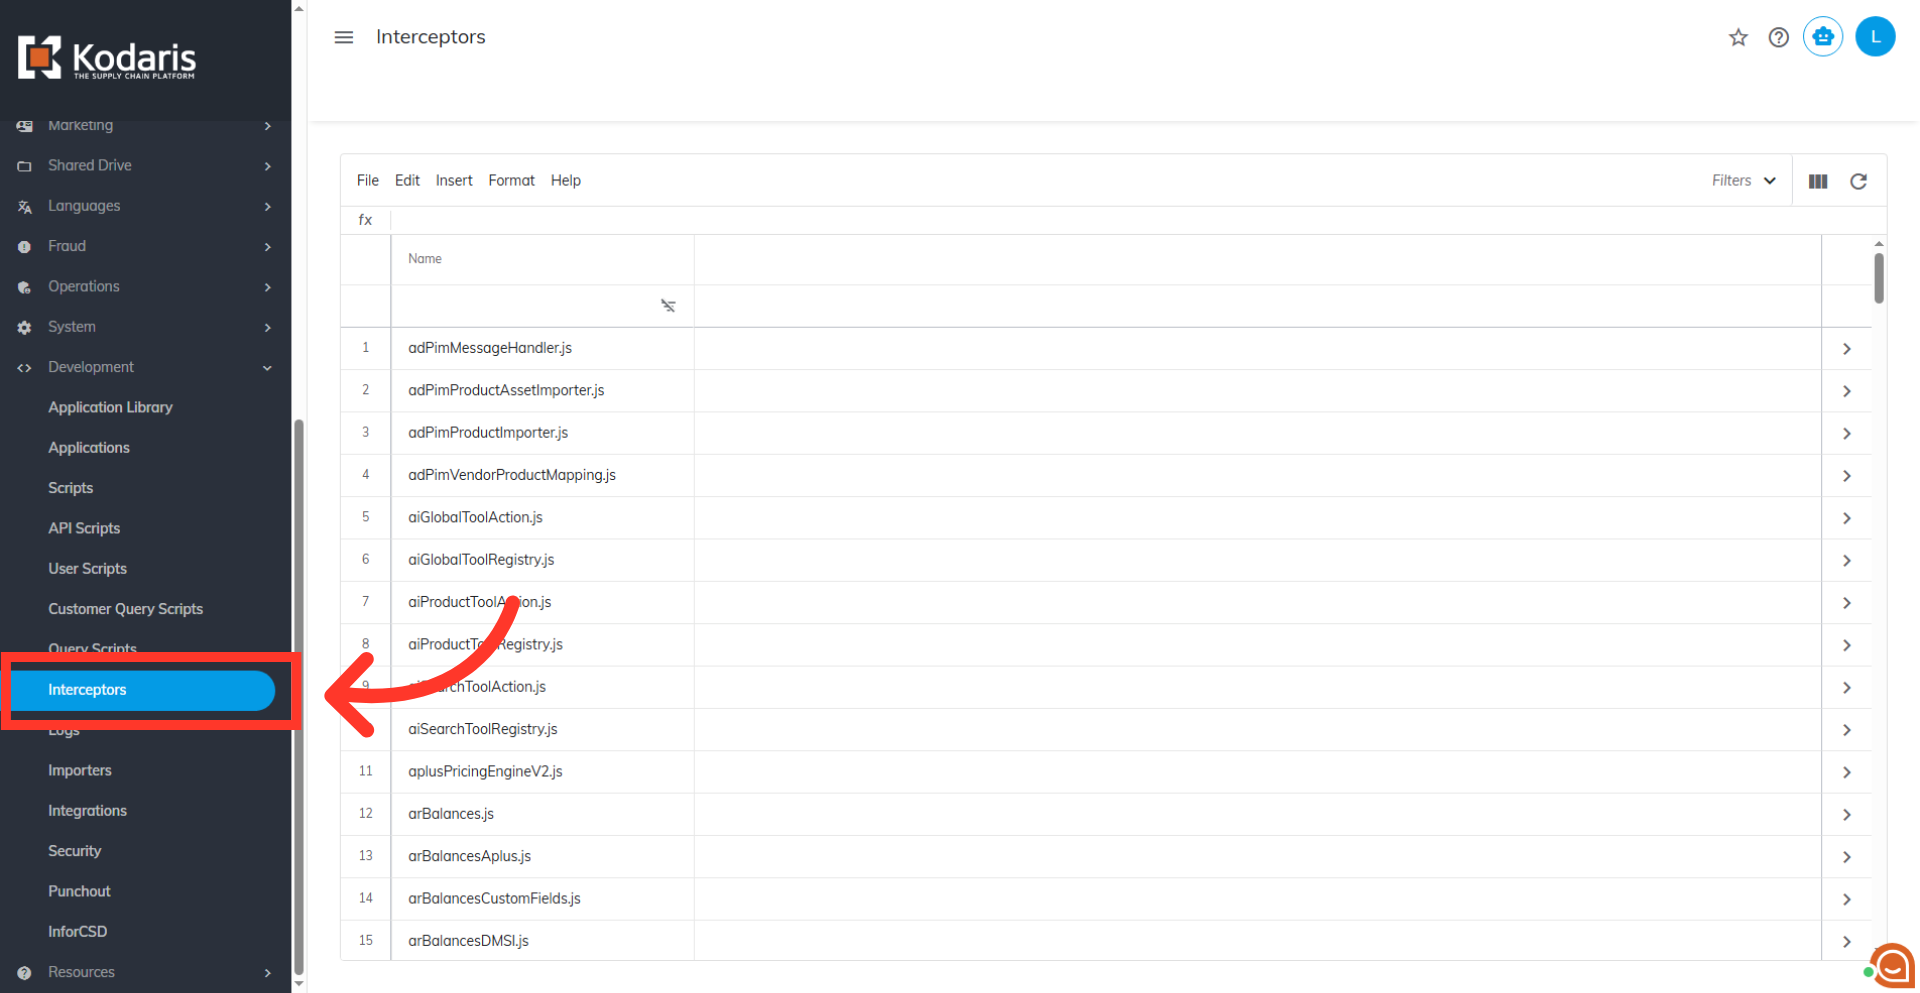
Click "Interceptors"
Click "Interceptors". In order to access "Interceptors" the account will need to be set up either as an "administrator" or a "superuser", or have the appropriate role: "scriptEdit".
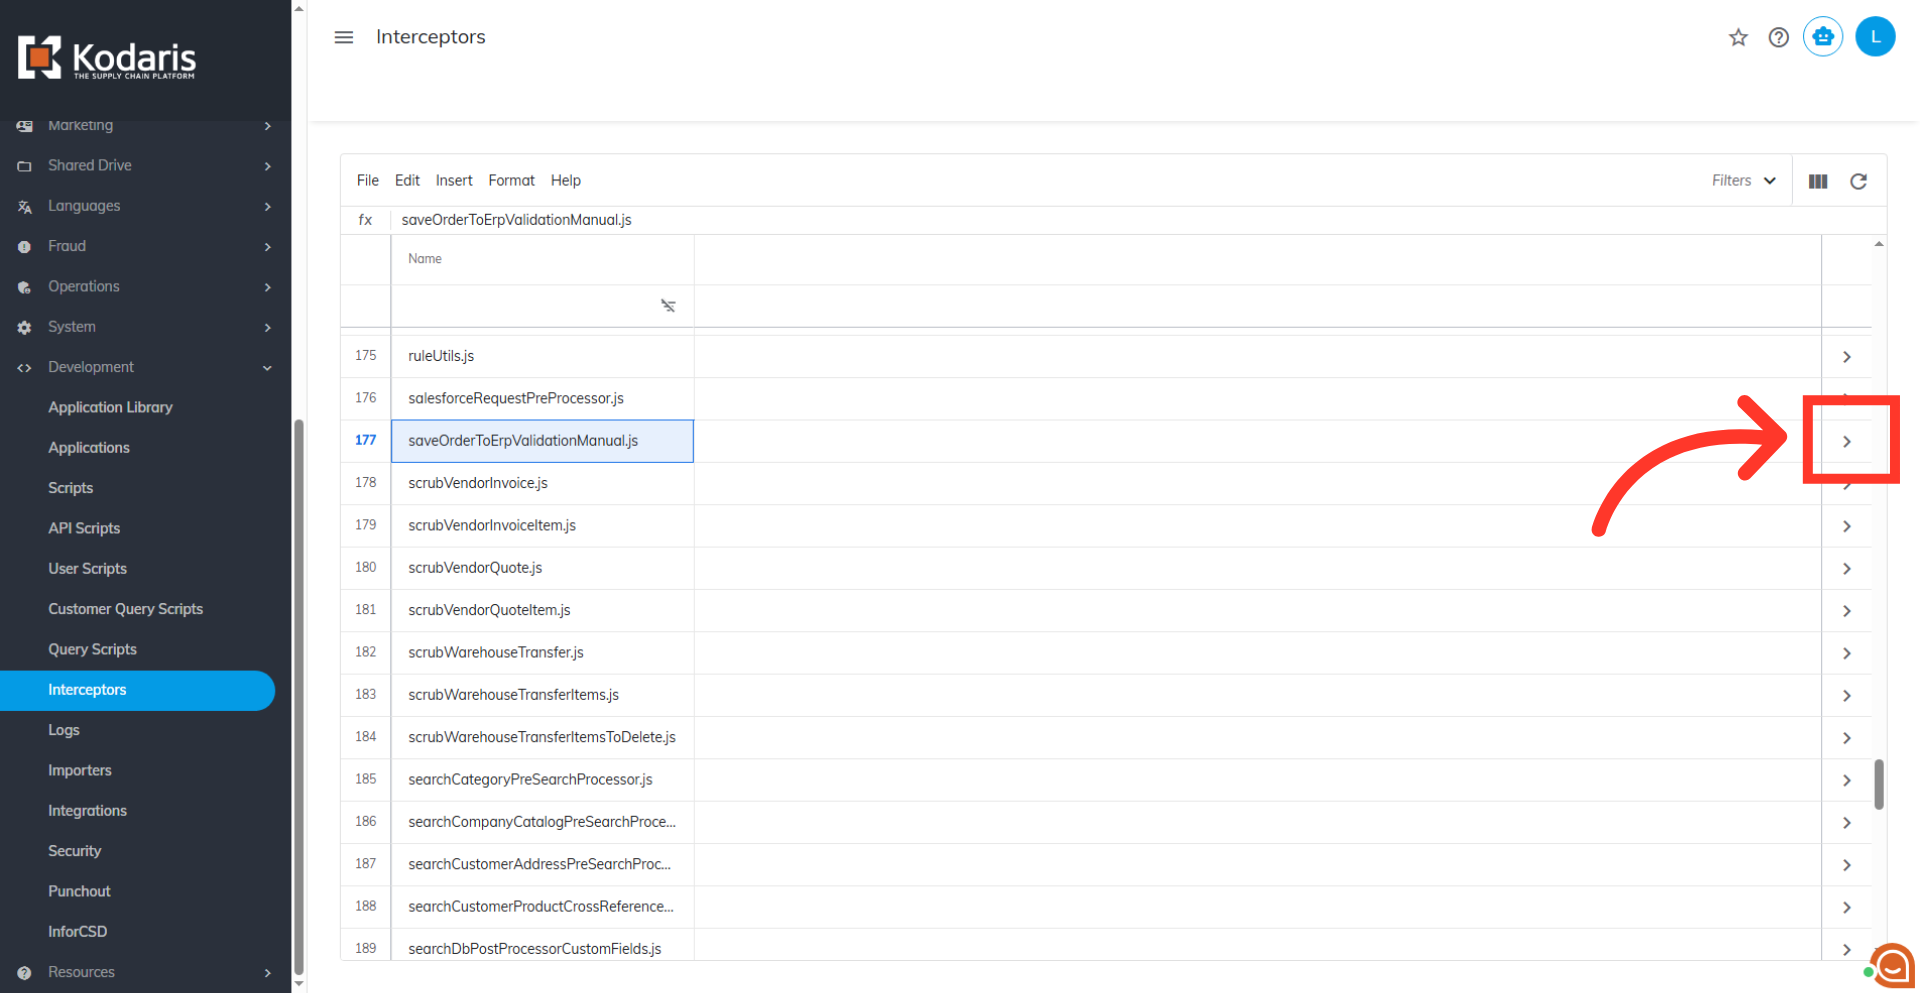
Locate the "saveOrderToErpValidationManual.js" interceptor
Scroll down the list to locate the "saveOrderToErpValidationManual.js" interceptor. This specific interceptor is executed just before an Order or Cash Quote is saved to the ERP.
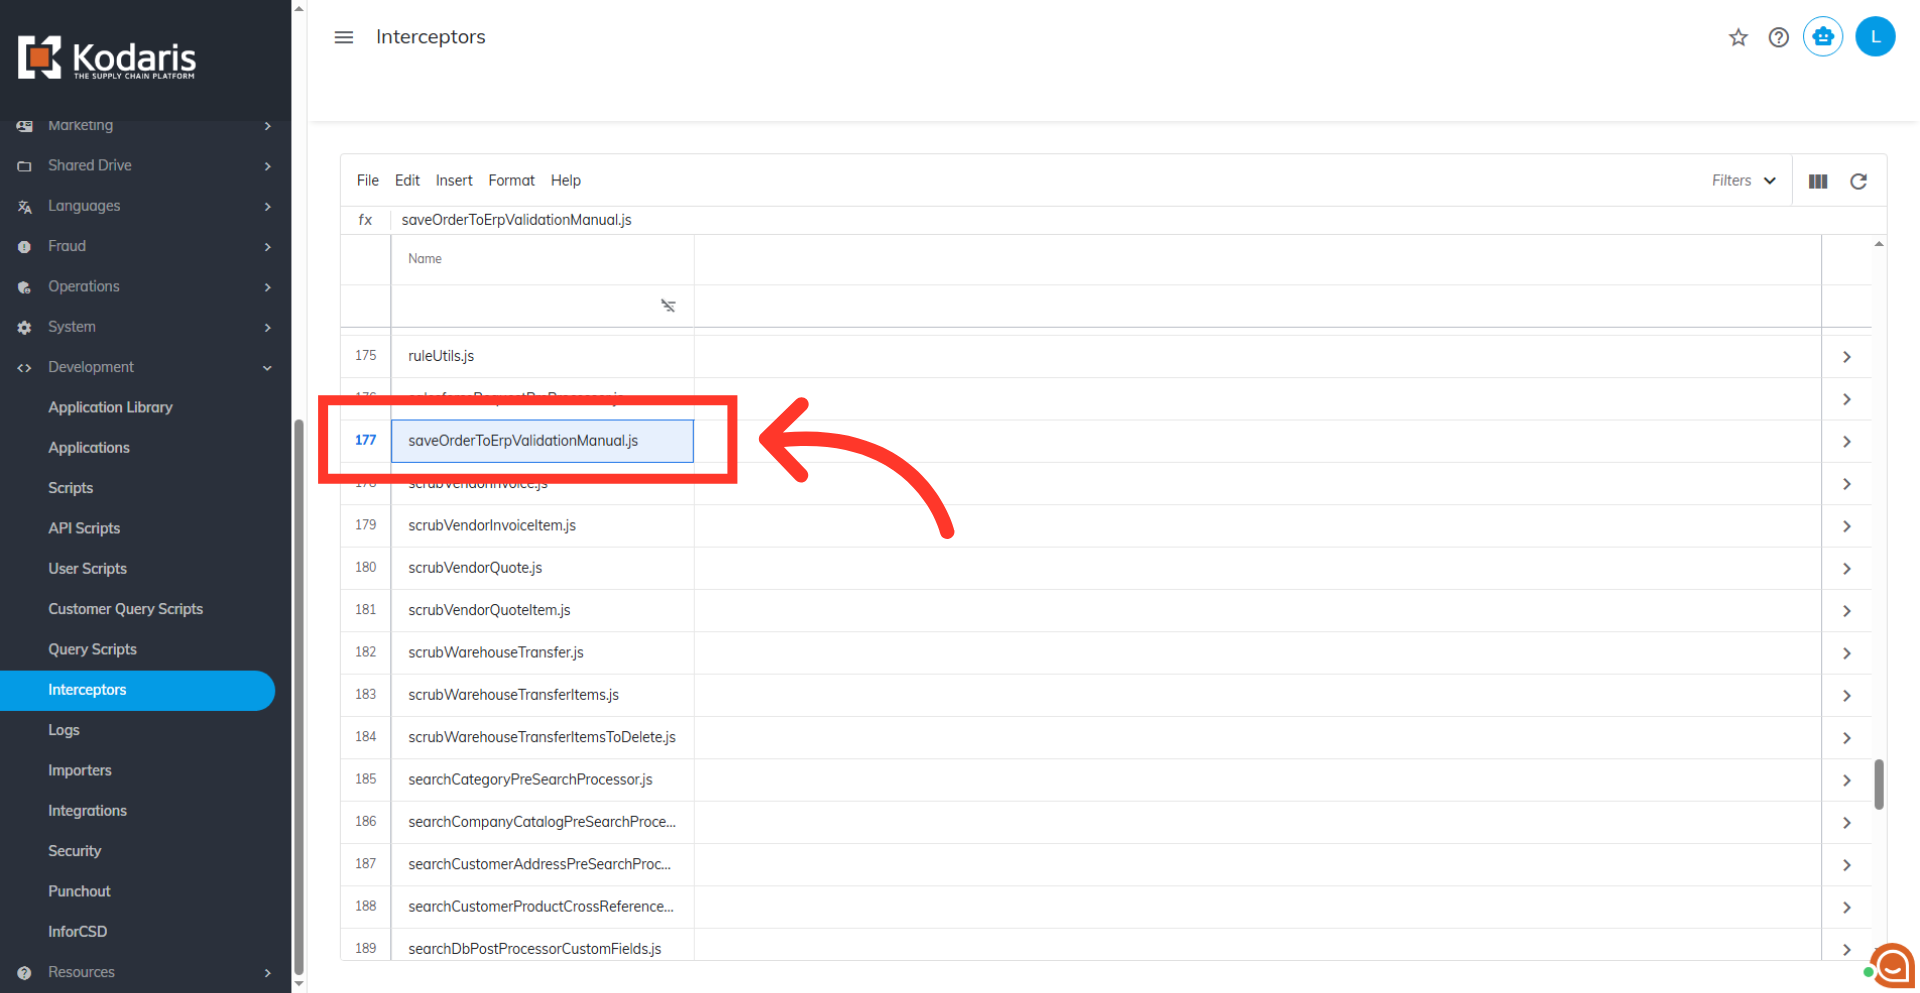
Click the more details icon
Click the more details icon to open the editor screen. This opens the code editing interface where the validation rule will be added.
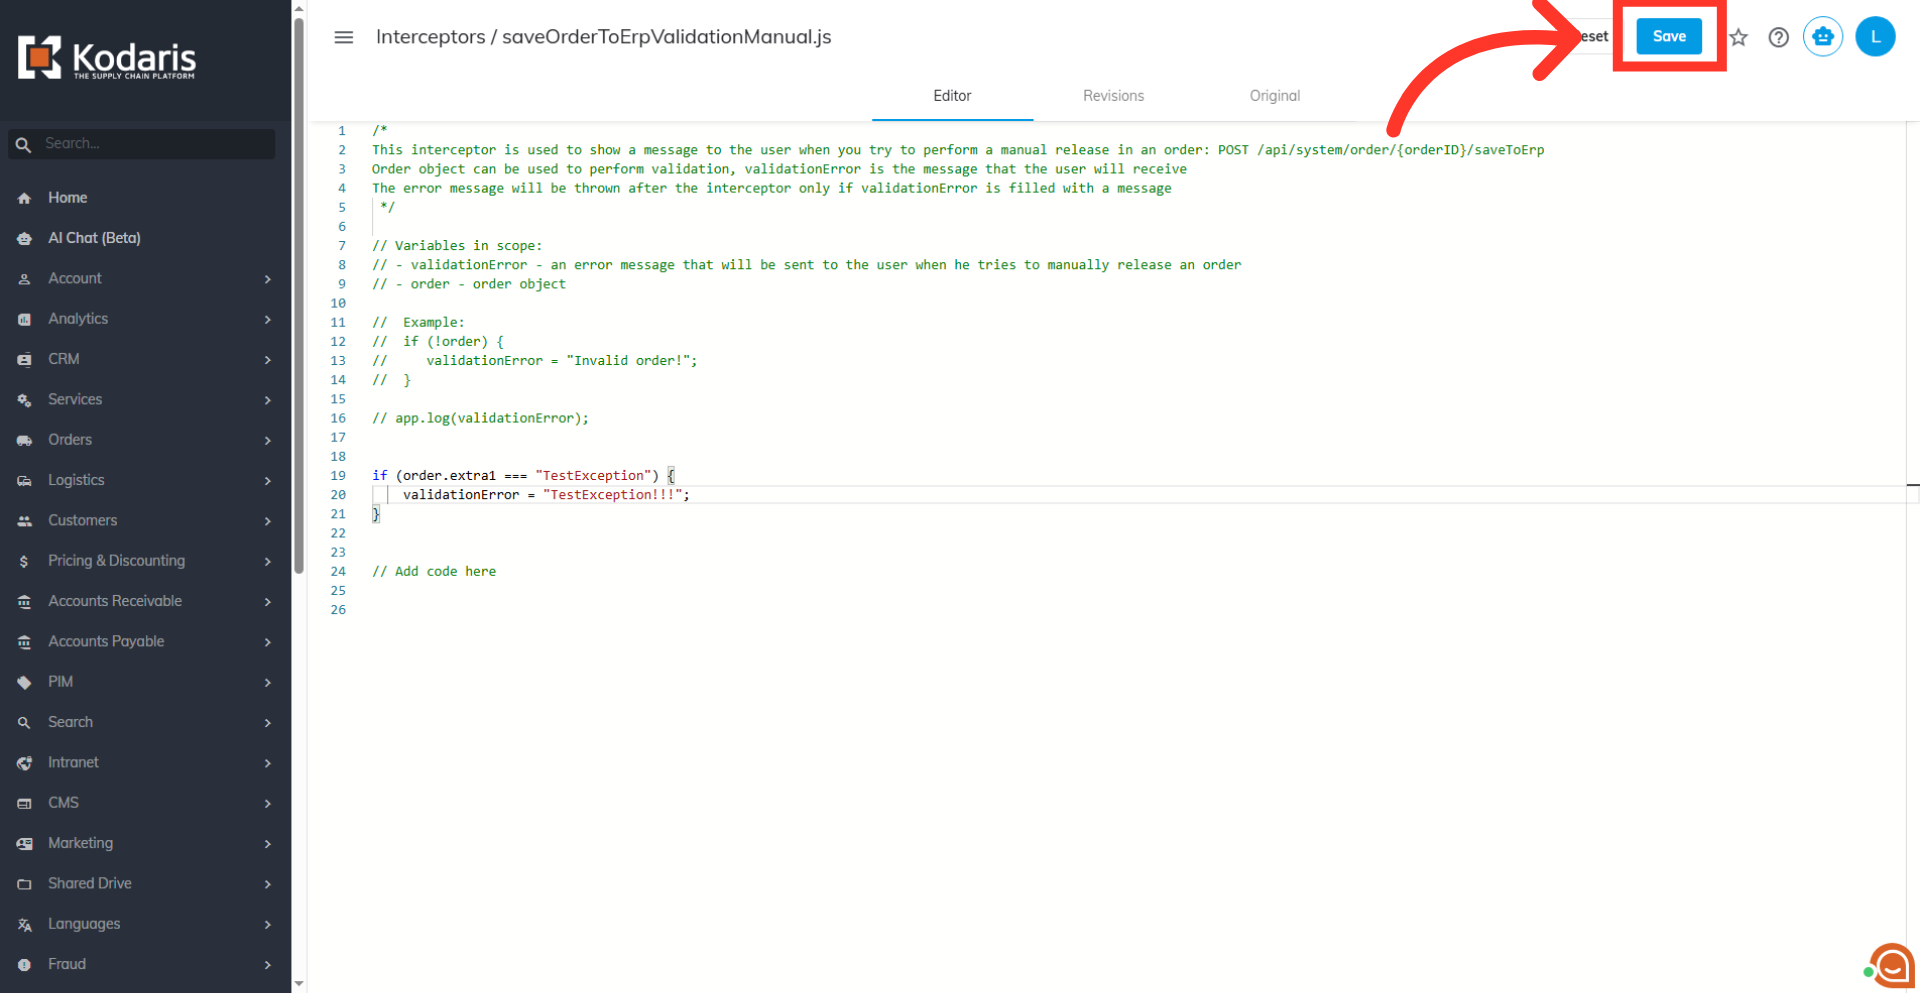
Locate the code block
Locate the code block in the editor that outputs the warning string.
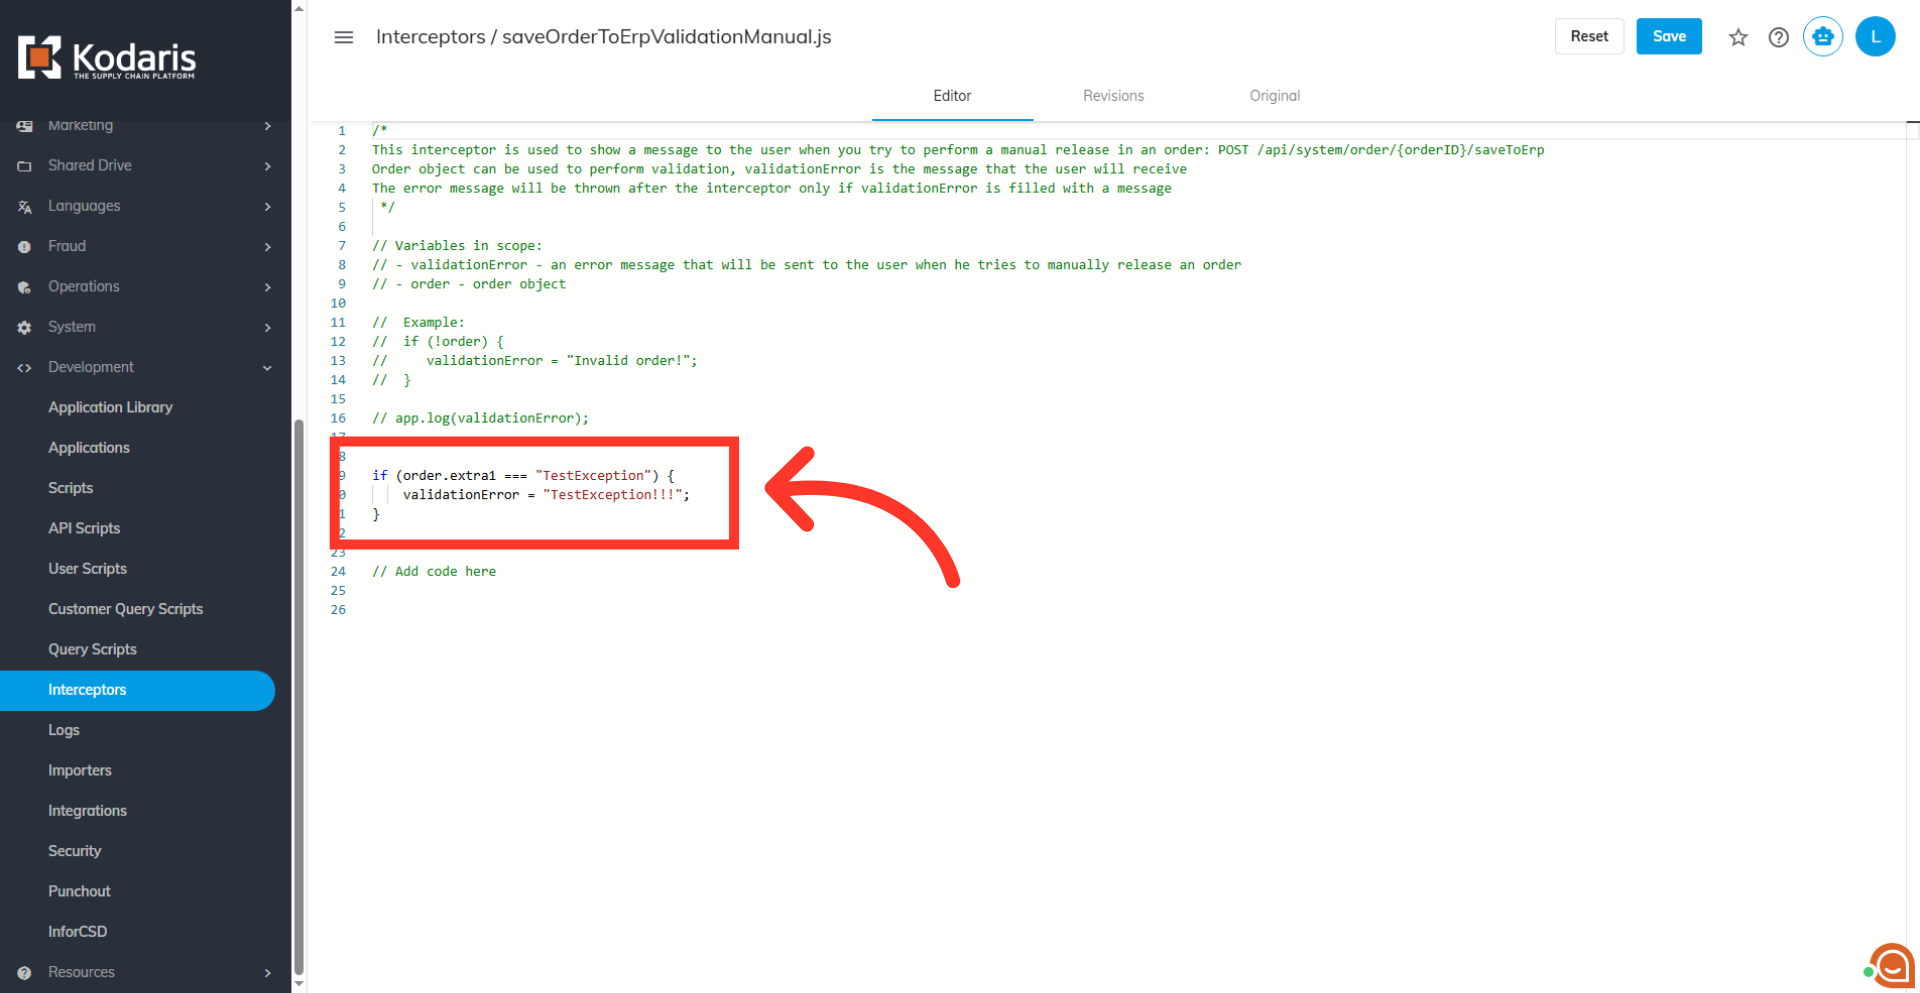
Type in the code
If the required code block is not present, insert the code block that performs the validation check directly into the editor.

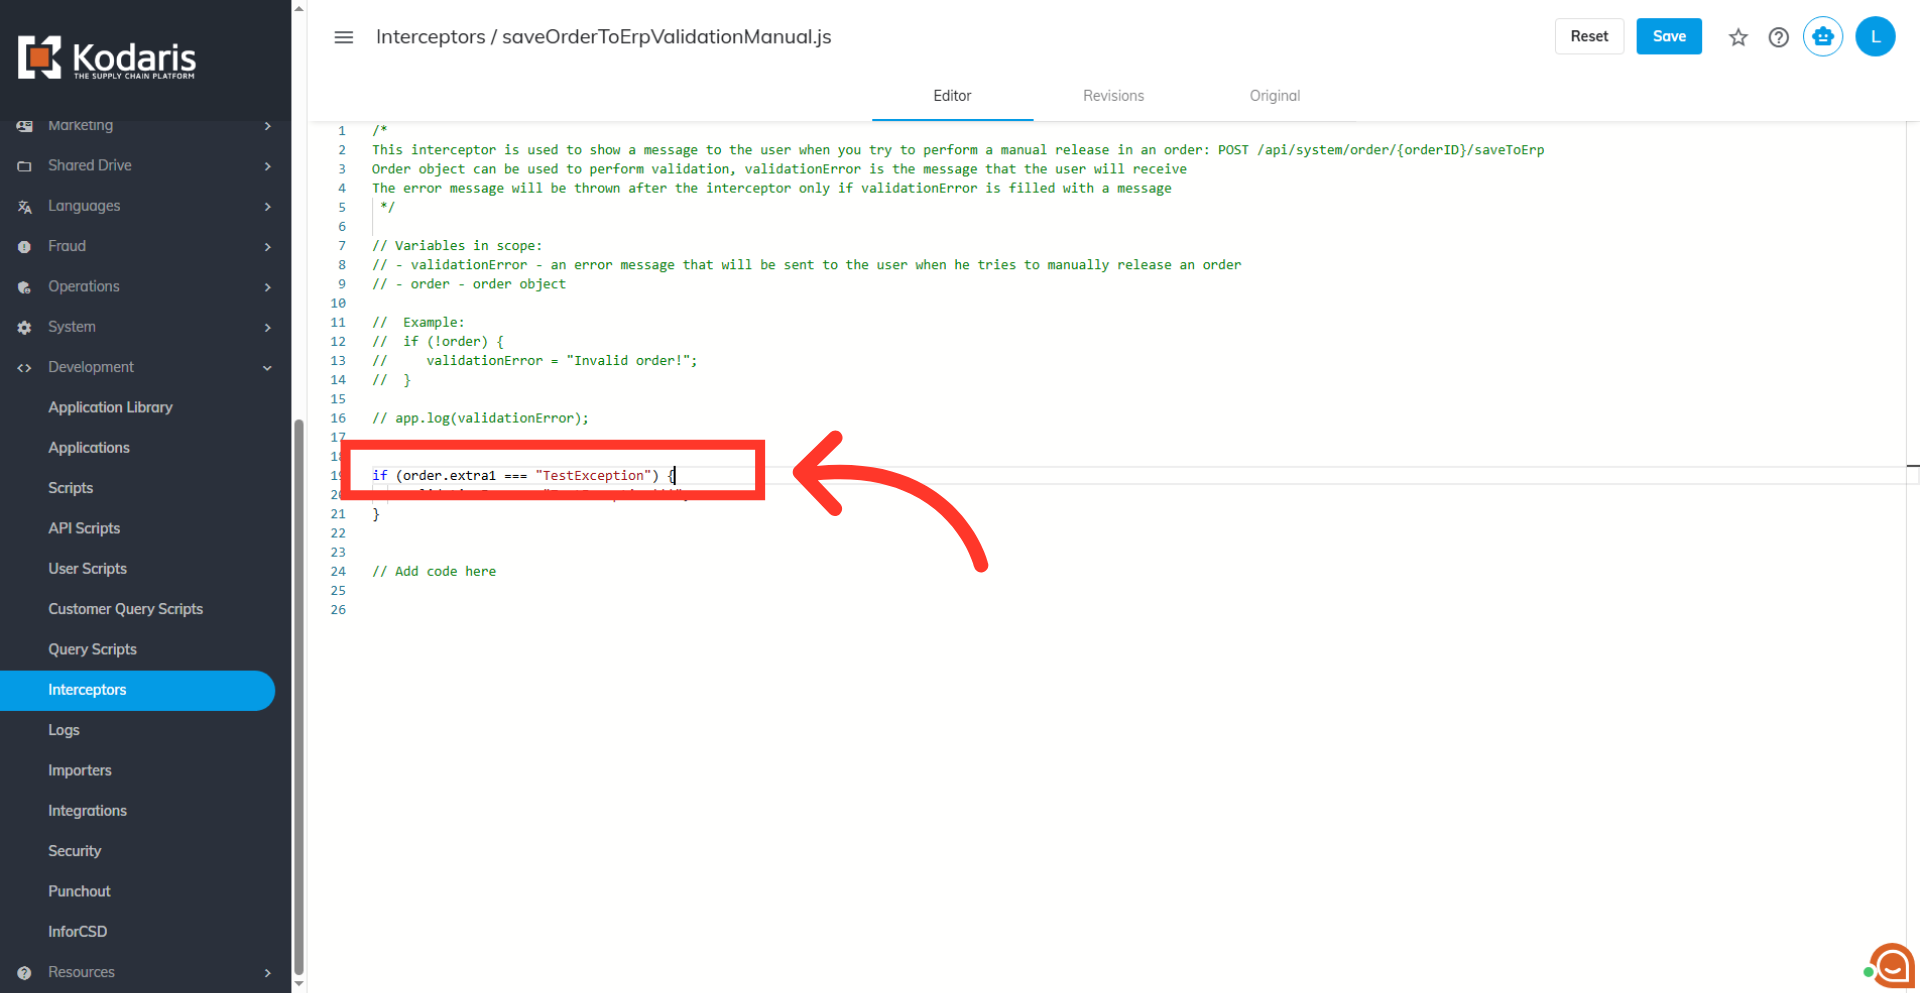
Set conditional statements
Set the custom conditional statement to check a field's value against an input value.
Set the "Save to ERP" warning message
Assign a custom string to the "validationError" variable. The string is displayed as "Save to ERP" warning message.
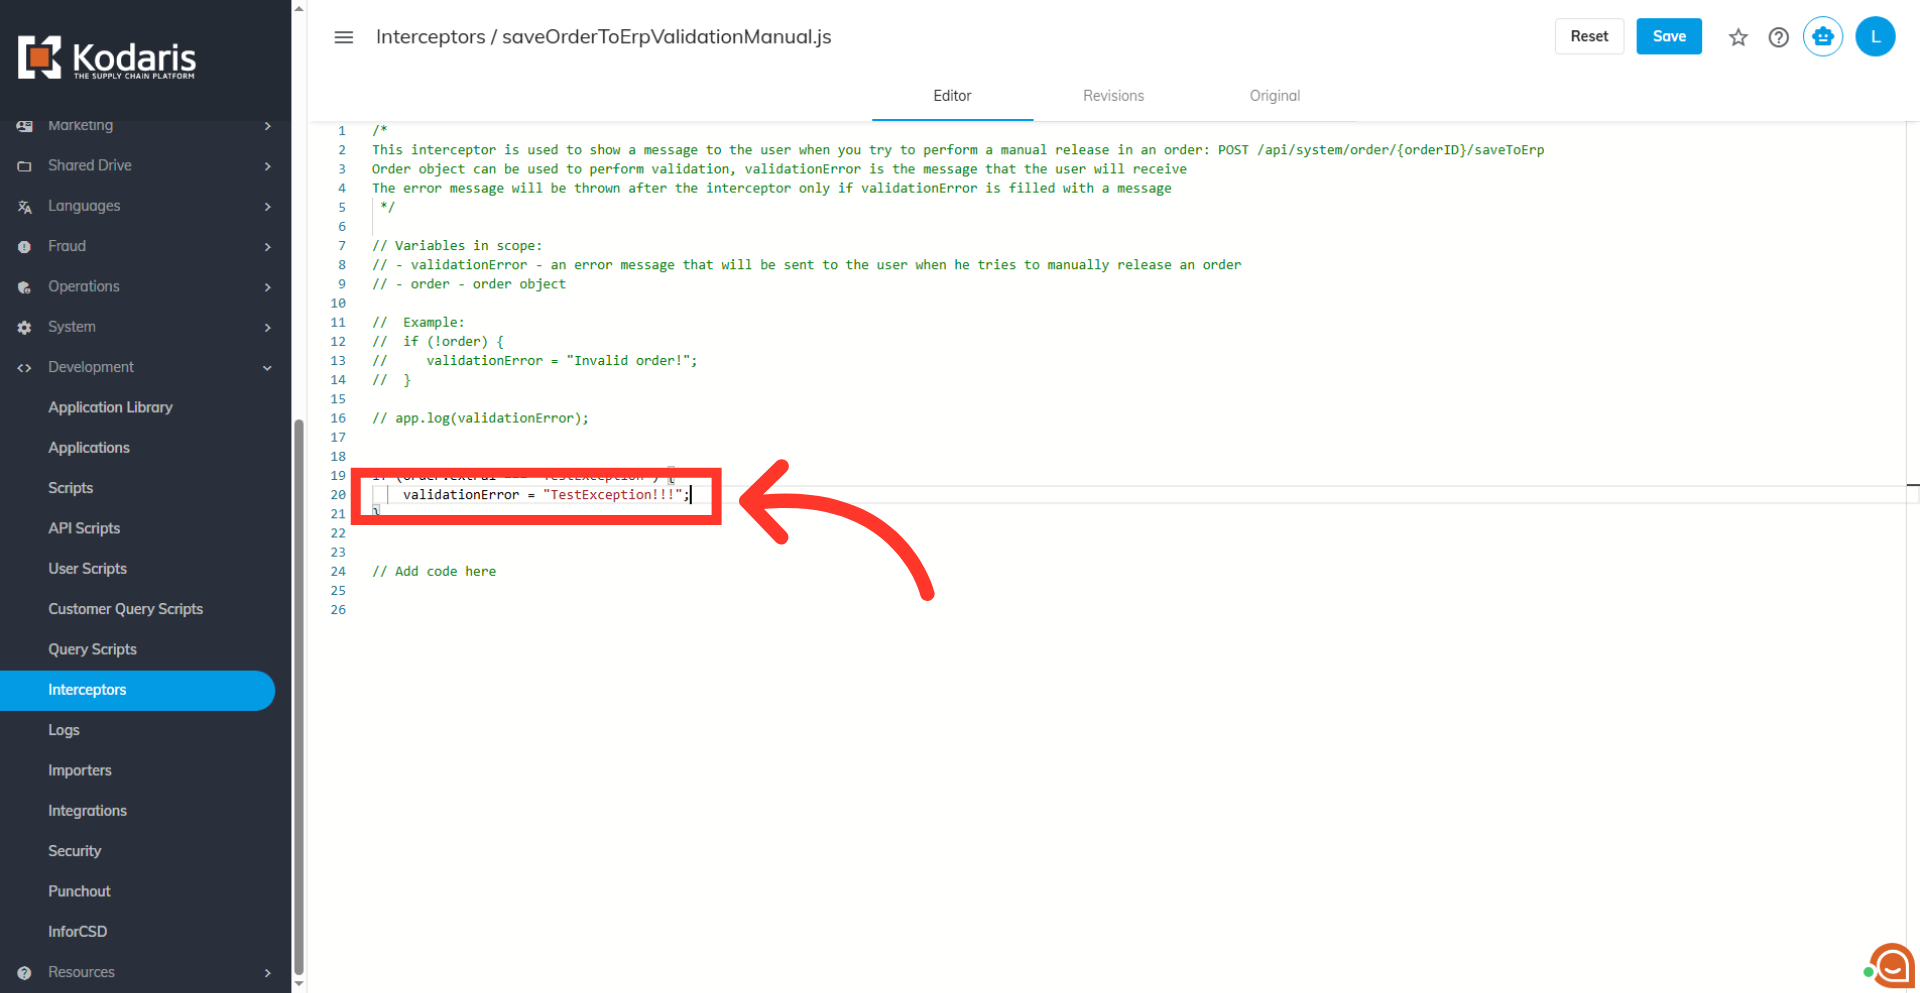
Click on "Save" button
Click "Save" to save the code block to the interceptor.
Go to "Orders"
To check if the code is working, navigate to "Orders" screen. In order to access and update "Orders", you will need to be set up either as an "administrator" or a "superuser", or have the role: "orderEdit".
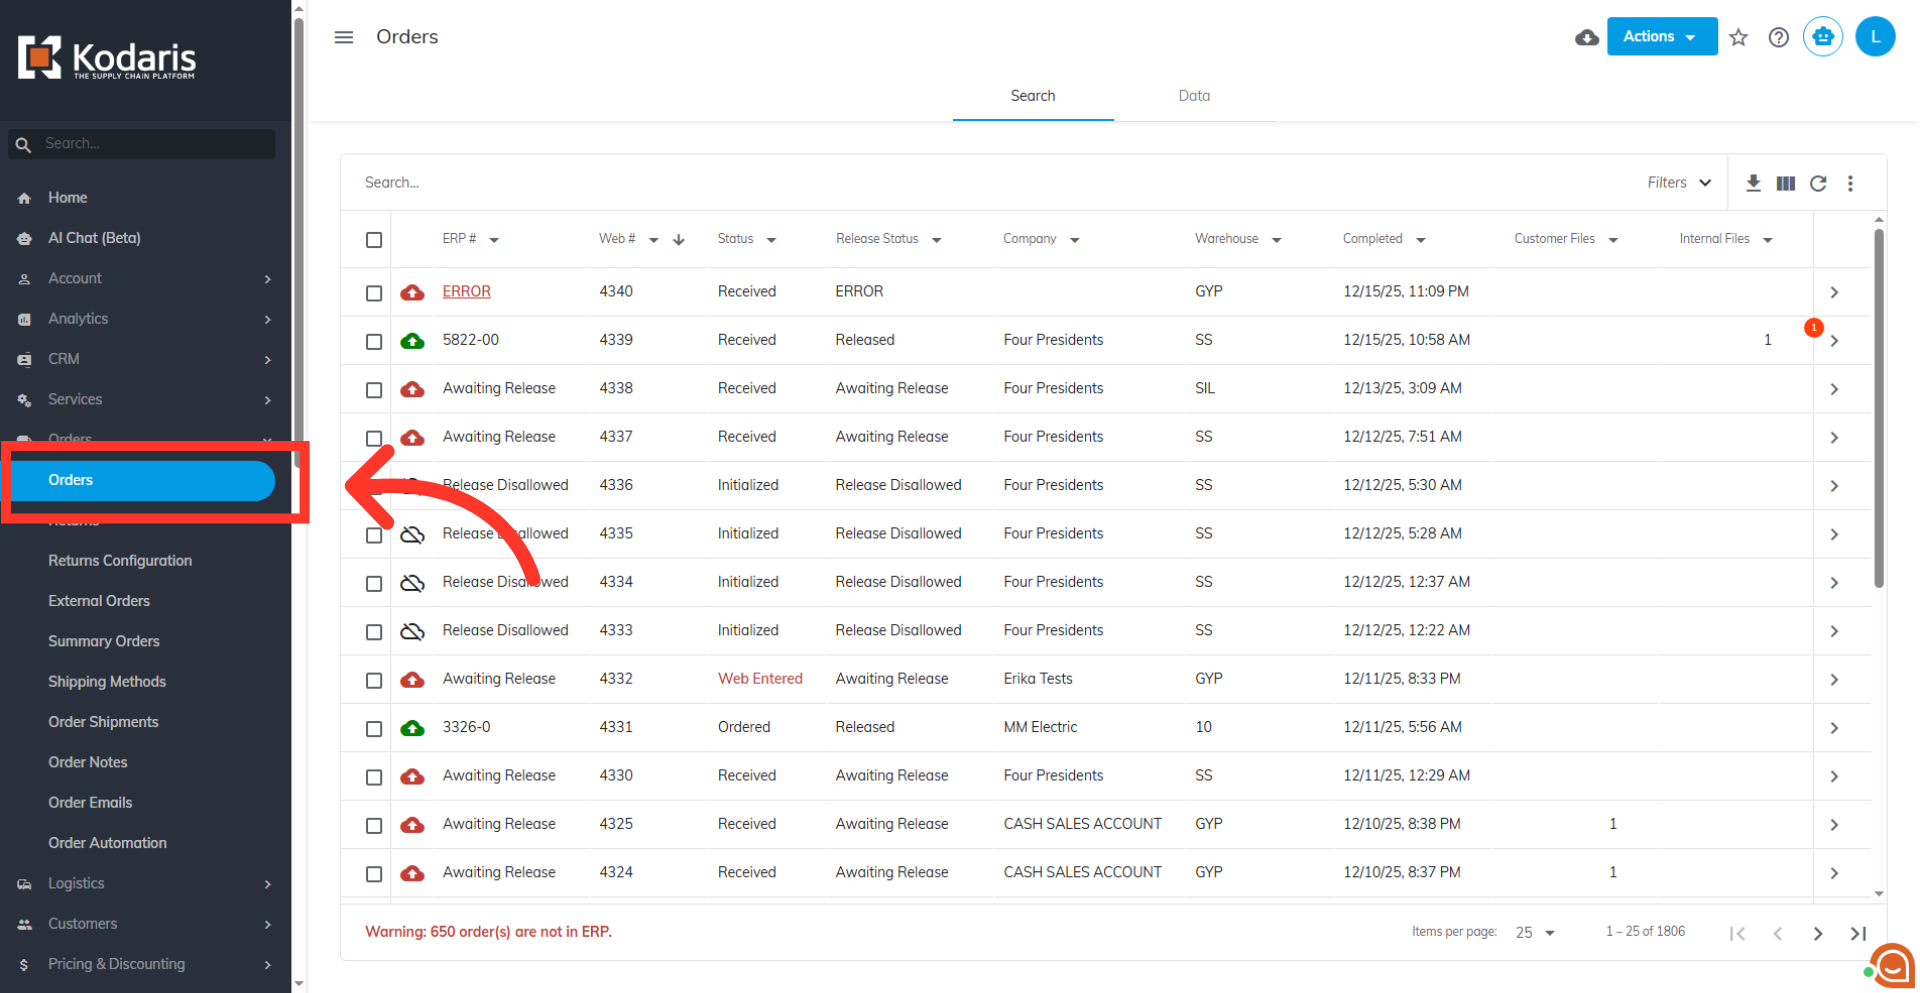
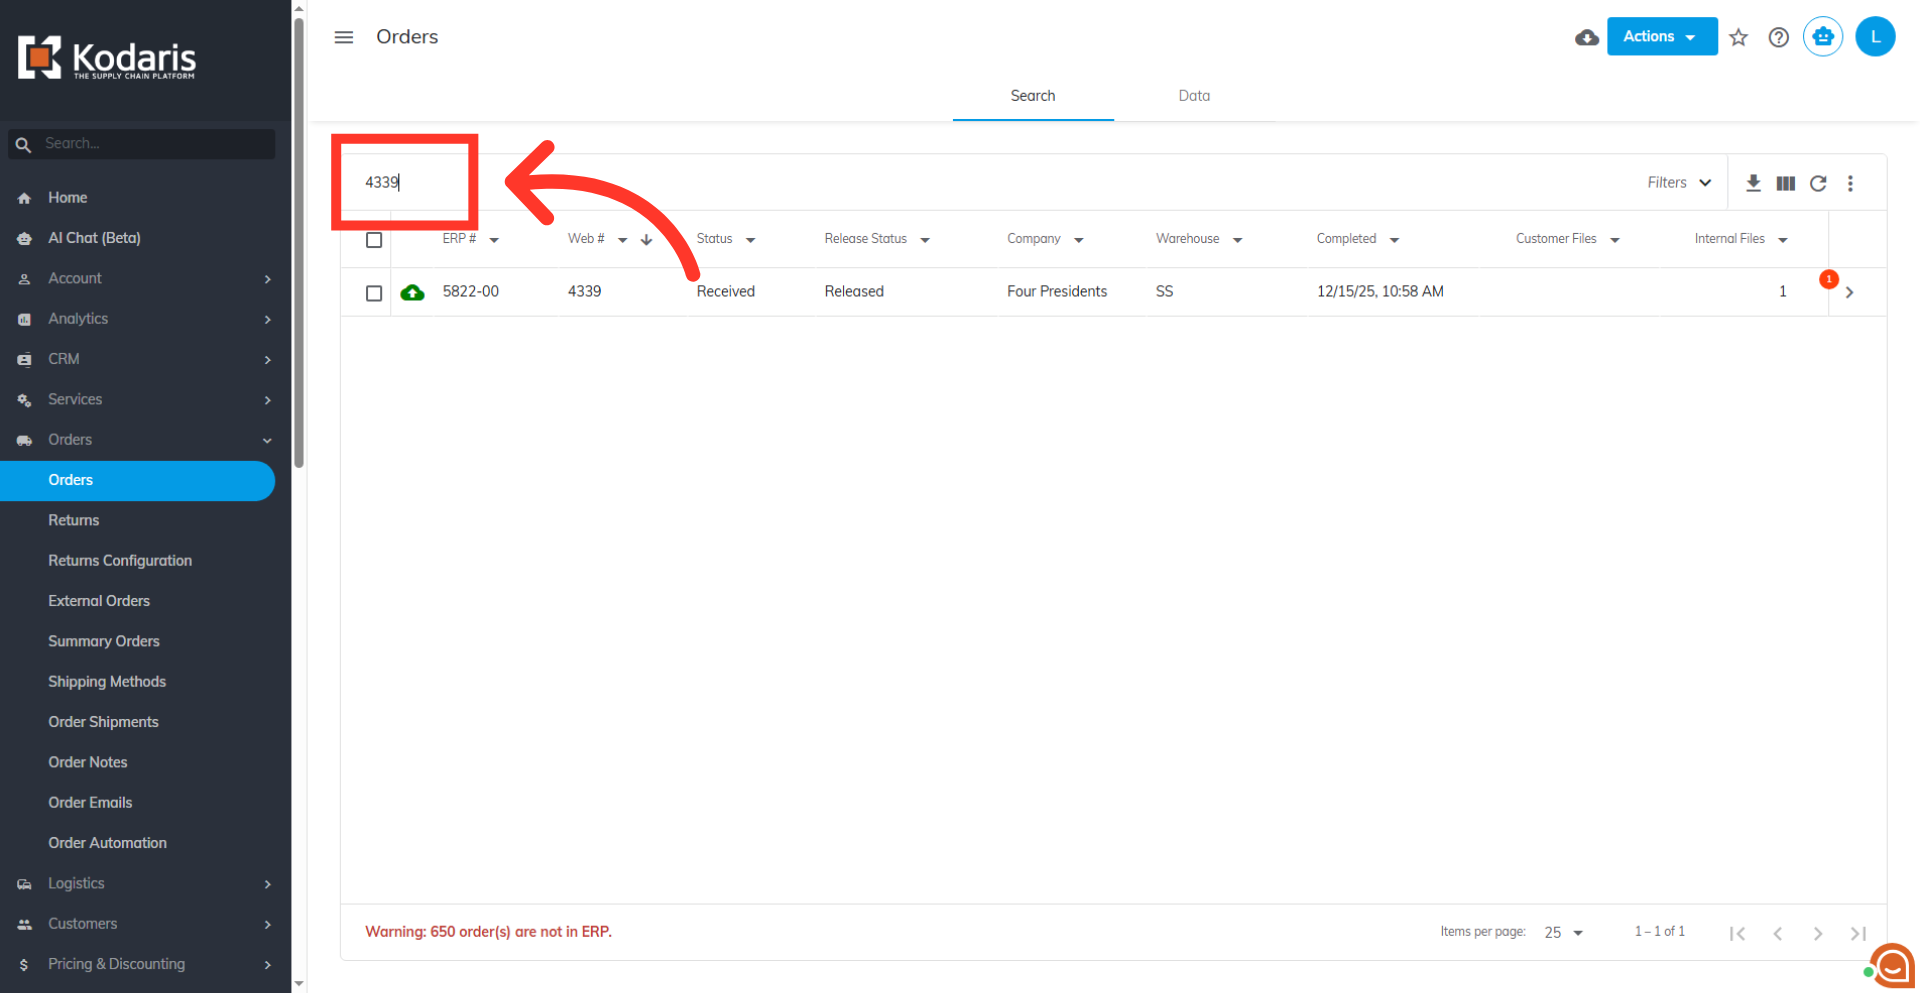
Search for an order
Search for an order to test.
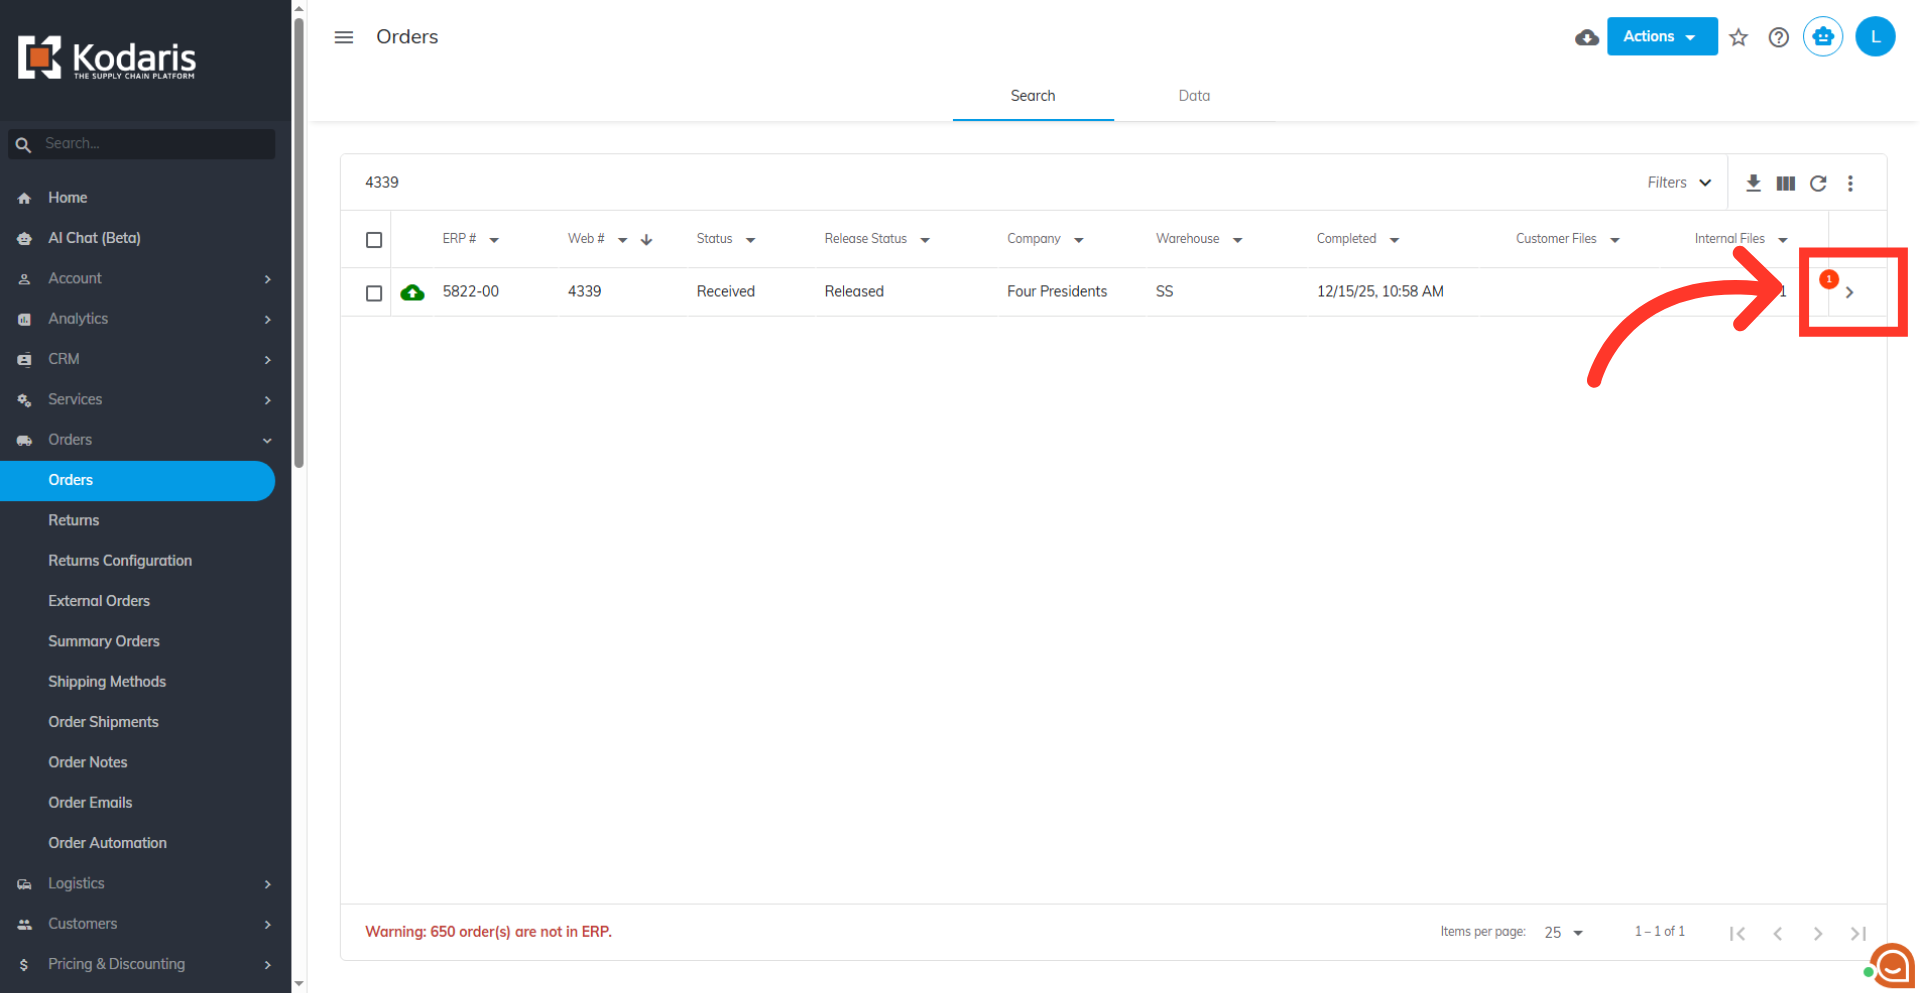
Click on the more details icon
Click the icon to navigate to the details screen of the order.
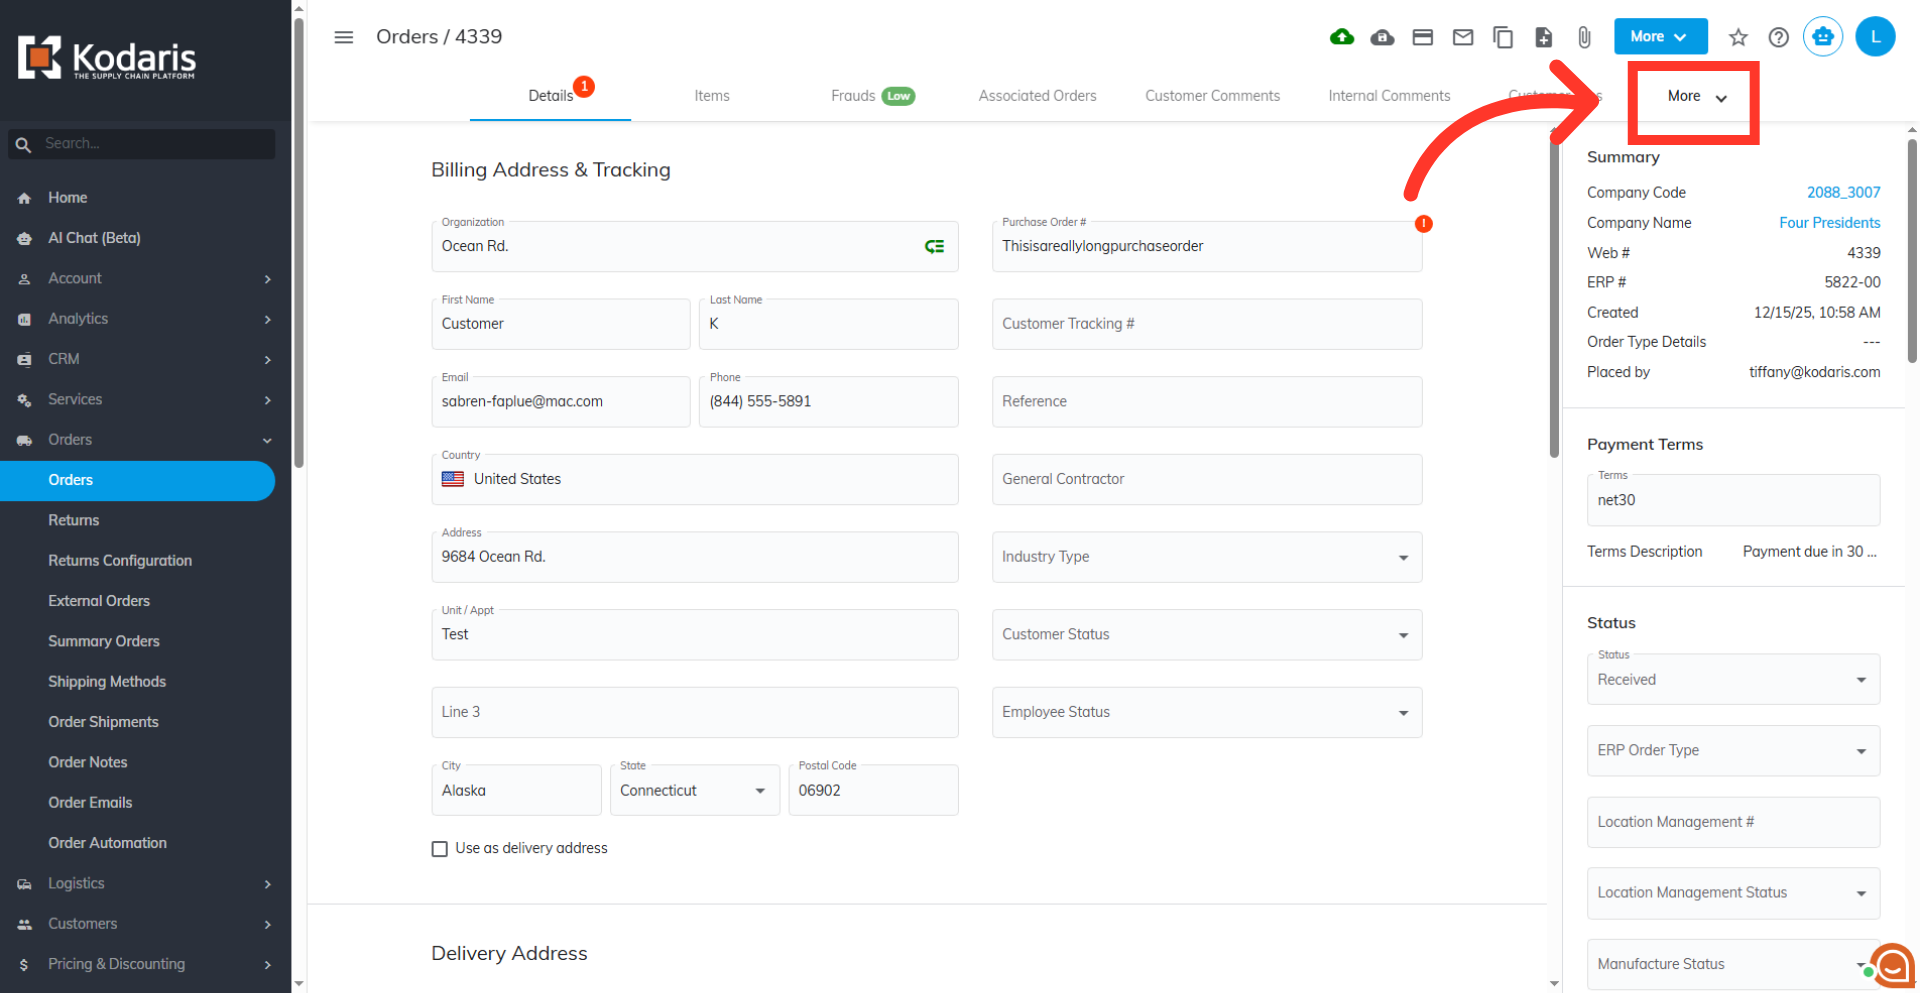
Click the "More" dropdown
Click on "More" to view the more tabs.
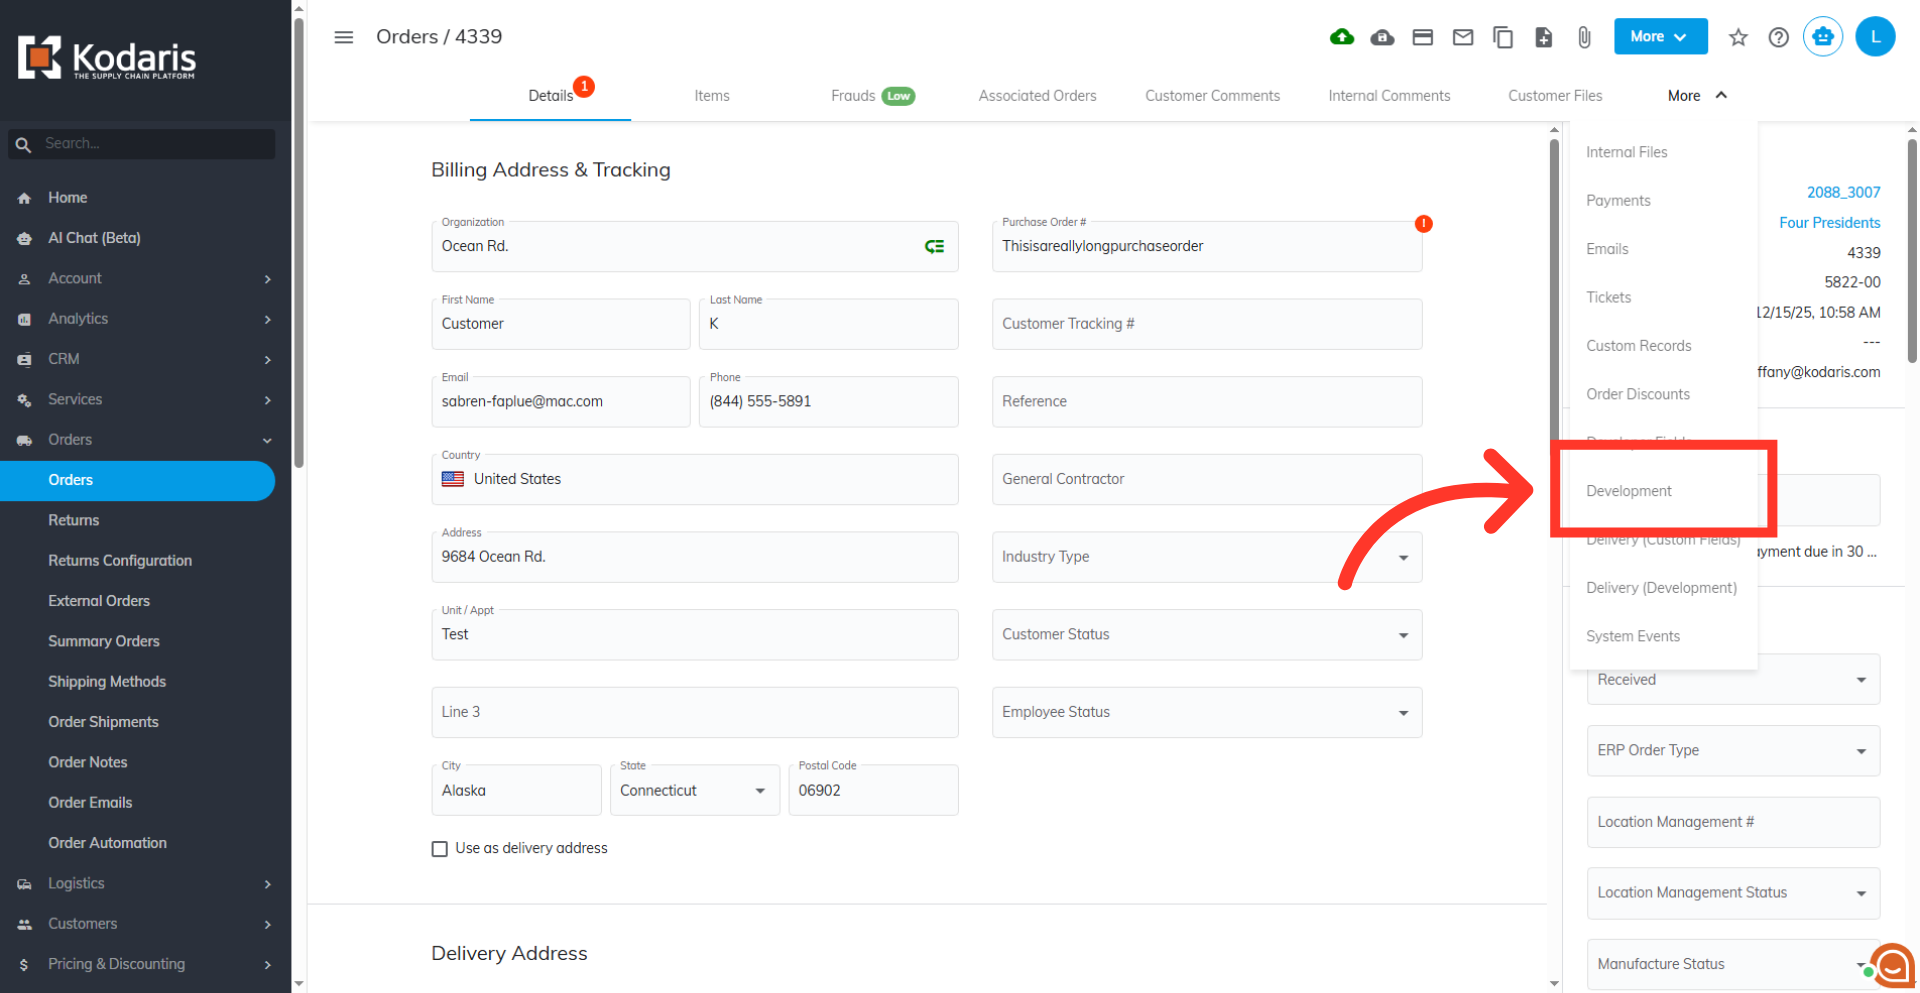
Click the "Development" tab
Click on the "Development" tab. In order to access this tab, you will need to have the role; "Developer".
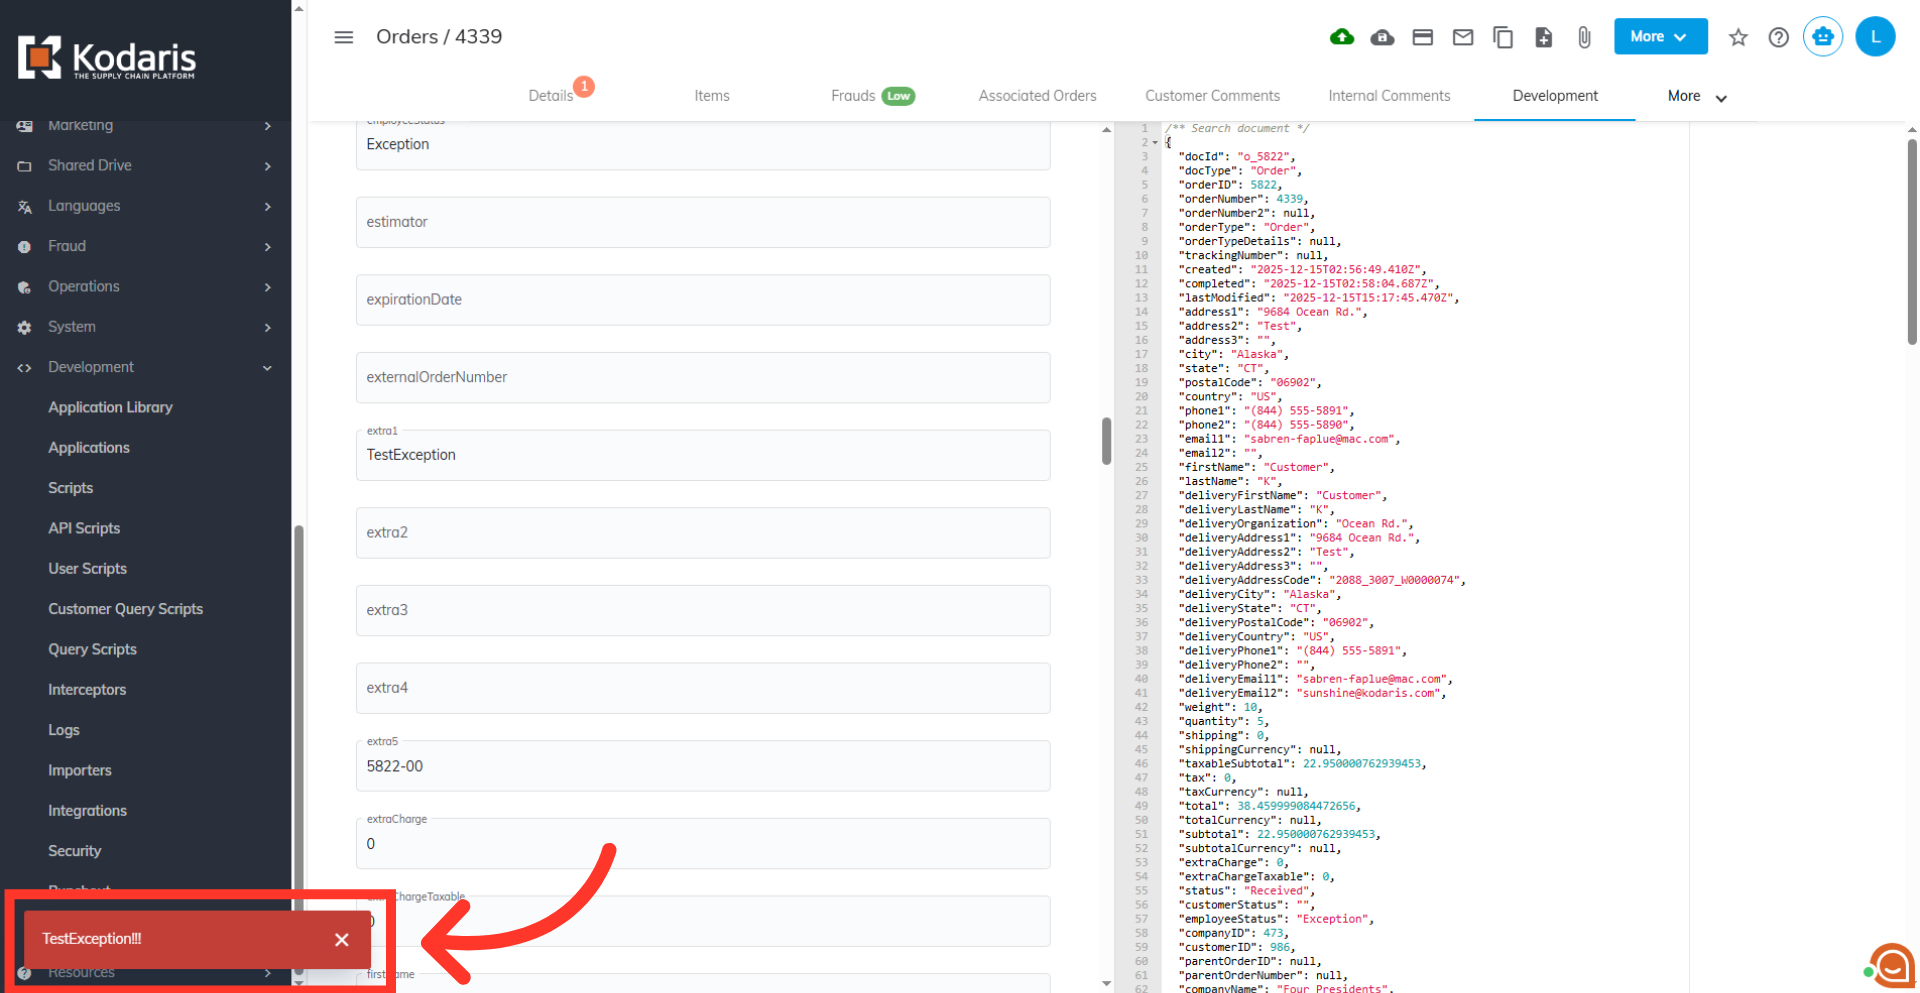
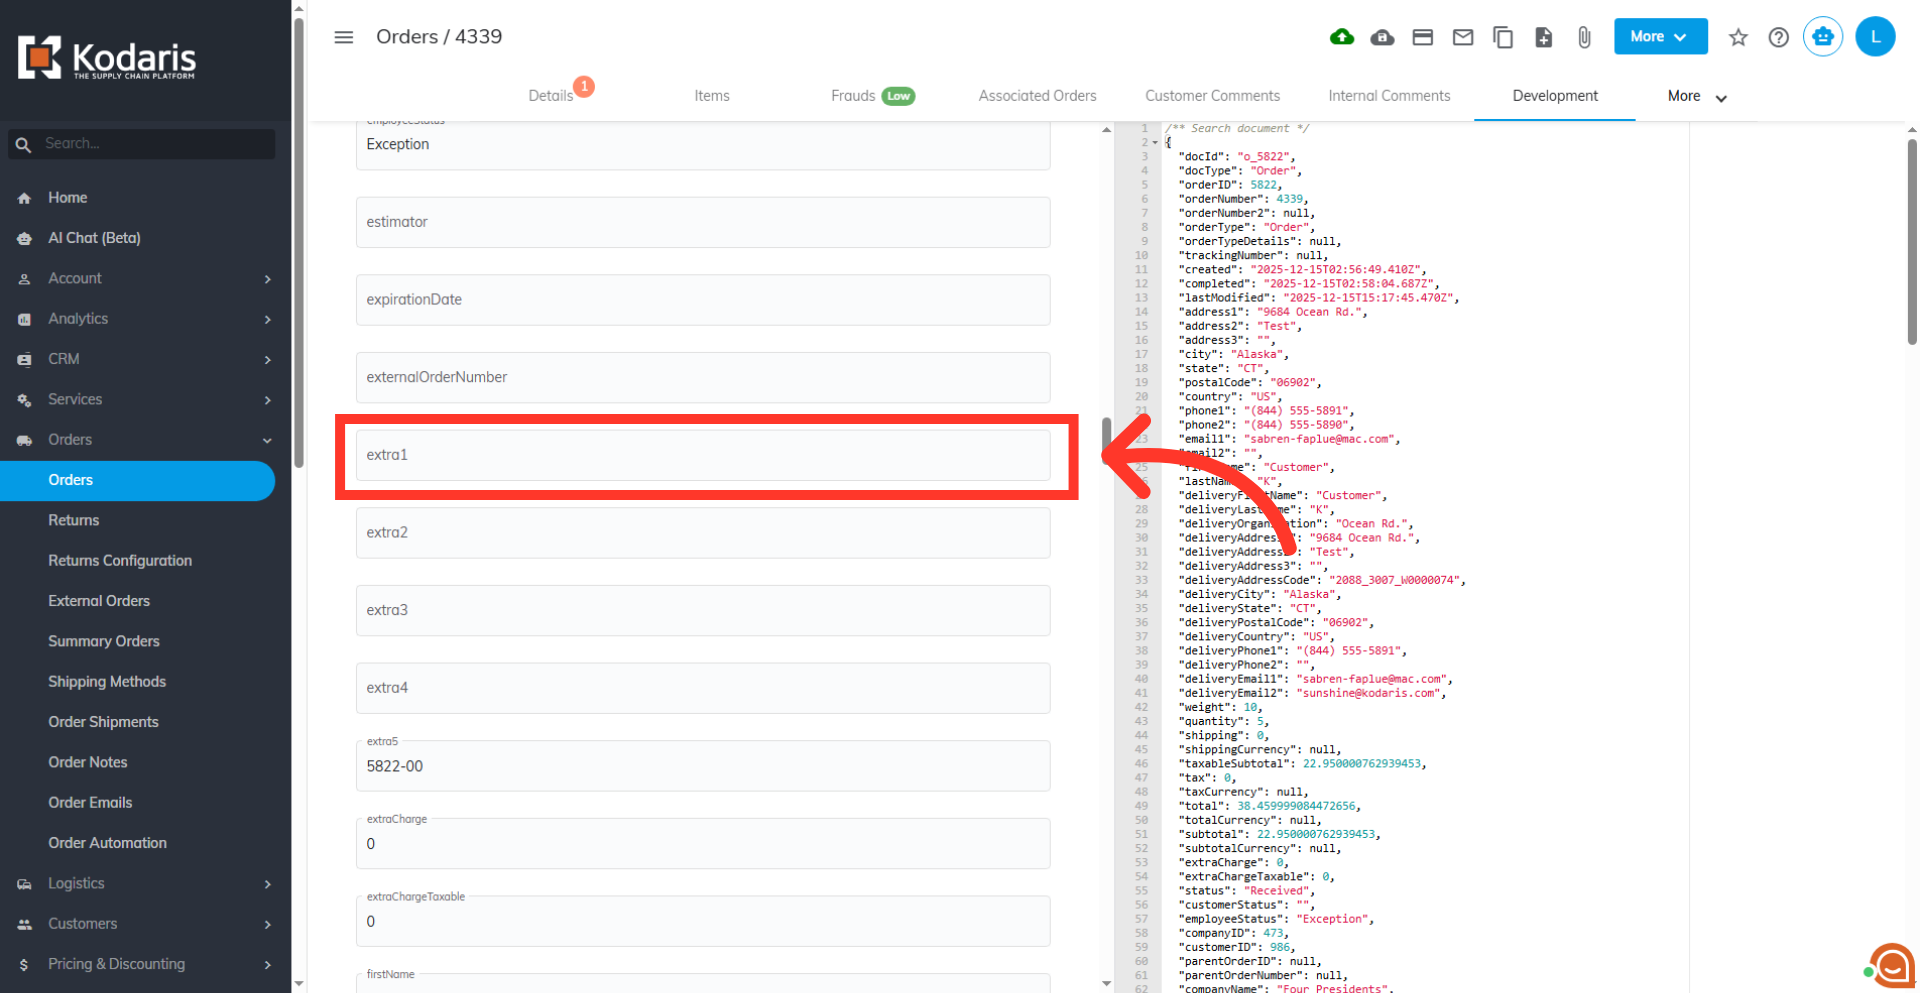
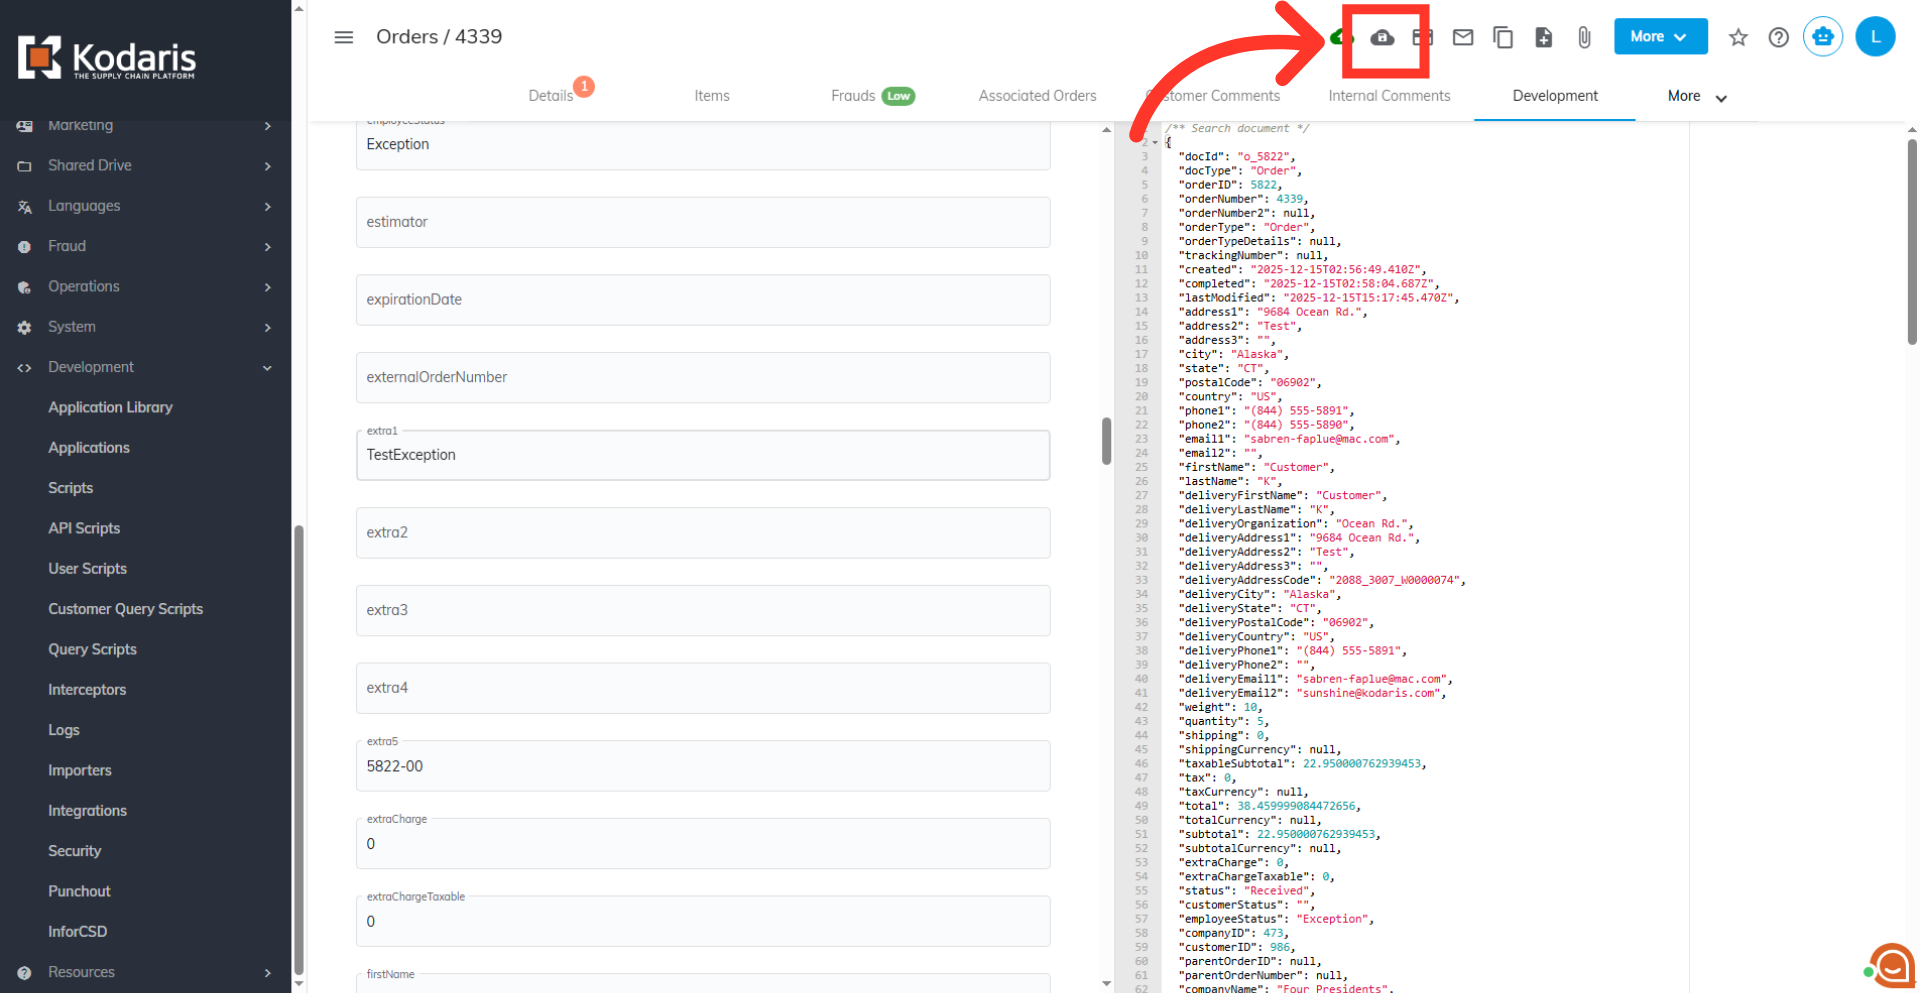
Locate "extra1" field
Scroll down to locate the "extra1" field. Any data you input in this field will go through the conditional code block created earlier.
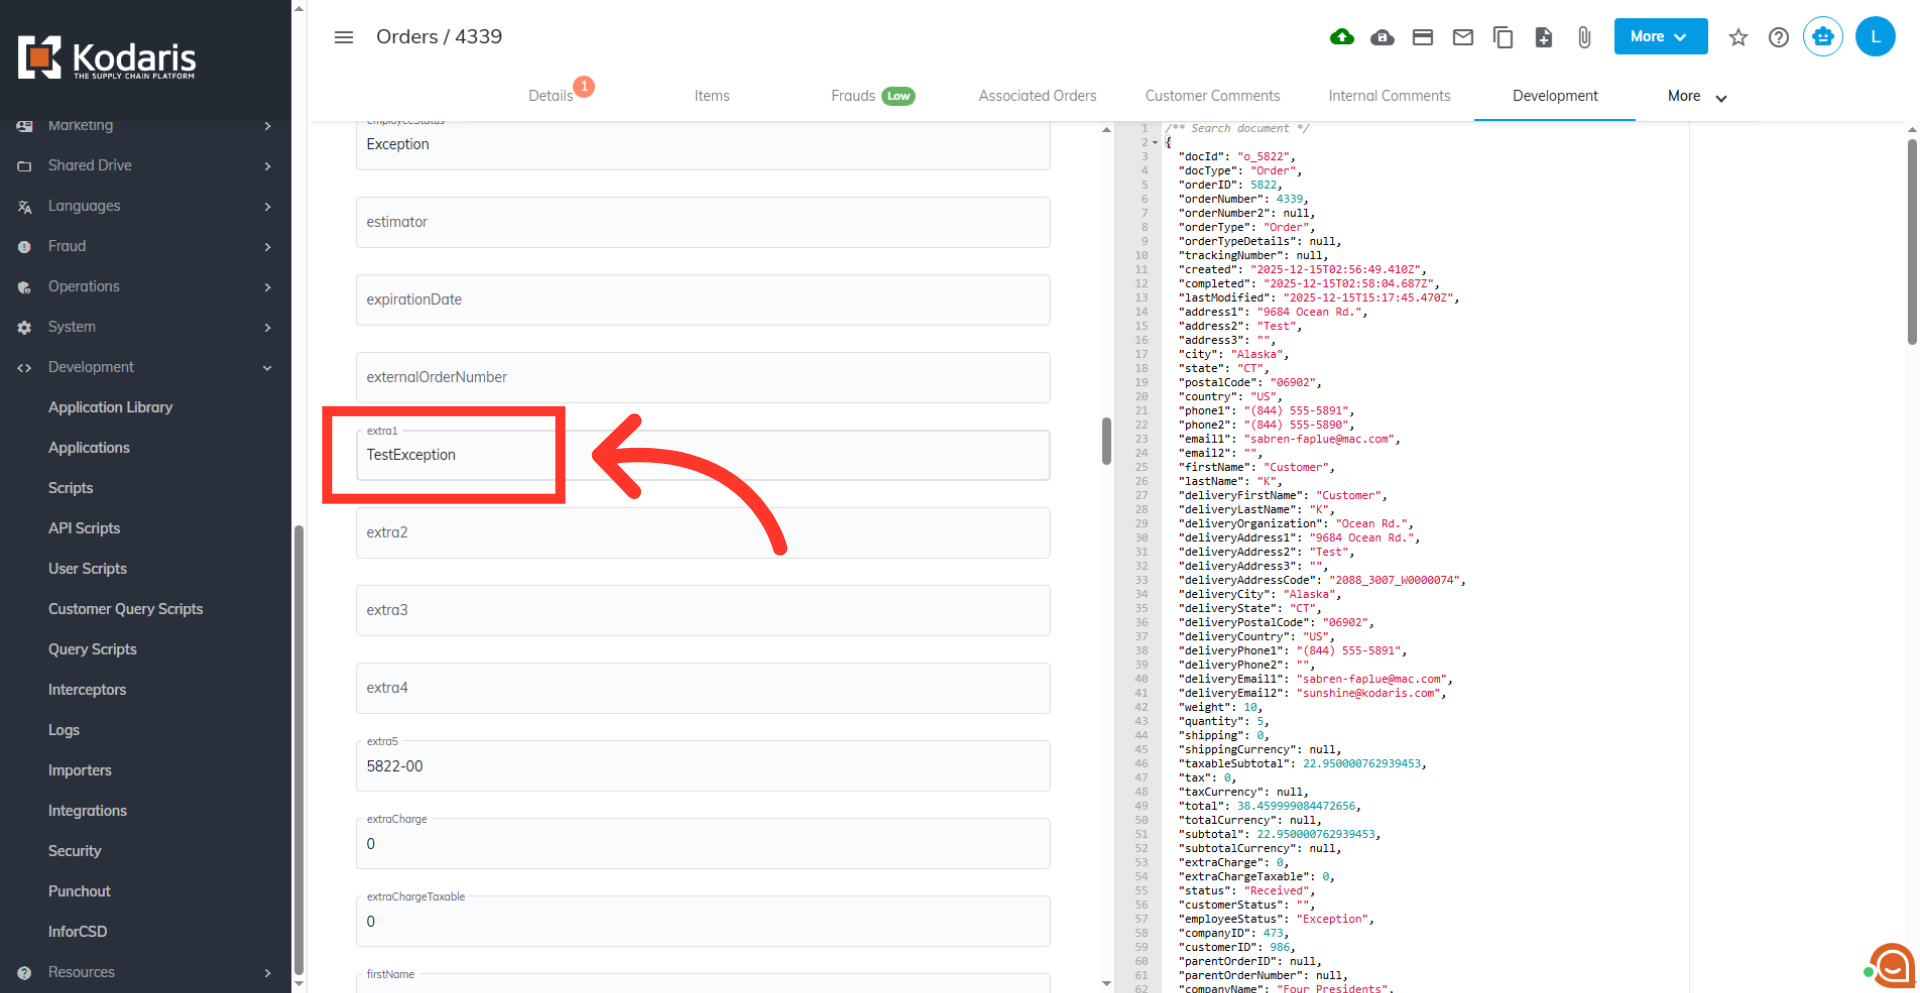
Update the field accordingly
Type in the value that you set earlier in the interceptor. This sets the necessary condition to trigger the conditional statement and display the error warning on the screen. In this example, we used "TestException".
Click on "Save to ERP"
Now, click on the "Save to ERP" icon. This will execute the previously defined conditional code block.
Verify warning message
If the condition in the code block is met or if the field value matches the assigned value, the ERP save process automatically stops, and the value assigned to the "validationError" variable is displayed as a warning message on screen.