Operations Customers - Add Additional Roles to Customer Users by Import
Navigate to "Customers"
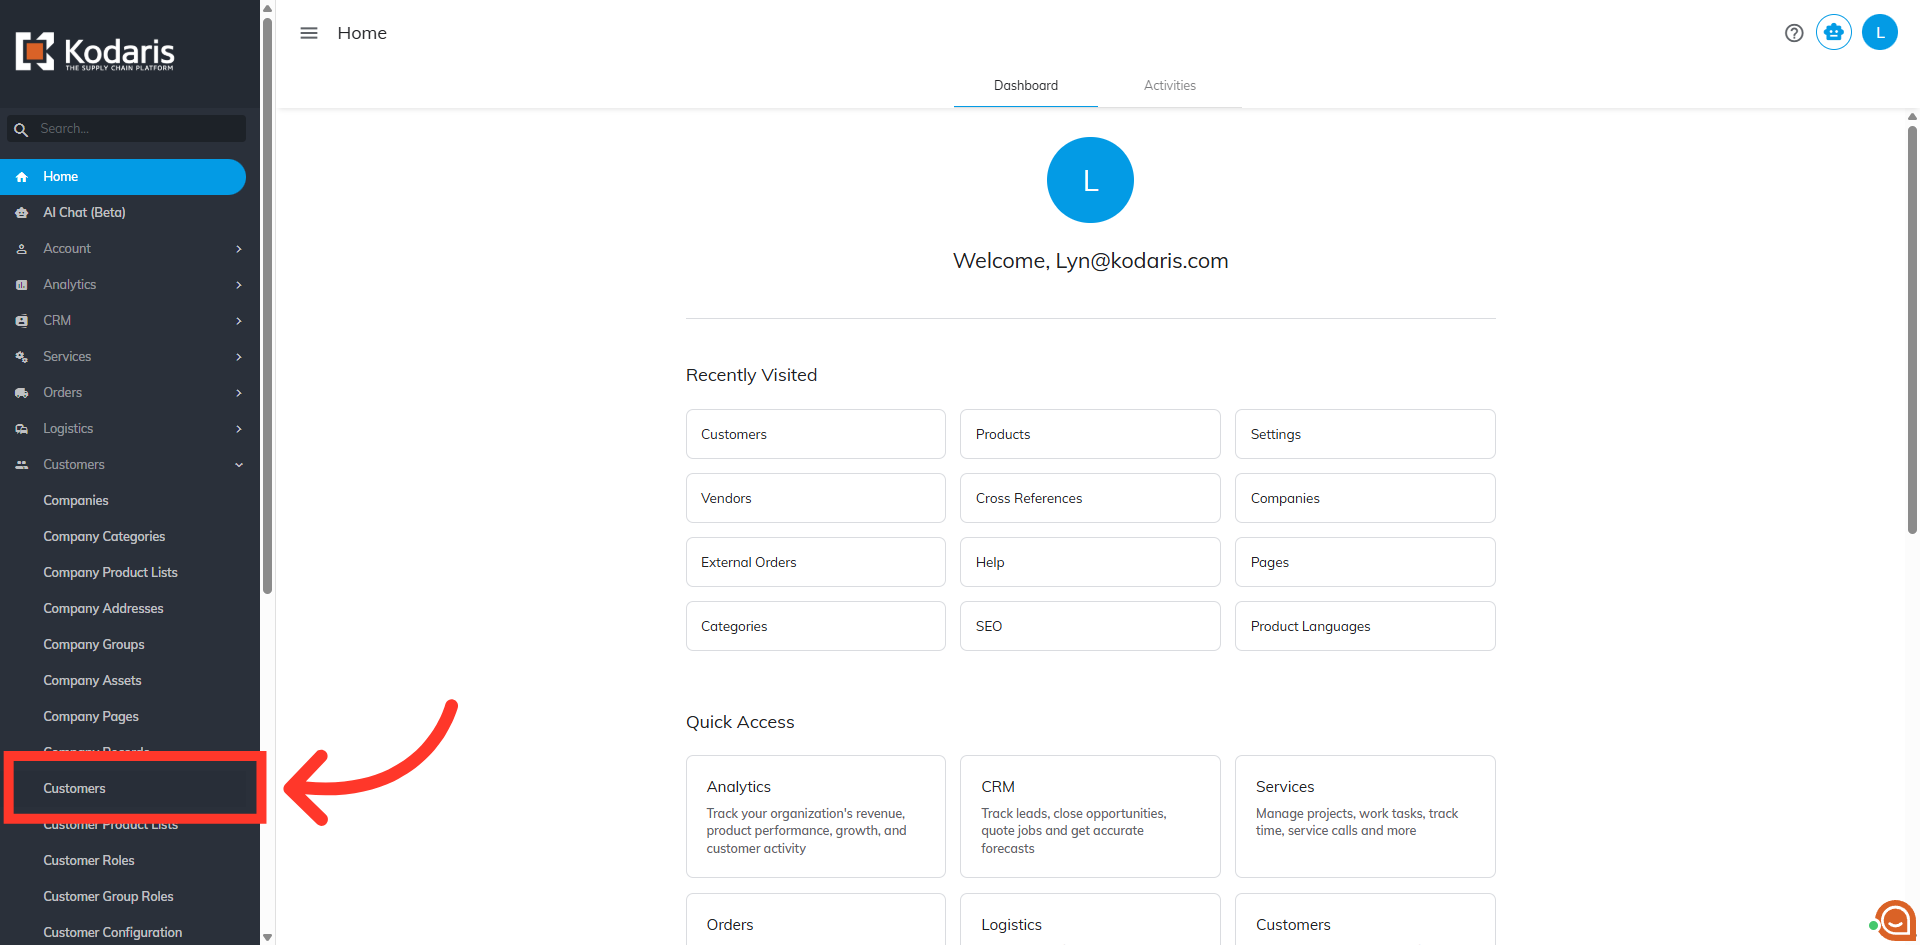
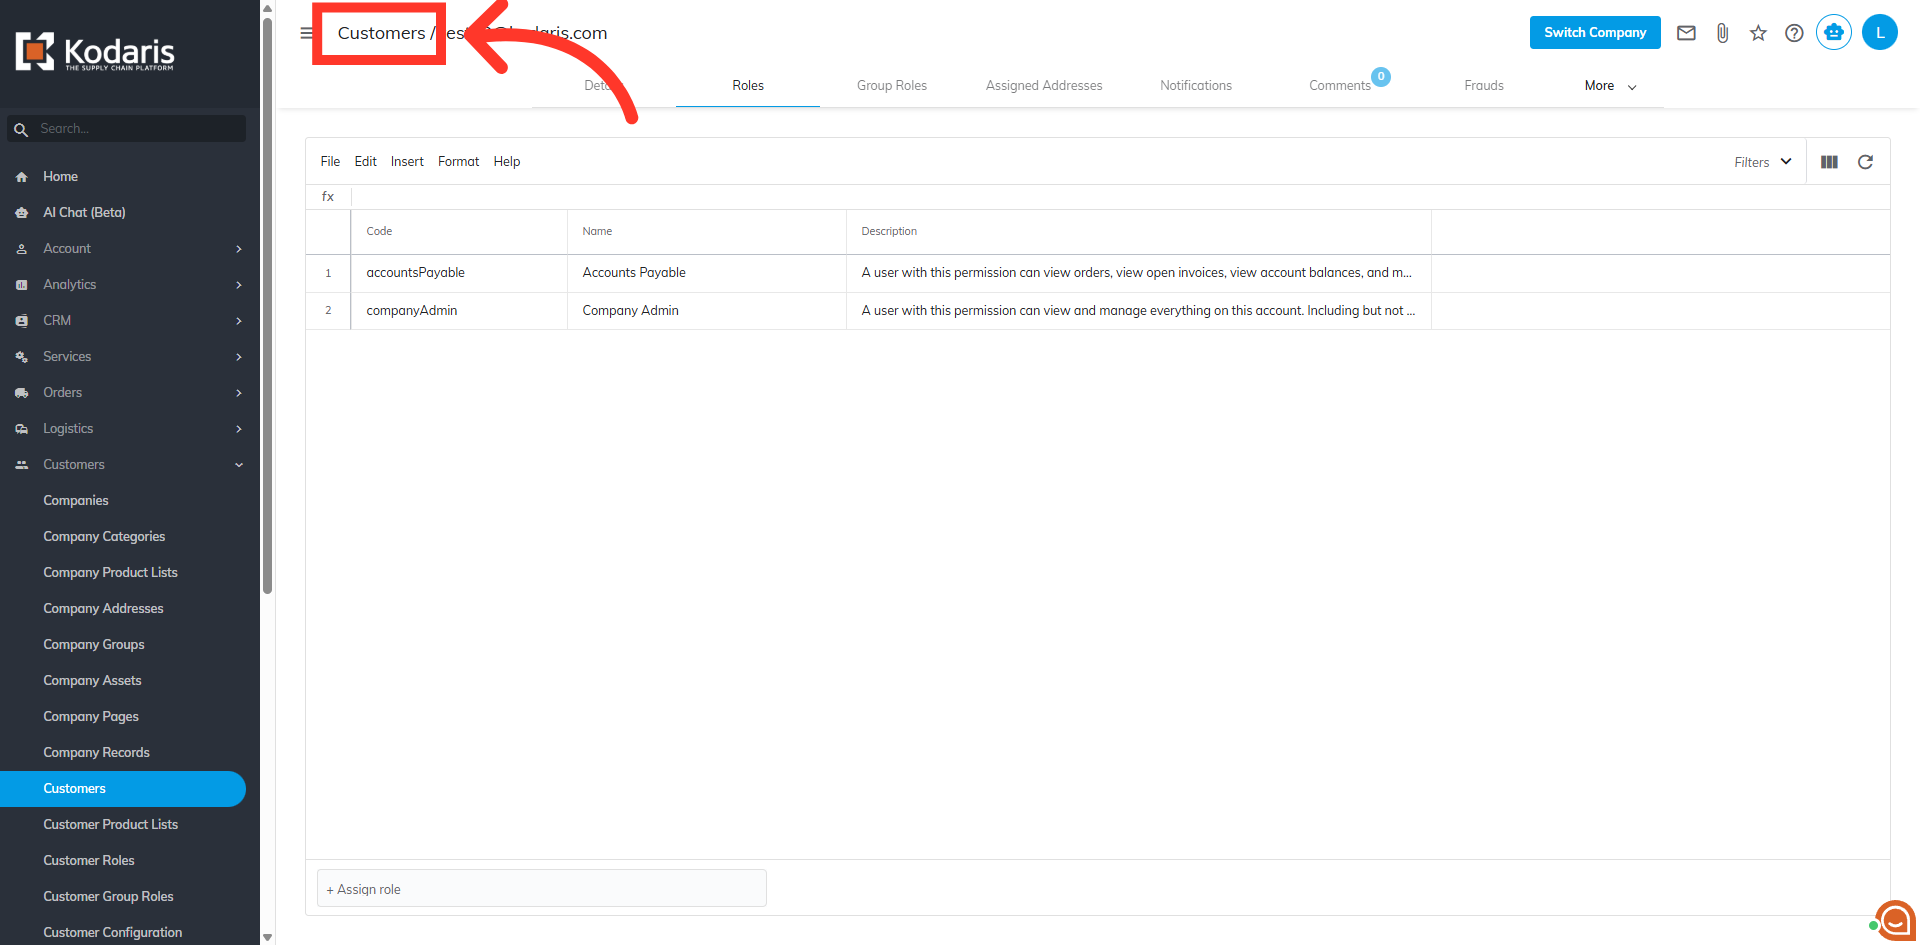
To add additional roles to customer users by import, navigate to the "Customers" section in the Operations Portal.

Click "Customers"
Then, click "Customers''. In order to access and edit Customer Role, you will need to have the role of: "administrator" or "superuser", or have the roles of: "customerView" and "customerEdit" along with "importEdit" and "importView". These last two roles are needed for importing.
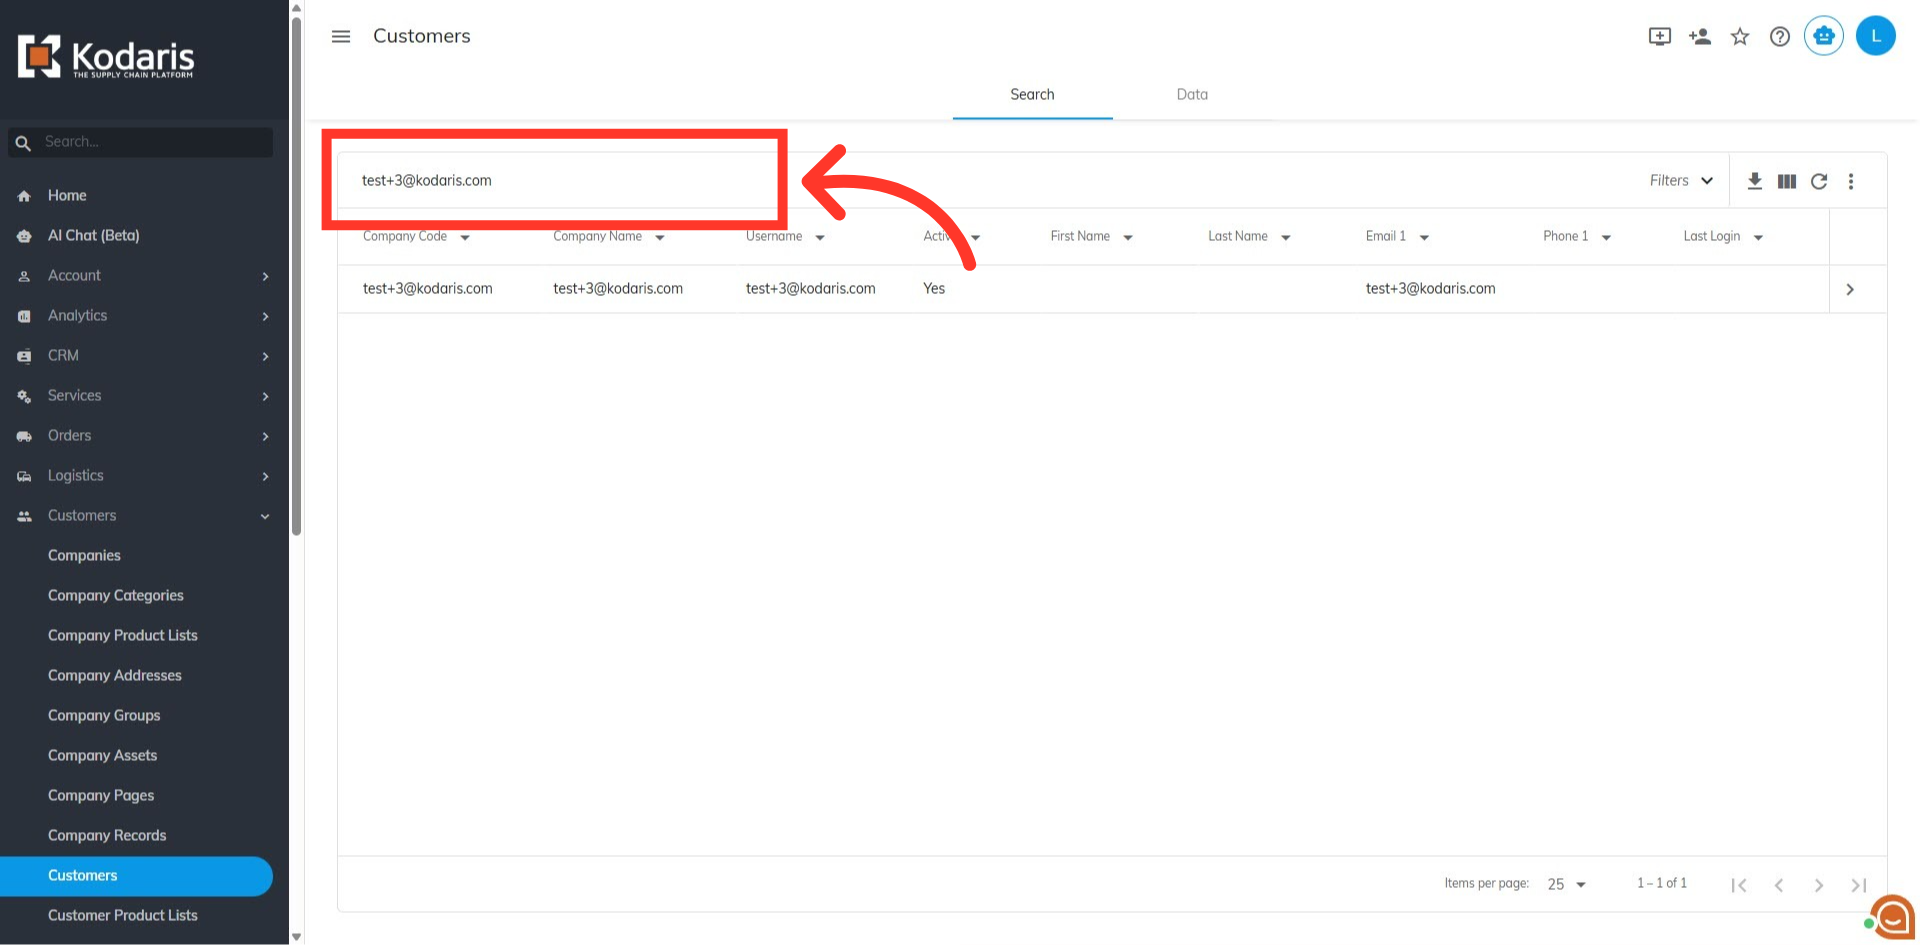
Search for the customer
Search for the customer in the "Search" field.
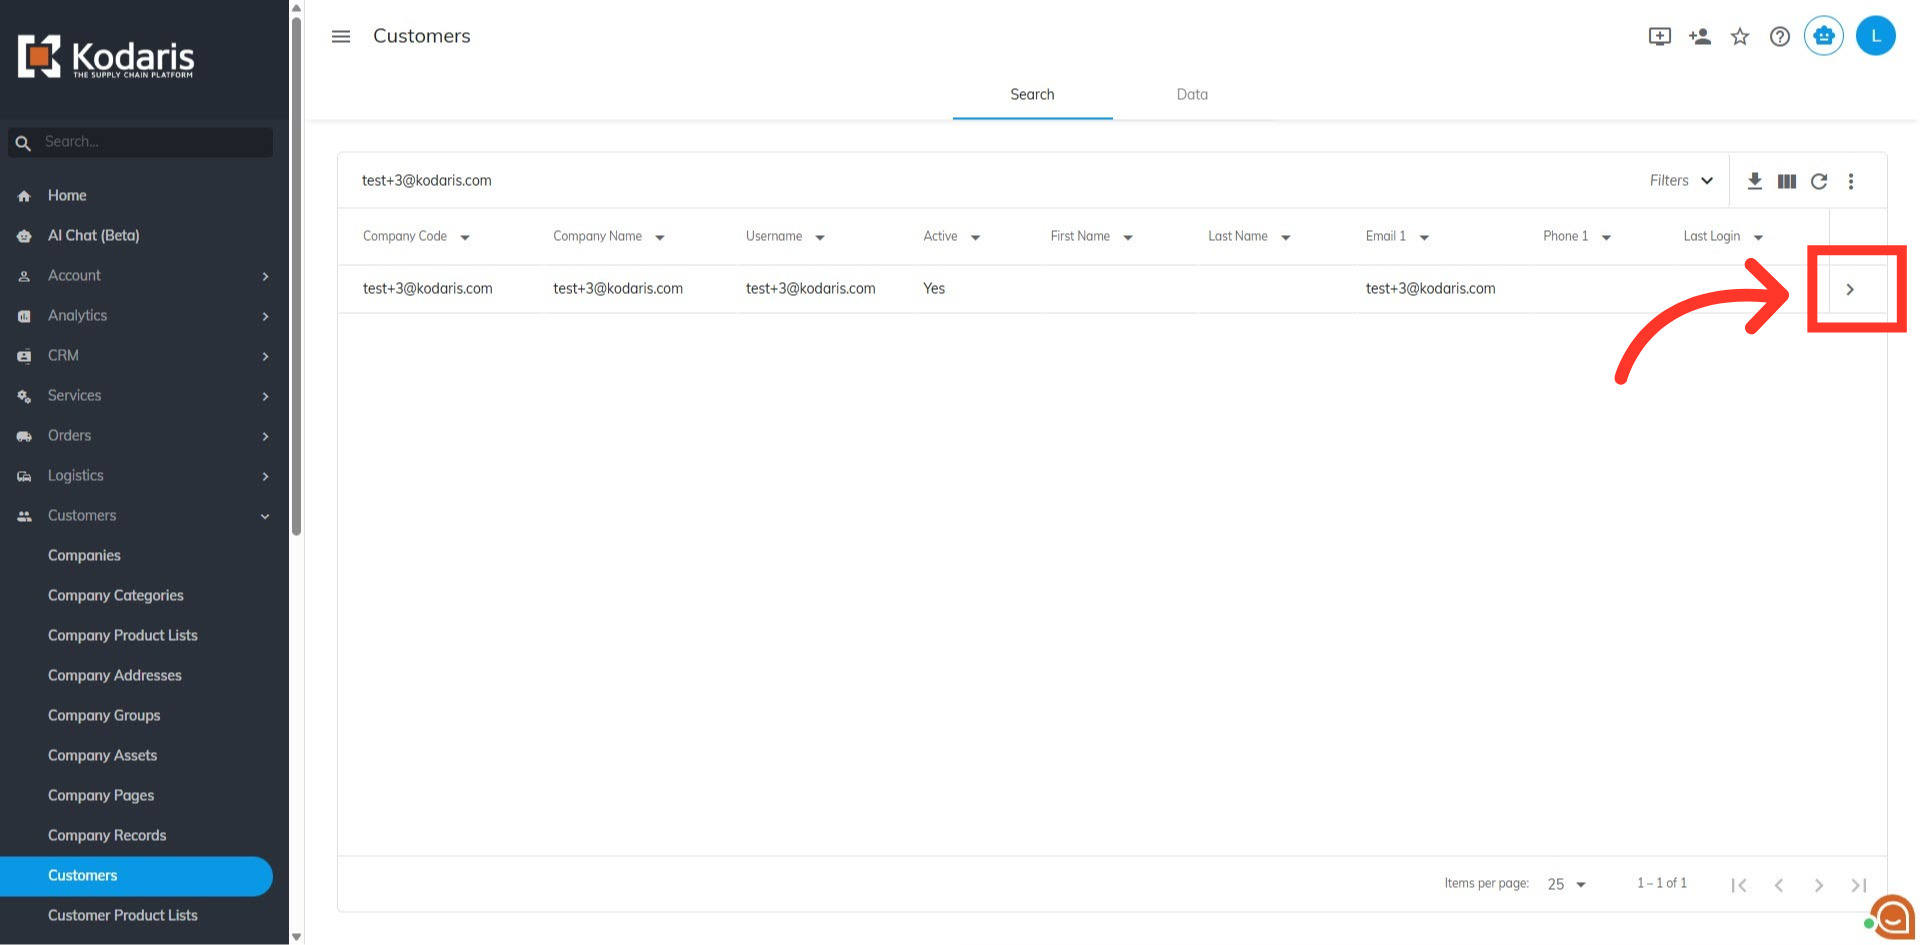
Click on the more details icon
Then, click on the more details icon.
Go to the "Roles" tab
Go to "Roles" tab.
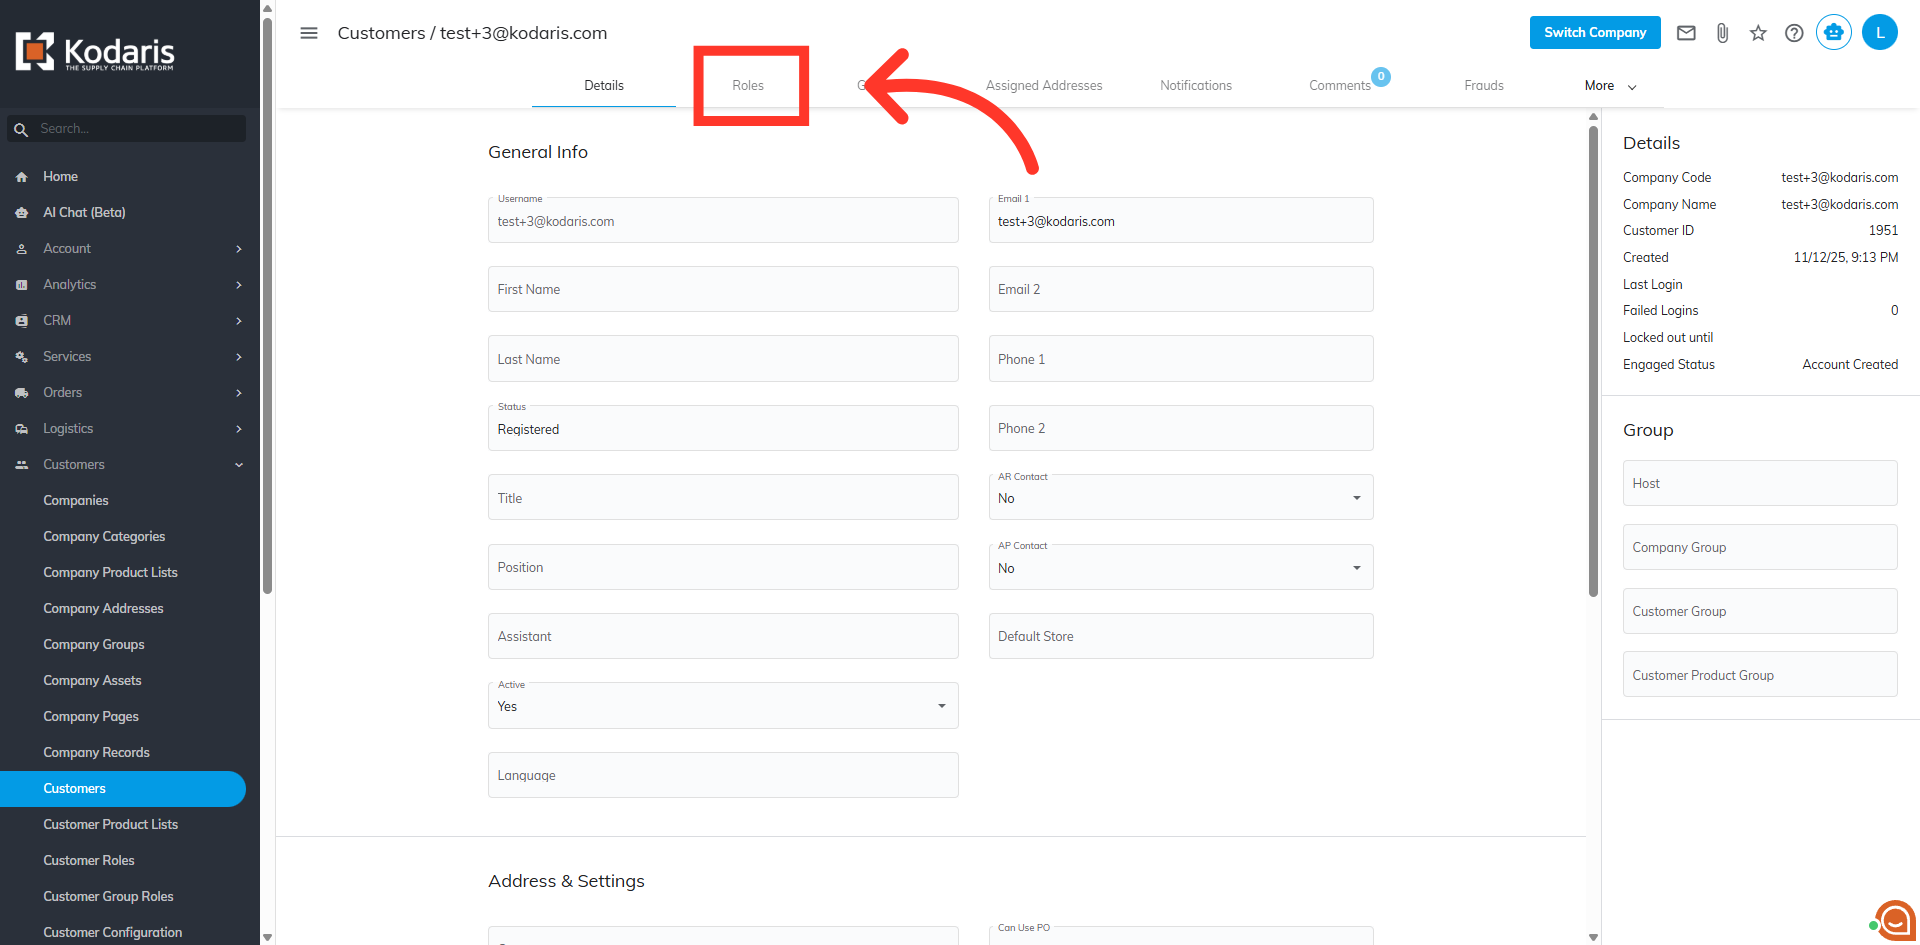
View customer roles
Here you can view the customer roles currently assigned.

Example Spreadsheet
In order to add additional roles to a customer via import, the file used for importing must include the "userName" and "addRoles" header rows.
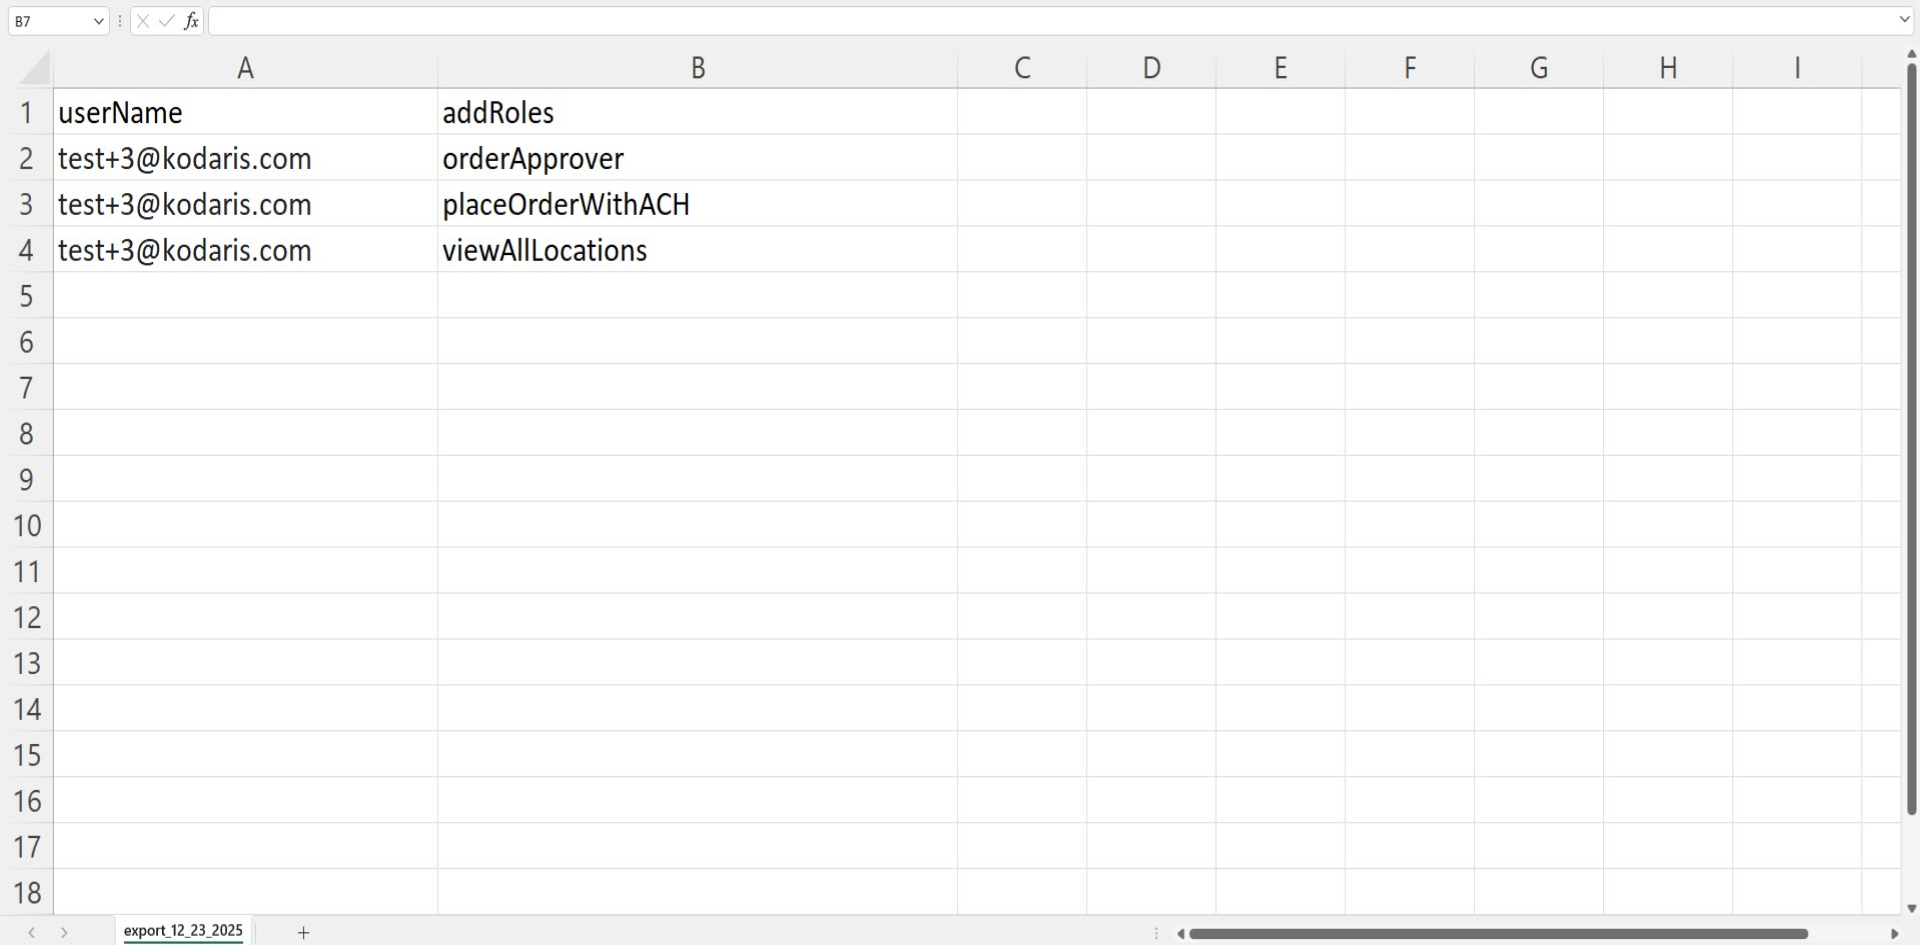
"userName" = Customer Username
The "userName" serves as the unique identifier for matching data in the system.
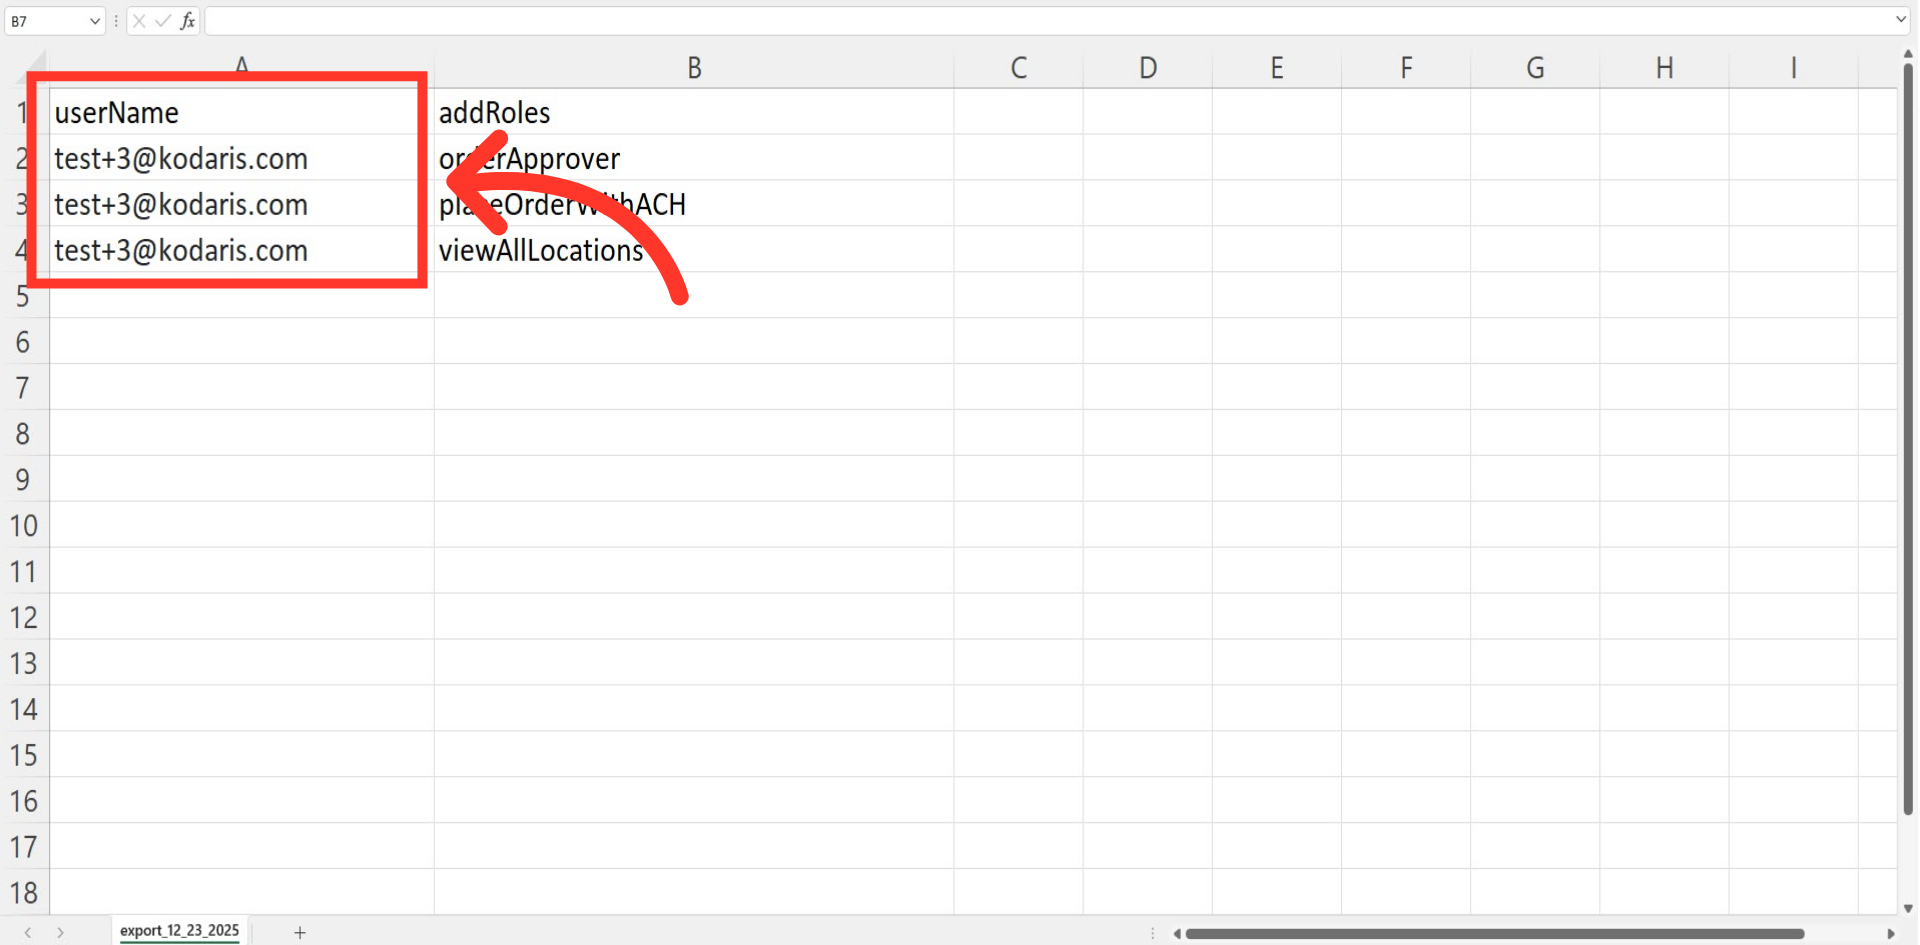
"addRoles" = Roles or permissions to be added
The "addRoles" column contains the role codes that you want to assign to customers. This field will add these roles to the customer's current roles in the system.
Click "Customers"
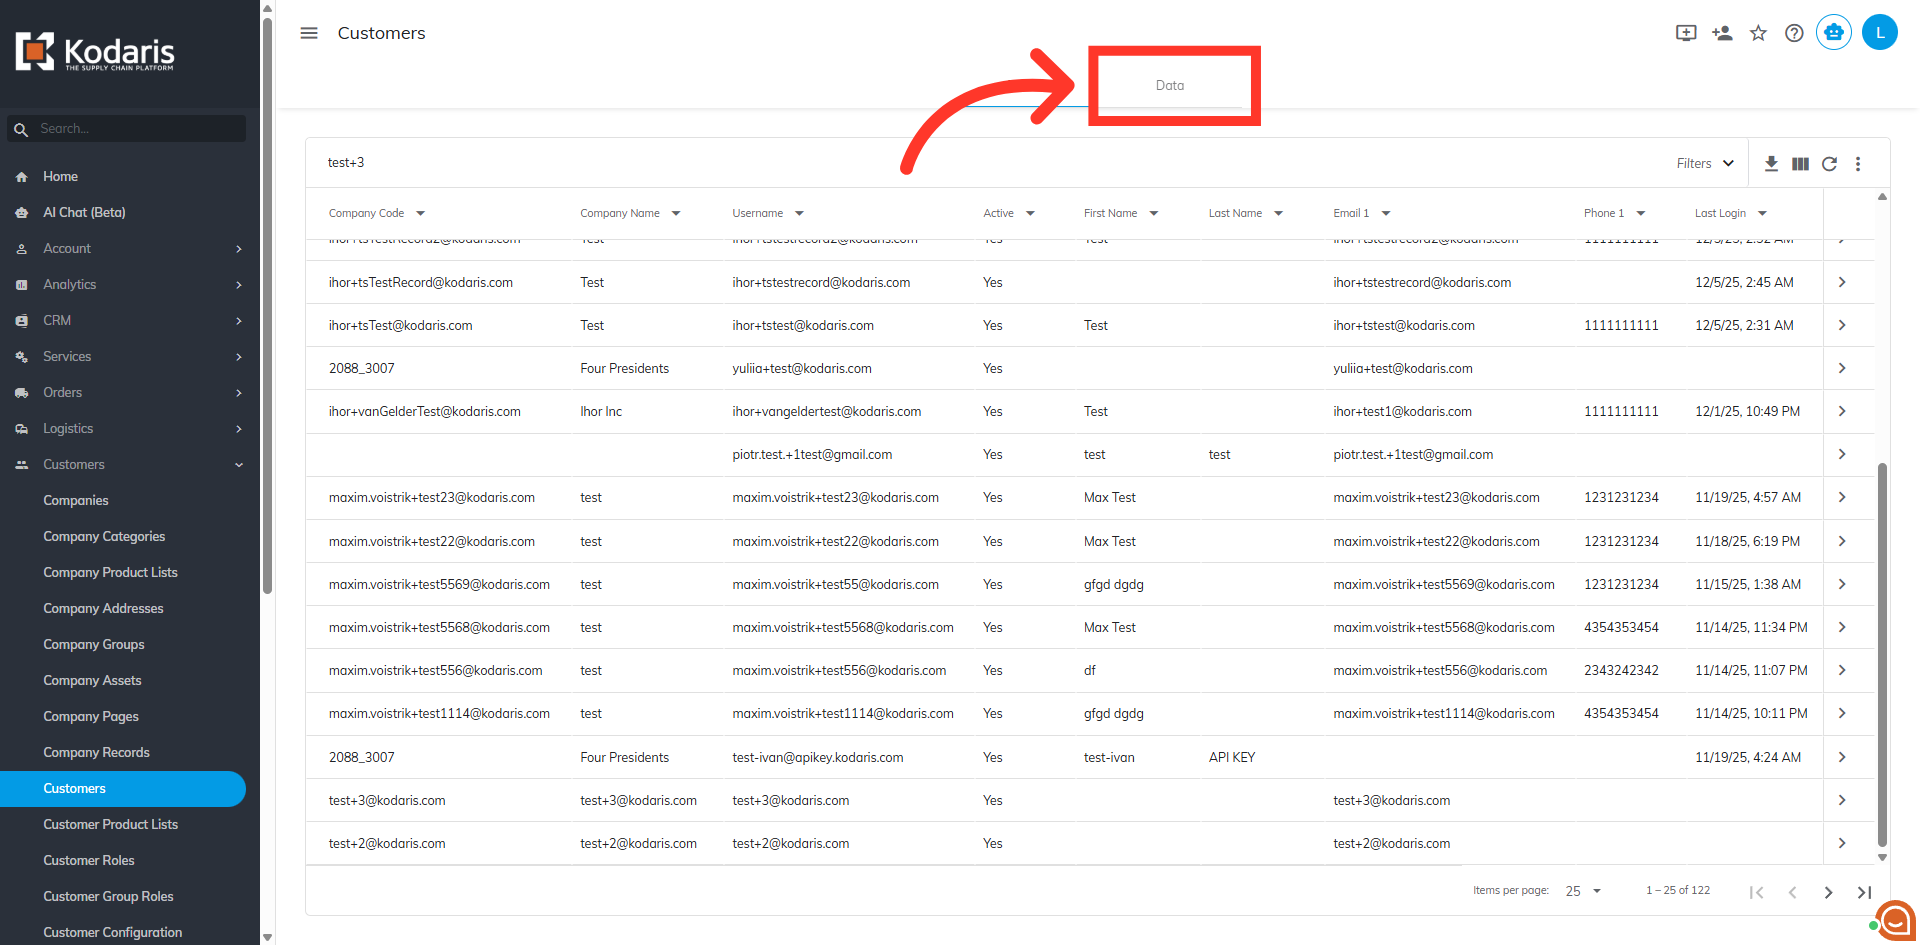
Once you have updated your spreadsheet and saved it as a CSV file, go back to the "Customers" screen in the Operations Portal.
Go to the "Data" tab
Go to the "Data" tab.
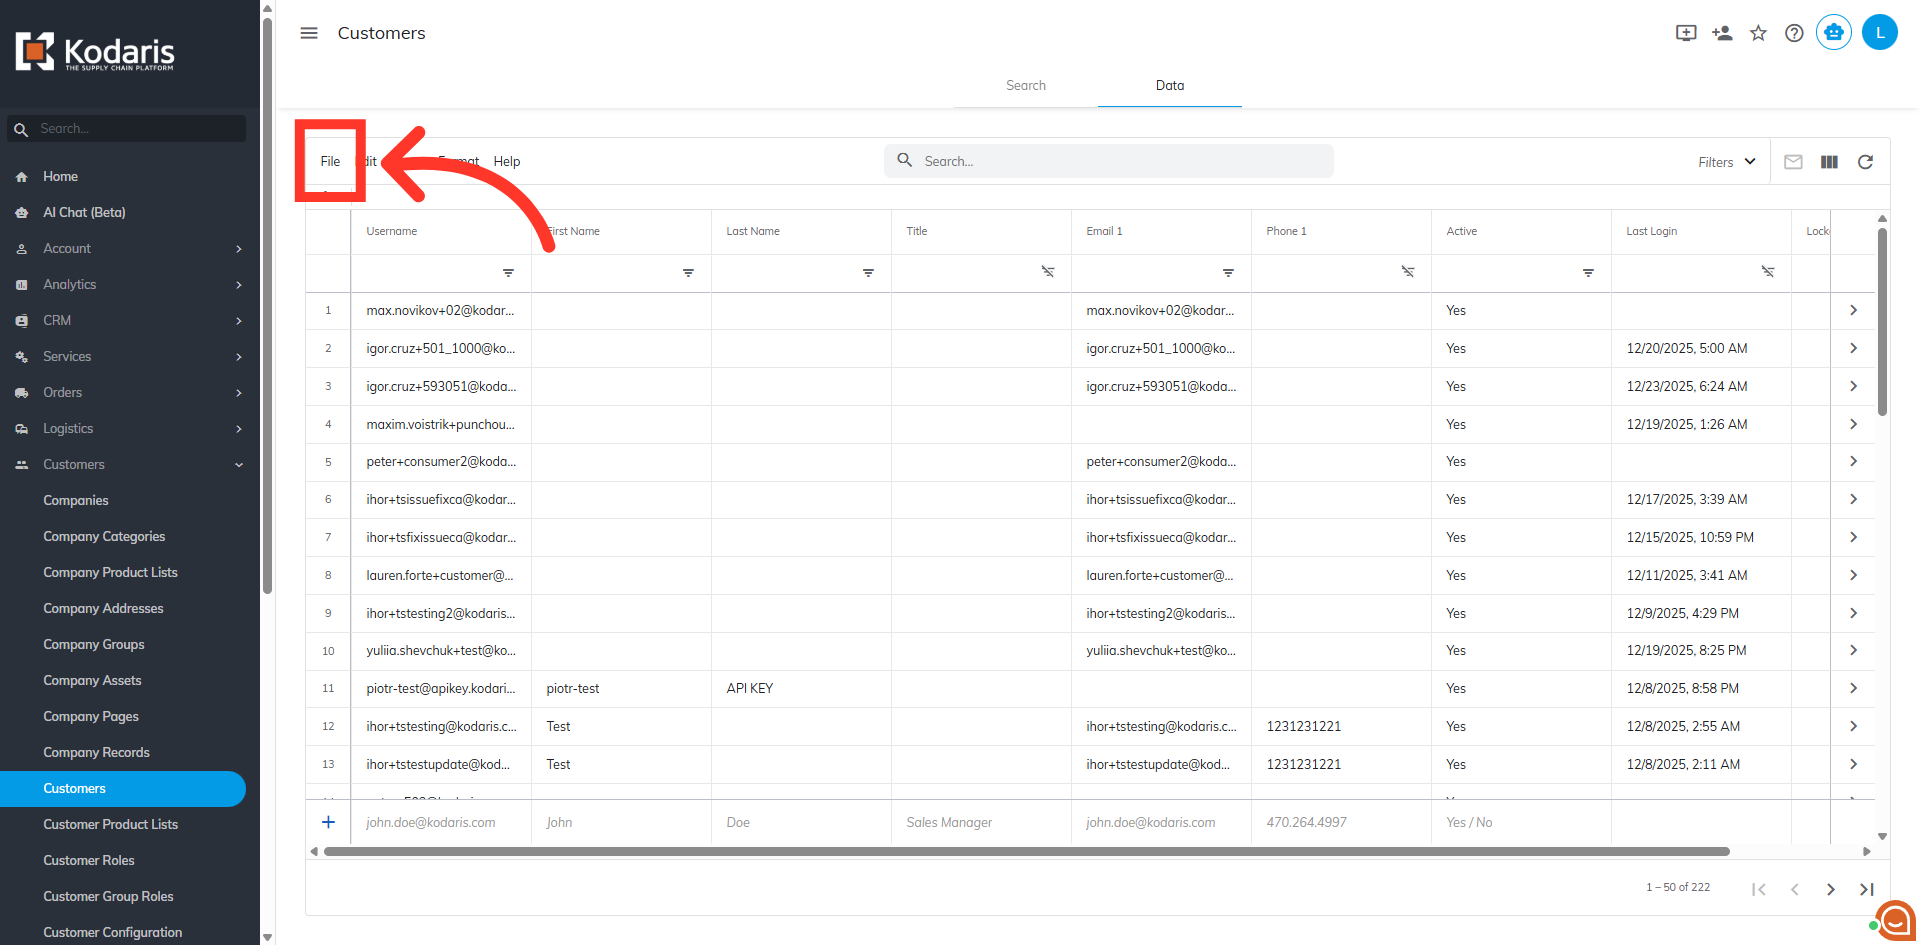
Click "File"
Then, click "File".
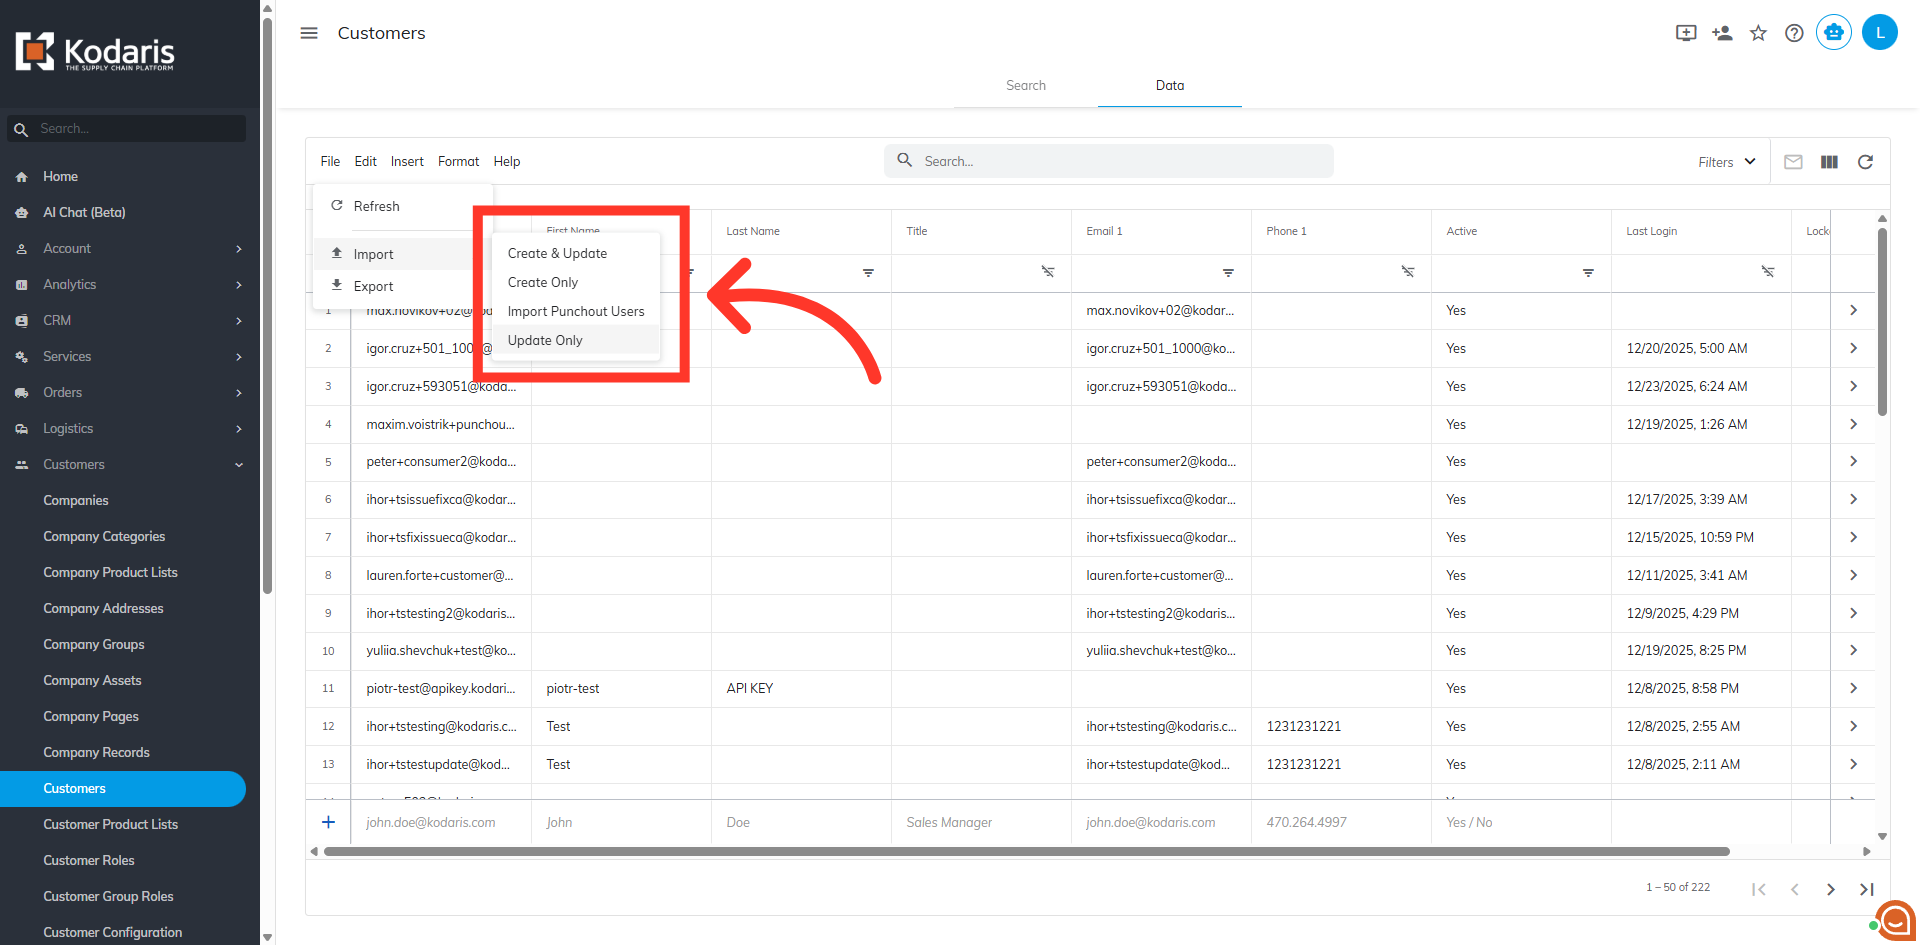
Click "Import"
Click or hover your mouse over "Import" to see the options.
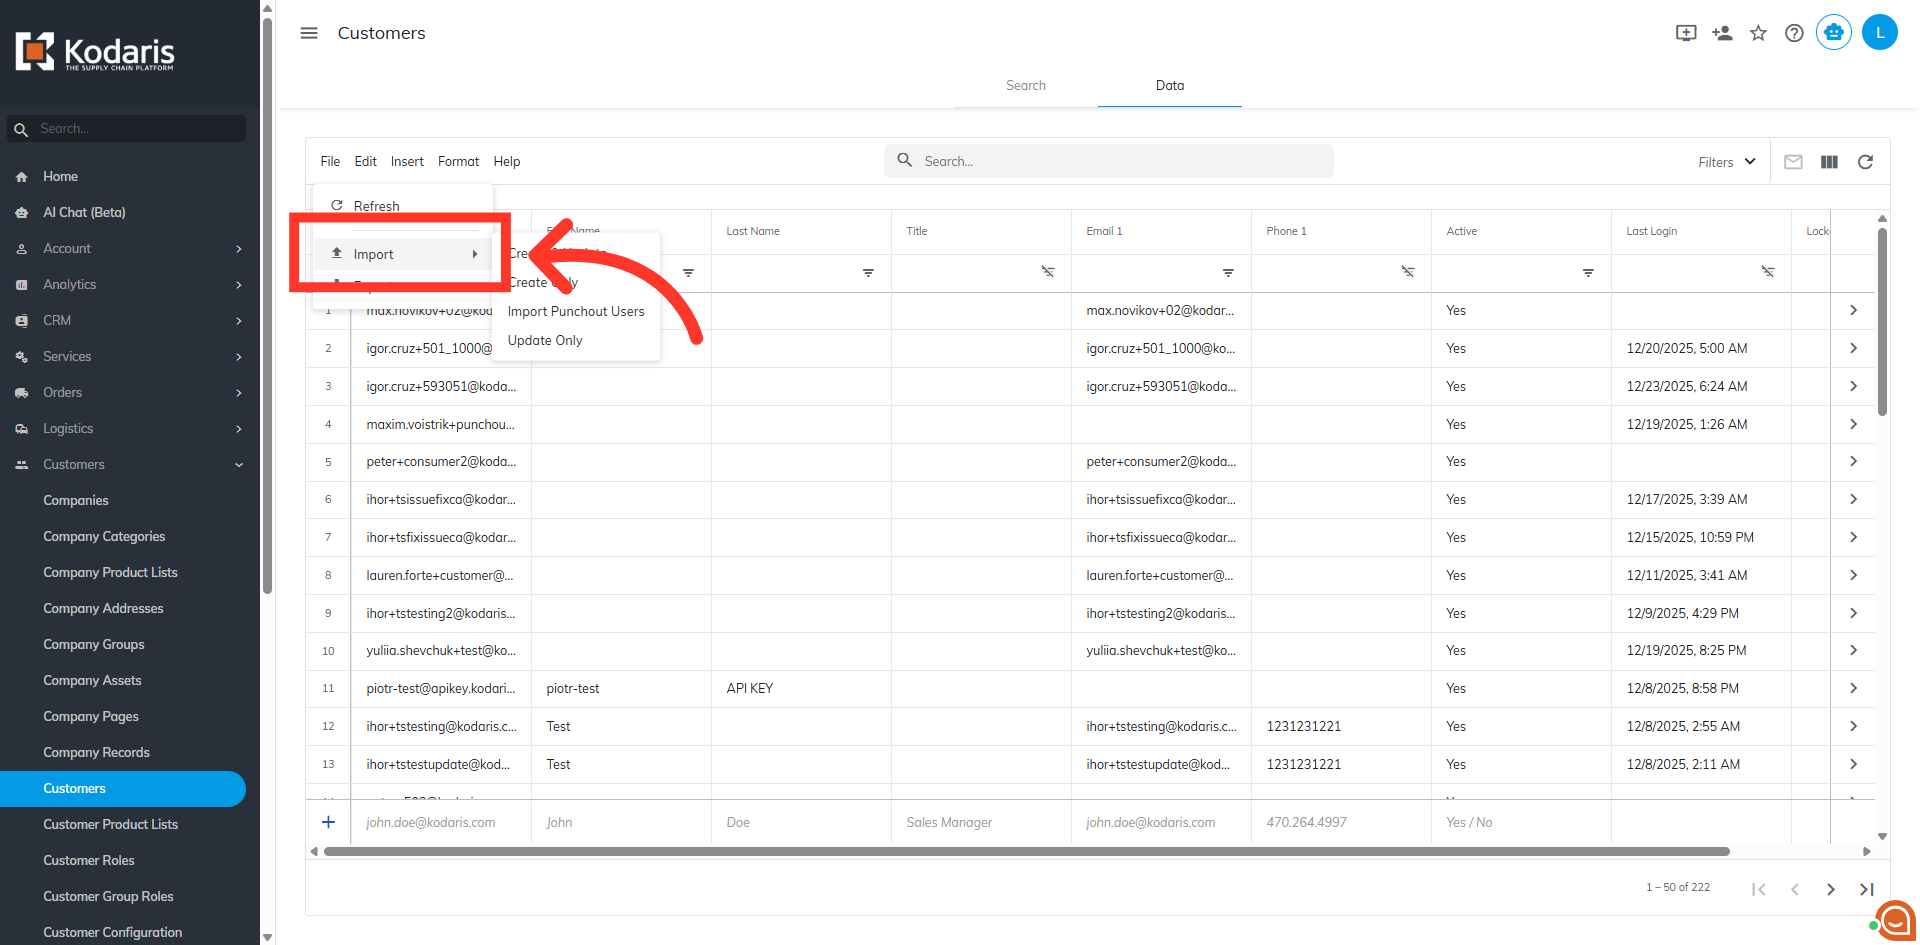
Select from the import options
Choose your preferred import option. "Create & Update" will create any new usernames included in the spreadsheet and also update existing usernames with the data in your spreadsheet. "Create Only" will only create new usernames with the data in your spreadsheet. "Update Only" will only update existing usernames with the data in your import. Since we only want to add roles at this time, we want to select the "Update Only" option.
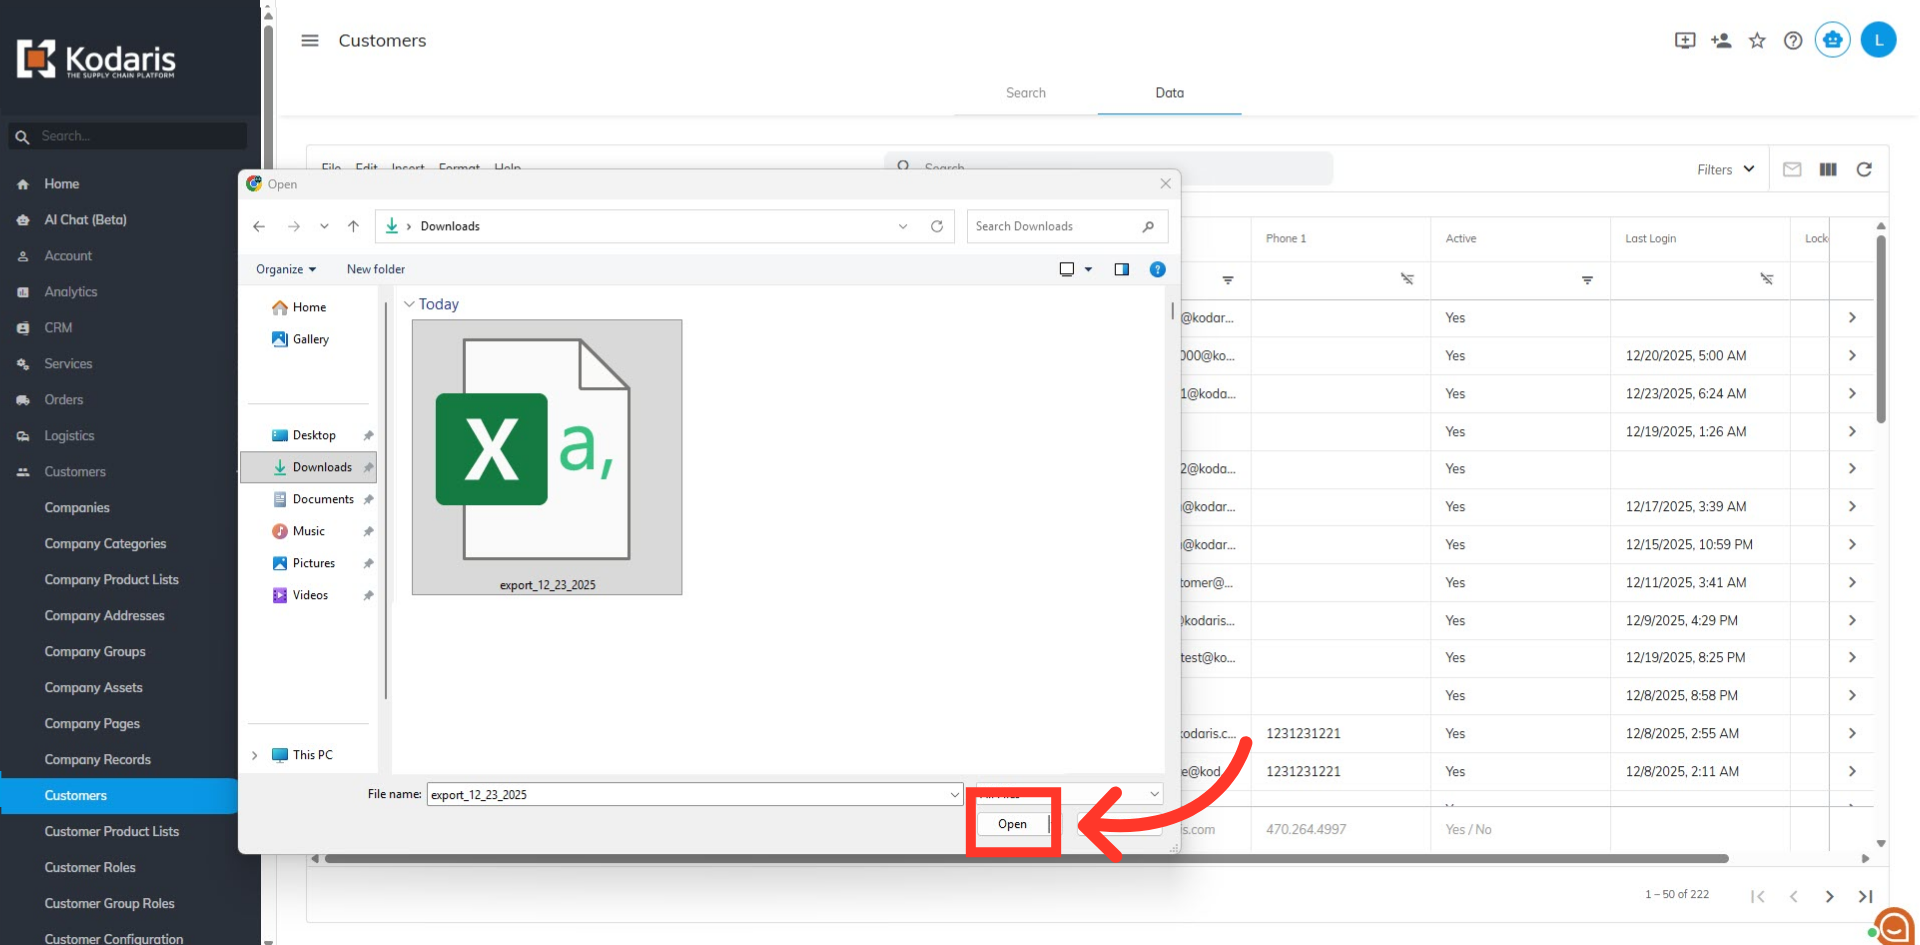
Select the file and click "Open"
Select the correct CSV file from your device, as imports are irreversible. Then, click "Open".
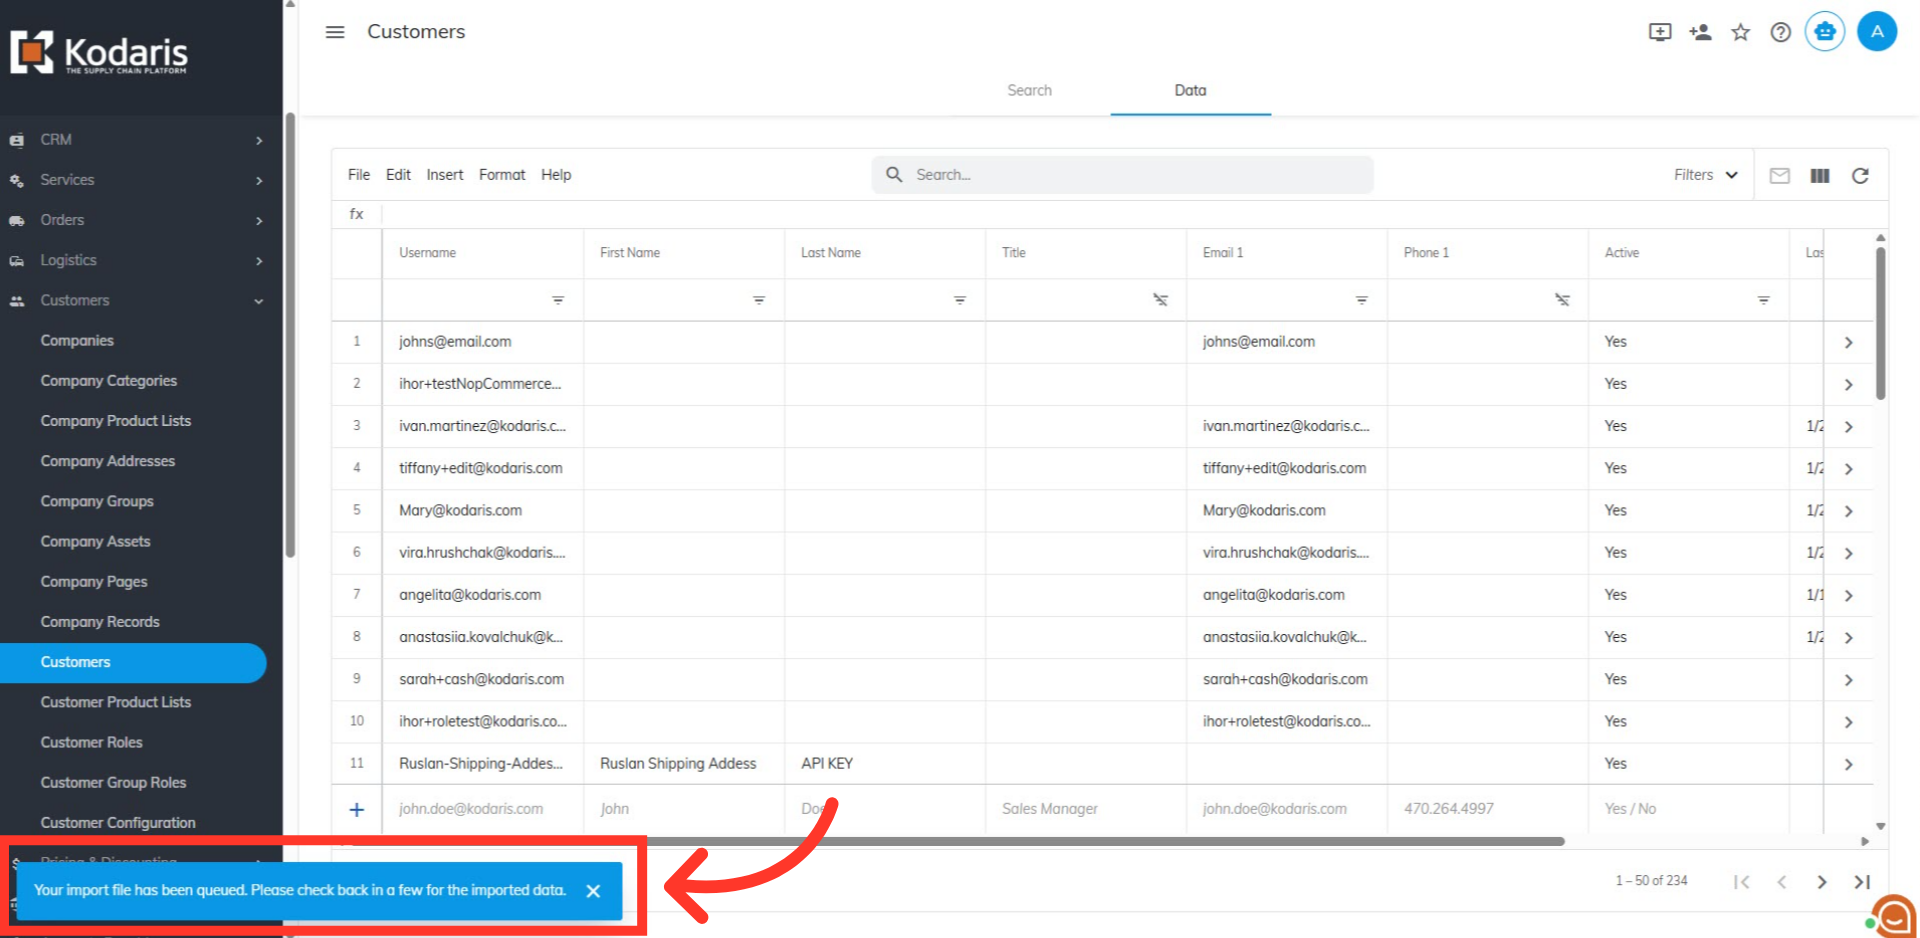
Import Status
A message showing the import status will appear at the bottom of the screen. The import process runs in the background, so please allow a few minutes for the data to be fully imported. Keep in mind that larger imports may take additional time.
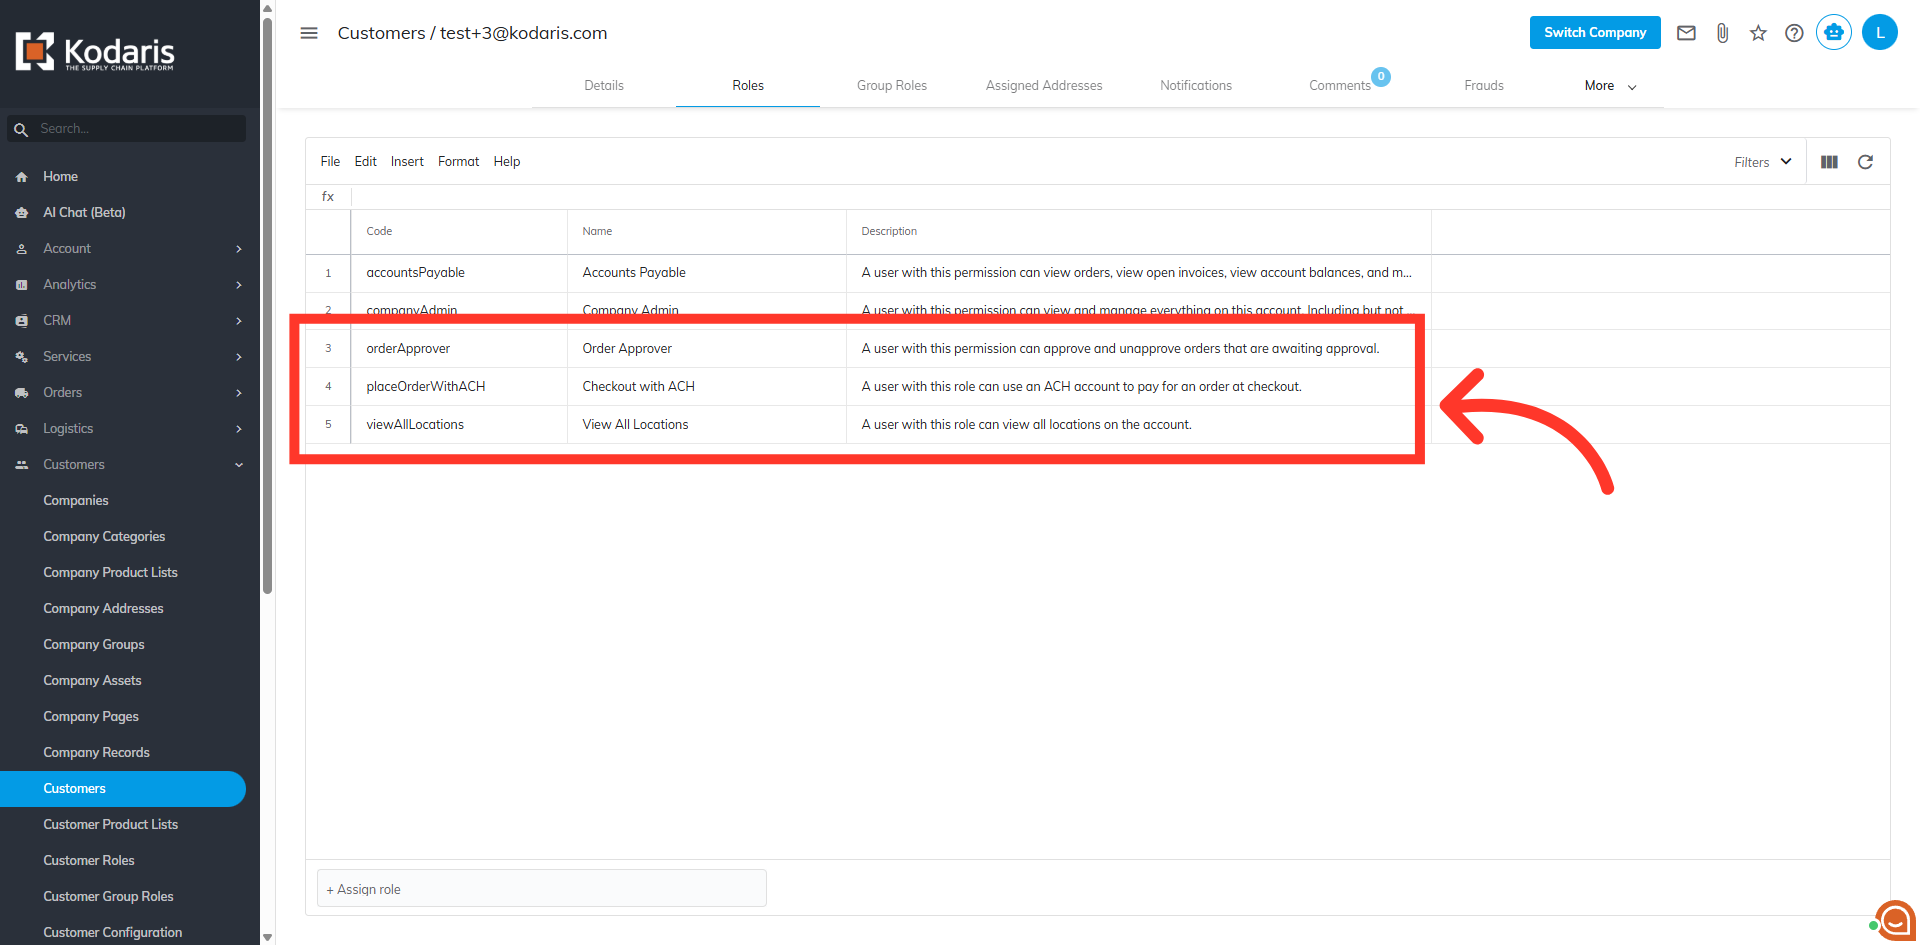
Verify the import results
Once the import is finished, go back to the Customer's "Roles" tab. The screen shows that the new roles have been added.
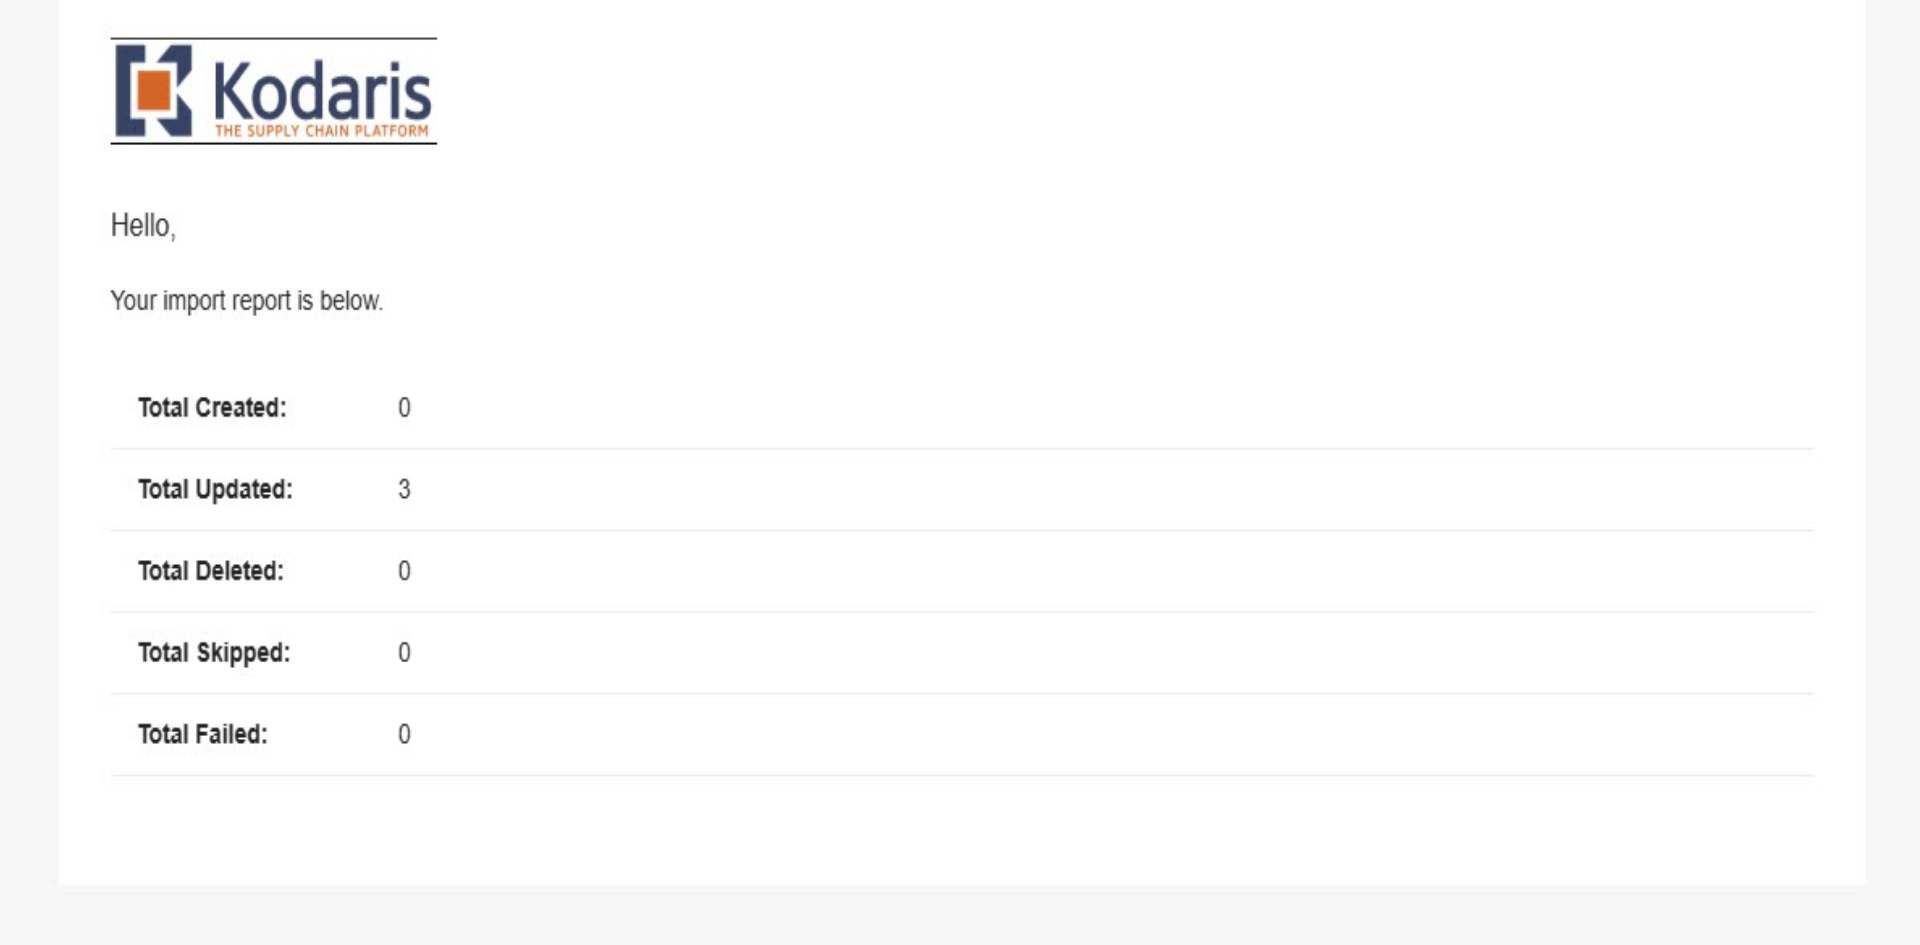
Email Report
Once the import has completed, you should receive an email report.