Operations Portal - Order Management: Filtering by Date Columns on Data Grid
Navigate to the "Orders" screen
To filter by date when using data grids, navigate to the "Orders" section in the Operations Portal.
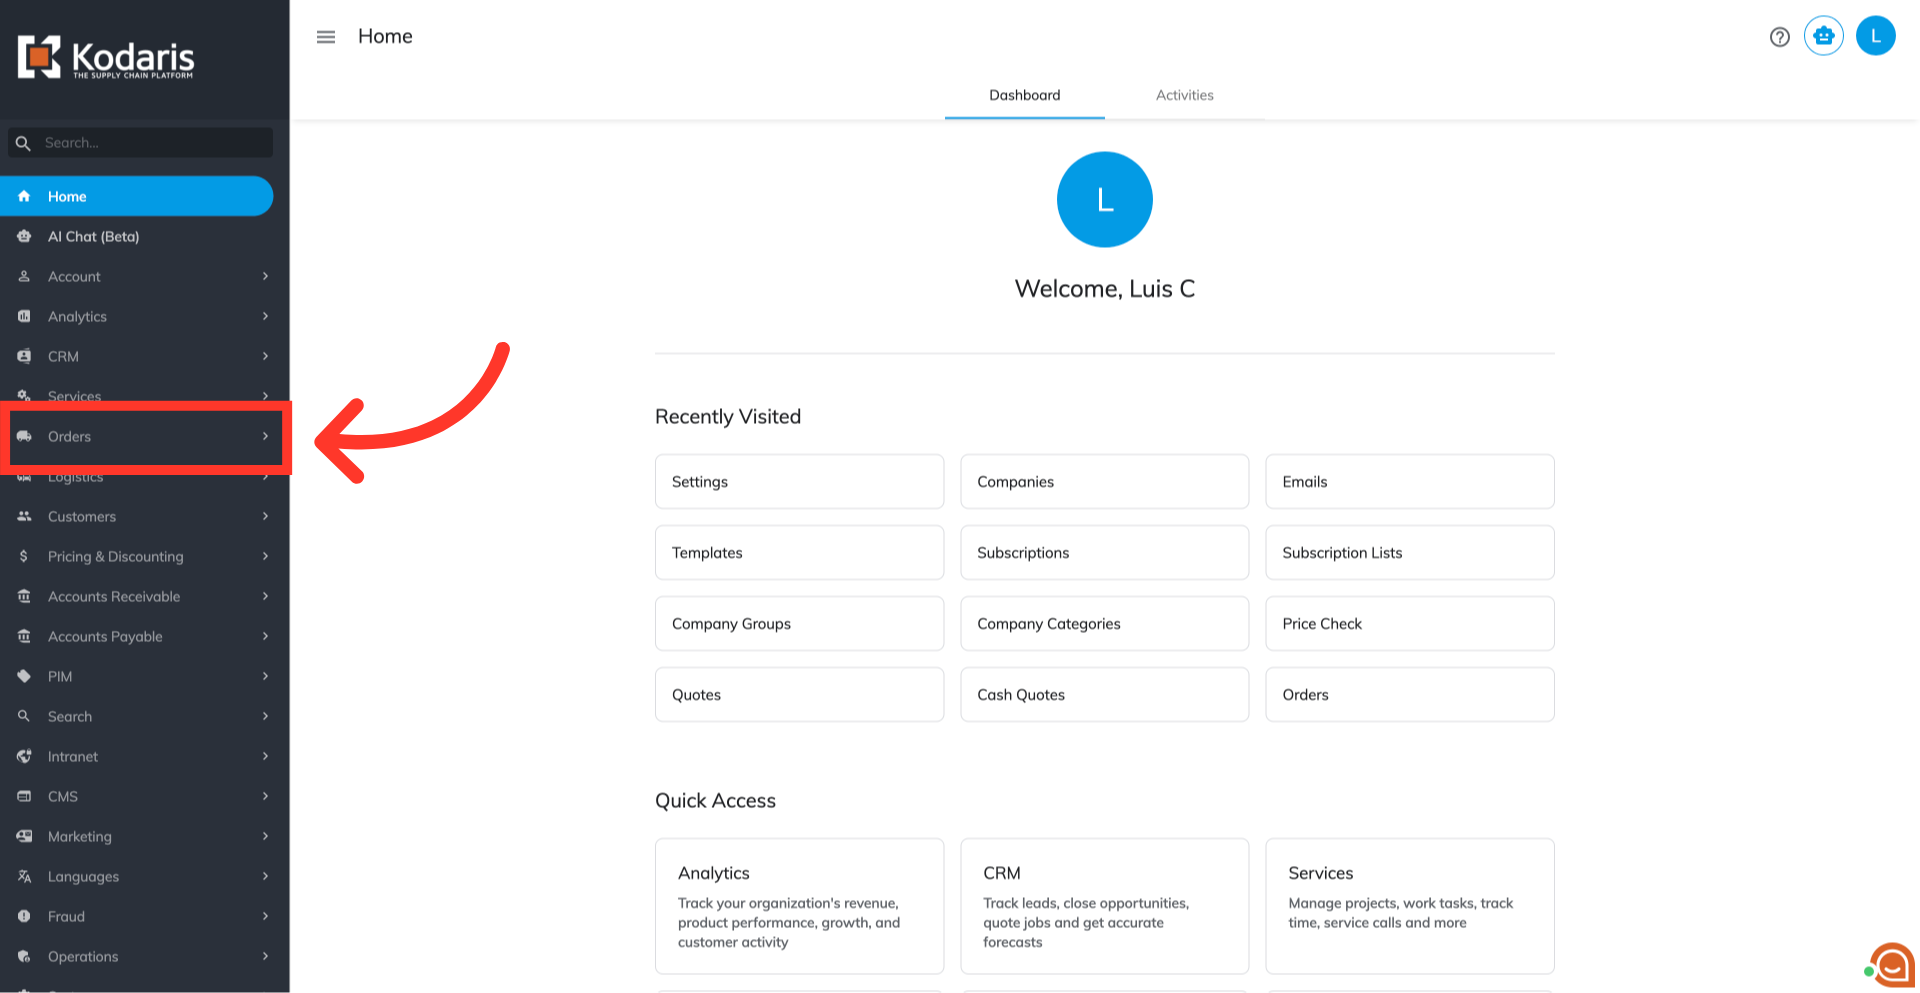
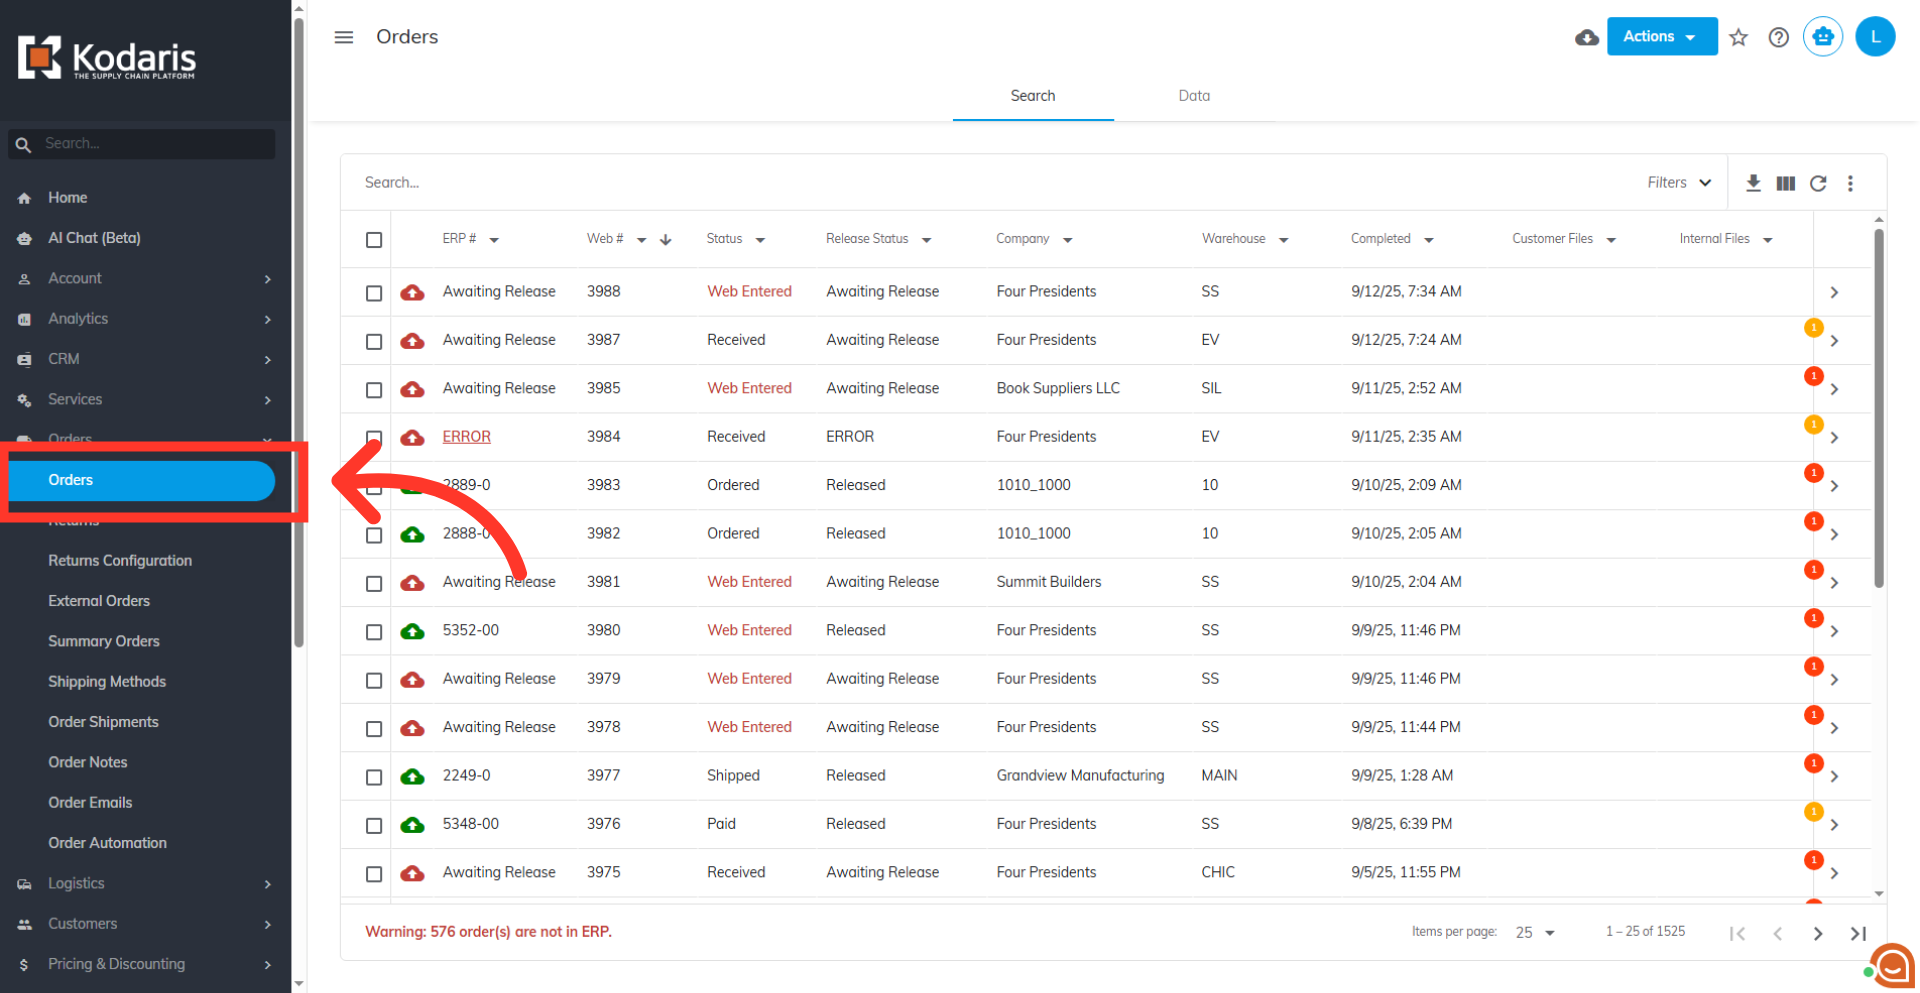
Click "Orders"
Then, click "Orders". In order to access "Orders", you will need to be set up either as an "administrator" or a "superuser", or have the appropriate roles: "dispatch", "orderEdit," "orderView," "crmCompanyOrderView," and "crmCompanyOrderEdit," Just a reminder, "crmCompanyOrderView and crmCompanyOrderEdit" access only allows employees to view company orders that are assigned to them.
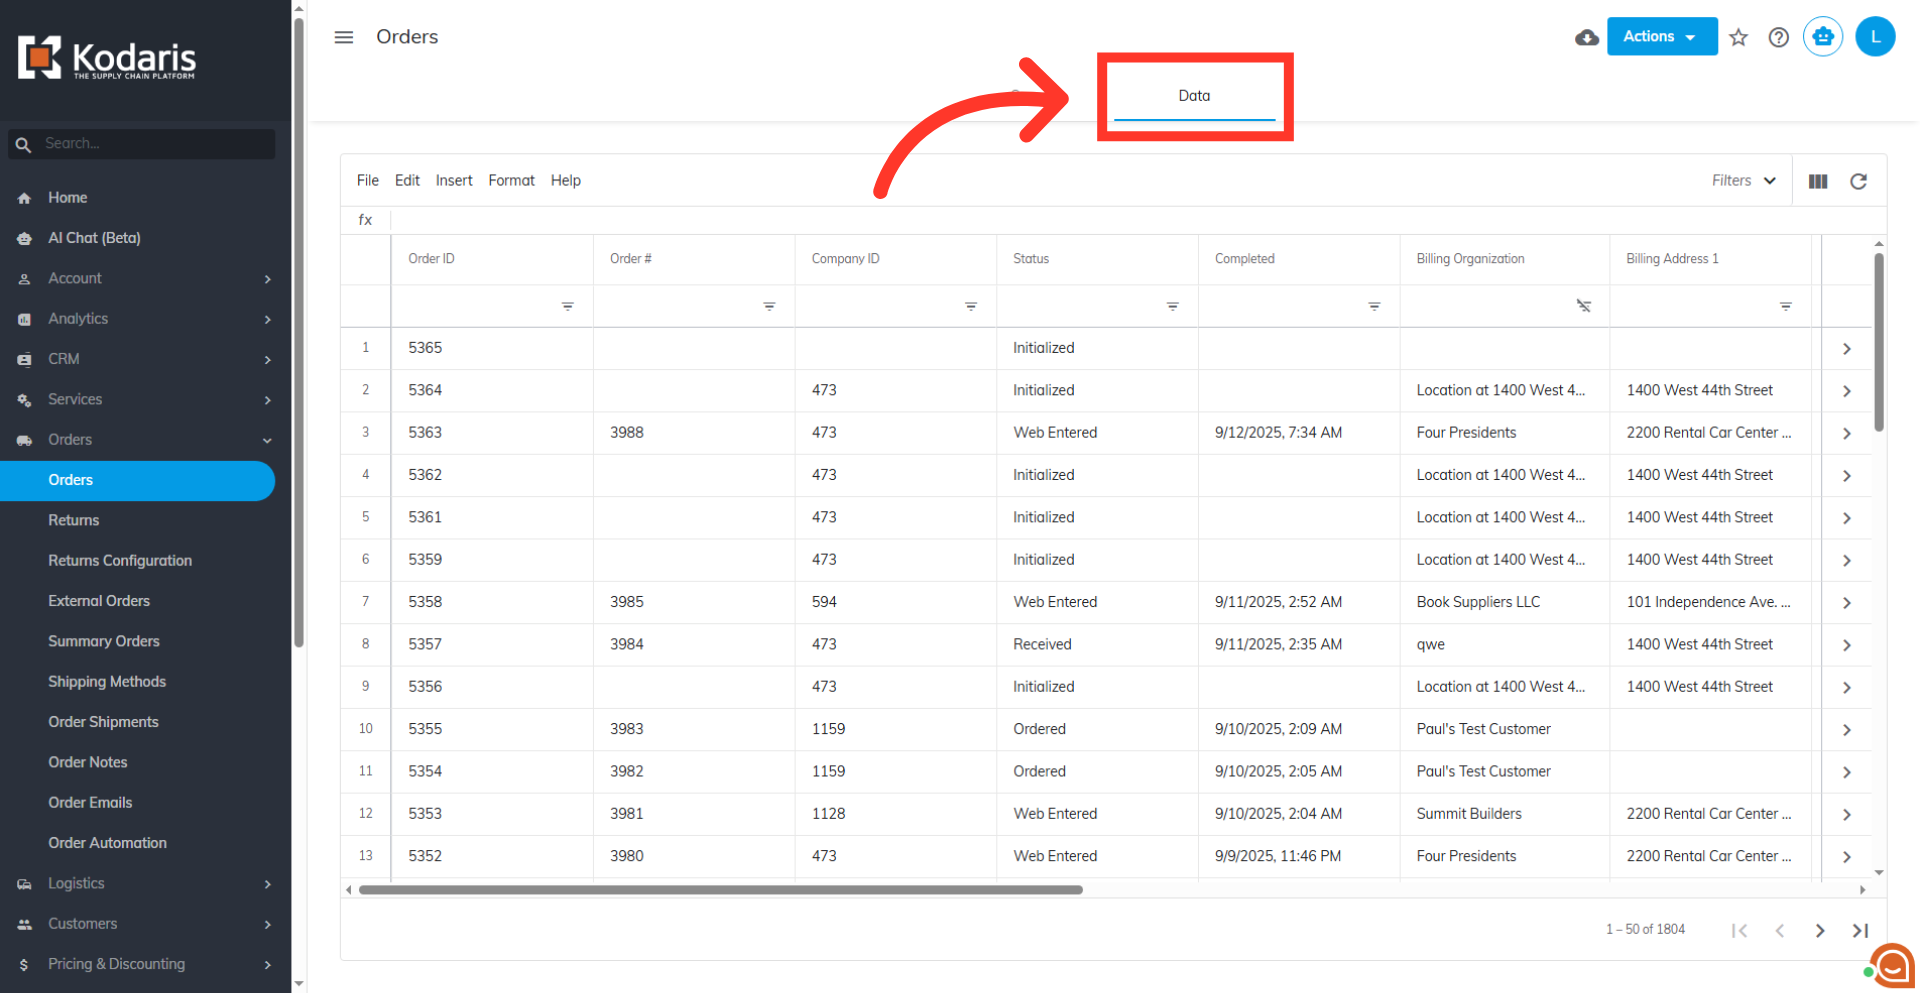
Click on the "Data" tab
Next, click on the "Data" tab.
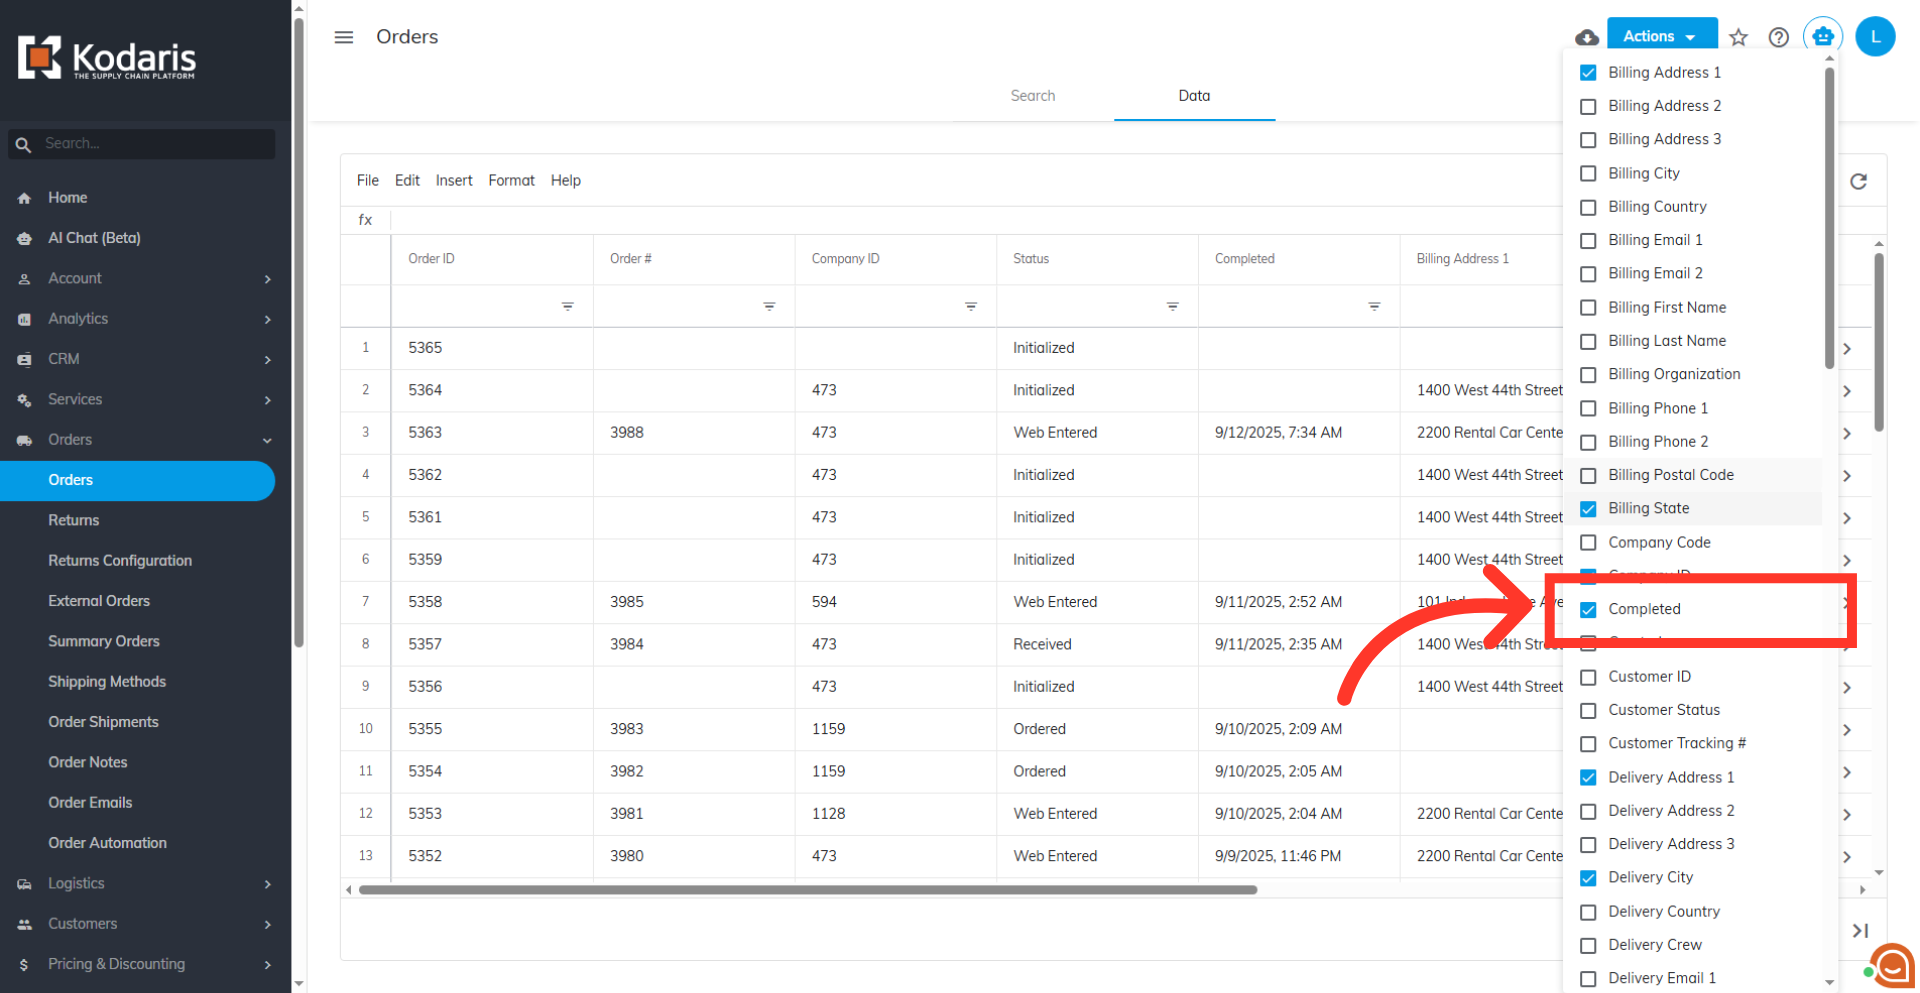
Click on the "Show/Hide Columns" icon
Click on the "Show/Hide Columns" icon.

Select a date-type column
Click on any date-type column you want to work with, such as the "Completed" column.
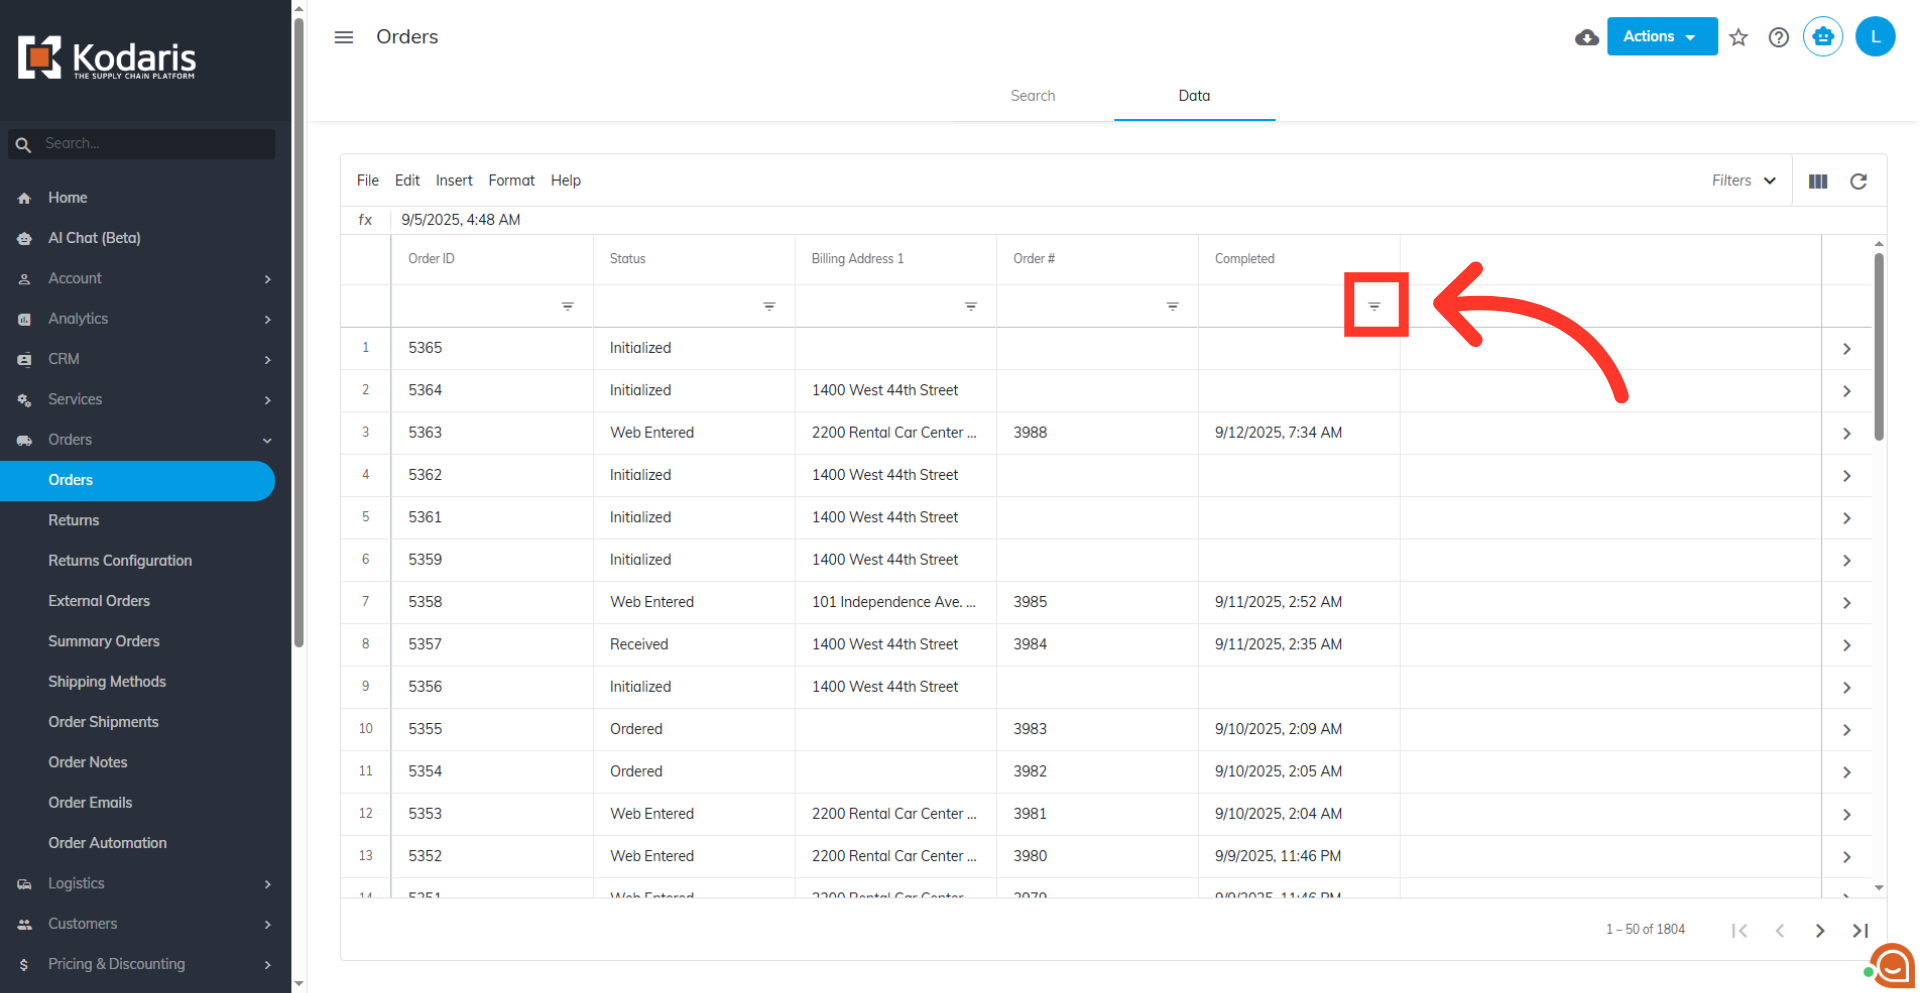
Click on the filter dropdown
Click on the filter icon to show the filter options.
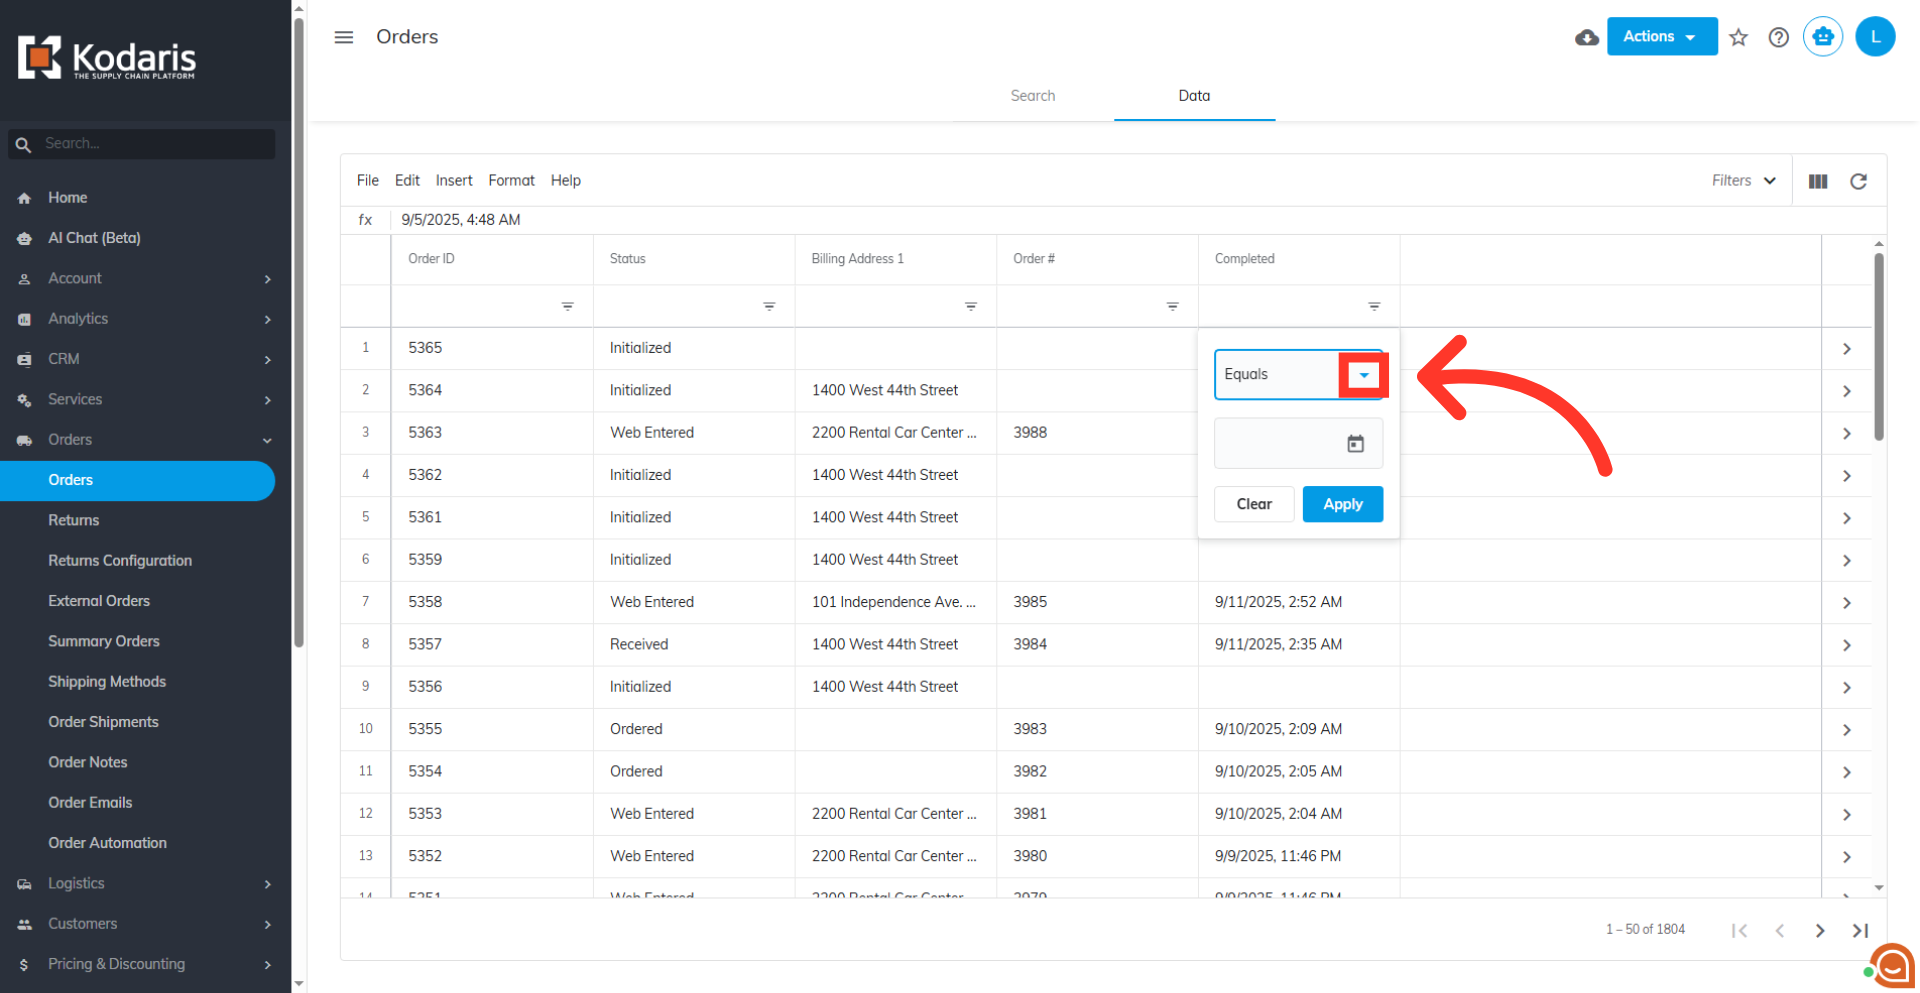
Click the operator dropdown
Then, click the operator dropdown.
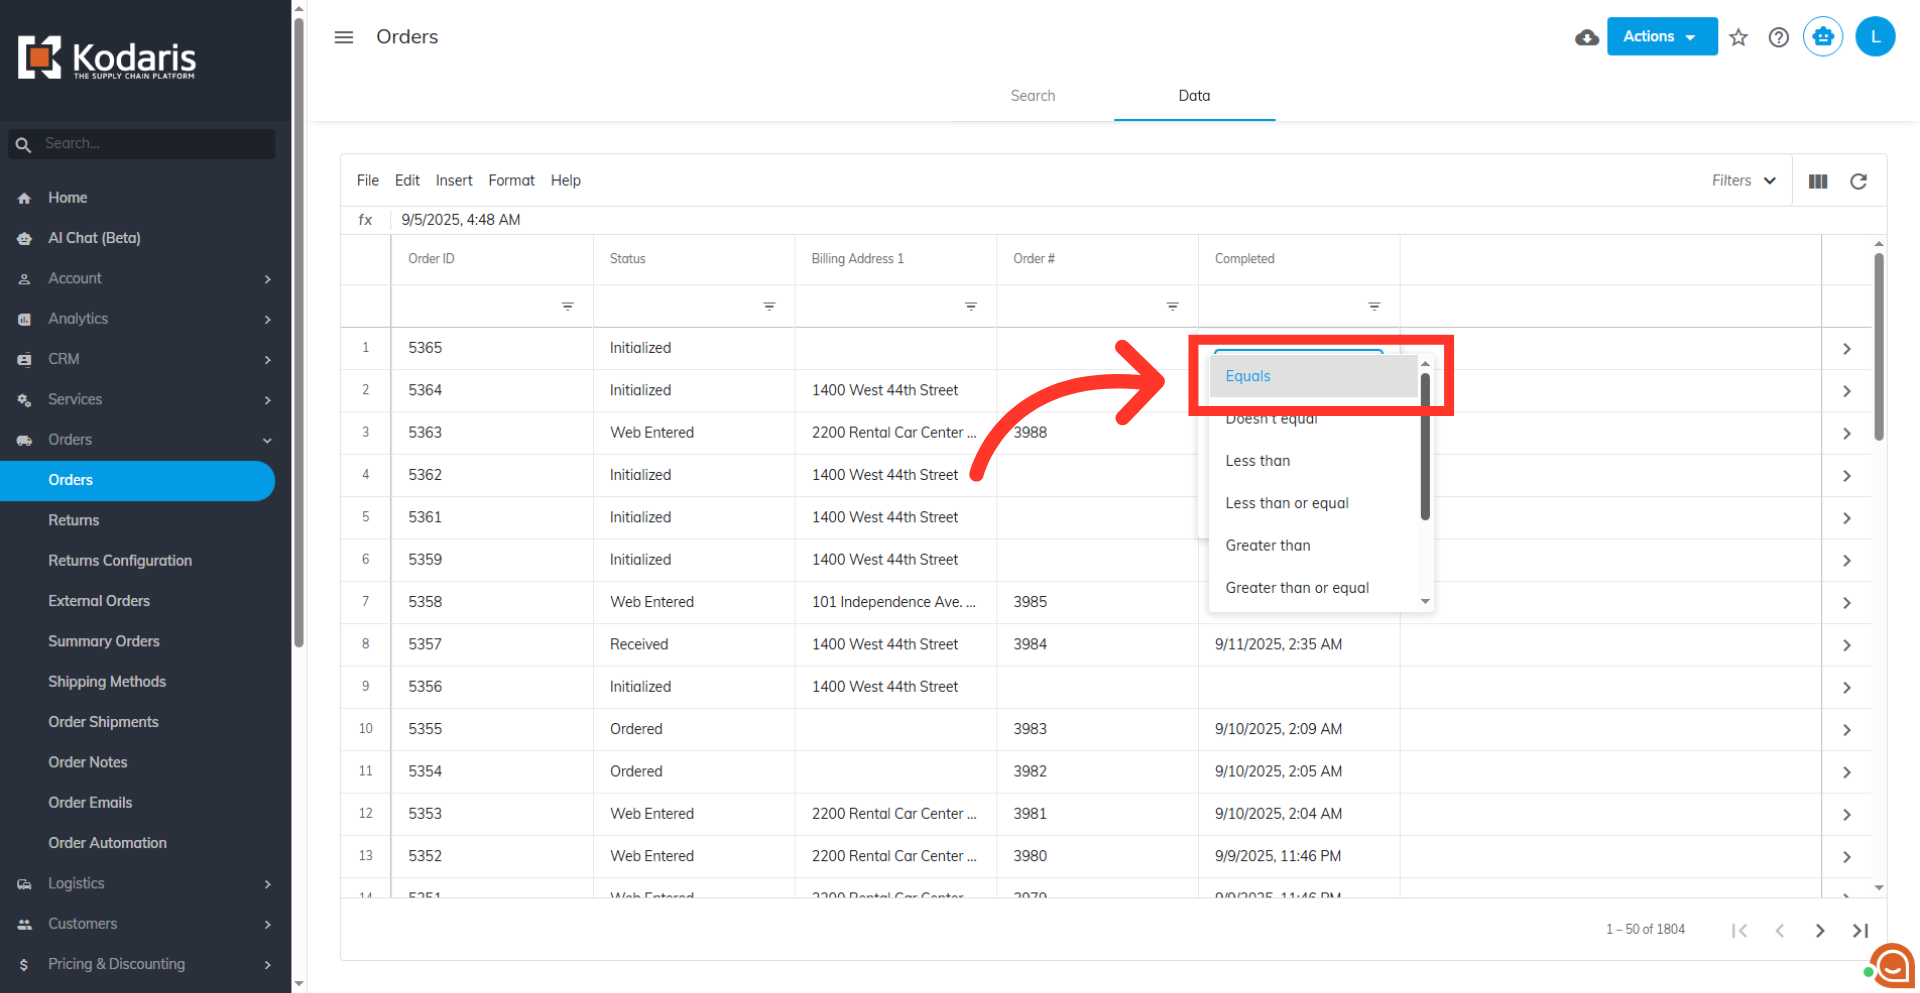
Filter date by Single Date Operators
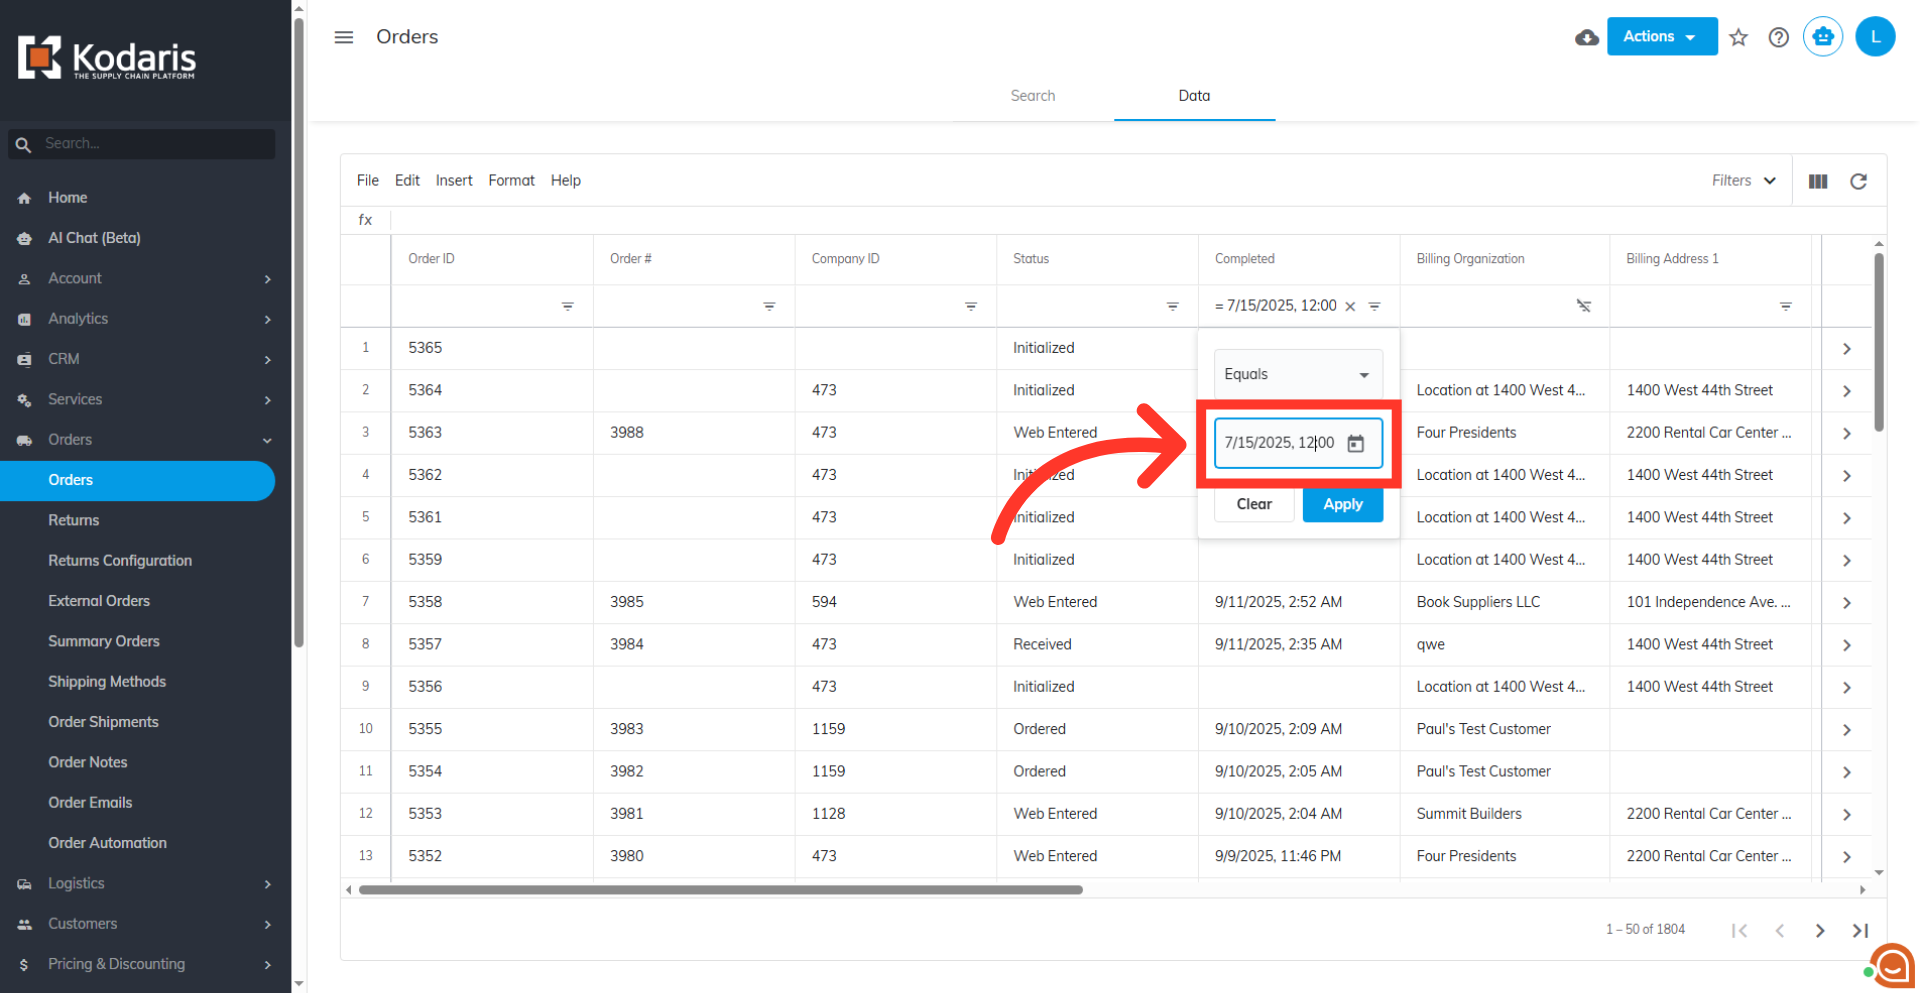
To filter by date, you can enter a specific date or a date range. You then select a date filter operator to determine whether you are filtering for a single date or a range. To filter date by single date operators, you can select "Equals” to filter for orders that match the exact date you enter. Other operators that also allow you to enter a single date are "Doesn't equal," "Less than," "Less than or equal," "Greater than," and "Greater than or equal."
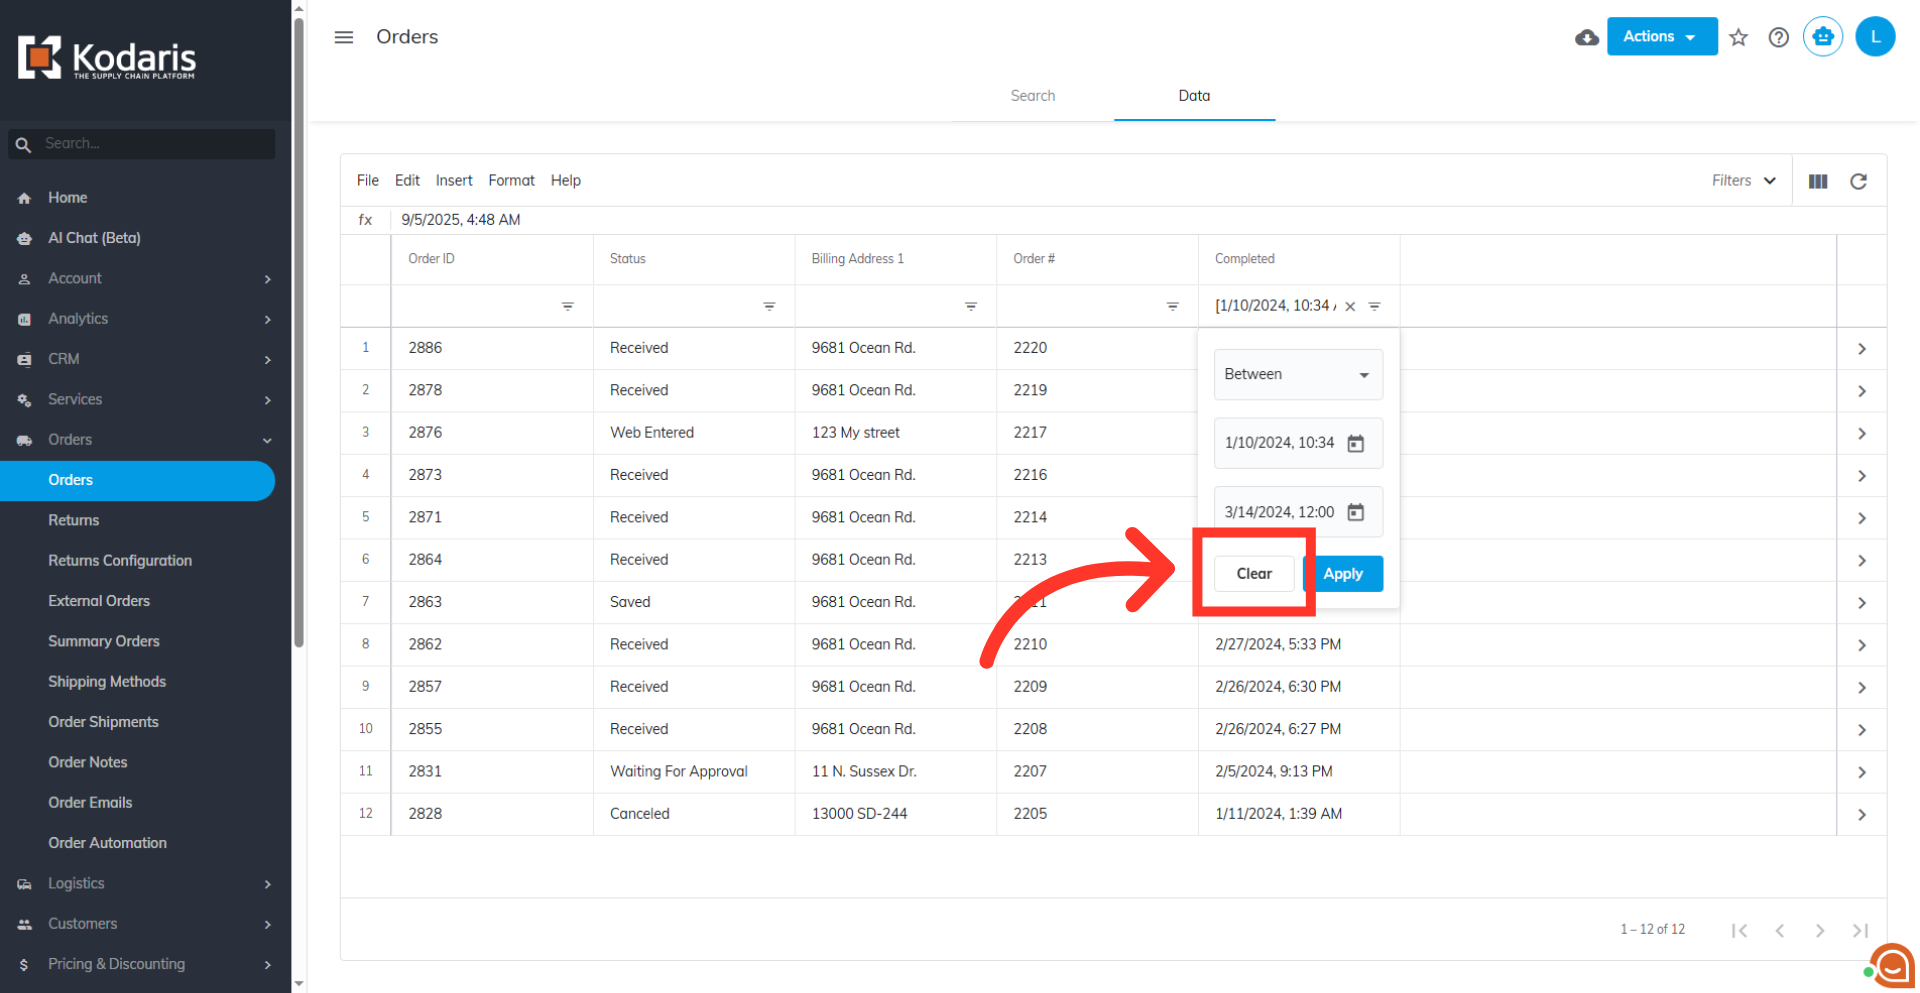
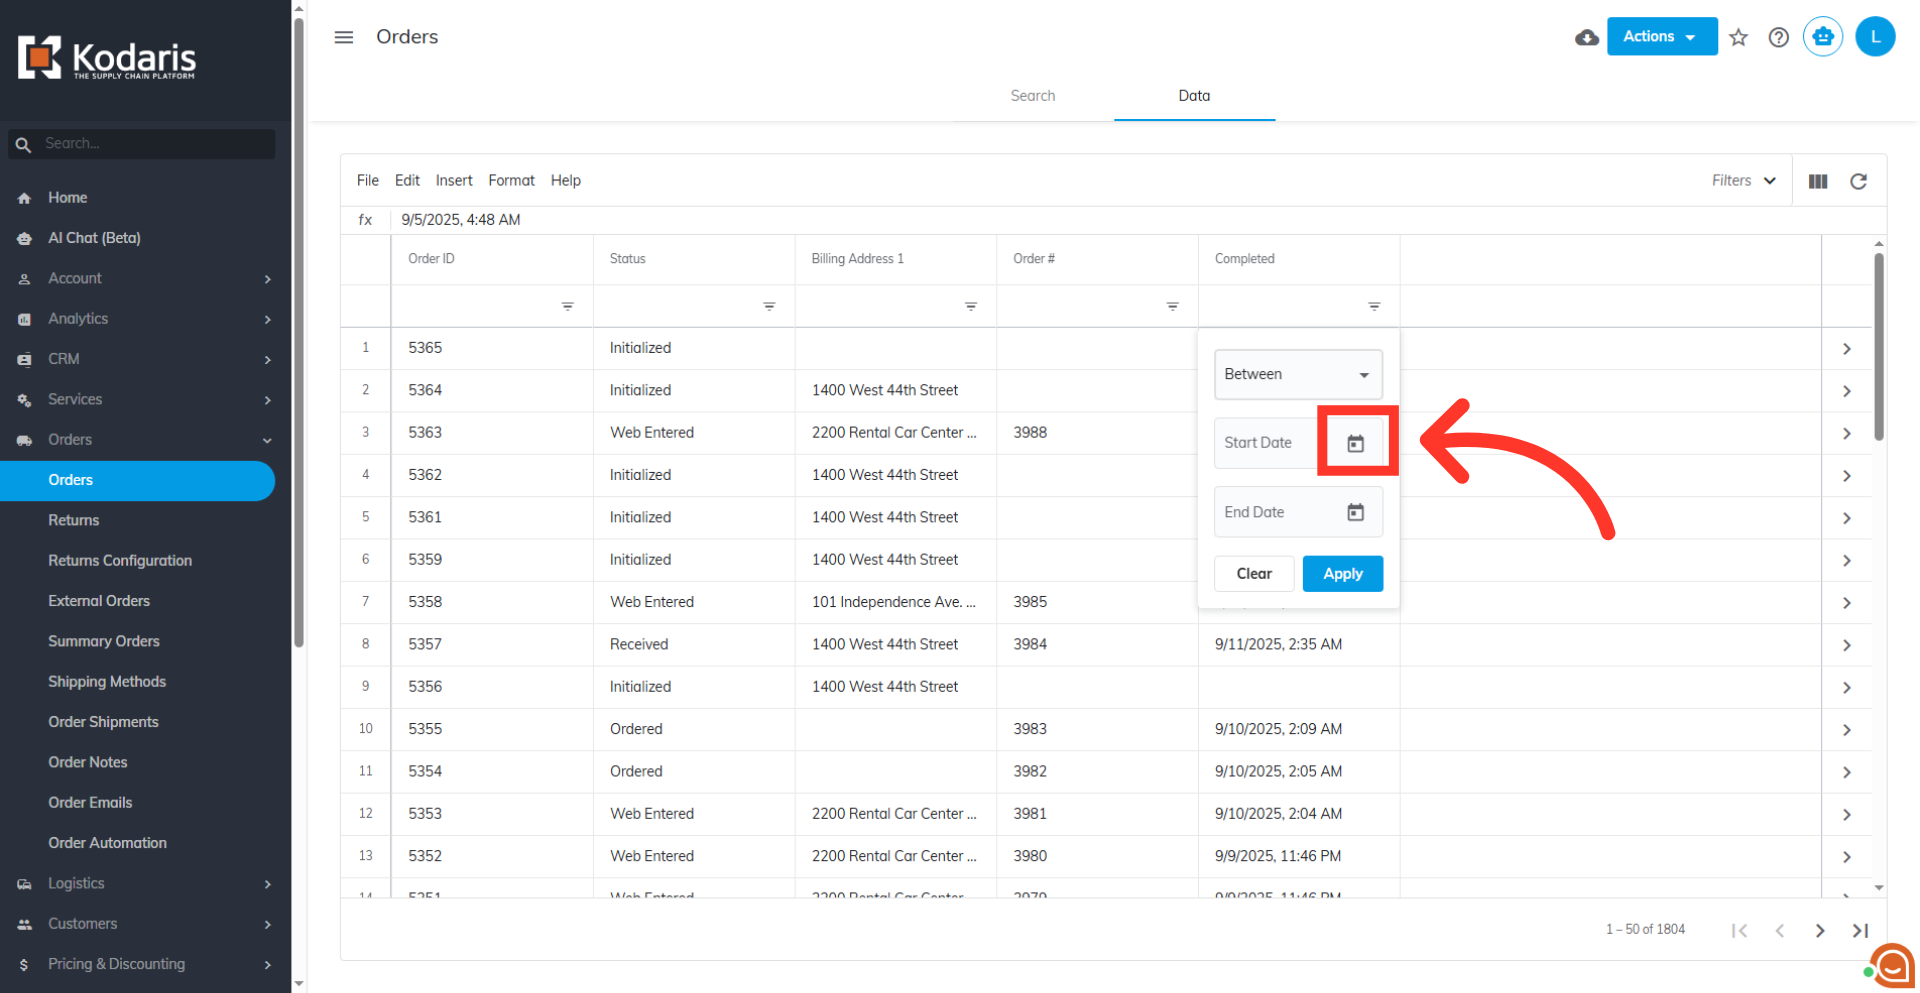
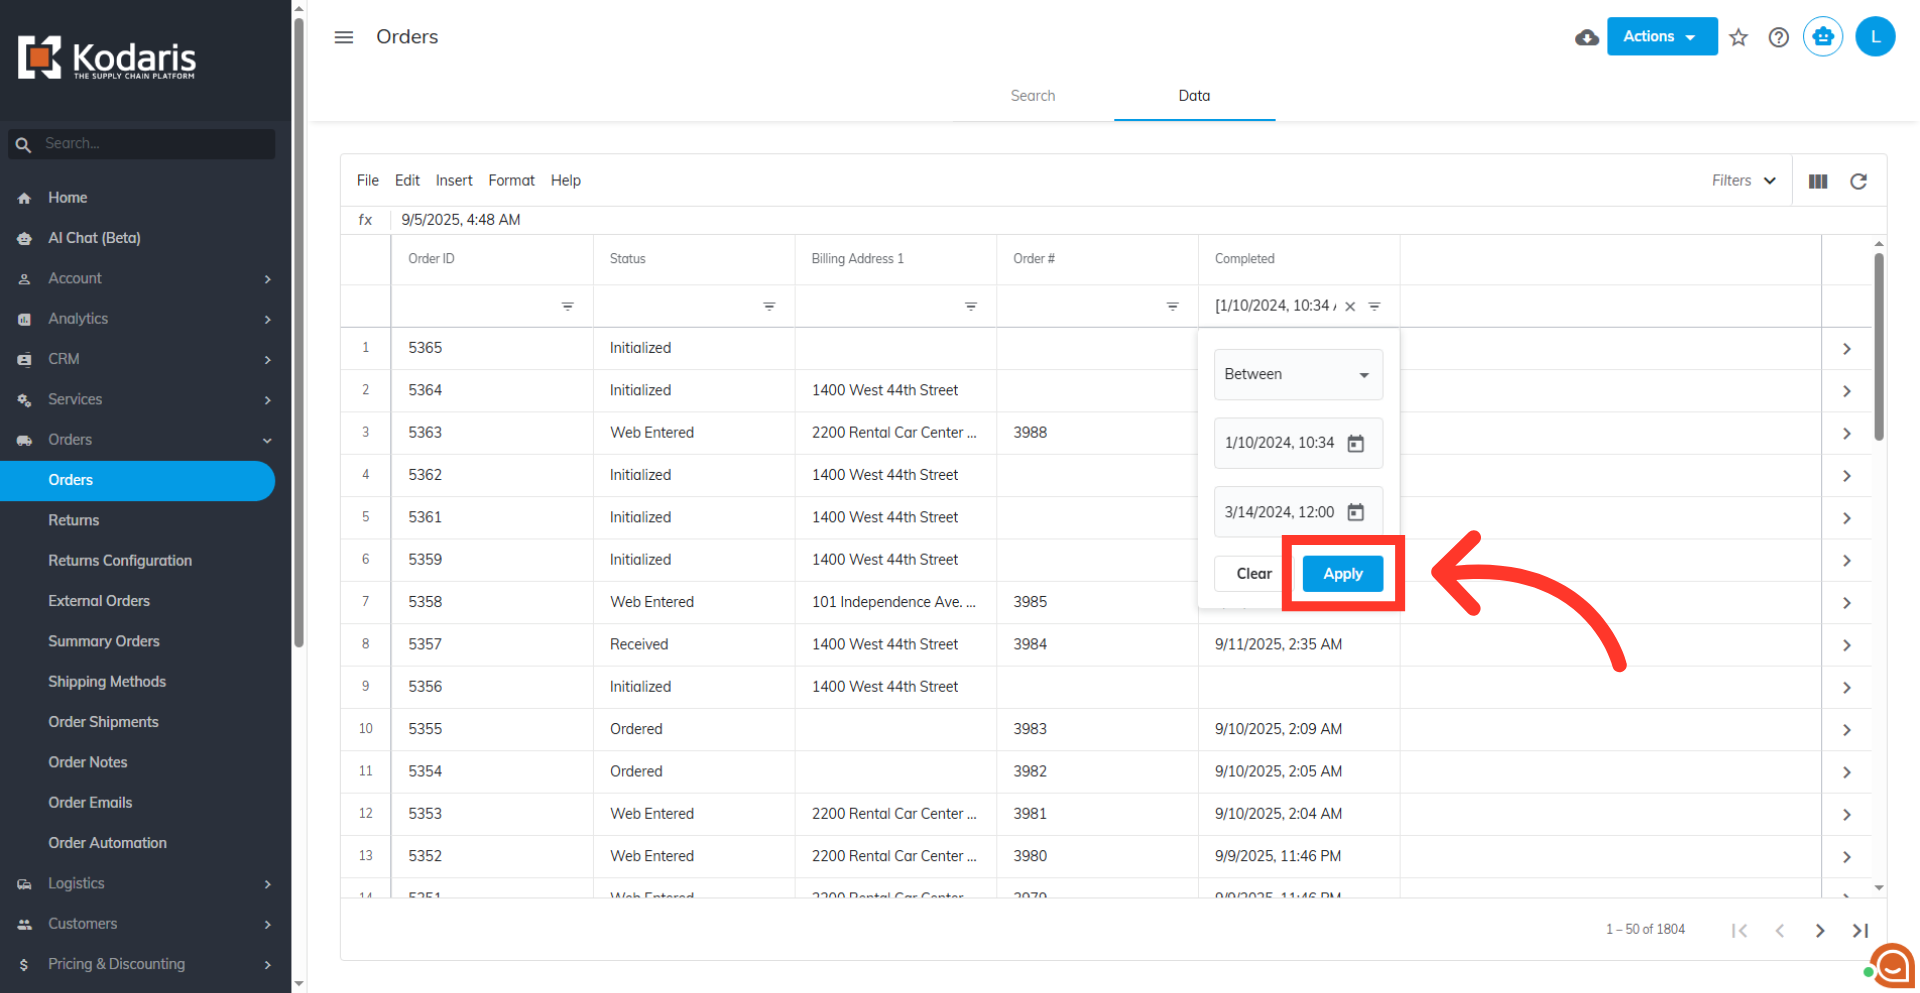
Filter date by "Between" condition
Select the "Between" condition to filter for orders that fall between those two dates.
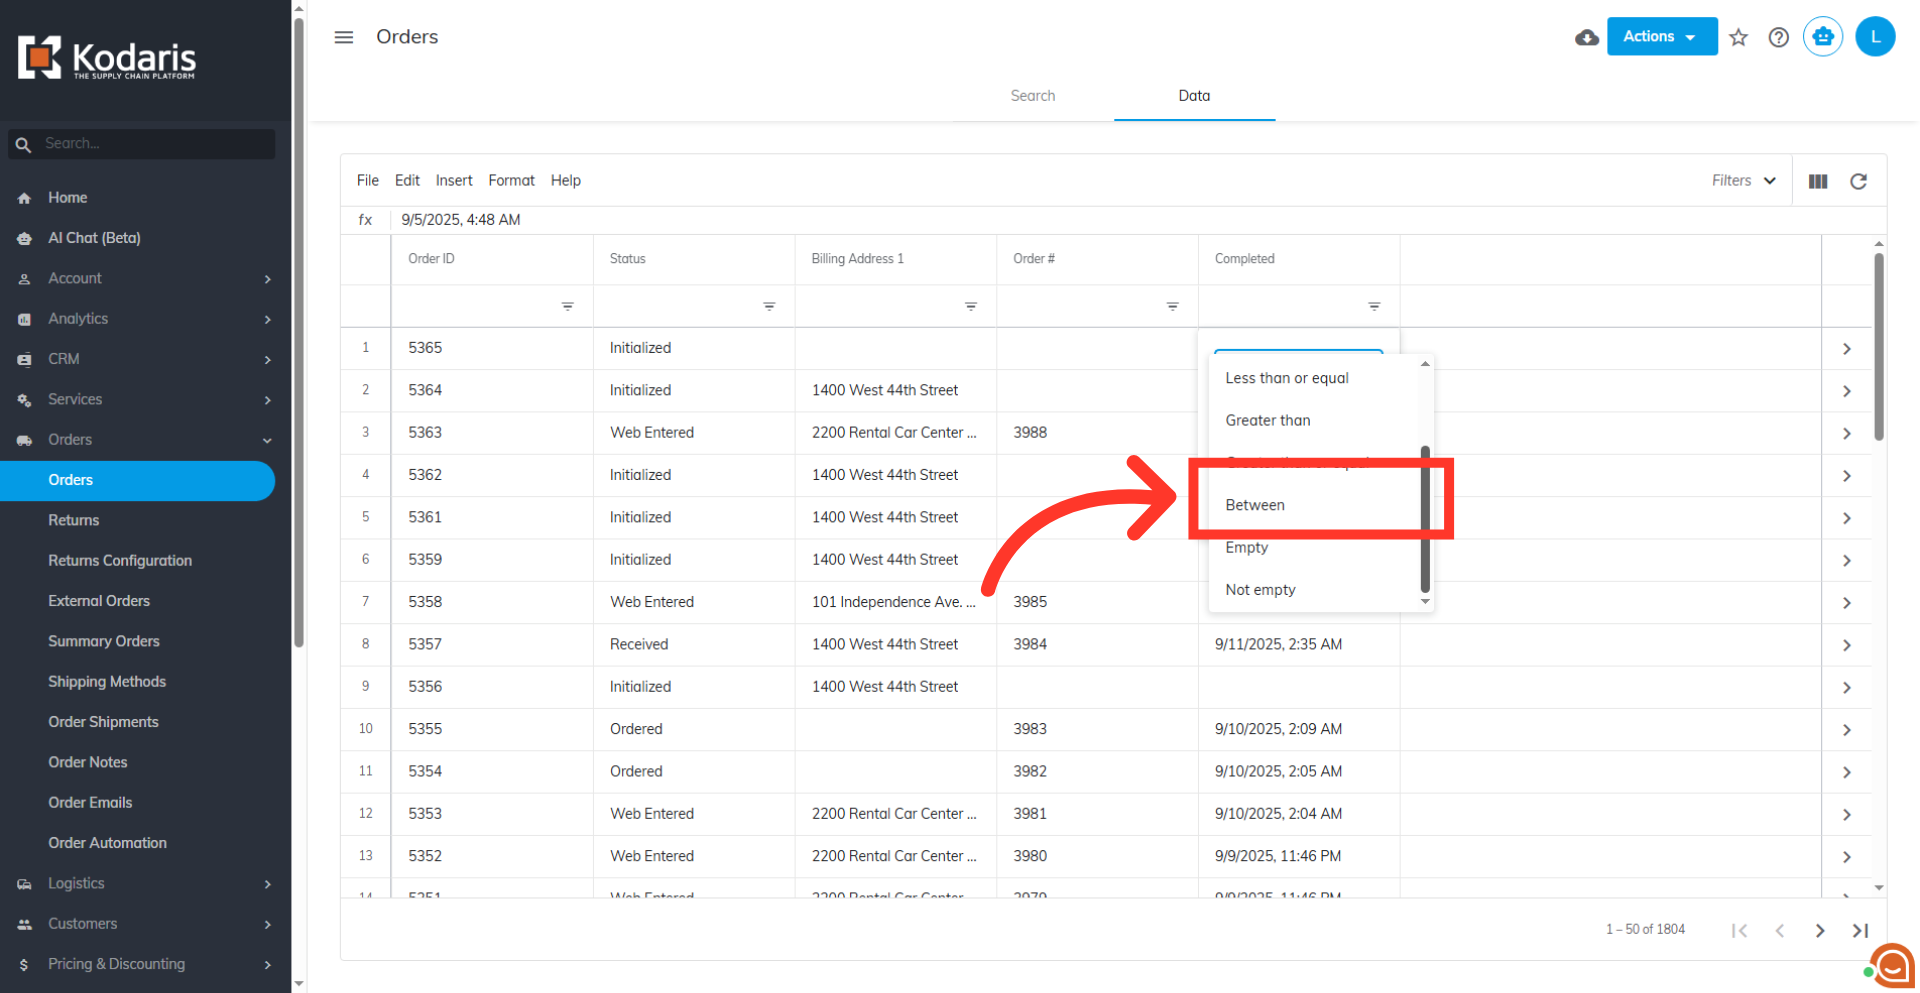
Filter date by "Empty" or "Not Empty"
To filter for orders that either have or do not have a date value, select "Empty" or "Not empty."

Click on the date picker icon
Now, click on the date picker icon to open a calendar. This will help you select a specific date or a date range based on your needs.
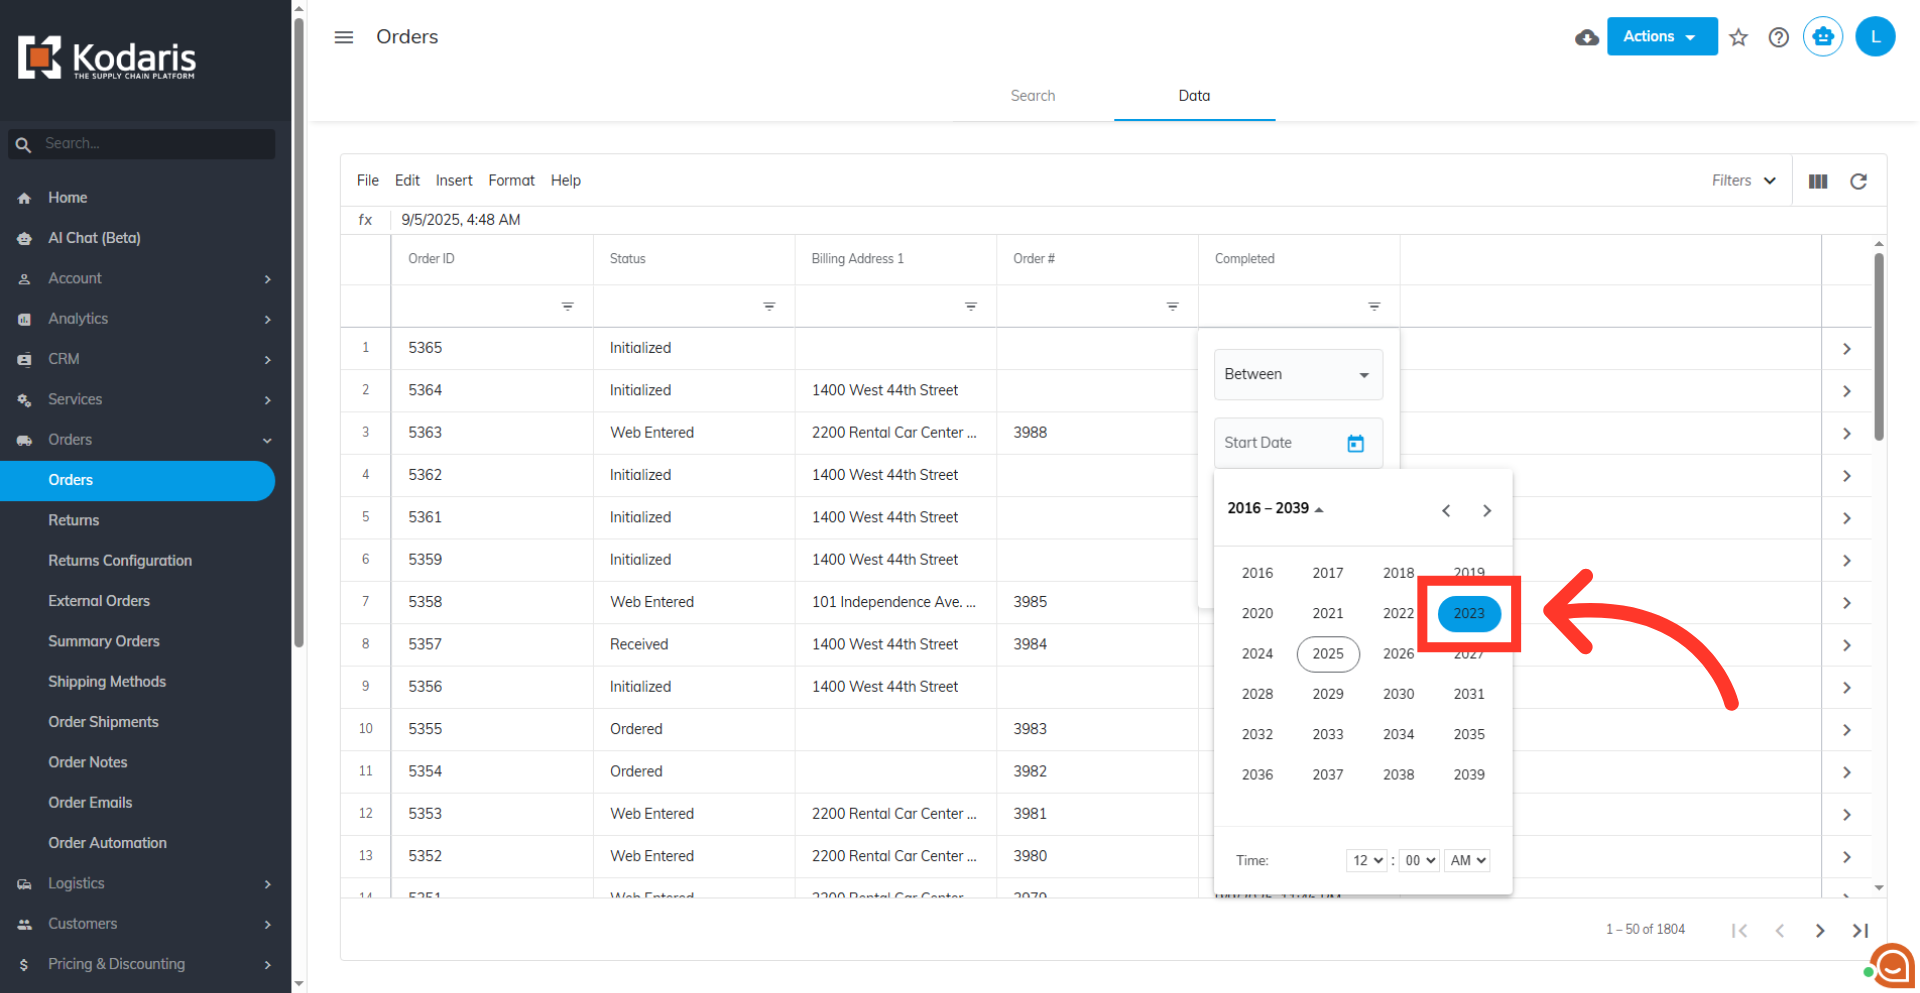
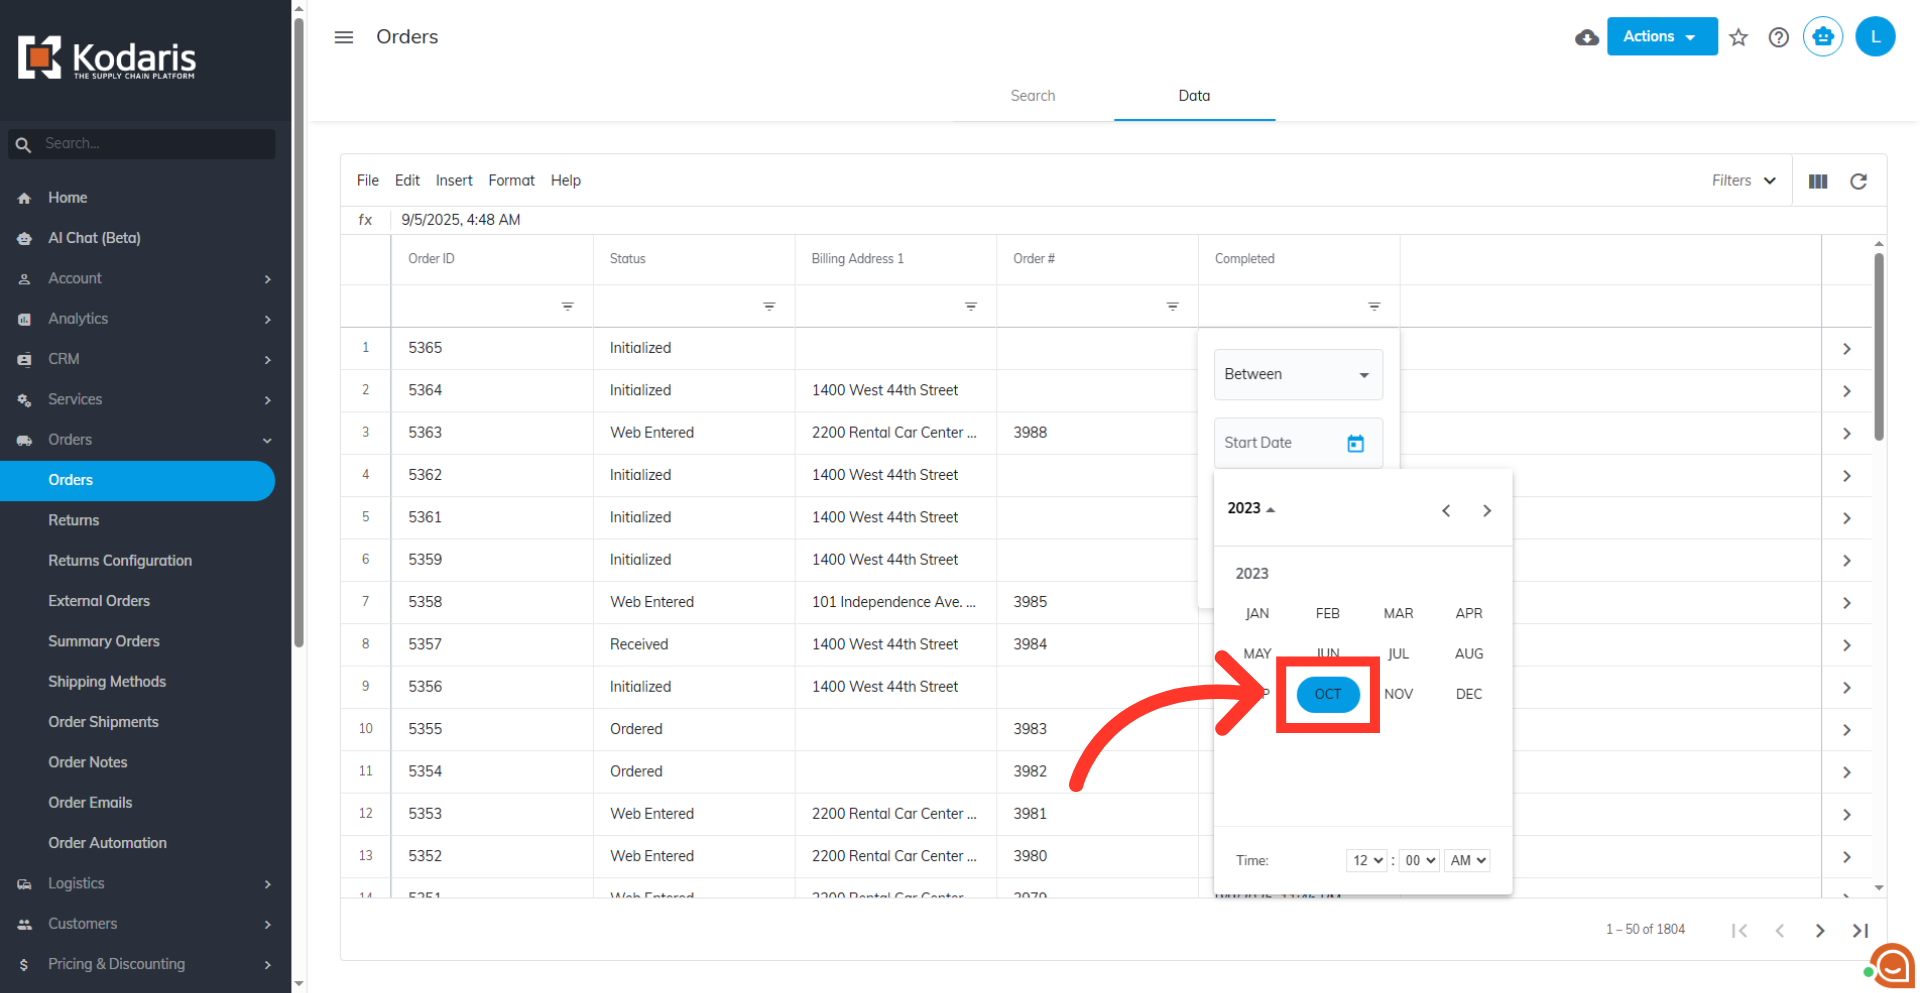
Click the Month Year button
Click the "Month Year" button.
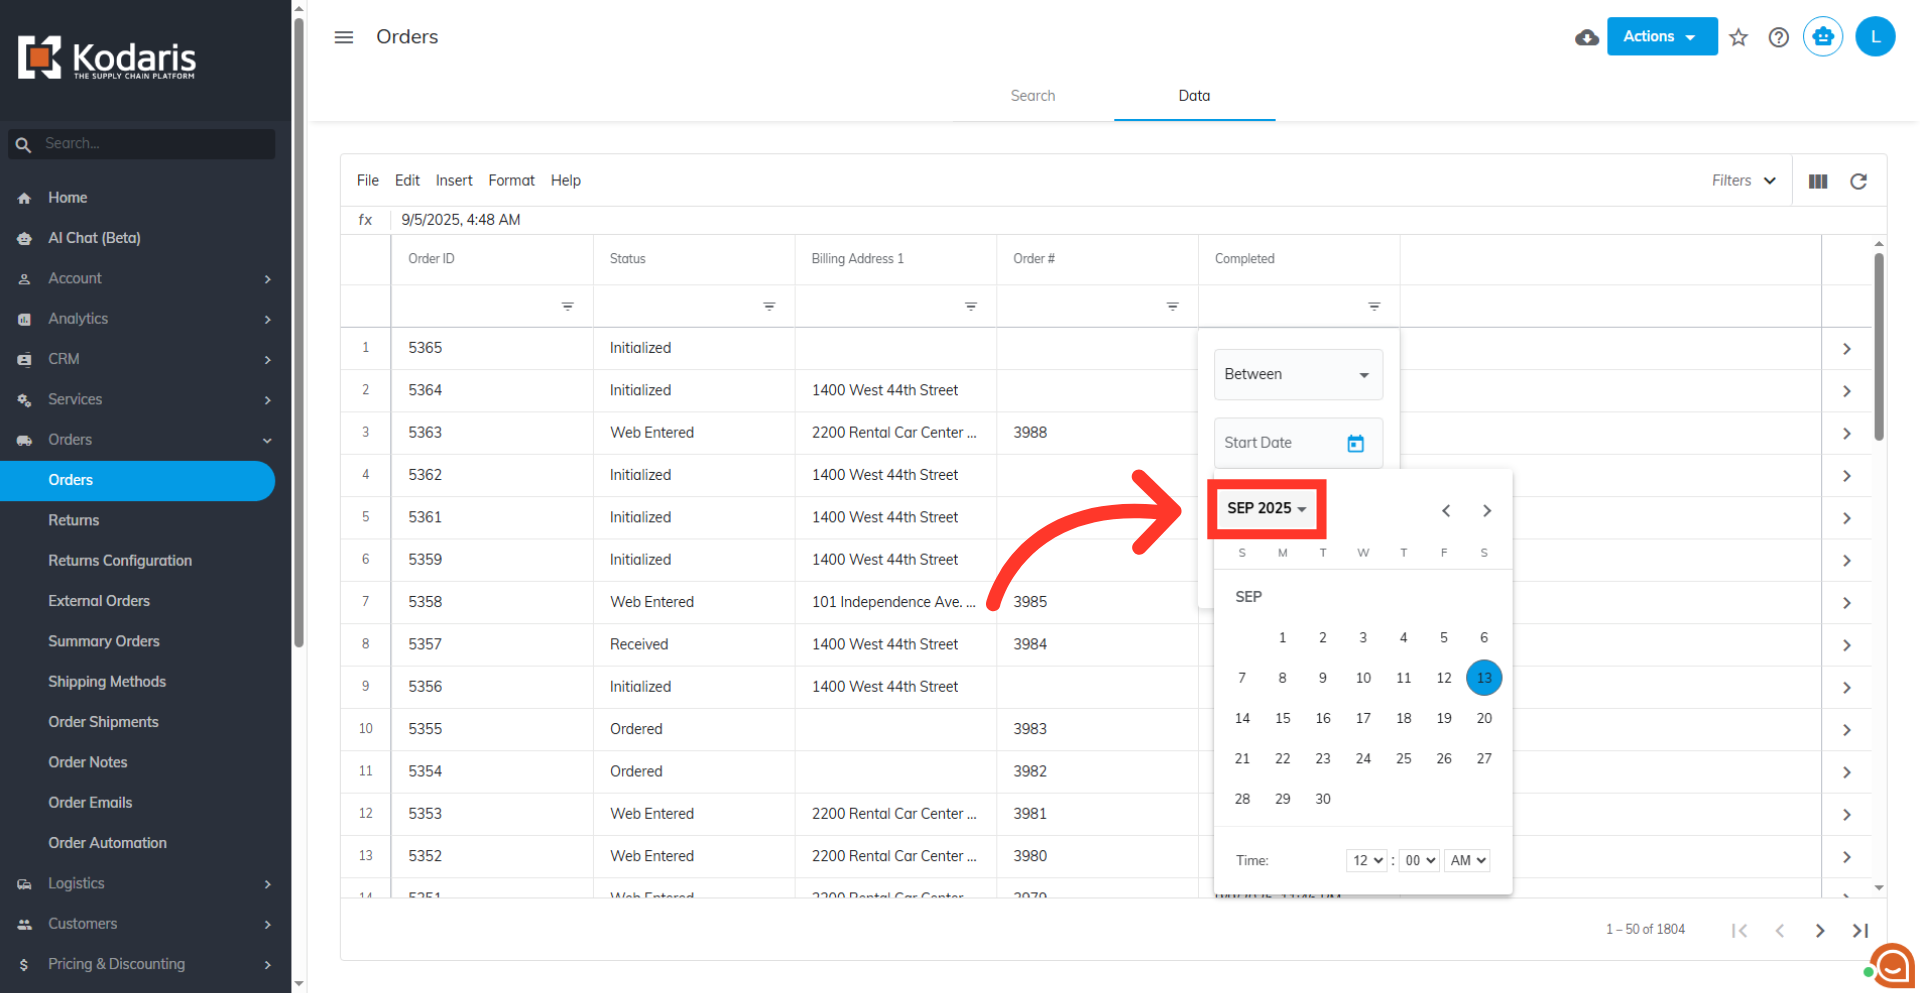
Select a year
Click on the year to set the calendar year you want to preview.
Select a month
Click on the month to set the calendar month you want to preview.
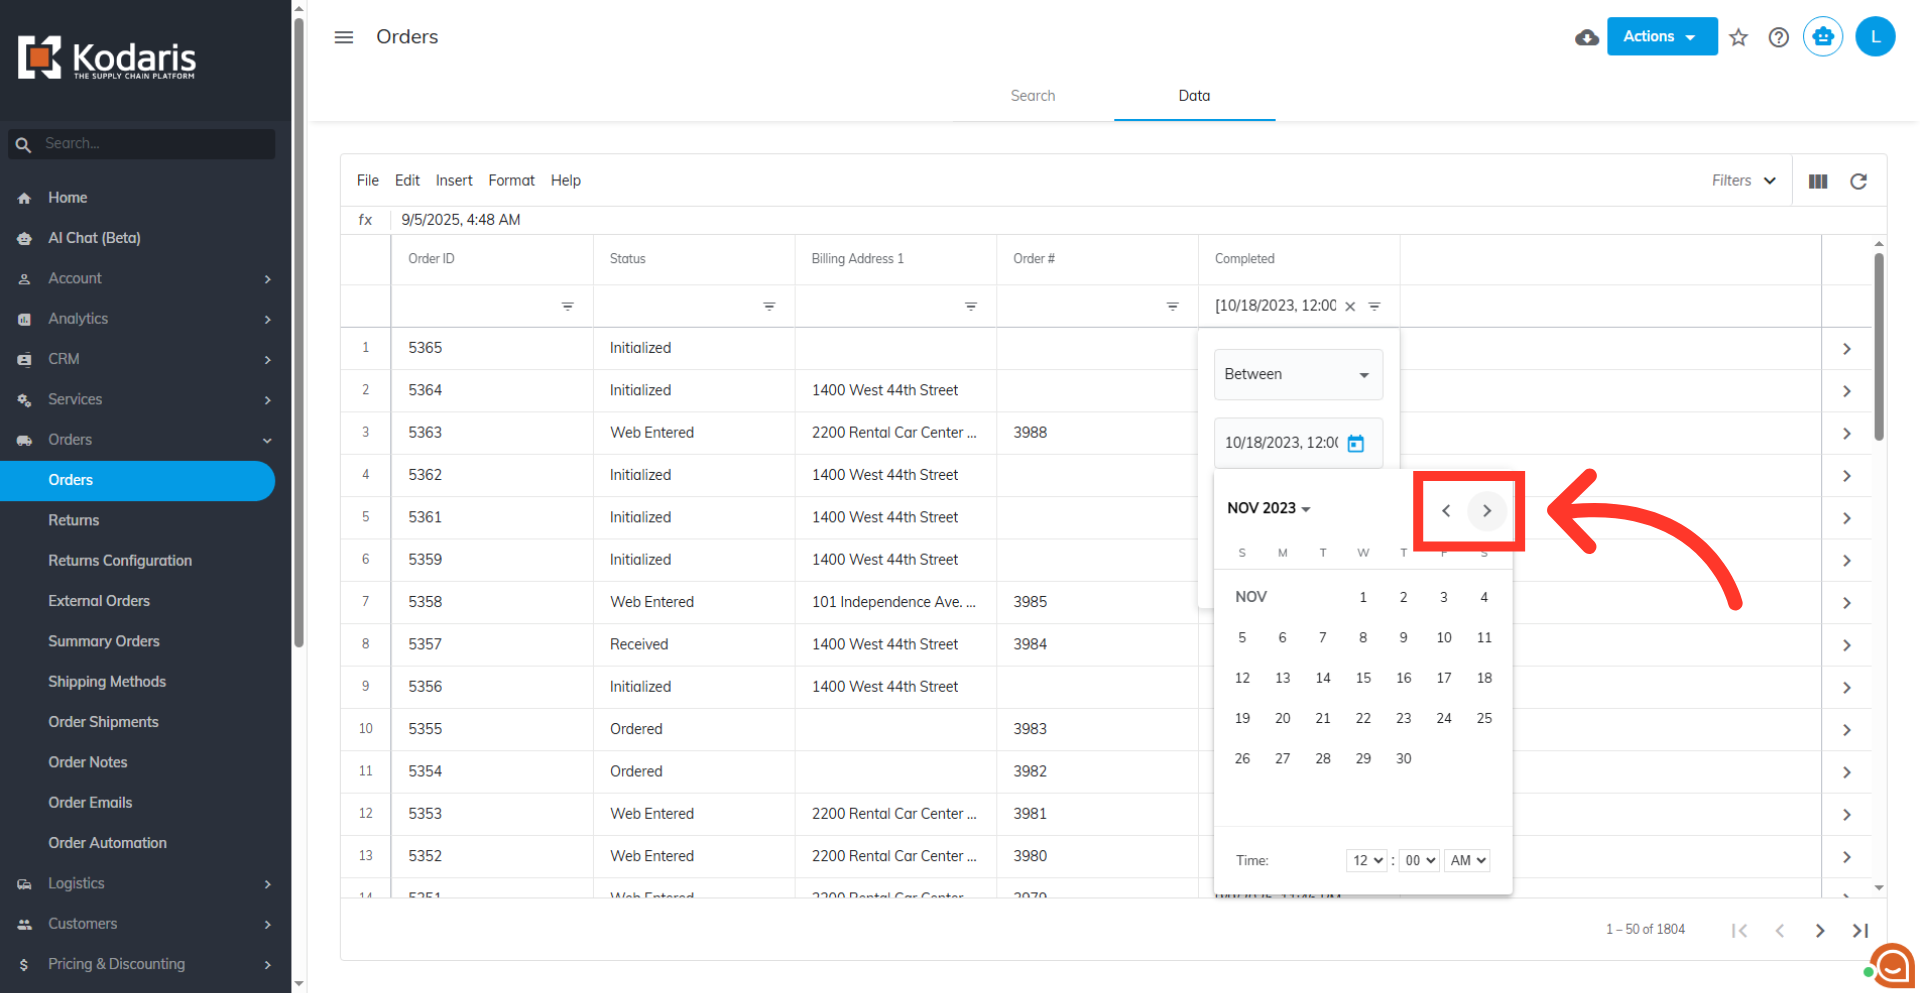
Navigate using the arrow icons
Use the arrows to move the calendar preview one month at a time.
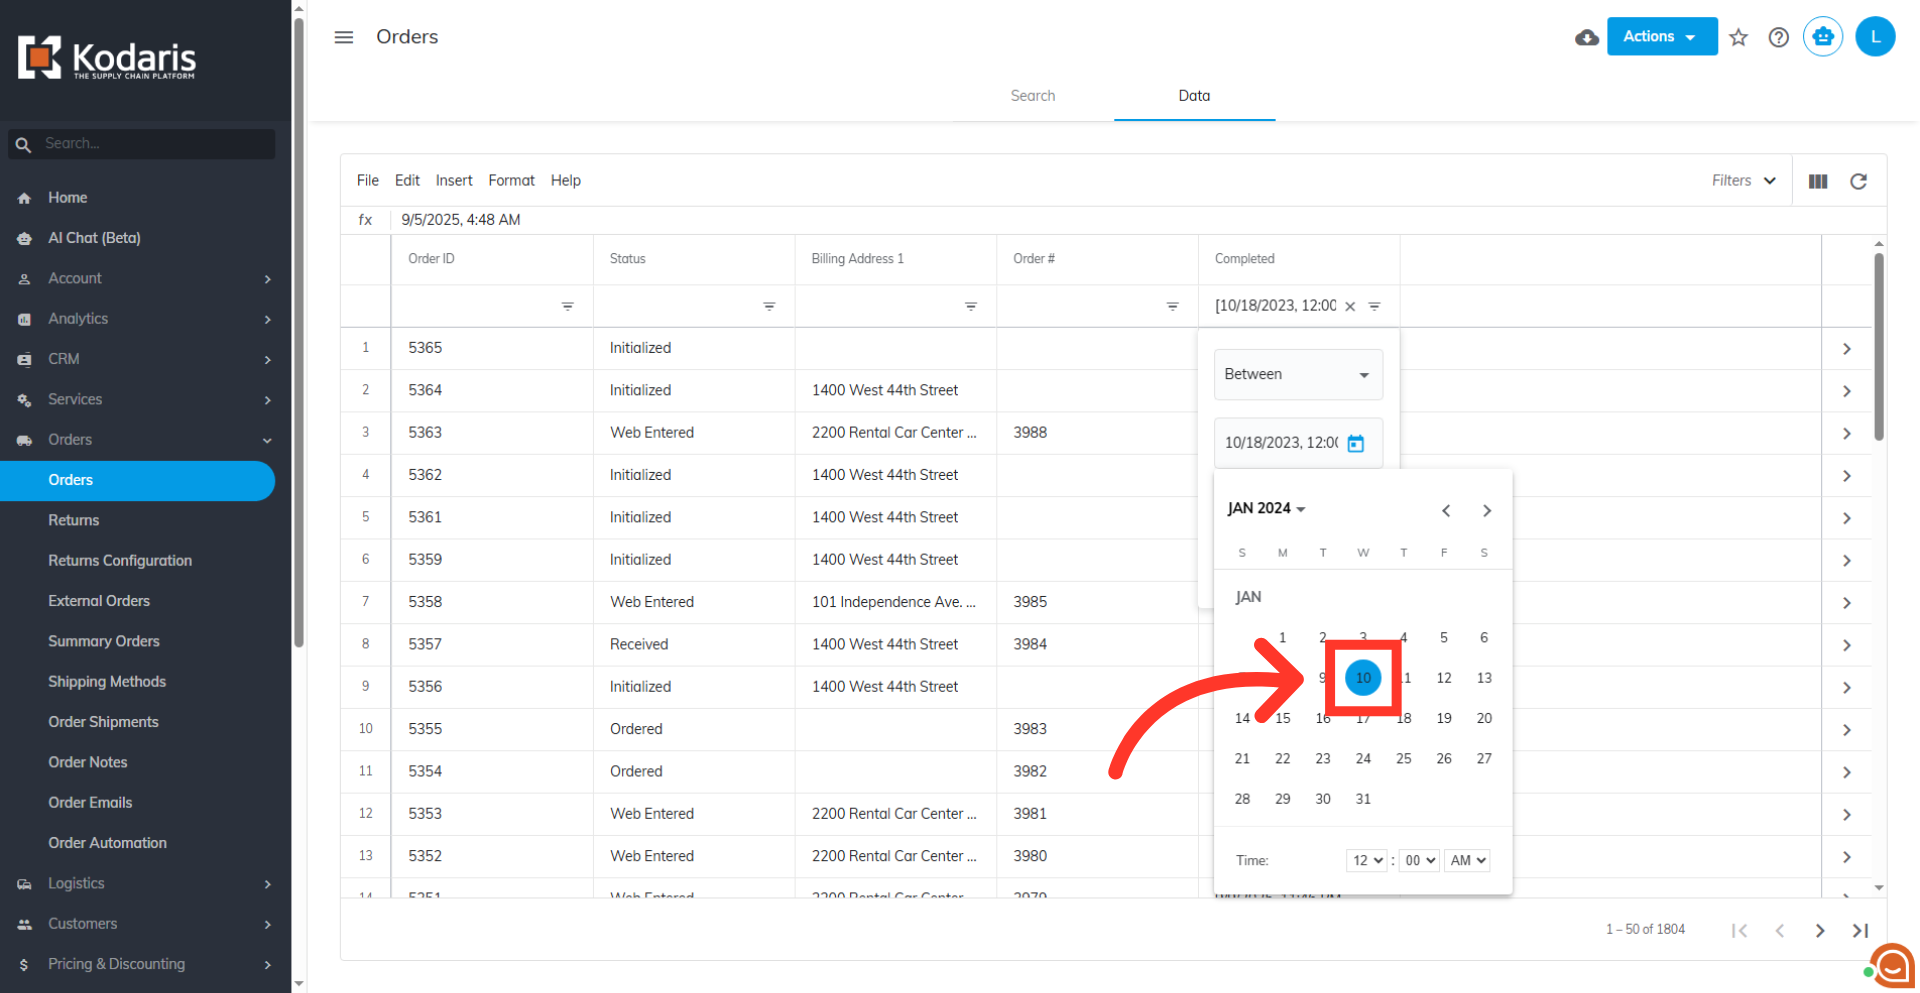
Select a day
Once your month and year are set, you can click on a day to set.
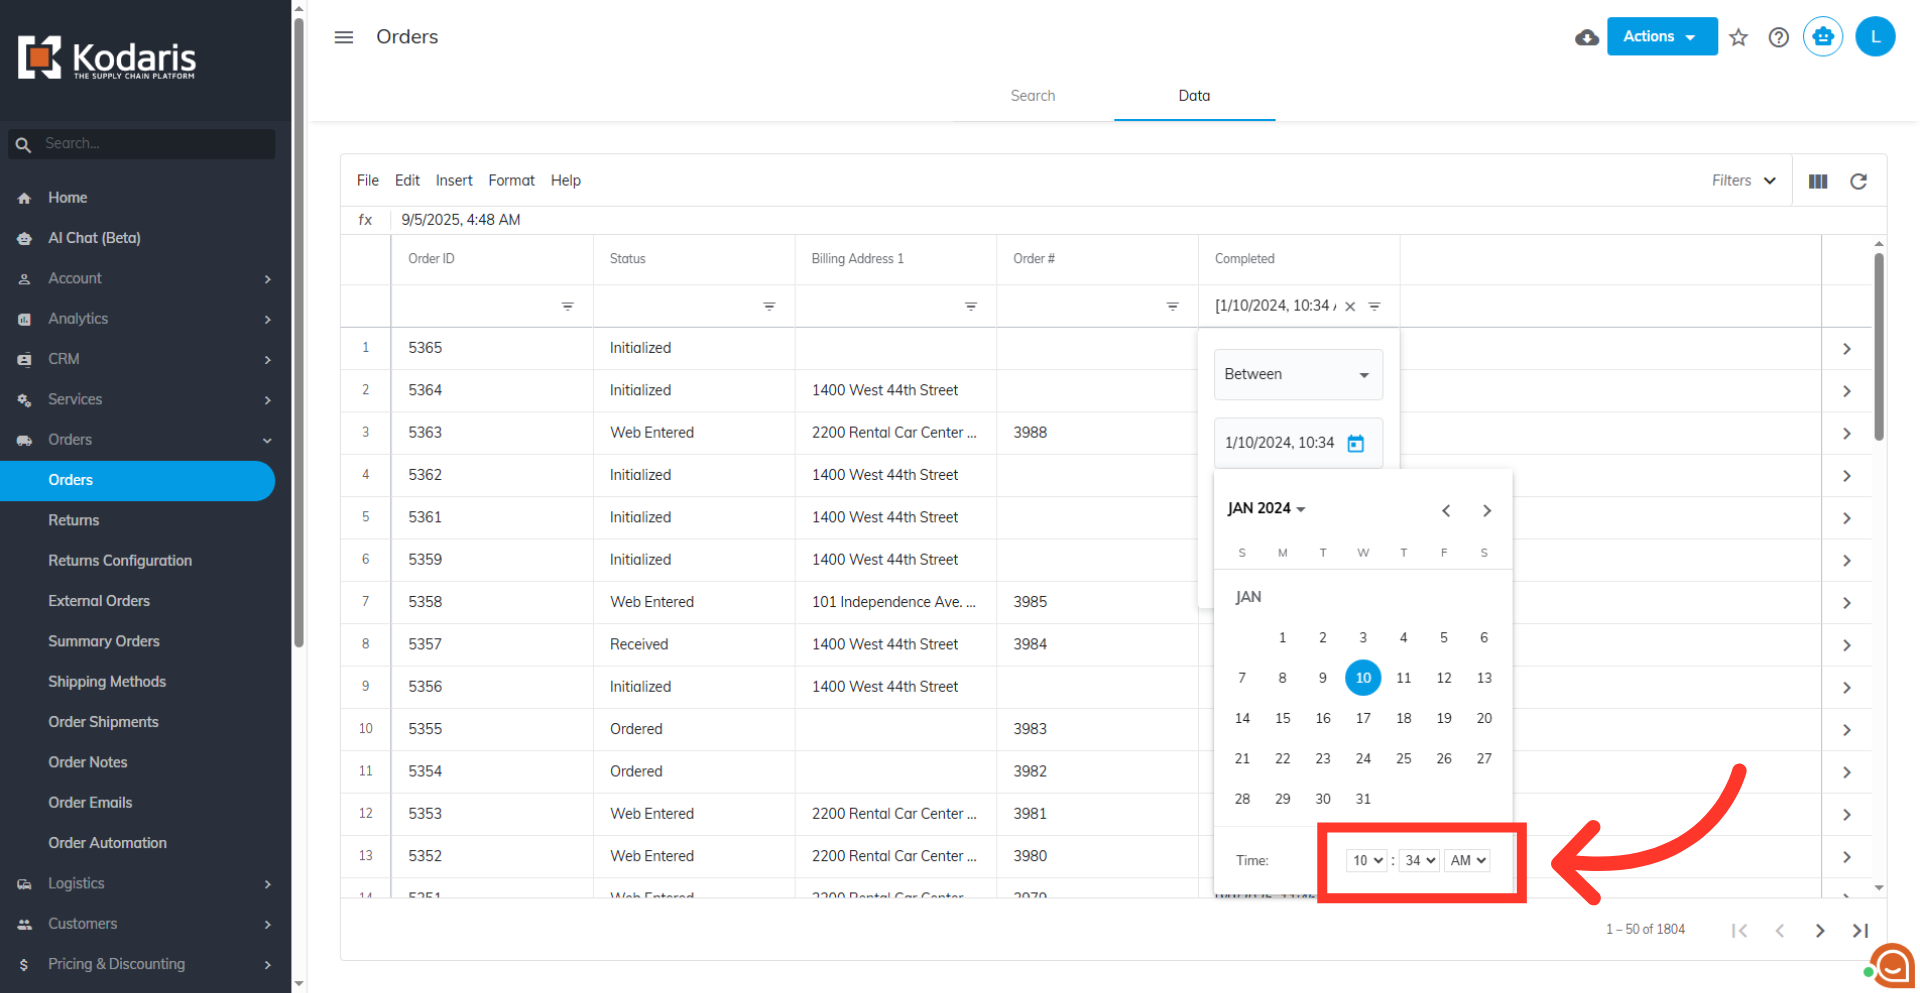
Set the time
You can also narrow search by setting the the time.
Manually enter a date and time
You can also manually enter a date into the filter field. Use the format Month/Day/Year in numeric format, then enter the time using the format hours:minute and the meridiem (AM or PM), also separating the date and time with a comma.
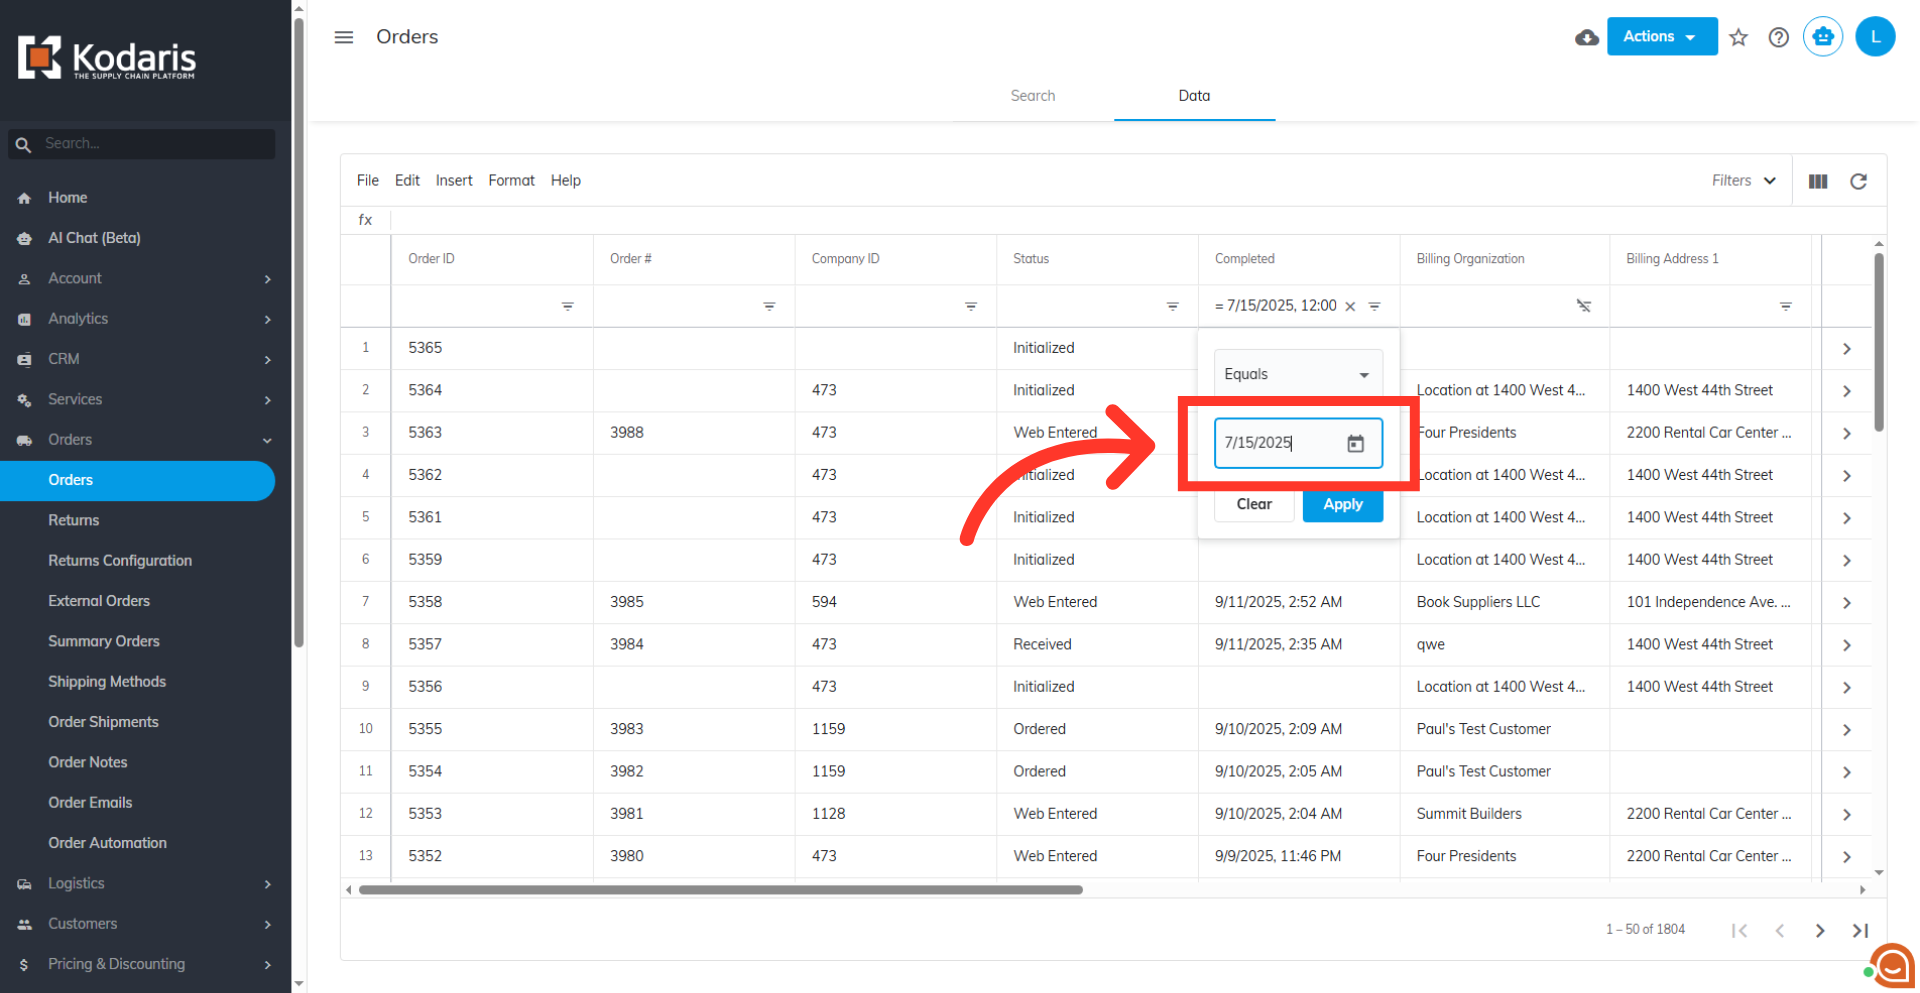
Remove the time
You can also remove the time from the date field to search for all records that match the date you entered.
Click "Apply"
Click the "Apply" button to update the grid.
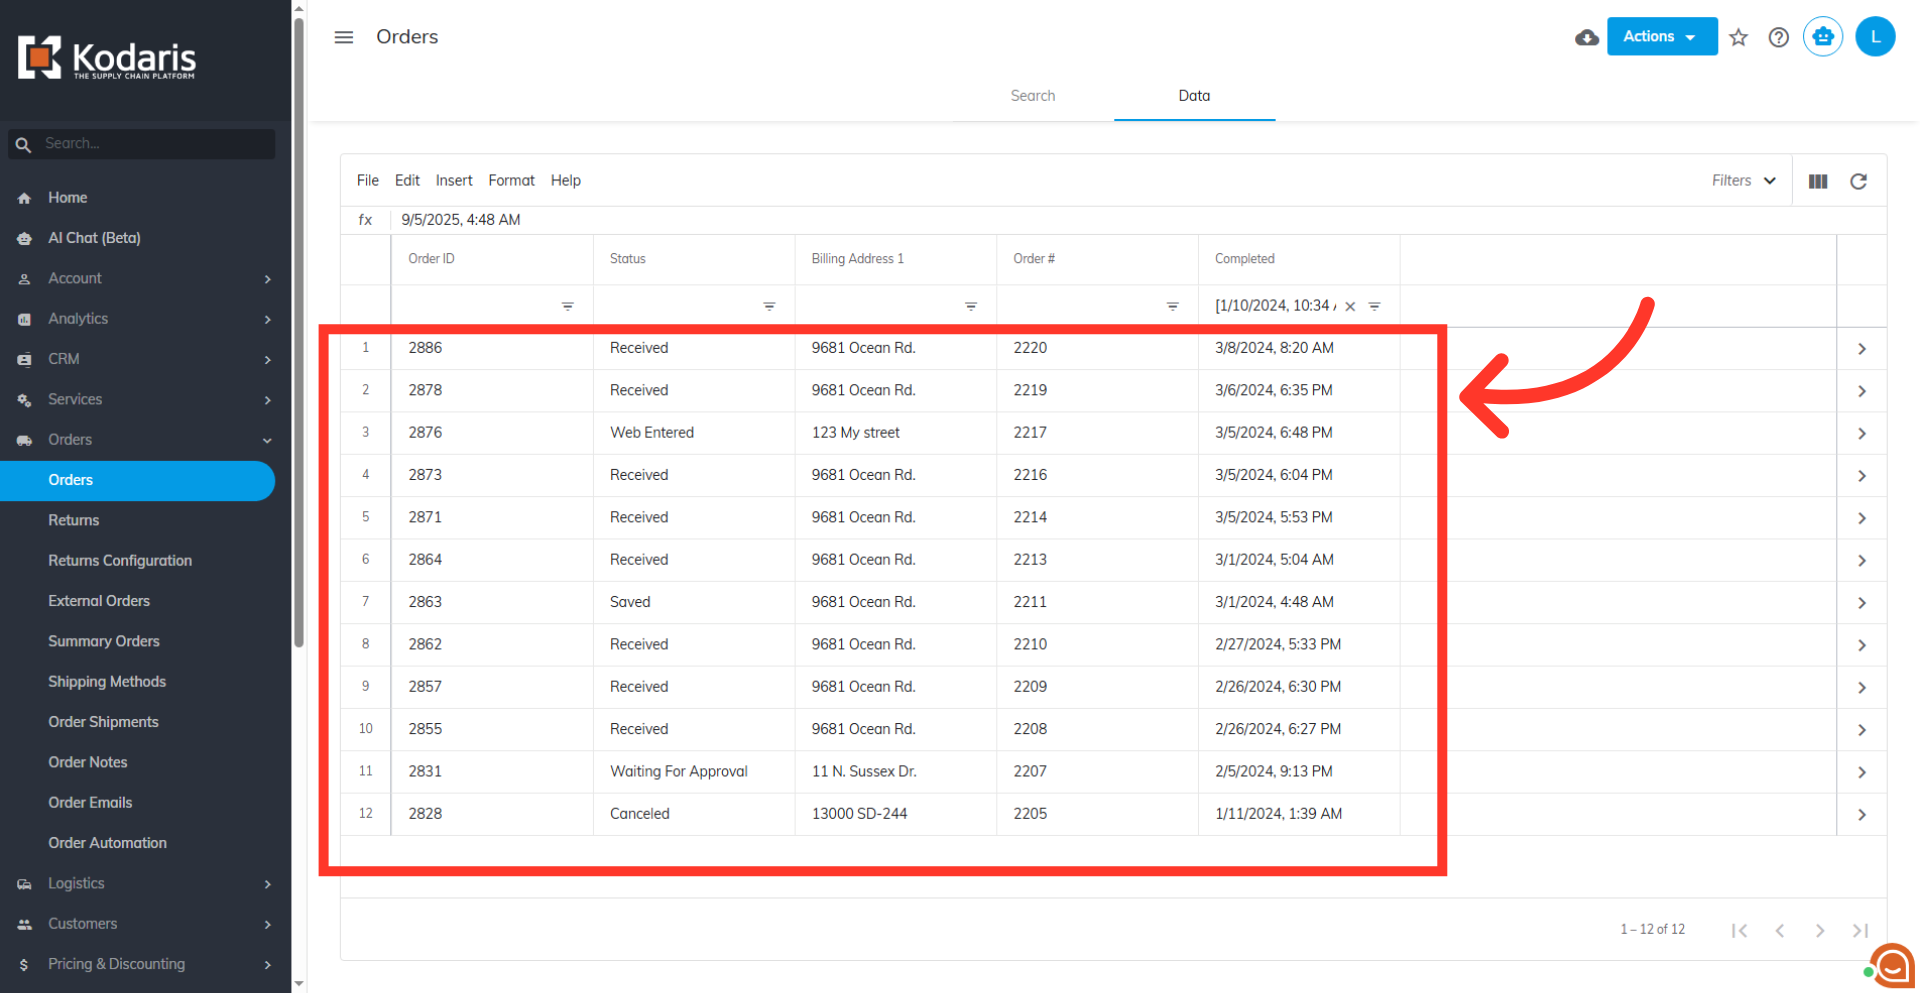
Filtered result
The data will now show only the records that match your selected date criteria based on the date filtering options you've selected.
"Clear" button
Click on the "Clear" button to start over.