Operations Employees - Create Employee Group Roles
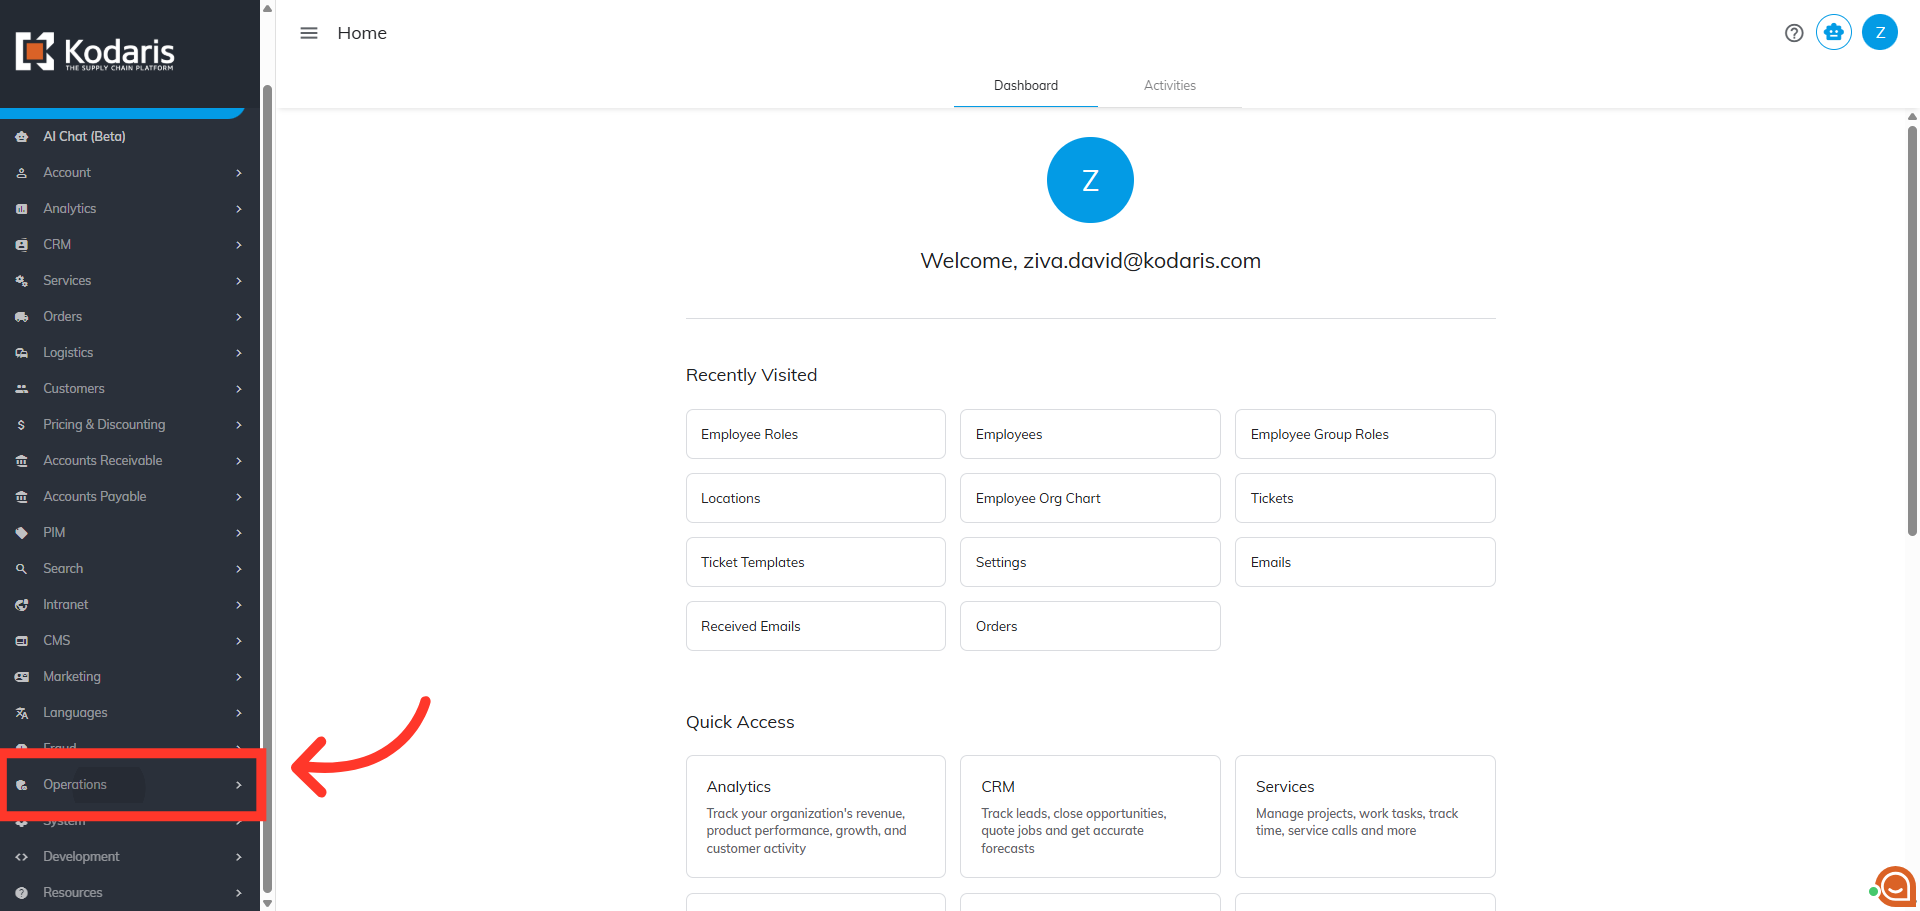
Navigate to "Operations" section
Employee Group Roles streamline the process of granting multiple permissions to your users. To create an "Employee Group Role", navigate to the "Operations" section in the Operations Portal.
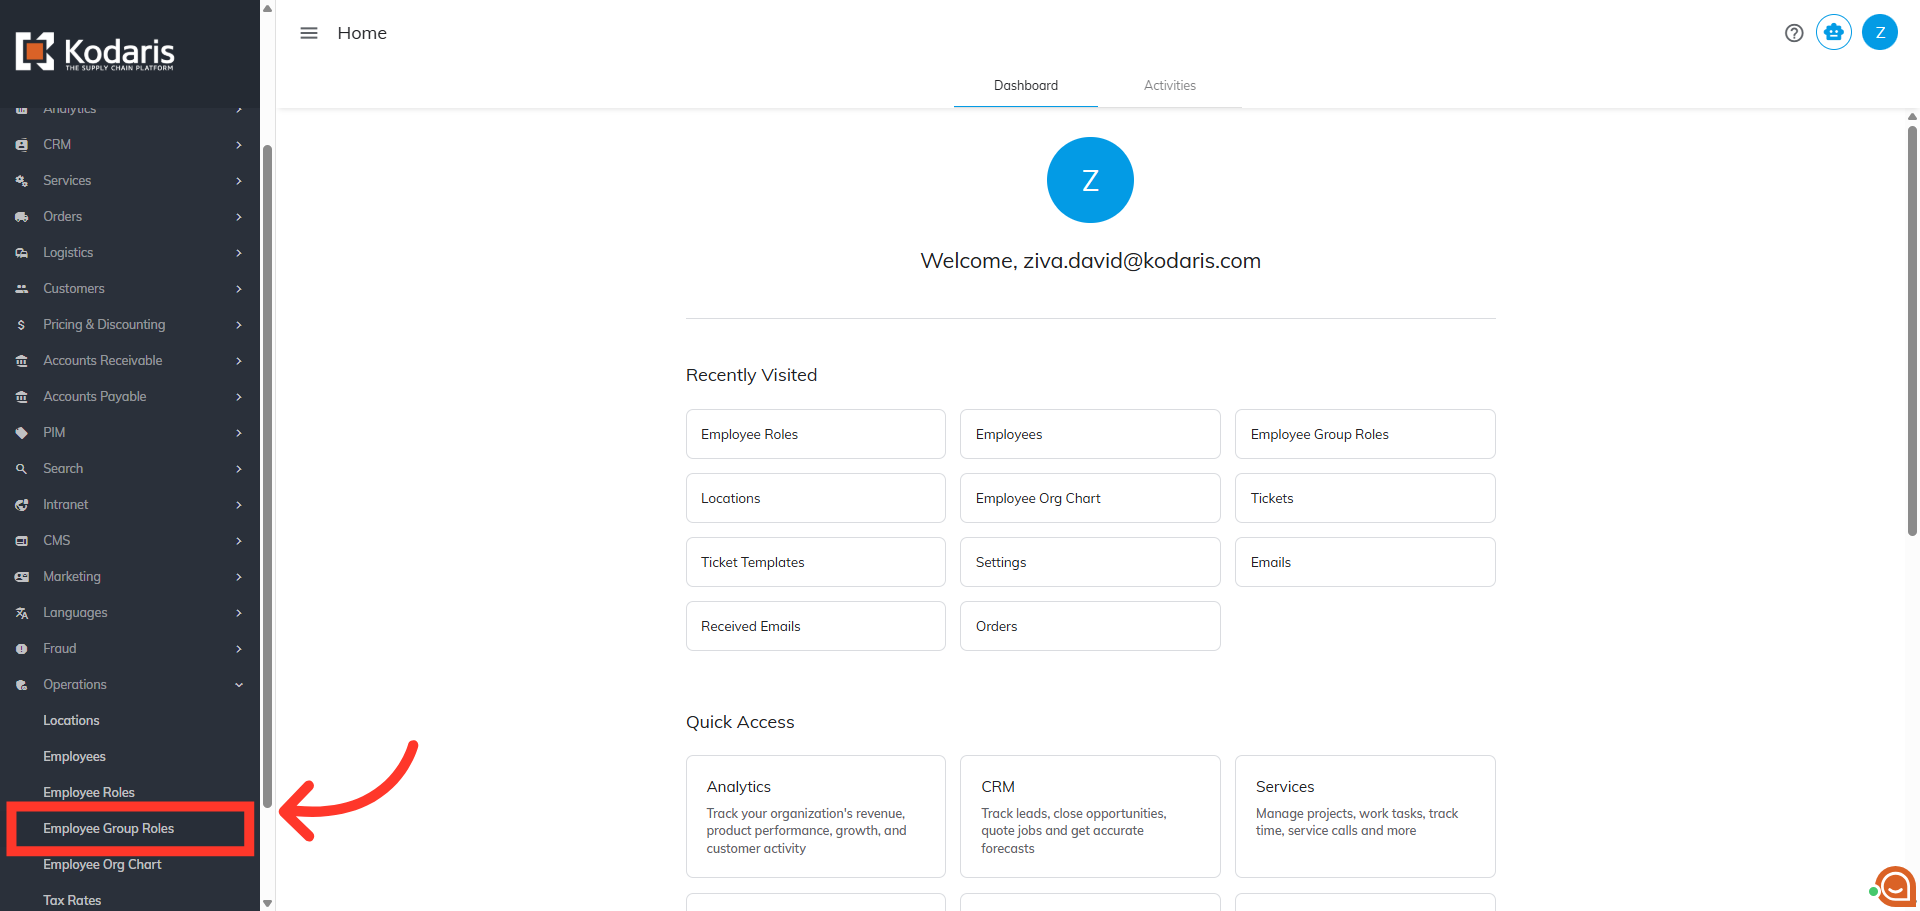
Click "Employee Group Roles"
Then, click "Employee Group Roles". In order to access and update "Employee Group Roles" you will need to be set up as a "superuser".
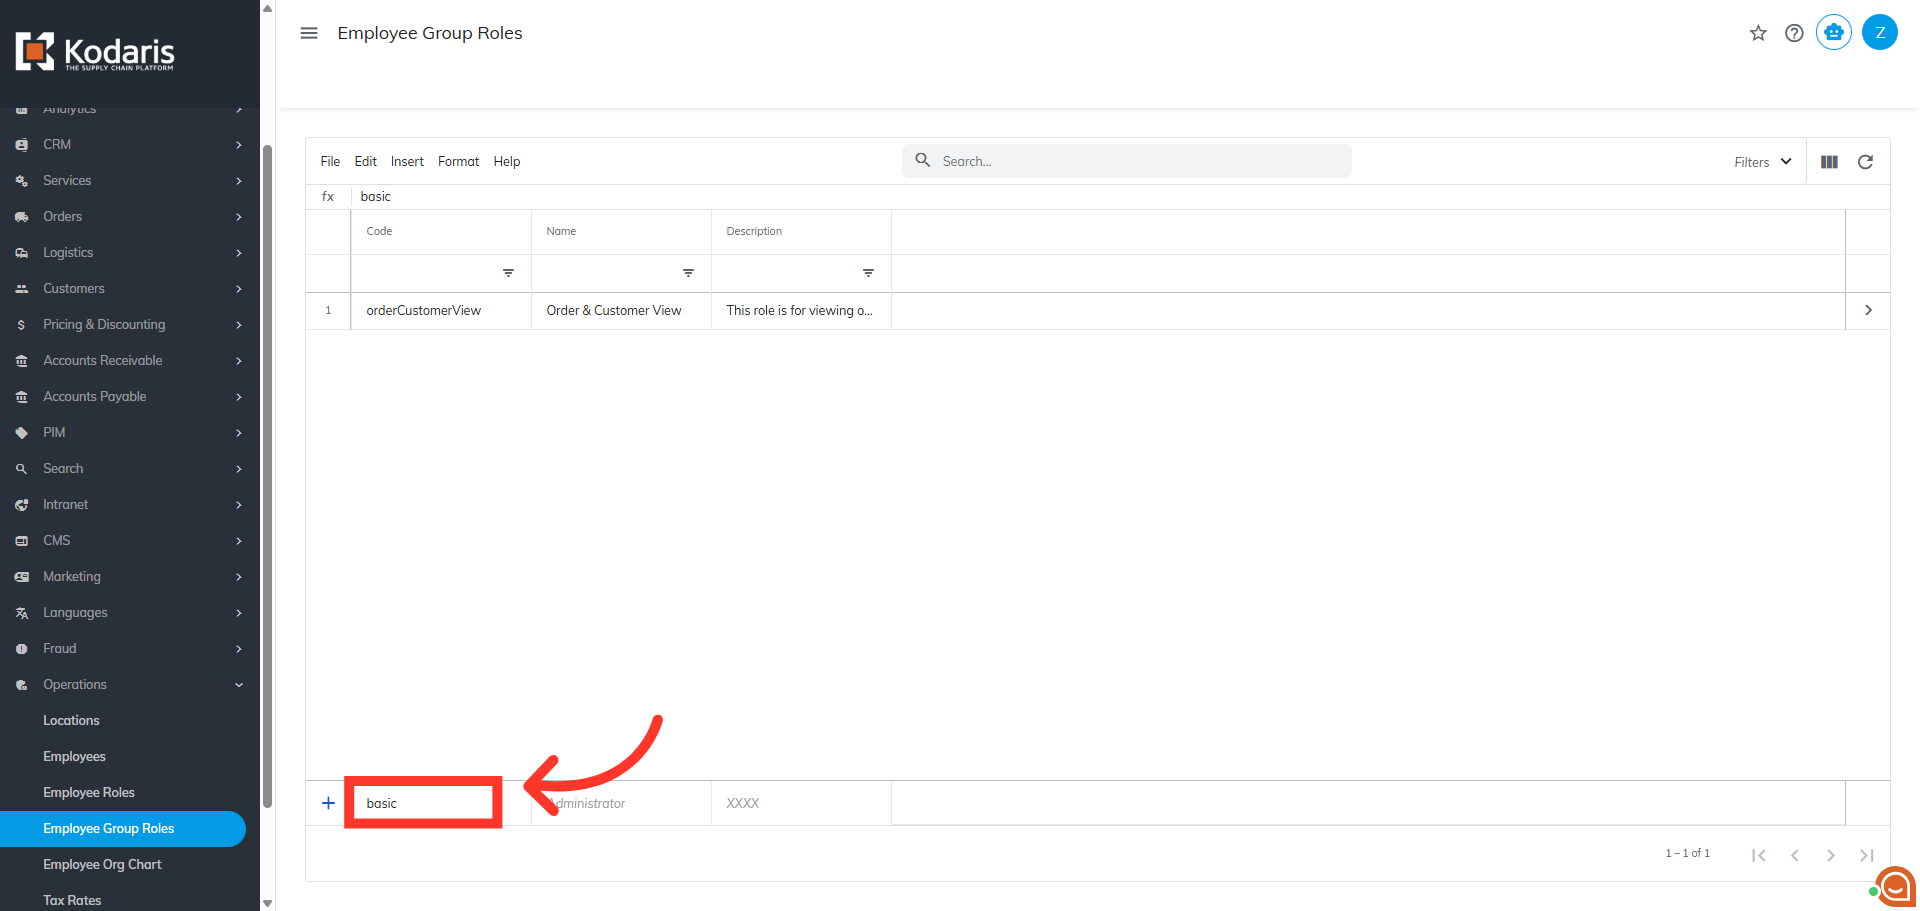
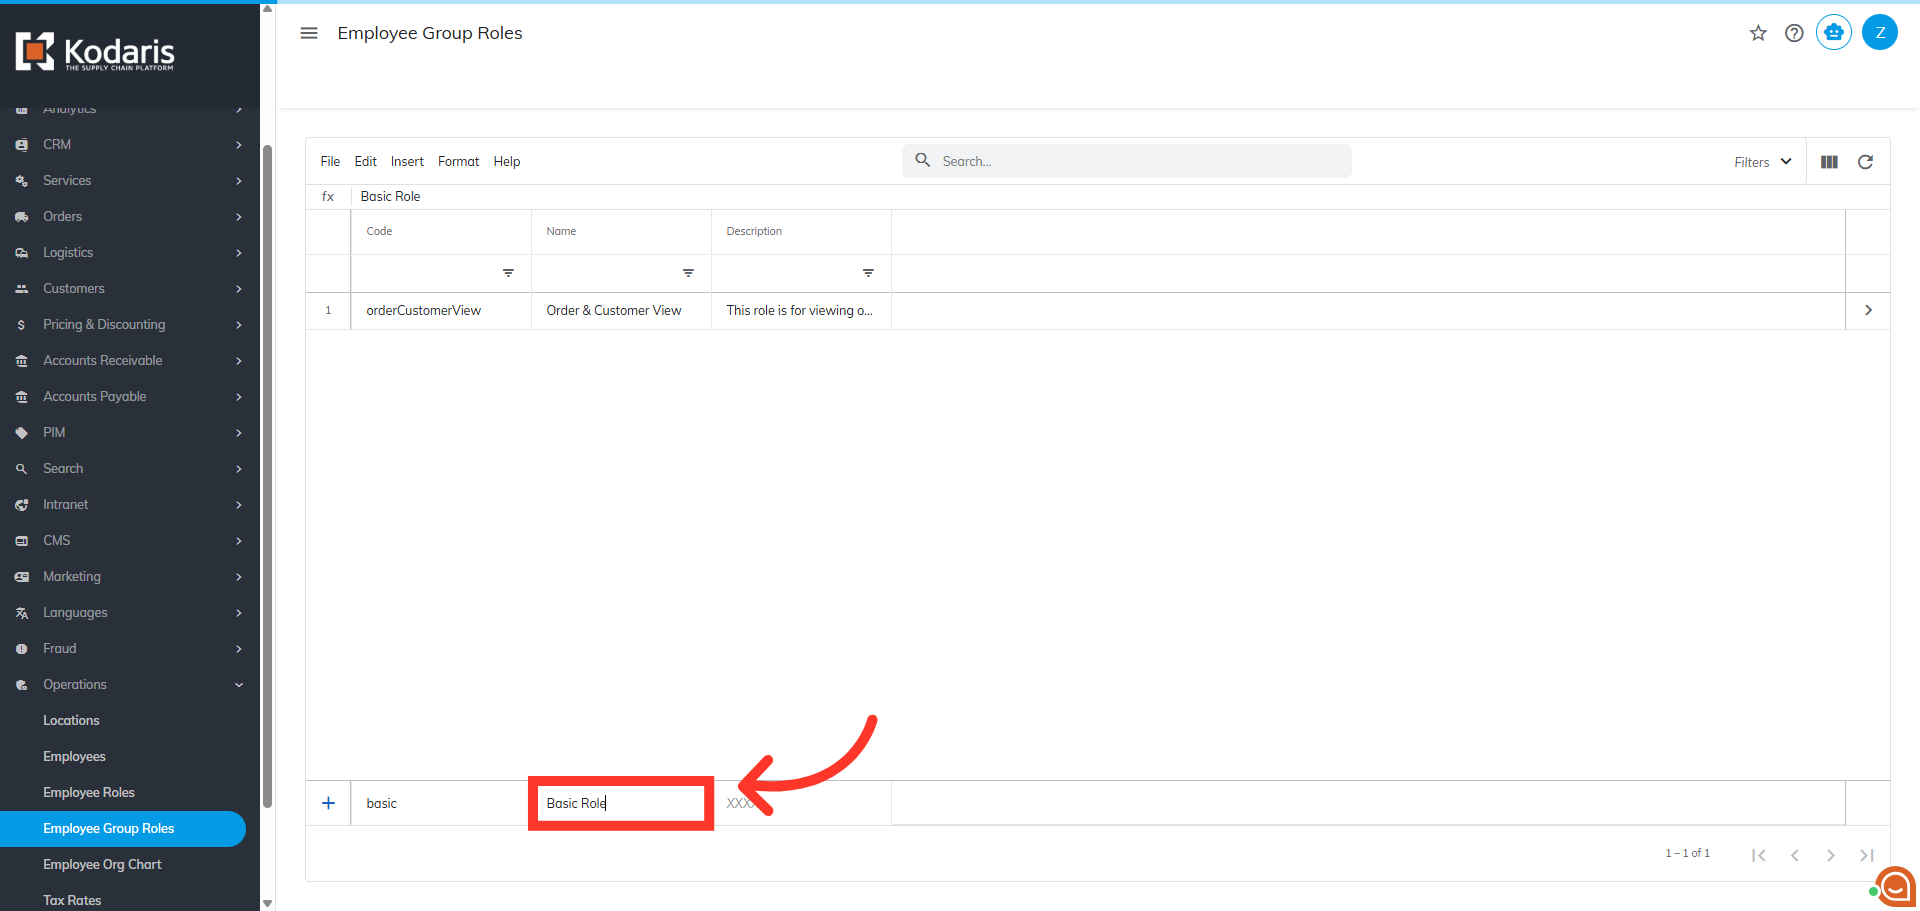
Enter a "Code"
Click in the "Code" field and enter a unique identifier code value for the group role you are creating.
Enter a "Role Name"
Click in the "Name" field and enter the name for the group role. This value helps identify the role you are creating. When completed, hit "Enter".
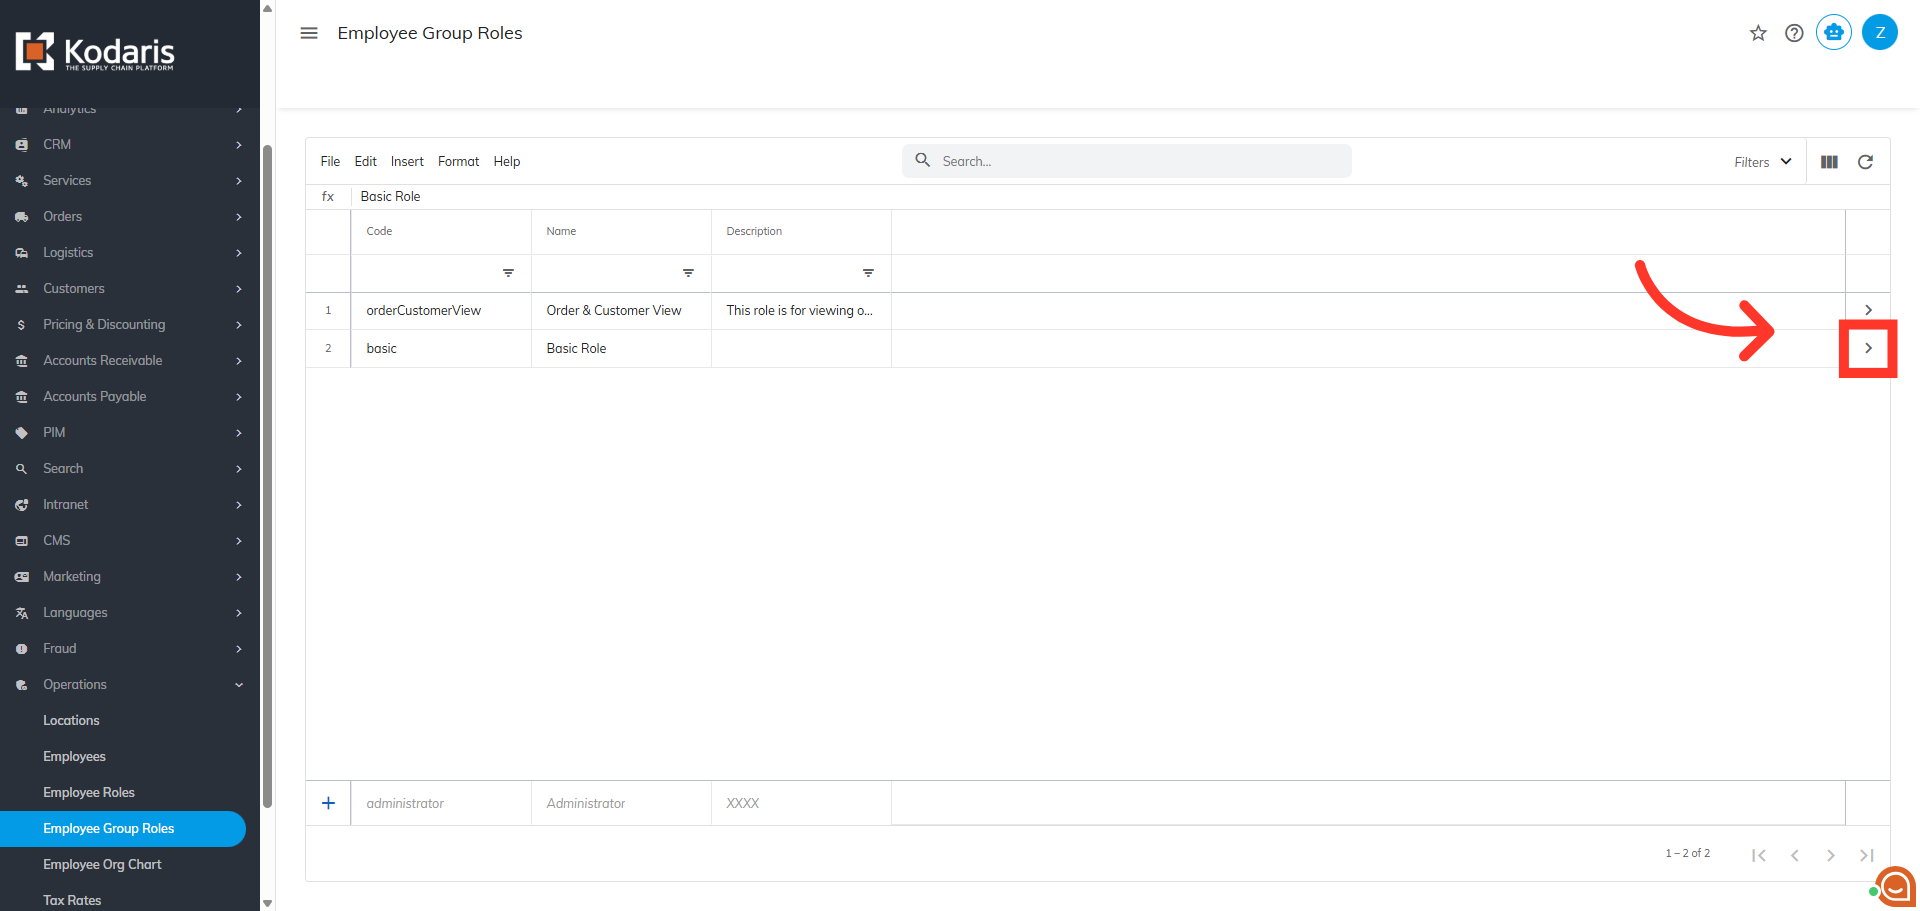
Click the more details icon
Click the more details icon to go to the role's details page.
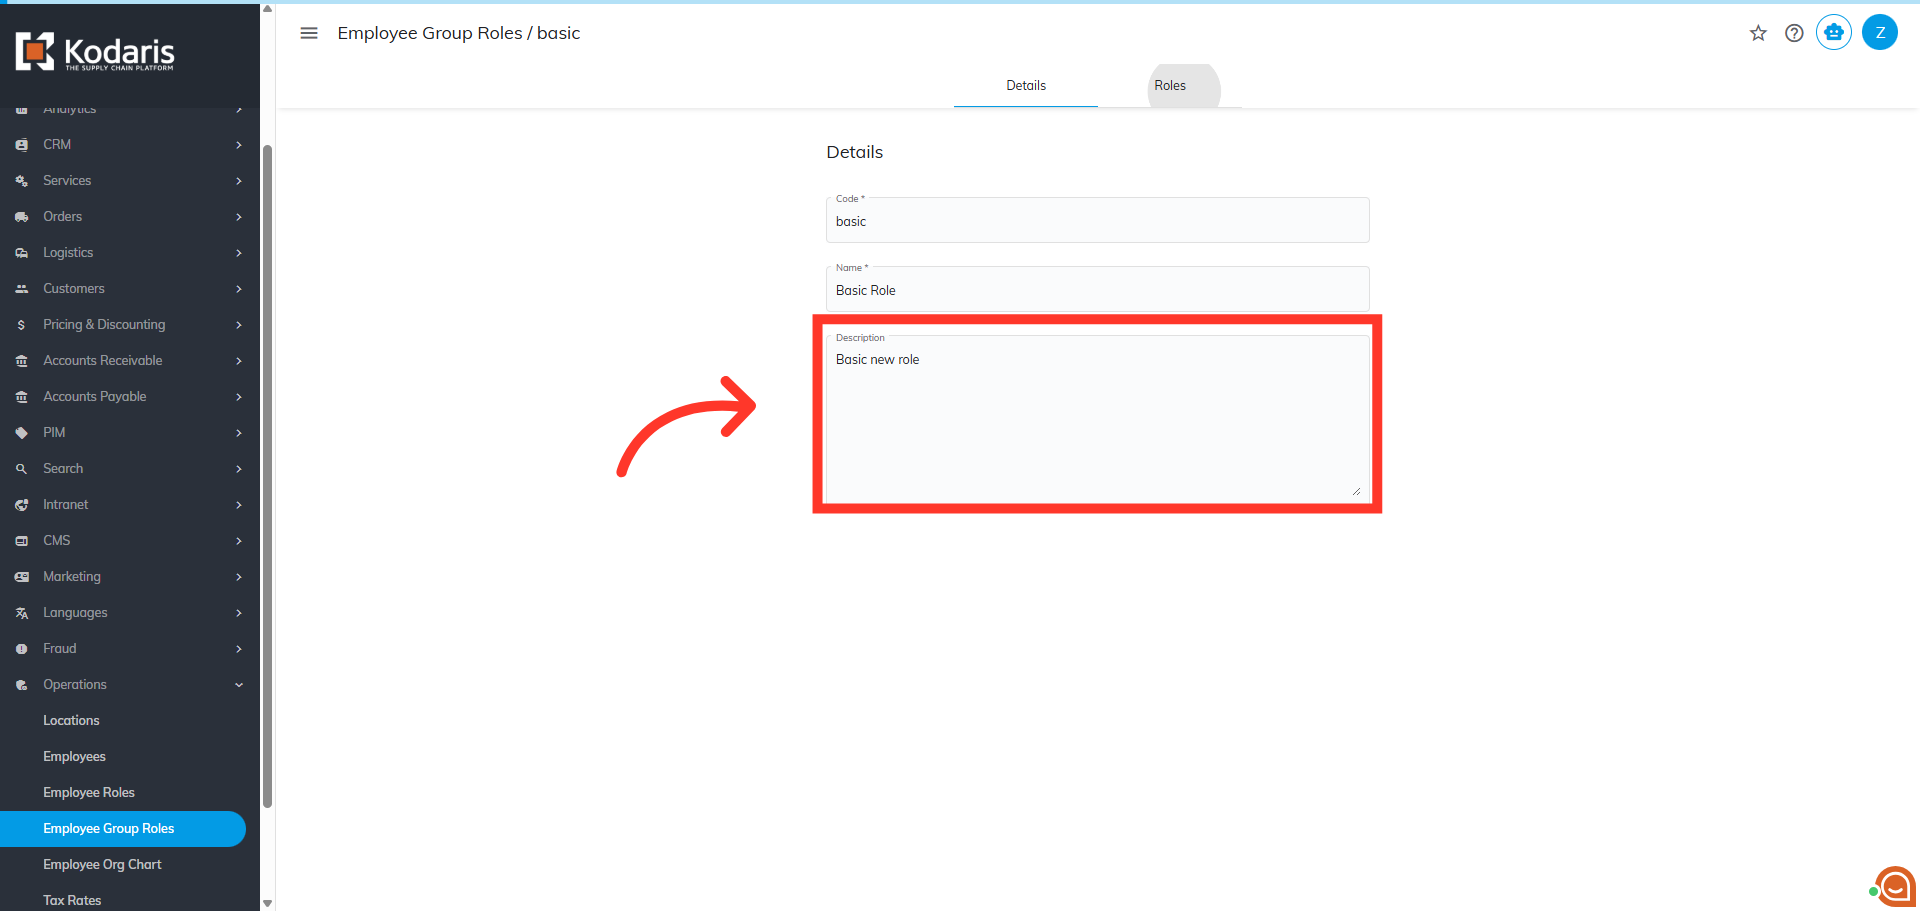
Enter a "Description"
On the "Details" tab you can enter an optional description to further identify the purpose of the group role.
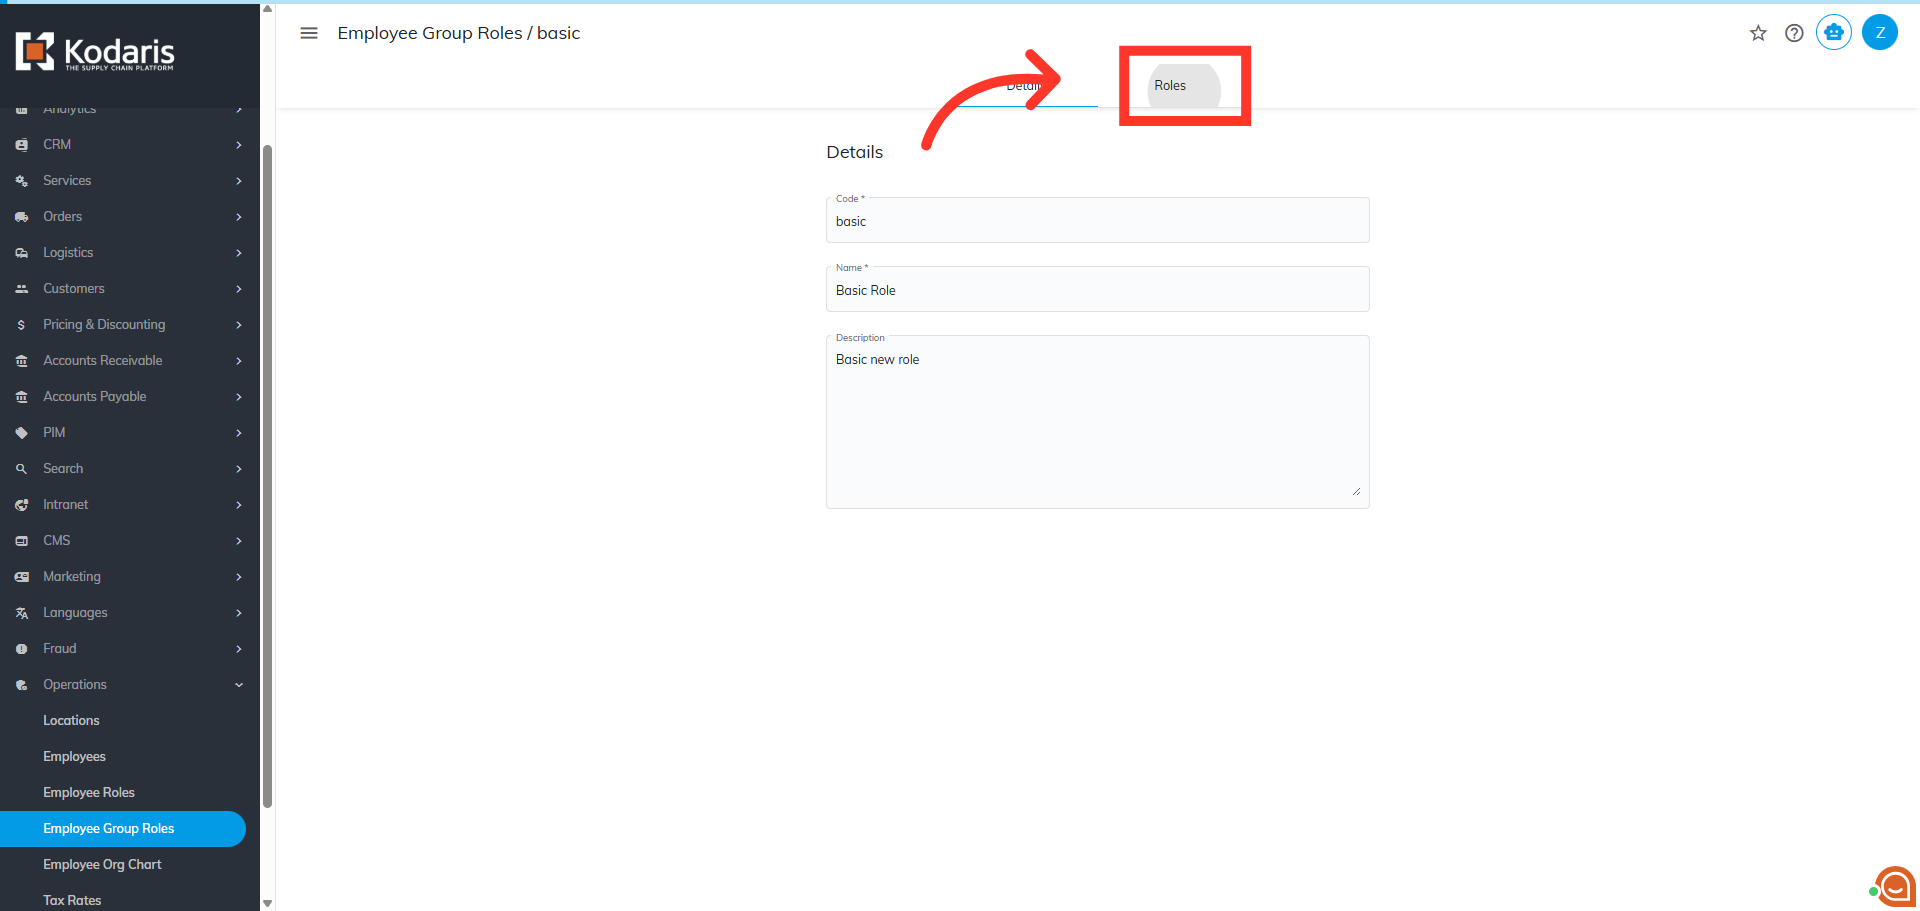
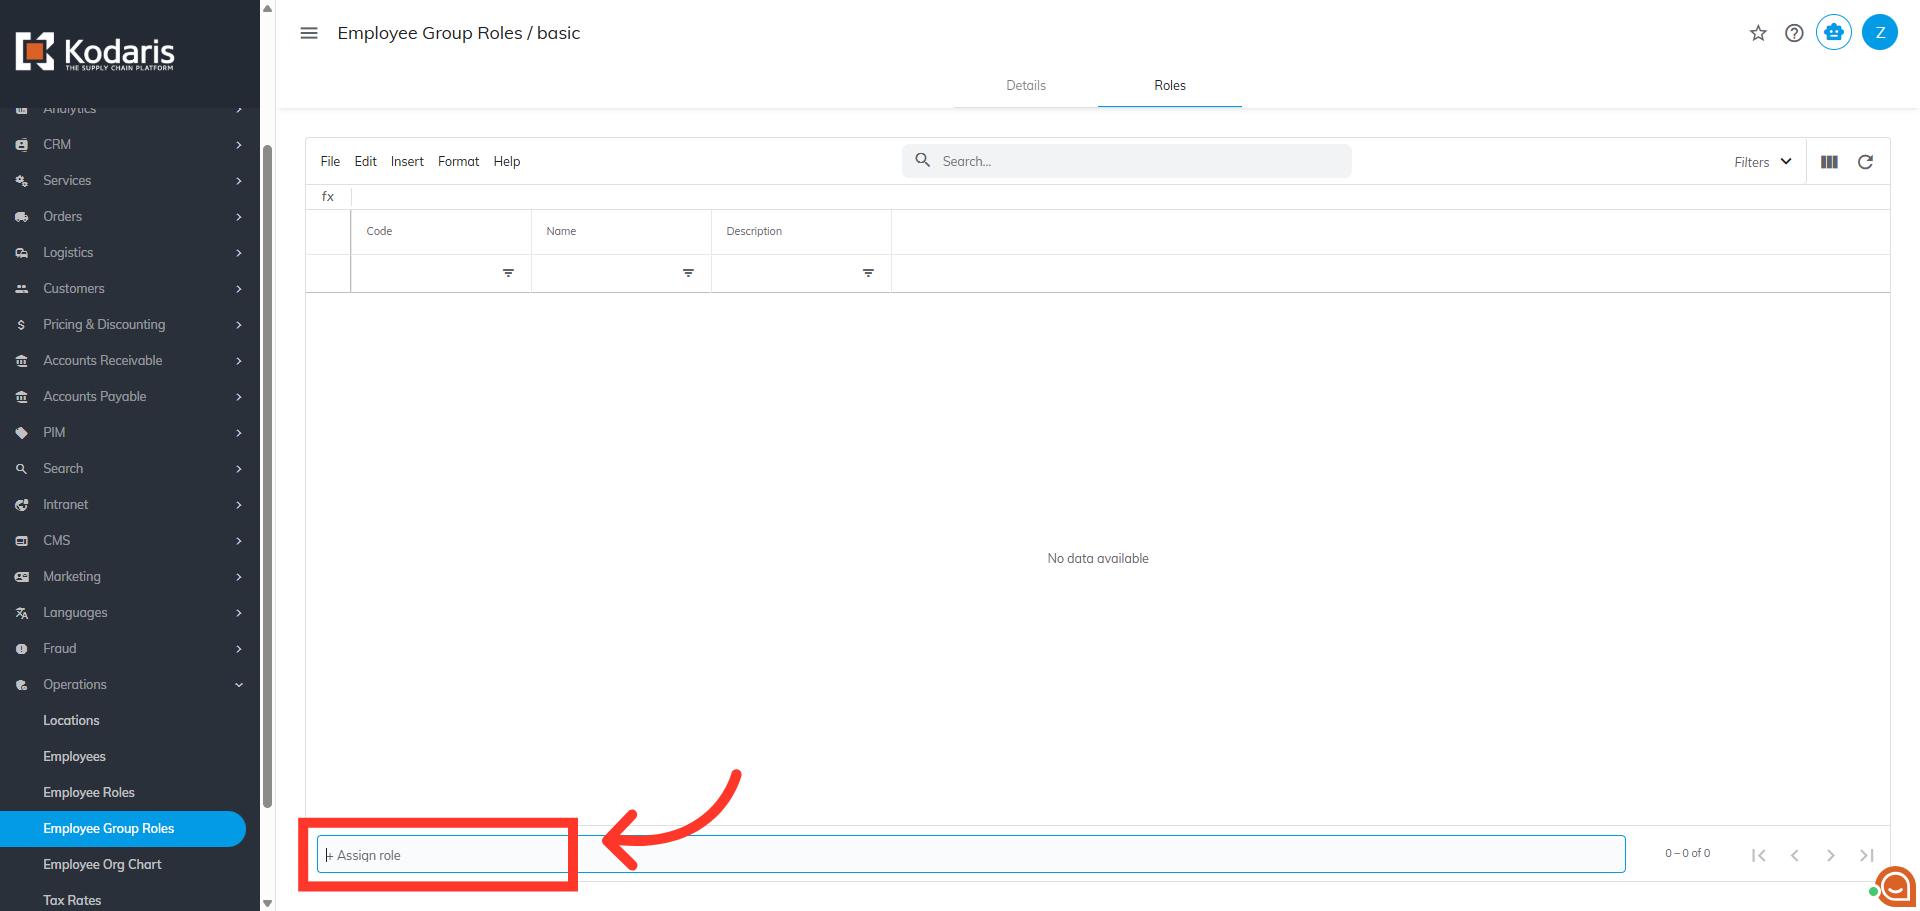
Go to the "Roles" tab
Next, start adding roles. Go to the "Roles" tab.
Click the "Assign role" field
Then, click the "Assign role" field.
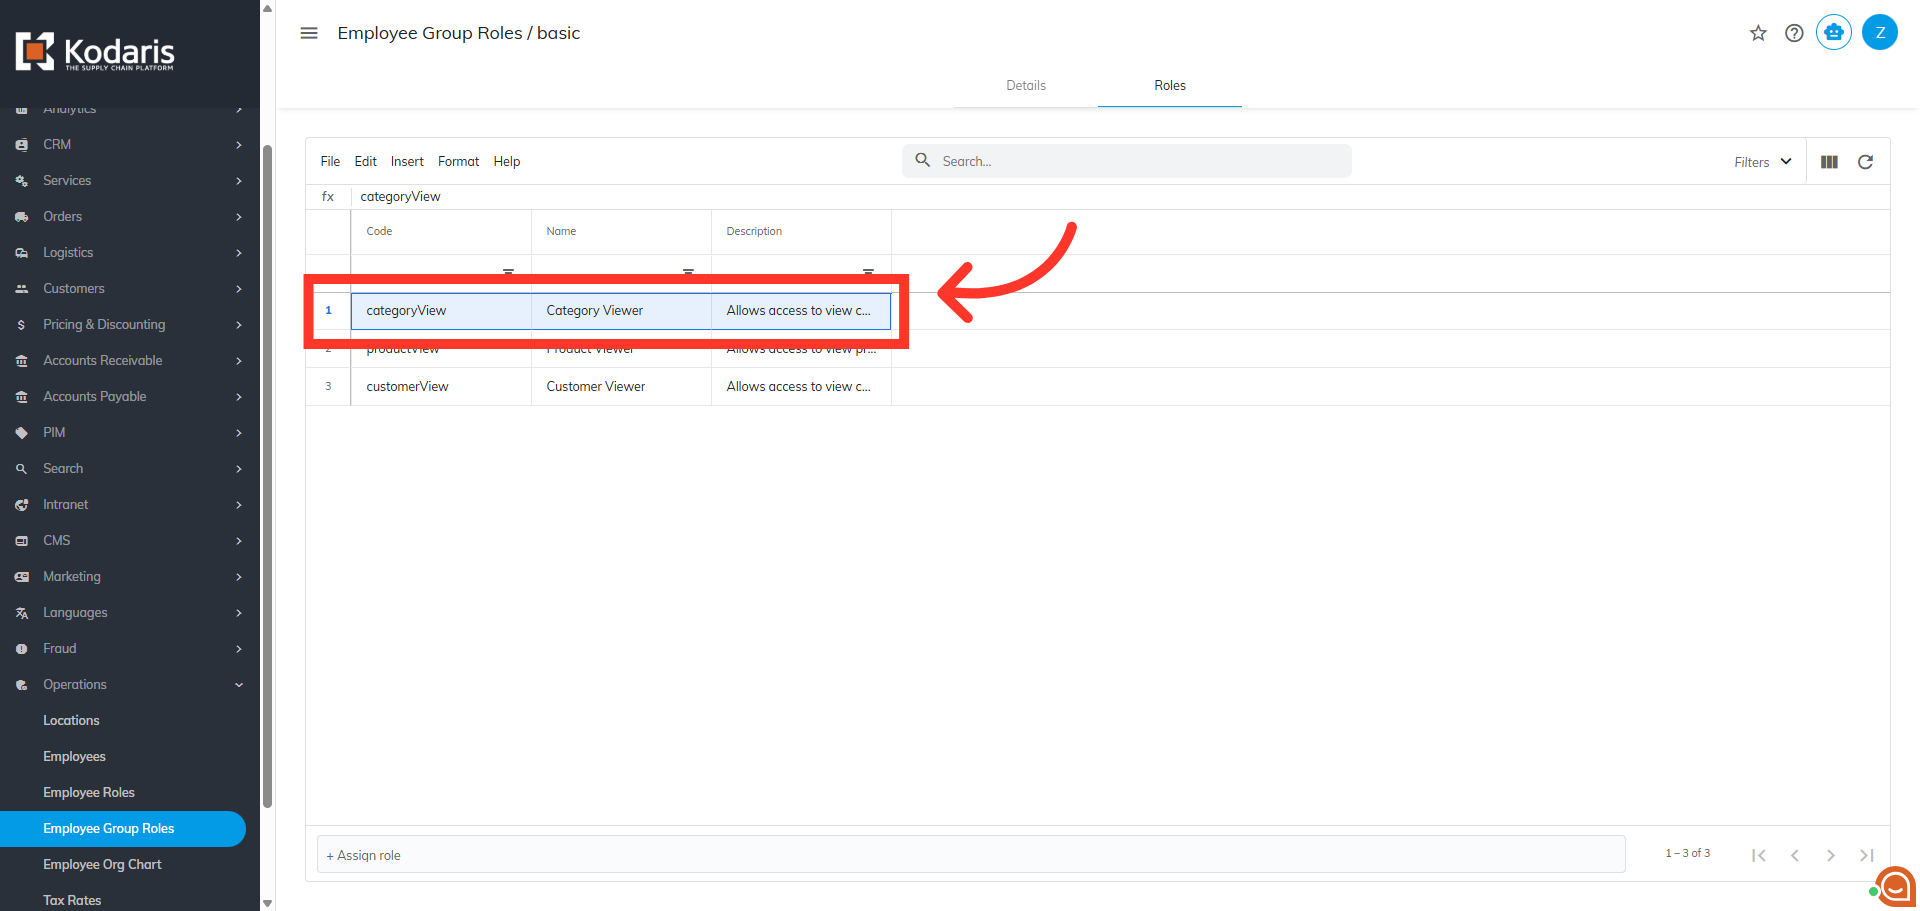
Search for a role
Start typing the name of the role you wish to add. This field will display search results of the available roles as you type. Then, click on the role you want to add. You can add as many roles as you'd like.

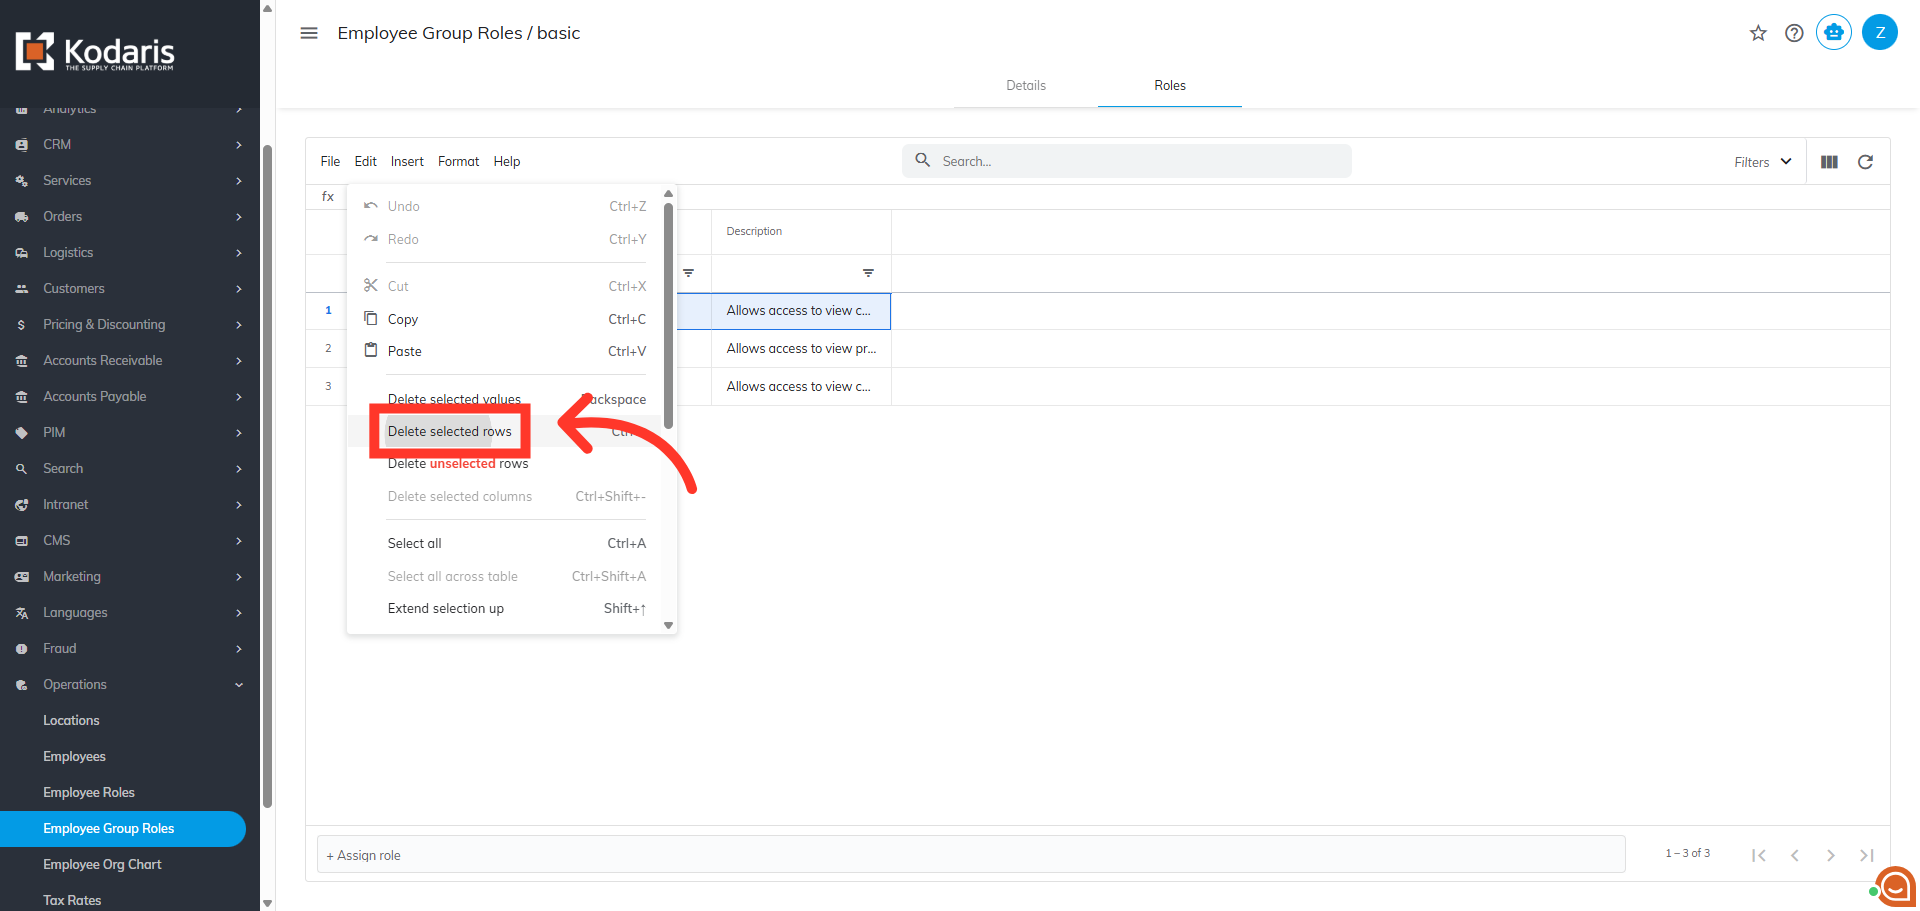
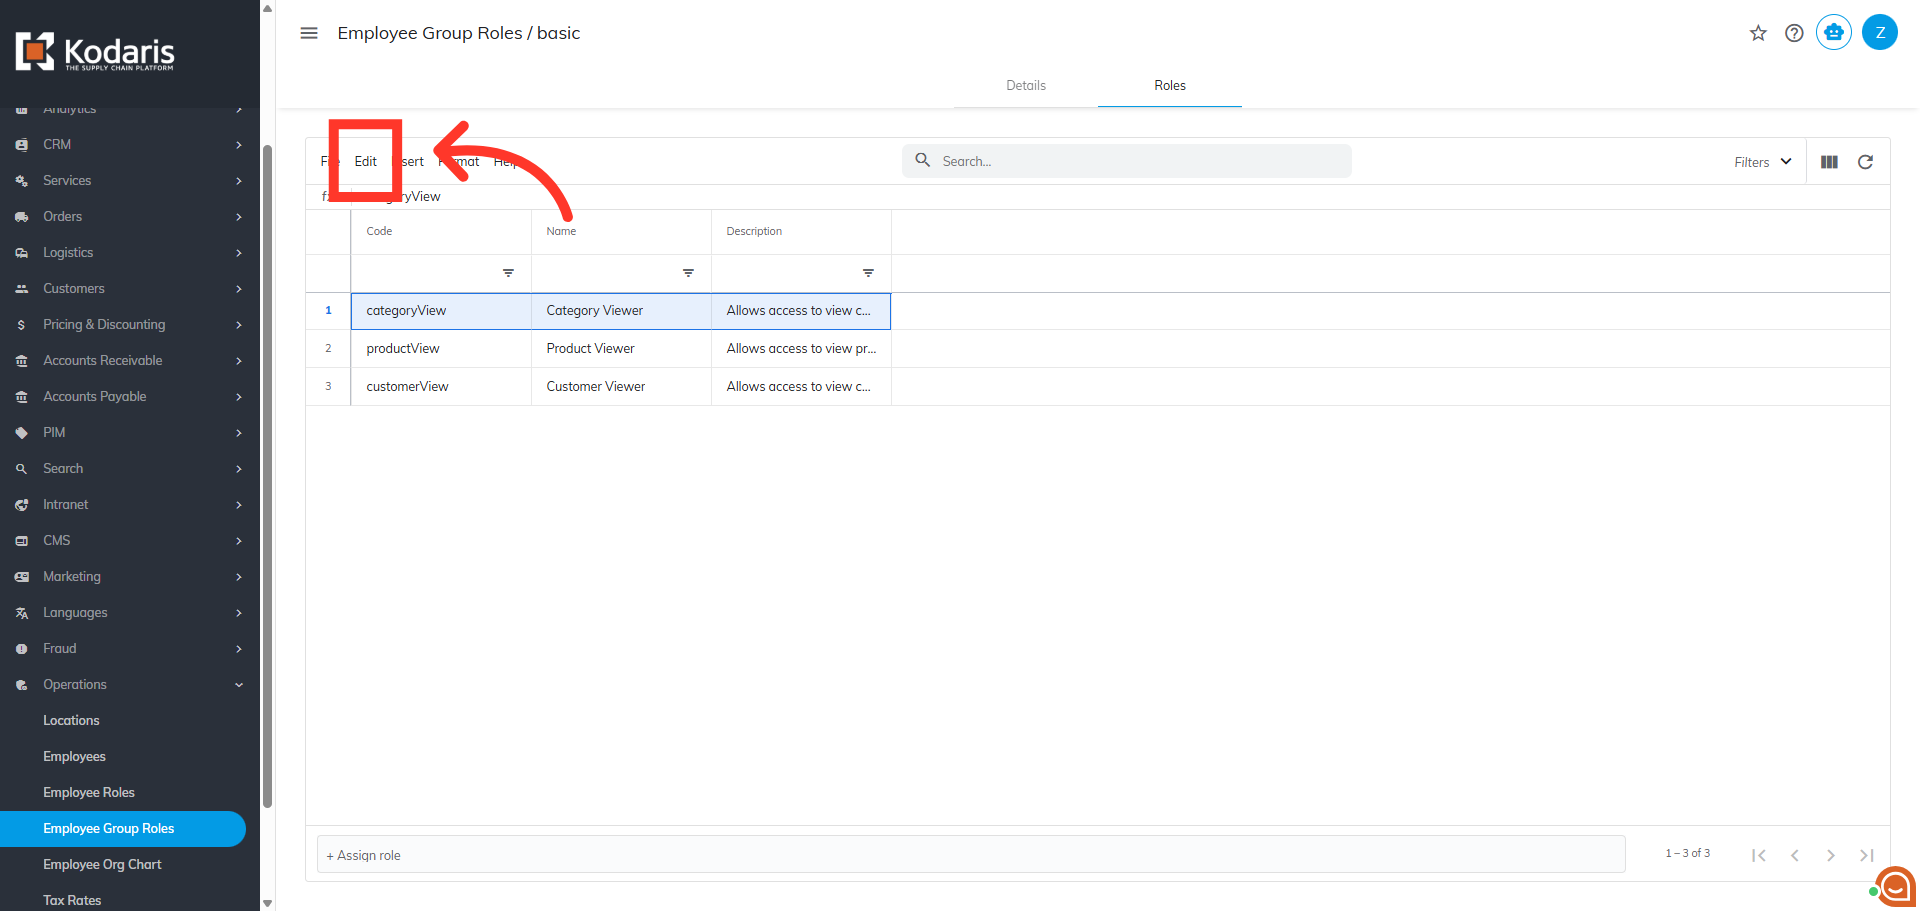
Remove an added role
To remove a role you do not want to include, highlight the row of the value you wish to delete by clicking on the row number.
Click "Edit"
Next, click "Edit".
Click "Delete selected rows"
Then, click "Delete selected rows". The role should be removed from the list.